Quick Links
Before You Begin
You must have at least the following:
An Ethernet-enabled device, such as a laptop or desktop computer that will connect
to the DHP-200.
Note:
You will need at least two DHP-200 devices in order to create a
powerline network.
Safety Instructions
1. Do Not operate this product near water
2. Do Not locate this product where people may walk on the Ethernet cable.
3. The AC coupler should be plugged directly into a 110 VAC wall outlet.
Do Not use an extension cord between the adaptor and AC power source.
4. Disconnect this product from wall outlet during a lightning or thunder storm.
5. Unplug from the wall outlet before cleaning. Use a damp cloth for cleaning.
Do Not use liquid cleaners or aerosol cleaners.
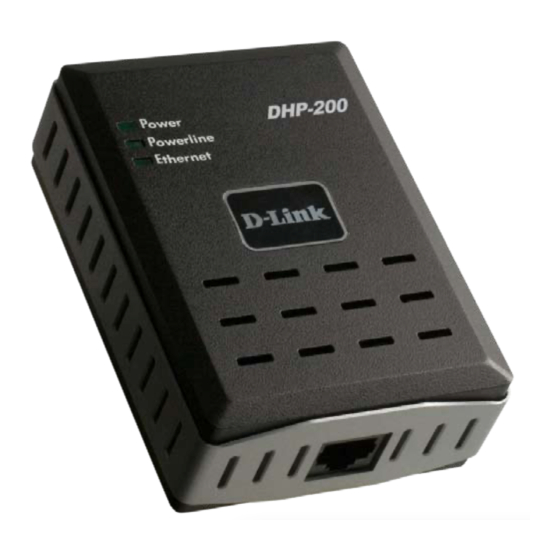
Check Your Package Contents
These are the items included with your DHP-200 purchase:
If any of the above items are missing, please contact your reseller.
©2006 D-Link Systems, Inc. All rights reserved. Trademarks or registered trademarks are the property of their respective holders. Soft-
DHP-200 PowerLine
CD-ROM (containing Manual and Warranty)
Ethernet (CAT5 UTP/Straight-Through) Cable
ware and specifications subject to change without notice.
Express PowerNetwork™
DHP-200
Powerline Bridge

Related Manuals for D-Link DHP-200


Summary of Contents for D-Link DHP-200
- Page 1 Ethernet (CAT5 UTP/Straight-Through) Cable If any of the above items are missing, please contact your reseller. ©2006 D-Link Systems, Inc. All rights reserved. Trademarks or registered trademarks are the property of their respective holders. Soft- ware and specifications subject to change without notice.
- Page 2 Connecting DHP-200 To Your Network The DHP-200 is an excellent solution that can be used to extend your wireless network. In the home or small office building, use a pair of DHP-200 Powerline adapters to link two wireless remote locations without the need to run Ethernet cables.
- Page 3 Connecting DHP-200 To Your Network (continued) You can connect the DHP-200 directly to PC’s network adapter, switch, or any other Ethernet enabled device. (Note: The Ethernet Port on the DHP-200 is Auto- MDI/MDIX. Meaning you can use a straight-through or a crossover Ethernet (CAT 5) cable when connecting to another Ethernet enabled device.)
-
Page 4: Configuration Utility
Configuration Utility The D-Link Configuration Utility for Windows OS enables the users to identify HomePlug devices on the powerline network, measures data rate performance, ensures privacy and performs diagnostics by setting user defined secure powerline networks. Installing the D-Link Configuration Utility To use the Configuration Utility you will need a laptop or desktop computer running Microsoft Windows Operating System. - Page 5 Installing the D-Link Configuration Utility (continued) Click Next Click Next The D-Link PLC Utility installation is now complete. Click Finish...
-
Page 6: User Interface
Using the D-Link PLC Utility In order to start the utility, double-click the utility icon. Figure 1 , shows the main screen of the configuration utility. The top panel of the screen shot shows a HomePlug device connected locally to the host computer. The... - Page 7 User Interface(continued) Figure 2 , illustrates the presence of two local HomePlug devices connected locally to the computer. The lower panel displays all the HomePlug remote devices, discovered on the current logical network. The total number of remote devices connected on the same network can be found on top of the remote device panel.
- Page 8 User Interface(continued) To set the Password of the device (required when creating a private network). First select the device by clicking on its name in the lower panel and then click on the Enter Password button. A dialog box will appear as shown in Figure 3 to type the password.
- Page 9 User Interface(continued) The Scan button is used to perform an immediate search of the HomePlug devices connected to the Powerline network. By default, the utility automatically scans every few seconds and updates the display screen. A typical screen after naming and supplying passwords might appear as in Figure 5.
- Page 10 User Interface(continued) The Set Local Device Only button can be used to change the network name (network password) of the local device. If a new network password is entered, all the devices seen on the Main panel prior to this will be no longer present in the new network, effectively making the local devices not to communicate to the devices who were in the old logical network.
- Page 11 The lower part of the panel may display options for user customizations or preferences (such as turning the auto-scan feature on or off) as shown Figure 8. You have now completed the installation for you DHP-200. Please be sure to configure all other PowerLine devices on your network to use the same password,...
-
Page 12: Specifications
Specifications Standards Data Rate -IEEE 802.3 Ethernet/802.3u Fast -Ethernet: 10/100 Mbps Ethernet -HomePlug: Up to 85Mbps -HomePlug 1.0 Operating Temperature Dimensions 0°C to 40°C (32°F to 104°F) 105 x 73 x 37mm Storage Temperature Device Ports -20°C to 70°C (-4°F to 158°F) -Ethernet: RJ-45 10/100BASE-TX Ethernet port with auto MDI/MDIX Operating Humidity... -
Page 14: Technical Support
Technical Support You can find software updates and user documentation on the D-Link website. Tech Support for customers within Australia: D-Link Technical Support over the Telephone: 1300-766-868 Monday to Friday 8:00am to 8:00pm EST Saturday 9:00am to 1:00pm EST D-Link Technical Support over the Internet: http://www.dlink.com.au... - Page 15 You can find software updates and user documentation on the D-Link website. Tech Support for customers within South Eastern Asia and Korea: D-Link South Eastern Asia and Korea Technical Support over the Telephone: +65-6895-5355 Monday to Friday 9:00am to 12:30pm, 2:00pm-6:00pm...
- Page 16 Technical Support You can find software updates and user documentation on the D-Link website. Tech Support for customers within India D-Link Technical Support over the Telephone: +91-22-26526741 +91-22-26526696 –ext 161 to 167 Monday to Friday 9:30am to 7:00pm D-Link Technical Support over the Internet: http://ww.dlink.co.in...
- Page 17 Technical Support You can find software updates and user documentation on the D-Link website. D-Link provides free technical support for customers for the duration of the warranty period on this product. Customers can contact D-Link technical support through our web site or by phone.
- Page 18 Technical Support You can find software updates and user documentation on the D-Link website. Tech Support for customers within the U.A.E & North Africa: D-Link Technical Support over the Telephone: (971) 4-391-6480 (U.A.E) Sunday to Wednesday 9:00am to 6:00pm GMT+4 Thursday 9:00am to 1:00pm GMT+4 D-Link Middle East &...
- Page 19 You can find software updates and user documentation on the D-Link website. Tech Support for customers within South Africa and Sub Sahara Region: D-Link South Africa and Sub Sahara Technical Support over the Telephone: +27-12-665-2165 08600 DLINK ( For South Africa only )
- Page 20 Technical Support You can find software updates and user documentation on the D-Link website. Tech Support for Latin America customers: D-Link Technical Support over the followings Telephones: Argentina: 0800-666 1442 Monday to Friday 09:00am to 22:00pm Chile: 800-214 422 Monday to Friday 08:00am to 21:00pm...