Table of Contents
3-207-372-11 (1)
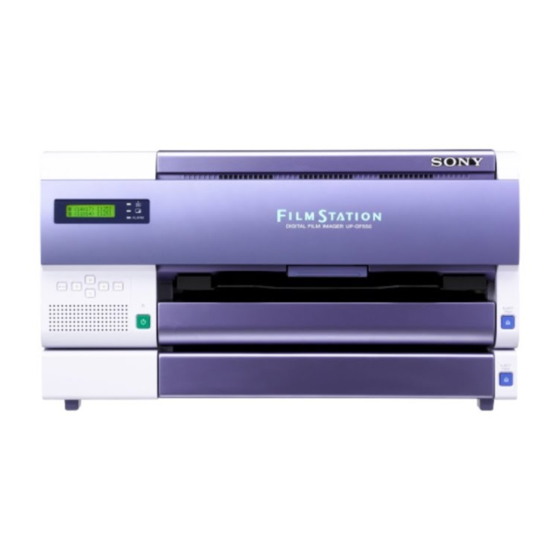
Digital Film Imager
Instructions for Use
Page 2
Setup Manual
Page 31
This manual is comprised of the Instructions for Use and the Setup Manual.
The Instructions for Use gives the information on how to use the printer for the
routine work.
The Setup Manual gives the system administrator the information needed to setup
the printer and connect it to the network.
UP-DF500
© 2003 Sony Corporation
Chapters
Table of Contents

Related Manuals for Sony UP-DF500


Summary of Contents for Sony UP-DF500
- Page 1 The Instructions for Use gives the information on how to use the printer for the routine work. The Setup Manual gives the system administrator the information needed to setup the printer and connect it to the network. UP-DF500 © 2003 Sony Corporation...
- Page 2 This unit has been certified according to Standard CSA C22.2 NO.601.1. For the customers in the U.S.A and Canada Model UP-DF500 is Non-Patient Equipment. This unit can not be used in the vicinity of patients. * Patient Vicinity Important safeguards/notices for use in the medical environments 1.
- Page 3 susceptible equipment. Plug this unit and the susceptible equipment into different branch circuit. Consult your dealer. (According to standard EN60601-1-2 and CISPR11, Class B, Group 1) Caution When you dispose of the unit or accessories, you must obey the law in the relative area or country and the regulation in the relative hospital.
-
Page 4: Table Of Contents
Instructions for Use Table of Contents Introduction About this Manual ...5 System Overview ...5 System Configuration Example ...6 Location and Function of Parts and Controls ...6 Preparation Supplied Accessories ...8 Assembly ...8 Placing the Unit ...8 Connections ...9 Operation Loading Film ...11 Loading Film ...11 Printing ...14 Adjustment... -
Page 5: Introduction
System Overview The UP-DF500 digital film imager is a thermal printer designed to reproduces image data in DICOM format sent via the network. The UP-DF500 has the following functions’... -
Page 6: System Configuration Example
DICOM LAN network Modality Image diagnosis equipment and so on UP-DF500 System Configuration Example / Location and Function of Parts and Controls Location and Function of Parts and Controls For details, refer to the pages given in parentheses. - Page 7 When film is running short: Lights in yellow. When film has been exhausted: Goes off. The ALARM indicator lights in orange and the message is displayed in the LCD. PRINT indicator (14, 26) Lights in green while the printer is printing. D ALARM indicator (25) Lights in orange when the film has been used up, film jams occur, or other problems occur.
-
Page 8: Preparation
Preparation Supplied Accessories The unit is packed together with the following accessories. Check that nothing is missing from your package. Film tray (1) Casters for vertical placement of the unit (2 AC power cord (1) Cleaning kit (1) Stopper sheet (1) Ferrite cores (2) Warranty card (1) (for the customers in the U.S.A. -
Page 9: Connections
Be sure to place the roller of the caster in the groove of the stopper sheet. Notes • Ask your nearest Sony dealer to attach the casters to the unit. • Use the casters to allow the unit to be pulled out from under the desk and so on. - Page 10 How to attach the ferrite cores Before using the unit, attach the supplied ferrite cores for noise prevention. To confirm to radiation standards, attach the supplied ferrite cores to both ends of the cable. Ferrite core Stoppers 12.5 mm (1/2 inch) Release the two stoppers to open the ferrite core.
-
Page 11: Operation
Contains blue thermal transparent film. 125 sheets of 14 × 17 inch film Be sure to use film made expressly for the UP-DF500. If you use other film, the quality of the printout cannot be guaranteed. Use of another type of film may also cause malfunction of the unit. - Page 12 Cut the blank part of the bag from the wedges on the bag. Note Remove the seal after loading the film in the film tray. If you remove it before loading, the film may slip and drop. Seal used to grasp the film sheets Loading Film Hold the aluminum damp-proof bag with both hands so that the opened side faces toward the inner...
- Page 13 roller, pinch roller, and separation rubbers” (on page 21). • Do not add film halfway through one bag of film. The reason for this is because the unit counts the remaining film using the IC tag on the printing protection sheet on the bottom. Remove the seal from the film placed in the film tray.
-
Page 14: Printing
Printing Before printing • Ensure that the unit is properly connected to the LAN. (page 9) • Ensure that the film sheets are properly loaded in the film tray. (page 11) PRINT indicator Turn on the power of the unit. After turning on the power, the LCD should appear as shown here. -
Page 15: Adjustment
Adjustment Menu Operation You can set the following items using the relevant menu: • Confirming information (INFORMATION) (page 15) • Adjusting the print quality (PRINT QUALITY) (page 15) • Calibration (CALIBRATION) (page 16) • Adjusting the density (DENSITY ADJ) (page 17) •... -
Page 16: Calibrating The Printing Density
The unit enters the sharpness adjustment mode. Select the desired level by pressing the G or g button. Current sharpness The sharpness can be adjusted among 15 levels between 1 and 14 including OFF. As the * mark is moved towards the right, the outline is emphasized. -
Page 17: Adjusting The Tone
1 Display LIMITED CAL, by pressing the F or f button. 2 Select ON by pressing the G or g button. Display ON in capital letters by pressing the G or g button. To reset to the default status If you reset to the default status, the calibration is not performed by selecting FULL RANGE CAL. - Page 18 The unit starts the printing of the tone pattern. Adjust the tone while checking the pattern print. To adjust the low tone Select the way the light areas of images will be printed. 1 Display SELECT POINT 95% by pressing the F or f button.
-
Page 19: Selecting A Gamma Curve
Select the desired gamma curve by pressing the G or g button. The gamma curves for SONY 1 to SONY 5 have been pre-set, you cannot change these settings. The gamma curves for USER 6 to USER 10 can be set to the desired value. -
Page 20: Miscellaneous
• Cleaning the fan filter In addition to the above maintenance, regular maintenance is required after every 5,000 printings. However, you should ask your nearest Sony dealer to perform this maintenance. You can check the total number of prints using the TOTAL PRINTS item of the INFORMATION menu. - Page 21 To replace the cleaning roller The supplied cleaning kit contains the cleaning rollers (for replacement) and wet pads. Proceed as follows to replace the cleaning roller with a new one. Pull the lever toward you to open the front cover. Hold the left side of the cleaning roller and remove it by sliding it toward the right.
- Page 22 Pull the lever toward you to open the front cover. Wipe the thermal head with the wet pad. Note Before wiping the thermal head, touch the metallic part of the unit to remove static electricity from your body. Thermal head Wipe the surface of the thermal head gently with the wet pad.
- Page 23 Note When removing the film tray, hold both sides of the film tray and the tray cover with both hands and remove it. Open the tray cover and wipe the separation rubbers with the wet pad. Separation rubbers Reset the film tray. The cleaning has been completed.
-
Page 24: Specifications
Reset the filters and close the cover. After you have finished all cleaning tasks Set the main POWER switch on the rear panel to ON, and then set the ON/STANDBY switch on the front panel to ON. The following message appears for about several minutes. -
Page 25: Messages
Medical Specifications Protection against electric shock: Class I Protection against harmful ingress of water: Ordinary Degree of safety in the presence of flammable anesthetics or oxygen: Not suitable for use in the presence of flammable anesthetics or oxygen Mode of operation: Continuous Design and specifications are subject to change without notice. -
Page 26: Other Messages
DICOM TROUBLE Trouble has occurred in the DICOM part of the unit. tTurn off the power immediately and contact your Sony dealer. TAG INVALID Trouble has occurred in the IC tag part. tTurn off the power immediately and contact your Sony dealer. -
Page 27: Troubleshooting
If a problem appears, check the following trouble shooting guide first and perform whatever action is necessary to solve the problem. If the problem persists, turn off the printer and consult your Sony dealer. Symptom Possible causes and remedies ON/STANDBY Nothing appears in the •... - Page 28 When the rear cover is opened When the top cover is opened When the top and the front covers are opened Troubleshooting When the front cover is opened When the top and inner covers are opened Close the opened cover firmly. The following message appears on the LCD.
- Page 29 When REMOVE FILM TRAY: J7 appears Remove the film tray completely. Remove the jammed film near the inside of the unit. Re-insert the film tray as it was. When REMOVE FILM SOME PLACES: J8 Several film sheets have jammed. Open all of the covers, rear, front, top and inner covers and check the location of the jammed film.
-
Page 30: Index
Index About this Manual 5 Calibrating the density each time the unit makes a printout unit 16 CALIBRATION FULL RANGE CAL 16 LIMITED CAL 17 Cleaning cabinet 20 cleaning roller 20 filters 23 pinch roller 22 platen roller 22 separation rubbers 23 thermal head 22 Connections 9 DENSITY ADJ... - Page 31 Setup Manual Table of Contents Preparation Overview ...32 Requirements ...32 IP Address ...33 Setup Setting up the Personal Computer to be Used for Setup ...34 About the Setup Window ...34 Opening the Setup Window ...34 Components of Pages ...35 Setup of the Unit ...37 Setup of E-Mail ...37 Confirmation After Setup ...38...
-
Page 32: Preparation
The following hardware and Web browser software are necessary to perform the setup. • Computer: A computer which can be connected to the network connector of the UP-DF500 • Operating system : Microsoft Windows 95, Windows 98, Windows NT 4.0, Windows 2000, or Windows XP •... -
Page 33: Ip Address
Before starting the setup, confirm the following with the network administrator. • The IP address the UP-DF500 will use on the network • Sub-net mask of the network • Gateway address, if a gateway is included in the... -
Page 34: Setup
Setting up the Personal Computer to be Used for Setup / About the Setup Window About the Setup Window The UP-DF500 can be set up on the setup window displayed on the Web browser of the personal computer to be used for setup. -
Page 35: Components Of Pages
Components of Pages Summary/Print Job Page This page displays information on the UP-DF500. A Printer (printer status) display section Printer Status: Displays the printer status. Thermosensitive Film: Displays the type of film in use. 14 × 17: Displays the size of the film in use (14 ×... - Page 36 Printer Status Page This page displays the status of the UP-DF500. A Printer Status display area Motor/Sensor: Displays the error status of the motor/sensor system. Film Path: Displays the status of the printing path. Cover: Displays the status of covers (opened or closed).
-
Page 37: Setup Of The Unit
IP Address text box Sub-net Mask text box Default Gateway text box 1 Enter the IP address of the UP-DF500 on the network in the IP Address text box. 2 Enter the sub-net mask in the Sub-net Mask text box. -
Page 38: Confirmation After Setup
Setup User ID text box After all of settings have been completed Turn off the power of the UP-DF500 and disconnect the UP-DF500 and the personal computer for setup. Proceed as follows to confirm the operation of the UP- DF500. - Page 39 Sony Corporation...