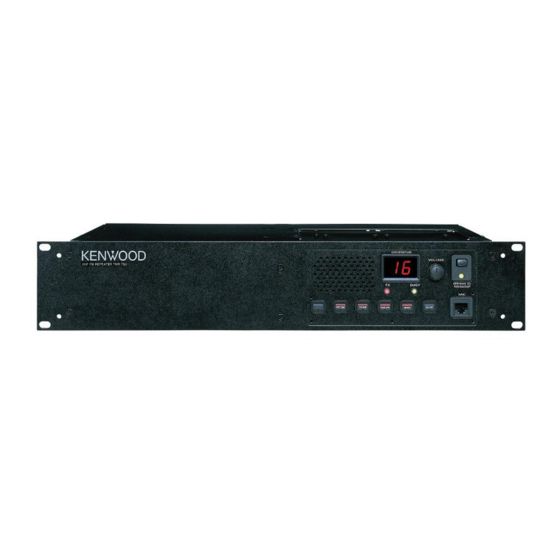
Kenwood TKR-750 Programming Reference Manual
Hide thumbs
Also See for TKR-750:
- Service manual (102 pages) ,
- Brochure & specs (2 pages) ,
- Instruction manual (2 pages)

Related Manuals for Kenwood TKR-750


Summary of Contents for Kenwood TKR-750
- Page 1 Field Programming Reference (FPRG) Version: 1.01 Last Updated: Sep, 2005 Language: English Type:...
- Page 3 Kenwood Corporation does not warrant quality and performance of the software described in this technical document and relevant in-depth manuals to conform to the applicability of any use, and Kenwood Corporation shall be free from liability for any defects, damage or loss, or from any warranty to anything other than expressly described in this technical document and relevant in-depth manuals.
-
Page 4: Table Of Contents
CONTENTS 1 SETTING UP THE KPG-91D......1 Model Information ........16 5.1.1 Model Type ..........16 System Requirement ........1 5.1.2 Frequency ..........16 Connecting to the PC ........1 5.1.3 Optional Board .......... 16 Installing KPG-91D ........1 Uninstalling KPG-91D ........2 6 EDIT MENU .......... - Page 5 CONTENTS 6.4.3 Others Tab (Optional Features) ....34 7.3.9 TX/RX Button ..........62 Key Assignment Window ......37 7.3.10 Print Button ..........62 7.3.11 Tuning Mode ..........62 Scan Information Window ......39 6.6.1 Priority ............39 6.6.2 Priority Channel .........39 8 TOOLS MENU .......... 65 6.6.3 Look Back Time A ........39 6.6.4 Look Back Time B ........39...
-
Page 6: Setting Up The Kpg-91D
It is possible to configure various functions of the TKR- Connection cable 750/850/751/851 by KPG-91D and write the configuration It has to connect the TKR-750/850/751/851 to the PC data into the TKR-750/850/751/851 via the PC installed using KPG-46 programming cable. The DB-9 pin female KPG-91D. -
Page 7: Uninstalling Kpg-91D
1 SETTING UP THE KPG-91D 3. You can install the KPG-91D with one of the following methods. • Double-click the CD-ROM drive icon > “setup.exe”. • Select “RUN” > “setup.exe” in the CD-ROM drive. • Click “Control Panel” > “Application addition/ removal”... -
Page 8: Basic Operation
This section describes basic operations of the KPG-91D. Modify the Configuration Data Note: ! The TKR-750/850 automatically enters PC mode when reading or writing the programming data. (Refer to FUNC 1.5 Mode.) Follow the procedures below to edit and write the configuration data. -
Page 9: Menu Description
This icon is for the “Print” function in the “File” menu. The Menu bar allows you to configure the functions of the This function allows you to print out the TKR-750/850. Click the menu title to open the pull-down Print configuration data. (Refer to 4.5 Print.) list. -
Page 10: Status Bar
The Status bar shows a serial communication port used 91D. (Refer to 4.7 Exit.) to perform a data communication between the KPG-91D and the TKR-750/850, and the current time and date. 3.2.2 “Model” Menu Figure 3-6 Status Bar > Note: You can display or hide the Status bar by selecting “View”... -
Page 11: Program" Menu
Test Frequency Window.) This function allows you to configure the Figure 3-12 “Setup” Menu Embedded characters to be stored in the TKR-750/850. Message Table 3-7 Function List of the “Setup” Menu (Refer to 6.14 Embedded Message Window.) This function allows you to configure the... -
Page 12: View" Menu
3 MENU DESCRIPTION 3.2.7 “View” Menu 3.2.9 “Help” Menu Figure 3-15 “Help” Menu Figure 3-13 “View” Menu Table 3-10 Function List of the “Help” Menu Table 3-8 Function List of the “View” Menu Function Description Function Description This function allows you to search for the Help Topics help topics. -
Page 13: Shortcut Keys
3 MENU DESCRIPTION Shortcut Keys 3.3.3 “Channel Information” Window Table 3-13 Shortcut Keys used in the “Channel Information” The following shortcut keys is assigned for each Window command of KPG-91D. Key Name Function Appear the “Channel Copy” window. You 3.3.1 Menu Bar Operation can also copy the configured channel data [Shift] + [F3]... -
Page 14: Test Mode, Tuning Mode
3 MENU DESCRIPTION 3.3.5 Test Mode, Tuning Mode Table 3-15 Test Mode, Tuning Mode Shortcut Keys Key Name Function Toggle between transmission and reception. [Space] (Refer to 7.3 Test Mode Window, 7.3.11 Tuning Mode.) 3.3.6 Help Table 3-16 Shortcut Keys for the Help Key Name Function Appear the “KPG-91D HTML Help”... -
Page 15: File Menu
4 FILE MENU Select “File” > “New” to create a new data file. You can clear the current configuration data and create the new data file. The default file name for a new file will be “kpg91d.dat”. Follow the procedures below to create the new data file. 1. -
Page 16: Save As
4 FILE MENU You can store the configuration data with the file name entered in the “File Name”. The warning message appears if a file with the same name exists in the destination folder. Figure 4-4 File Save 2. Select one of the following options. •... -
Page 17: Print Out List
Range The “DTMF” parameters will not be Unchecked 3. Click “OK”. printed out. You can print out the “KENWOOD KPG-91D Radio Default Unchecked Programming Information”. (Refer to 4.6 Print Preview.) " Encode/Decode Table The configured “Encode/Decode Table”... - Page 18 4 FILE MENU " Multi-table The configured “Channel Information” parameters are printed. (Refer to 6.1 Channel Information.) The configure “Multi-table” parameters are printed. (Refer to 6.11 Multi-table Window.) The “Channel Information” Checked parameters will be printed out. The “Multi-table” parameters will be Range Checked The “Channel Information”...
-
Page 19: Print Preview
4 FILE MENU " “Clear All” Button 4.6.1 Toolbar of the Print Preview Click “Clear All” to uncheck all checkbox. " “Select All” Button Click “Select All” to check all checkbox. Figure 4-10 Print Preview_Toolbar " Total Pages " “Print” button The total number of pages appears. -
Page 20: Exit
4 FILE MENU Exit This function is to exit the KPG-91D program. Follow the procedures below to exit the KPG-91D. 1. Select “File” > “Exit”. The confirmation dialog box appears to exit the KPG- 91D. Figure 4-11 File_Exit_1 2. Select one of the following options. •... -
Page 21: Model Menu
“Model Information” window. Figure 5-2 Model Information_Warning_1 ! 406.0 MHz and 406.1MHz are assigned as the Emergency locator beacons in the United States. Therefore, the TKR-750/ 751/850/851 is not designed to use these frequencies. 5.1.3 Optional Board Select the optional board installed in the TKR-750/850/ Figure 5-1 “Model Information”... -
Page 22: Edit Menu
It can configure the Reception Frequency in this window. Burst tone at end of transmission. You can directly enter the value in the edit box. ! When the DQT Encode is selected, the TKR-750/850/751/851 transmits the DQT Turn-off Code. TKR-750/751 100.00000 - 280.00000 MHz... -
Page 23: Qt/Dqt Encode
U, y, -, =, _ Default Channel Number (1 - 16) Note: The TKR-750/850/751/851 may not properly recognize the entered characters when entering the reserved characters, such as “PG”, “E1”,”E2”, “E3”, “E4”. Do not use the reserved characters for the channel name. -
Page 24: Power
! When “CW ID On” or “CW Message On” is enabled while channel. Select “High” or “Low” from the dropdown list. sending the CW ID, the TKR-750/850/751/851 stops sending the current CW ID and sends the new CW ID instead. -
Page 25: Frequency Copy ([Shift] + [F4])
6 EDIT MENU 6.1.14 Frequency Copy ([Shift] + [F4]) It can copy the data configured in the “Reception Frequency” to the “Transmission Frequency” of the same channel. Follow the procedures given below to copy the frequency. 1. Select the channel to copy. You can select the channel by clicking the channel Figure 6-4 QT/DQT Copy window number. -
Page 26: Context Menu
In this menu, you can copy or delete the configuration data. TKR-750/751 100.00000 - 280.00000 MHz Range TKR-850/851 327.00000 - 550.00000 MHz Default Blank... -
Page 27: Transmission Frequency
Default None Reverse Burst code at end of transmission. ! When the DQT Encode is selected, the TKR-750/850/751/851 Note: transmits a DQT Turn-off Code. ! You can use numbers, “D”, “N”, “I”, “.”, and “,” for the 5 digits of the QT/DQT Encode code. -
Page 28: Wide/Narrow
6 EDIT MENU Note: The TKR-750/850/751/851 may not properly recognize the 6.2.9 Multi-table (Channel Edit) entered characters when entering the reserved characters, such as “PG”, “E1”,”E2”, “E3”, “E4”. Do not use the reserved It can enable that the waits a call with TKR-750/850/751/851 characters for the channel name. -
Page 29: Qt Reverse Burst
! To use Compander, both the transmitting party's configuration Default and the receiving party's configuration must be the same. Note: When the The TKR-750/850/751/851 is turned ON or the channel is changed, the code selection ports specify the 6.2.15 CW ID configured Scrambler code regardless of the status of Voice Scrambler. -
Page 30: Cw Id Window
Range 9,:, =,? A - Z It can configure a duration between the time when the TKR-750/850/751/851 starts transmitting and the time Default Blank when it sends a CW ID. You can configure the duration using the spin buttons or directly enter the value. -
Page 31: Tx Required In Interval
TX Required in Interval It can transmit a CW ID when the channel is selected or changed. The TKR-750/850/751/851 transmits a CW ID regardless of the configuration of the CW Mod. Delay It can be enable to send a CW ID with the configured Time and the TX Interval Time. -
Page 32: Optional Features Window
“Optional Features 1", “Optional transmission ends with the TOT and the time that the Features 2", “Others” tabs and you can switch the display TKR-750/850/751/851 can start transmitting again. by clicking tabs. You can configure the duration by the spin buttons or (Refer to "... - Page 33 Off, 1 - 250 ms ! When the QT/DQT Encode code configured to the channel In steps of 1 ms is QT, the TKR-750/850/751/851 sends the QT Reverse Default 80 ms Burst Code. When the DQT Encode is selected, the it sends the QT Turn-off Code.
- Page 34 It can configure a Data Password. With this function assigned to an Auxiliary output port. This function enabled, the configuration data of the TKR-750/850/ activates it that is assigned to the RX Signal Detect 751/851 will not be read even when an unauthorized when the RSSI voltage becomes lower than the person attempts to read it by FPU.
- Page 35 " Firmware Program the speaker. It operates in the signalling squelch mode when it makes the repeat operation. It can allow the TKR-750/850/751/851 enter in the Firmware Programming Mode. When this function is " Scrambler Backup enabled, the it enters Firmware Programming Mode It can restore the Voice Scrambler configuration.
-
Page 36: Optional Features 2 Tab
This is a duration to make continuous transmission by when the TOT Reset Time is disabled. the Local Mic PTT. The TKR-750/850/751/851 automatically stops transmission and returns to the ! It not allow to configure the duration if the “Time-out Timer”... - Page 37 This allows to emit the Backup Battery Warning Tone when the power is switched to the backup power. This allows to emits the Power On Tone when the TKR-750/850/751/851 is turned ON. Emits the Backup Battery Warning Checked Tone for 5 seconds when the power Checked The Power On Tone sounds.
- Page 38 6 EDIT MENU (Refer to " Backup Battery directly enter the value. In steps of 10 Hz Operation Tone.) Default 800 Hz Range 300 - 3000 Hz Note: In steps of 10 Hz ! You can configure this tone only when the DTMF signalling is used.
-
Page 39: Others Tab (Optional Features)
CW ID On This function is available on the channel having the CW ID. CW Message 1 The TKR-750/850/751/851 sends the assigned CW ID from CW Messages 1 to 8 when it starts operation. (Refer to 6.12 CW Message Window.) - Page 40 Repeat Hold Time is enabled. (Refer to 6.4.1 Optional Features 1 Tab.) Local TX Disable The TKR-750/850/751/851 restricts the transmissions using the Local Mic PTT. Local TX Enable The TKR-750/850/751/851 enables the transmissions using the Local Mic PTT. The TKR-750/850/751/851 switches the transmission power from Low to High.
- Page 41 Off or the AF Amp is switched Off while the 1st, 2nd, then 3rd. Select the function from the is in Power Saver Mode. dropdown list. TKR-750/850/751/851 Configure the duration by the spin buttons or directly enter the value to configure the duration. Range Refer to Table 6-2 Available functions.
-
Page 42: Key Assignment Window
(Refer to Table 6-7 Assigning Functions to the Auxiliary Output Ports.) Channel 1 The TKR-750/850/751/851 moves to the channel from one of CH 1 to CH 16 channels. You cannot configure this function when “Channel Select” is configured to Auxiliary I/O ports 1 - 4. “E2”... - Page 43 It does not allow to configure this function if no channel is configured to the repeat operation. Reset The operation of the TKR-750/850/751/851 is reset and it returns to the default when pressing the PF key. Scan On/Off It can enable/disable the Scan function by pressing the PF [Scan On/Off] key.
-
Page 44: Scan Information Window
Configure the period by the spin TKR-750/850/751/851 scans channels in numerical order buttons or directly enter the value to configure the period. (Normal Scan) when the priority scan function is selected None. -
Page 45: Dropout Delay Time
This is a duration to resume scanning after stop revert channel. transmitting. The revert channel is assigned to the last TKR-750/850/751/851 pauses scanning if the PTT switch selected channel. is pressed to transmit during the scan and resumes In case of pausing the scan due to changing scanning after the transmission ends. -
Page 46: Dtmf Window
Default 6 digit/s 6.7.2 First Digit Delay Time This is a delay time between the time when TKR-750/850/ 751/851 starts transmitting and the time when it sends the DTMF code. Configure the duration by the spin buttons or directly enter the value to configure the duration. -
Page 47: Encode/Decode Table" Window
6 EDIT MENU “Encode/Decode Table” No. 1 is 159D. Default Window No. 2 - No. 32 are blank. It can configure the DTMF Encode/Decode code and the 6.8.2 Frequency function relating to the Transpond function. You can configure this function when the DTMF signalling is used. This is a frequency to transmit Single tone as the This window consists of “Encode”... -
Page 48: Remote Control Window
It can configure the Decode code with a maximum of 16- Remote Control Window digit DTMF Tone. Enter the code in the edit boxes from No. 1 to No. 40. It can configure the TKR-750/850/751/851 to be controlled by other transceivers on the “Remote Control” 16 digits Range window. -
Page 49: Pf Key Tab
6 EDIT MENU " Deactivation (PF Key) Table 6-5 The Transmitting channel during Scan. This is a standby Air Remote code to be decoded in While the Scan Transmission event During the Scan order to deactivate the assigned function for the PF pauses. -
Page 50: Aux Input/Output Tab
6 EDIT MENU " Activation (PF Key Transponder) 6.9.2 AUX Input/Output Tab This is a Transpond code that is sent when the On this tab, it can control the function assigned to the function assigned to AUX In/Out activates with the Air Auxiliary Port by the Air Remote code. - Page 51 6 EDIT MENU " Deactivation (AUX Input) " Function (AUX Output) This is a standby Air Remote code to be decoded in The function assigned on the “Aux Output” tab of the order to deavtivate the assigned function for the “Function Port”...
- Page 52 6 EDIT MENU " Transponder (AUX Output) " Deactivation (AUX Transponder) This is a timing to send the Transpond code. It can This is a Transpond code when the function assigned configure only when no function is assign to to the Auxiliary port is deactivated by the Air Remote “Function”.
-
Page 53: Remote Access With Qt/Dqt
Input”, “AUX Output”, “Channel Select”, and “Multi- This is a timing to transmit a Transpond code. If check table Select”. box is checked, TKR-750/850/751/851 waits to transmit a Transpond code until the channel is available. AUX Input This port works as the PF Input port. -
Page 54: Aux Tab
6.10.2 AUX Tab Default Level It can configure functions assigned to the AUX Input port, Note: Although TKR-750/850/751/851 performs the detection when the detection is enabled, it performs Start Up first AUX Output port, and the AUX Input/Output port in this when Start Up is enabled when the “Level”... - Page 55 6 EDIT MENU Function Name Description Switch enable/disable the function assigned to the Auxiliary I/O port when the signal is applied to one of the PF AUX I/O 1 On/Off [AUX I/O 1 On/Off] to PF [AUX I/O 6 On/Off] ports. You can assign the function when “Selectable”...
- Page 56 6 EDIT MENU Function Name Description Switch the transmission power from High to Low when the signal is applied to the PF [Low Power Off] input Low Power On *1 port. This function activates only when at least one channel is configured as High Transmission Power. (Refer to 6.2.11 TX High Power.) Switch High/Low for the transmission power when the signal is applied to the PF [Low Power On/Off] input port.
- Page 57 Auxiliary Input port and the PF key, the operation may become unstable due to the chattering. TKR-750/850/751/851 assumes that it has received the No. Example: When the PF [Scan On/Off] key is switched 2 Reset signal when receiving the No. 3 Repeat Disable from Off to On: signal after receiving the No.
- Page 58 Note: ! When configuring the Activation code to the PF [COR] output port or the PF [TOR] output port, TKR-750/850/751/ 851 cannot activate the repeat operation since it sends the code while it is in Busy status, so that it cannot receive the Air Remote code and the Repeater Open code.
-
Page 59: Multi-Table Window
6 EDIT MENU # When Selecting the QT/DQT Encode Code with the 6.11 Multi-table Window Dropdown List: 67.0 - 250.3 Hz It can configure the QT/DQT (Current) code on this window. When the Multi-table function is enabled, it can Range DQT Normal D023N - D754N wait for the call with two types of QT/DQT code;... -
Page 60: Cw Message Window
(space), “, ', (,), +,,, -,., /, 0, 1, 2, 3, 4, 5, 6, 7, 8, 9,:, =,? # Start Up Function A - Z TKR-750/850/751/851 sends CW Message when it is Default Blank turned ON if the CW Message transmission function is assigned to Start Up. -
Page 61: Audio Frequency
146 - 174 Default Unchecked TKR-750 136 - 150 TKR-850/851 450 - 480 TKR-850 480 - 512 TKR-850 400 - 430 Table 6-9 Default Test Frequency of the TKR-750/751 (K) Reception Frequency Transmission Channel No. [MHz] Frequency [MHz] 146.10000 146.00000 160.10000 160.00000 173.90000... -
Page 62: Ch Paste Button
6 EDIT MENU 6.13.2 CH Paste Button Reception Frequency Transmission Channel No. [MHz] Frequency [MHz] Click “CH Paste” to copy the frequency configured in the 170.10000 170.00000 “Channel Information” window to each channel in the 158.50000 161.50000 “Test Frequency” window. 161.50000 158.50000 Note:... -
Page 63: Embedded Message W/Password Window
6 EDIT MENU " Password Button 6.15 Embedded Message w/ Password Window It can configure the password and change it. Follow the procedures below to configure/change the password. It can configure a message and a password into the TKR- 750/850/751/851 on the “Embedded Message w/ 1. - Page 64 6 EDIT MENU Field Programming Reference (FPRG) Version: 1.01...
-
Page 65: Program Menu
“OK” to start reading the Note: configuration data. ! The PC cannot write the configuration data when TKR-750/ 850/751/851 does not respond even if “Write” is clicked. In Note: this case, you must ensure the power of TKR-750/850/751/... -
Page 66: Test Channel
*1: The value configured in the “Optional Features 2" tab. (Refer to 6.4.2 Optional Features 2 Tab.) It can select the channel to test. You can select the TKR-750/850/751/851 numbers of the channel configured on the “Test Note: deactivates AF Mute when the signalling is decoded with the QT/DQT code and the Frequency”... -
Page 67: Wide/ Narrow
Select “Off” or “On” from the dropdown list. Figure 7-4 Example: “Frequency Adjustment” window Note: Refer to the Service Manual how to adjust the TKR-750/850/ 751/851 also. Field Programming Reference (FPRG) Version: 1.01... - Page 68 Low Power mode. Detect (Low) Single Reference Level Adjustment Wide You can adjust the Maximum Deviation level. TKR-750/751 (VHF): 6 Reference Level Adjustments (3 Reference levels for VCO A and B) Deviation Narrow TKR-850/851 (UHF): 3 Reference Level Adjustments Wide You can adjust the DQT Encode balance.
- Page 69 KPG- Narrow TKR-850/851 (UHF): Single Reference Level Adjustment Deviation Buttery Wide Configurati You can adjust the Battery Operation Tone Encode level.TKR-750/751 (VHF): 2 Reference Operation on value in Level Adjustments Tone the KPG- Narrow TKR-850/851 (UHF): Single Reference Level Adjustment...
-
Page 70: Tools Menu
The “Radio Information” window appears when selecting “Radio Information” in the “Tools” menu. Figure 8-1 “Radio Information” window 8.1.1 Model Type The model type of the TKR-750/850/751/851 appears. (Refer to 5.1.1 Model Type.) 8.1.2 Frequency The frequency bandwidth configured to the TKR-750/850/ 751/851 appears. -
Page 71: Setup Menu
9 SETUP MENU Communication Port Window It can select the COM port to communicate with the TKR- 750/850/751/851. When there is only one available Communication port on a PC, the port is automatically configured as COM1. The “Communication Port” window appears when selecting “Communication Port”... -
Page 72: View Menu
10 VIEW MENU 10.1 Tree View Window This window displays the functions in the “Edit” menu. Double-click each item to display the window of the selected item. Figure 10-1 “Tree View” window 10.2 Toolbar It can display/hide the toolbar. You can display or hide the Toolbar by selecting “View”... -
Page 73: Window Menu
11 WINDOW MENU The “Window” menu appears when the function is 11.3 Vertical Tile selected in the “Edit” menu and the window of the function is displayed. You can rearrange and close the You can rearrange the opened windows in the vertical opened windows. -
Page 74: Close All Windows
11 WINDOW MENU 11.5 Close All Windows You can close all opened windows by selecting “Close All Windows”. 11.6 Opened Window List You can display the title of the opened window. When clicking the title of the window, the selected window appears. -
Page 75: Help Menu
12 HELP MENU 12.1 Help Topics Window 12.2 About KPG-91D Window You can view the “KPG-91D Help” window by selecting You can view the “About KPG-91D Help” window by → “Help” > “Help Topics”. In this window, you can search for selecting “Help”... -
Page 76: Function List
13 FUNCTION LIST Refer to the PF key, AUX Input port, Save On/Off, Start Save Power Function PF Key Start Up Up, and Power Supply sections for details. Input On/Off Supply PF key (Refer to 6.5 Key Assignment Window.) AUX Out 1 AUX Input port (Refer to 6.10.2 AUX Tab.) On/Off... - Page 77 13 FUNCTION LIST Save Power Save Power Function PF Key Start Up Function PF Key Start Up Input On/Off Supply Input On/Off Supply Monitor Message 1 Momentary Multi Table Message 2 Multi Table Main Multi Table Message 3 Main/Sub QT/DQT Dec. Disable Message 4 QT/DQT Dec.
- Page 78 13 FUNCTION LIST Save Power Function PF Key Start Up Input On/Off Supply Test Tone Off Test Tone On Test Tone On/ TOT Disable TOT Enable TOT Dis/En TX Disable TX Enable TX Dis/En Low Power Low Power Low Power On/Off You can use this function only when the signal is detected with the Down Edge.
- Page 80 INDEX ......55 CW Message ......55 CW Message window Symbols .......55 CW Mod. Delay Time .......25 CW Mod.Delay Time ......5 "Edit" Menu ......25, 55 CW Speed ......5 "File" menu .......68 Cascade ......7 "Help" menu ......57 Ch Paste button ......5 "Model" Menu ......19, 24 Channel Copy ......6...
- Page 81 CONTENTS ......29 ....... 69 External Monitor Opened Window List ...... 19, 23 Operation Mode ......16 Optional Board ..... 27 Optional Features 1 tab ......29 Fan Action ..... 31 Optional Features 2 tab ......10 File menu ....27 Optional Features window ......
- Page 82 CONTENTS ......66 Setup menu ......8 Shortcut Keys ......20 .......42 Channel Delete ( Sidetone ....47 Single Tone (Aux Transponder) .....45 Single Tone (PF Key Transponder) ......28 Squelch Level ........36 Start Up ....3 Starting and Exiting the KPG-91D .......5 Status bar .......1 System Requirements ....31 TOT Rekey Time (Local Mic PTT)