1
2
Table Of Contents
3
4
5
6
7
8
9
10
11
12
13
14
15
16
17
18
19
20
21
22
23
24
25
26
27
28
29
30
31
32
33
34
35
36
37
38
39
40
41
42
43
44
45
46
47
48
49
50
51
52
53
54
55
56
57
58
59
60
61
62
63
64
65
66
67
68
69
70
71
72
73
74
75
76
77
78
79
80
81
82
83
84
85
86
87
88
89
90
91
92
93
94
95
96
97
98
99
100
101
102
103
104
105
106
107
108
109
110
111
112
113
114
115
116
117
118
119
120
121
122
123
124
125
126
127
128
129
130
131
132
133
134
135
136
137
138
139
140
141
142
143
144
145
146
147
148
149
150
151
152
153
154
155
156
157
158
159
160
161
162
163
164
165
166
167
168
169
170
171
172
173

Related Manuals for DAHAO BECS-D19

Summary of Contents for DAHAO BECS-D19
- Page 1 刺绣机电脑 Computerized Control System for Embroidery Machine BECS-D19 Version: 2019-02 操作手册 USER’S MANUAL...
-
Page 3: Table Of Contents
2.10 Embroidery Operation Bar and Turn Shaft Button ............21 2.11 Thread Breakage Detection and Patch Embroidery Switch ..........21 2.12 Working Status .........................22 Chapter 3 Disk Management ..............23 3.1 Disk Selection ........................23 3.2 Pattern Preview ........................25 3.3 Single/Multiple Selection ....................27 3.4 Pattern Input ........................28 BECS-D19 User’s Manual... - Page 4 4.15 Generate Pattern by Frame-moving ................. 50 4.16 Generate Outline Pattern from Normal Pattern ............... 51 4.17 Copy Pattern of Varied Stitch Length ................52 4.18 Set Common Parameters ....................52 Chapter 5 Machine Parameter Management ..........54 BECS-D19 User’s Manual...
- Page 5 5.4.5 Unlock Manufacturer Password ................64 5.4.6 Manufacturer Saves and Recovers Optimized Paremeters ........64 5.5 Initialize Machine Parameters ...................65 5.6 Save Machine Parameters to Disk ..................65 5.7 Read Machine Parameters from Disk ................65 5.8 Adjust XY Parameters of Servo Frame ................65 BECS-D19 User’s Manual...
- Page 6 6.2.3 Frame Protection Setting/Frame Origin Setting ............. 76 6.2.4 Frame Recovery ..................... 77 6.2.5 Set Embroidery Scope in Software ................ 78 6.2.6 Set System Clock ....................80 6.2.7 Select Language ..................... 80 6.2.8 Machine Software Information ................81 6.2.9 Help ........................82 BECS-D19 User’s Manual...
- Page 7 7.3.2 Positioning Idling by Backward Stitches ............... 98 7.3.3 Positioning Idling by Next Color-changing Code ..........98 7.4 Clear XY Displacements ....................98 Chapter 8 Pattern Edit ................100 8.1 Start Pattern Edit ......................100 8.2 Pattern Editing Operation ....................101 BECS-D19 User’s Manual...
- Page 8 11.4 Related Operations of Special Embroidery ..............119 11.4.1 Shift between Flat Embroidery and Special Embroidery ........119 11.4.2 M-axis Operation of Special Embroidery ............121 11.4.3 Presser Foot Operation ..................121 11.5 Special Embroidery Debugging ..................122 BECS-D19 User’s Manual...
- Page 9 12.5.9 Test Thread Breakage Detection ................ 135 12.6 Manual Operation ......................136 12.7 Change Color-changing Order ..................136 12.8 Manual Switch of Loop Embroidery Head ..............138 12.9 Mechanical Device and Drive Mode of Loop Embroidery ...........138 Appendix 1 Parameter Setting List ............140 BECS-D19 User’s Manual...
- Page 10 Appendix 3 Error List ................151 Appendix 4 Loop Embroidery Parameter List .......... 154 Appendix 5 Loop Embroidery Error List..........158 Appendix 6 Network Connection Instructions ......... 159 Note: changes of specifications will not be informed separately! BECS-D19 User’s Manual VIII...
-
Page 11: Chapter 1 General Information
Chapter 1 General Information Thanks for using the Computerized Embroidery Control System produced by Beijing Dahao Technology Corp., Ltd. User are recommended to read this manual carefully, so as to operate the machine correctly and effectively. Besides, user should keep at hand this manual for future use. - Page 12 Make sure the configuration of power supply in normal. Use Caution stabilized voltage power supply when the voltage rebound is between -10%~10%. In case of warning, please check out the problem. Operation can only Caution be carried out again when problem is solved. BECS-D19 User’s Manual...
-
Page 13: Main Features
7. Grouping Management of Parameters Parameters can be divided into groups based on their functions and embroidery types. The system can also save and recover the parameters used by technicians at end-user and the BECS-D19 User’s Manual... - Page 14 18. Repetition Embroidery The embroidery productivity of the machine can be increased by repetition embroidery, which can also be used with cyclic embroidery. 19. Cyclic Embroidery When cyclic embroidery function is activated, the machine automatically returns to the BECS-D19 User’s Manual...
-
Page 15: Technical Specifications
1. Maximum Number of Patterns Saved in Memory: 800 2. Memory Capacity: 2M 3. Screeen Resolution: 800*600 4. Network Port Speed: 10Mbps 5. Data Transfer Method: floppy disk, USB disk, network 6. Control Precision: minimum stitch interval under control is 0.1mm 7. Needle Range: 0.1mm~12.7mm BECS-D19 User’s Manual... -
Page 16: Chapter 2 Operation Guide
The keys on the keyboard can be used along with LCD. If you want to operate any menu item on the LCD, just press corresponding function key on the keyboard. The status of that key will be shown on the screen. BECS-D19 User’s Manual... - Page 17 ( Confirm Press this key to confirm certain operation. Under ready status, user can make various preparations, Confirm/Release such as selecting pattern for embroidery, setting pattern Embroidery parameters, etc. before confirmation. Then press this key to BECS-D19 User’s Manual...
-
Page 18: Instructions Of Main Screen
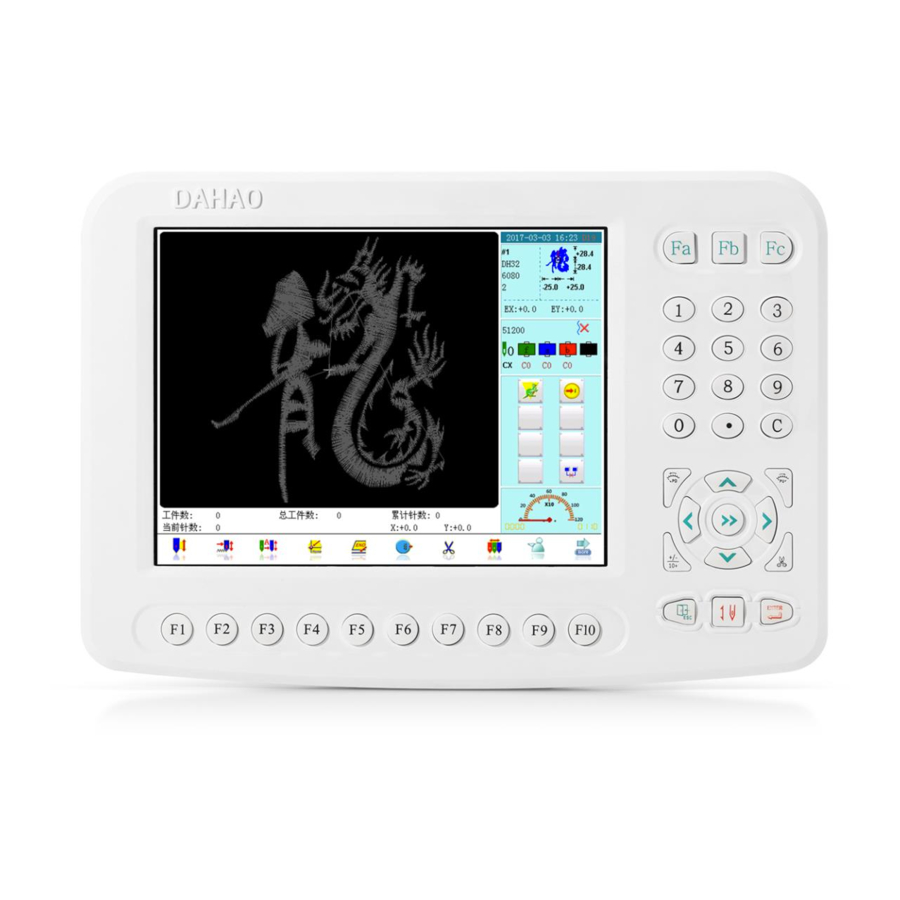
Press this key to exit the current operation. Page Press this key to turn pages. Number Keys Used to select menu item or set parameters. 2.3 Instructions of Main Screen Note: press to shift between the following two pages. BECS-D19 User’s Manual... - Page 19 Main shaft status (running , stop in Information (in the order of left position , not stop in position to right, top to Embroidery status (thread bottom) breakage , end of embroidery color-changing , jump , pull bar to stop BECS-D19 User’s Manual...
- Page 20 Press this key to enter disk management Chapter 3 Disk interface, for operations of floppy disk management and USB. Press this key to enter into pattern Pattern management interface, to select pattern Chapter 4 management for embroidery, input pattern to memory, BECS-D19 User’s Manual...
- Page 21 If you set auto start, machine will start automatically; if you set to manual start, pull bar to start. Auto color-changing auto start BECS-D19 User’s Manual...
- Page 22 Embroidery Status In embroidery preparation status, you can make various preparations, such as to select pattern, set parameter, etc. Embroidery Press this key and confirm, then preparation machine status changed from status preparation status to confirmation status BECS-D19 User’s Manual...
-
Page 23: Notes On Menu Item Status
” to shift options, press “ ” to confirm. At inputting number, press “ ” to input radix point, press “ ” to enter negative number. If there are several digits or letters on one key, you can press the key continuously BECS-D19 User’s Manual... -
Page 24: How To Move Cursor
User can imput pattern through network, floppy disk or USB disk. Only under status, can user transmit patterns by PC via network. For USB disk operation (including floppy disk), in the main screen to enter the “USB disk management” interface. You can also press BECS-D19 User’s Manual... - Page 25 Only under the status of “ ”, can user choose pattern for embroidery. 1. After entering pattern management interface, press “ ” to select the intended pattern for embroidery and then press BECS-D19 User’s Manual...
- Page 26 Please note: this function is to locate the pattern in the center of the frame as preset by soft limit. To set soft limit area, press to enter other assistant management operation. 5. Save pattern origin – in embroidery confirmation status, press to enter BECS-D19 User’s Manual...
- Page 27 After confirmation of embroidery, if needed, press to set another start point following the hint. (Note: when embroidery starts, this setting is invalid.) Set color-changing and starting method Under the main interface, press the position where the icon BECS-D19 User’s Manual...
- Page 28 (high speed) and (low speed). 3. Clear the frame coordinates When the machine stops, press “ ” then press “ ” to clear the XY displacements displayed in the main screen. The function can be used with manual frame-moving. BECS-D19 User’s Manual...
- Page 29 100º manually. 10. Manual operation of pneumatic frame, sequin and special embroidery This function is functional for the machines that are equipped with pneumatic frame, sequin and special embroidery devices. For such machines, press BECS-D19 User’s Manual...
-
Page 30: Normal Embroidery, Returning And Patch Embroidery
” (low-speed idling) and “ ” (high-speed idling). After user sets low-speed idling , the main shaft remains inactive when user pulls the bar for normal embroidery, but the frame runs forward along the stitch trace. When user pulls BECS-D19 User’s Manual... -
Page 31: Embroidery Operation Bar And Turn Shaft Button
For thread winding wheel type, it judges thread-breakage by checking the winding wheel angle. It reacts very sensitively in case of upper thread breakage; in most cases of bobbin thread run-out, the consumption of upper thread will reduce, as a result, system will judge by BECS-D19 User’s Manual... -
Page 32: Working Status
(pull the bar to right again and the machine goes into embroidery running status). In embroidery confirmation status ( is displayed), first press “ ” and then press “ ” to release embroidery confirmation status. Now the machine enters preparation status is displayed). BECS-D19 User’s Manual... -
Page 33: Chapter 3 Disk Management
USB disk and means floppy disk. Words mean volume lable (if there is no volume lable, default words will be used) and the numbers within the brackets mean the digital ID of the disk. C. Enter Disk Management Interface BECS-D19 User’s Manual... - Page 34 Copy pattern from disk to memory Pattern Output Copy pattern from memory to disk Previous Return to the previous directory Directory Refresh Disk Refresh current disk directory Create New Create new directory within the disk Directory File Deletion Delete the seleted file BECS-D19 User’s Manual...
-
Page 35: Pattern Preview
Pattern file name or directory name Object Icon Icon represents the file type: : directory : DSB pattern : DST pattern 3.2 Pattern Preview 1. In the disk management interface, press “ ” to select the pattern for preview. BECS-D19 User’s Manual... - Page 36 You can also use to find pattern in other pages. The selected object has a blue frame. 2. Press to display as follows: The system loads the data from the disk and displays the pattern’s image according to a BECS-D19 User’s Manual...
-
Page 37: Single/Multiple Selection
” to select the object and then press “ ” to confirm the selection, and repeat the same operation to make multiple selections. If user need cancel any selection, move to the selected object and press “ ” again to cancel. BECS-D19 User’s Manual... -
Page 38: Pattern Input
3. Input the pattern number and name in the memory. The system provides the minimum available pattern number as the default value, when user enters the interface for inputting the pattern number and name in the memory. User can BECS-D19 User’s Manual... -
Page 39: Pattern Output
1. Press 2. Select the pattern for output The system displays the list of patterns saved in memory. User can select patterns for output, and then press “ ”. 3. Input pattern number and name in the disk BECS-D19 User’s Manual... -
Page 40: Directory Operation
Press “ ” to create the new directory and system will refresh the current directory list. 3.7 Delete Disk File (Including Pattern File and Directory) 1. Select one or several objects for deletion (See 3.3) BECS-D19 User’s Manual... -
Page 41: Disk Formatting
If a file has the property of “only read” or “disk write- protection”, the file will not be deleted. 3.8 Disk Formatting 1. Select the disk to be formatted (See 3.1) 2. Press “ ” BECS-D19 User’s Manual... - Page 42 System will begin to format the disk and show the speed with a process bar. After formatting, the system will display a hint to show formatting success. Press the Return key to return to the disk management interface. Note: system will format the disk in DOS format. BECS-D19 User’s Manual...
-
Page 43: Chapter 4 Memory Pattern Management
The memory pattern management interface includes: pattern display area, information area and function menu area. The pattern image display area can show 9 patterns at most; beyond that, more pages will be needed. The function menu area is used for preview and order setting. BECS-D19 User’s Manual... - Page 44 Chapter 4 Memory Pattern Management BECS-D19 User’s Manual...
- Page 45 Disk Operation More disk operation, please see chapter 3 Copy Pattern Press this key to enter pattern copying interface Edit Pattern See chapter 8, how to edit selected or new pattern BECS-D19 User’s Manual...
- Page 46 Display the online help for pattern management interface Clear All Patterns Press this key to clear all selected patterns from memory See the following specifications for each operation. Press the key “ ” to return to the memory pattern management menu. BECS-D19 User’s Manual...
-
Page 47: Select One Or Several Patterns
If the operation is completed, system will close the memory pattern screen to return to the main screen. 4.4 Pattern Preview The selected pattern can be previewed in the memory pattern preview interface according to the preset way, to check details of the pattern. BECS-D19 User’s Manual... - Page 48 Area way and speed. Pattern Information Display the pattern information. Help Display the help menu. Redraw Display the selected pattern again. Single Step Display Draw the pattern by single steps. Draw/Pause Switch is for switching between drawing BECS-D19 User’s Manual...
-
Page 49: Copy Memory Pattern
” to enter the operation interface for copying memory pattern. At this time, system will automatically provide the available smallest pattern number and default pattern name. If the user doesn’t want to change them, go to step 6 directly. BECS-D19 User’s Manual... - Page 50 5. System will automatically enter pattern name modification area. If user wants to change it, input the new pattern name. 6. Press “ ” to confirm the change and conduct the copying operation, or press “ ” to cancle the copying operation, system will return to the pattern operation selection BECS-D19 User’s Manual...
-
Page 51: Delete Memory Pattern
2. Select patterns for deletion. User can select one or several patterns. 3. Press to enter the operation interface for deleting memory pattern. If you want to clear all the memory patterns, press to enter the operation interface for clearing all memory patterns. BECS-D19 User’s Manual... -
Page 52: Applique Pattern Setting
2. Select the target pattern in the pattern image area of the memory pattern management interface. 3. Press “ ” to enter the operation interface for setting appliqué for the pattern as BECS-D19 User’s Manual... - Page 53 The pattern display area shows the pattern which is being set with appliqué. After user sets the appliqué position, the pattern will be refreshed and the result will appear directly. 4. Press to move the list to the position for applique, and then press BECS-D19 User’s Manual...
-
Page 54: Satin Stitch Compensation
” to confirm. 6. Press “ ” to adjust the satin width and save it as a new pattern or press “ ” to cancel the adjustment operation, system will return to the pattern operation selection interface. BECS-D19 User’s Manual... -
Page 55: Edit Combined Pattern
If the current pattern is not the first pattern in the combined pattern, user should set the interval between it and the first pattern. BECS-D19 User’s Manual... - Page 56 ” to save the combined pattern. 7. Input the pattern number and name and press “ ” to save the pattern or press “ ” to quit saving the combined pattern, system will return to the pattern operation selection interface. BECS-D19 User’s Manual...
-
Page 57: Devide Pattern
If More than two patterns are selected, there will be a prompt to tell you to reselect. 3. If you don’t use the default value, you can use keyboard to change the pattern number, BECS-D19 User’s Manual... -
Page 58: Generate High-Speed Pattern
4.13 Compile Combined Pattern This operation is used to generate a normal pattern from a combined pattern. 1. Press in the main interface, to enter memory pattern management interface. 2. Select a saved combined pattern. BECS-D19 User’s Manual... -
Page 59: Generate Pattern By Parameters
2. Select pattern in the pattern image area of the memory pattern management interface. 3. Press “ ” to enter the operation interface for generating pattern by parameters. BECS-D19 User’s Manual... -
Page 60: Generate Pattern By Frame-Moving
1. In embroidery preparation status, move the frame to the point where the generated pattern starts. 2. Press in the main interface, to enter memory pattern management interface. 3. Press “ ” to enter the operation interface for generating pattern by frame-moving. BECS-D19 User’s Manual... -
Page 61: Generate Outline Pattern From Normal Pattern
” to enter the operation interface for generating outline pattern. 4. If user doesn’t want to use the default value, press “ ” to change by keyboard. 5. Press “ ” to generate the outline pattern or press “ ” to quit the operation, and BECS-D19 User’s Manual... -
Page 62: Copy Pattern Of Varied Stitch Length
2. Select pattern in the pattern image area of the memory pattern management interface. 3. Press “ ” to display the embroidery parameter setting interface, if the selected pattern is the pattern under embroidery. See chapter 5 for details. BECS-D19 User’s Manual... - Page 63 For setting parameters, please refer to 5.1 and 7.1. After setting, press the key “ ” to save the parameters with the pattern for future use. Press “ ” to quit saving, system will return to the pattern operation selection interface. BECS-D19 User’s Manual...
-
Page 64: Chapter 5 Machine Parameter Management
User can control the final embroidery results by adjusting these parameters. That’s why these parameters are often adjusted when a pattern is selected. In the embroidery preparation status “ ”, press in the main interface and then “ ”to enter the common parameter setting interface. BECS-D19 User’s Manual... -
Page 65: Pattern Direction
5.1.1 Pattern Direction 5.1.2 Rotating Angle This parameter can be used to make the pattern rotate in a certain angle. 5.1.3 Scaling This parameter controls the scaling rate in horizontal (X) direction, in order to scale up/down the pattern. BECS-D19 User’s Manual... -
Page 66: Repetition Priority
Note: some parameter value is input by pressing 3. Press “ ” to save the modification or press “ ” to quit without saving. 5.1.4 Repetition Priority There are two modes: X priority and Y priority. BECS-D19 User’s Manual... -
Page 67: Repetition Mode
For machines with encryption function, some parameters can be attached with administrator password or factory password. For setting the administrator passwords and the factory password, as well as initialization of parameters, please press to enter the BECS-D19 User’s Manual... -
Page 68: Setting Procedure For Other Parameters
For instance, if you want to modify machine stitch count parameter, which is located in the first item “D01 Needles <1, 15>” of “machine configuration & maintenance parameter”. 2. Press in the main interface, move the cursor to “machine configuration & BECS-D19 User’s Manual... - Page 69 4. Input the needle number according to machine type, and press “ ” to save the setting or press “ ” to quit, system will return to the interface of “machine configuration & maintenance parameter” Note: Some parameters can not be inputted, you can only use to select. BECS-D19 User’s Manual...
-
Page 70: More Functions For Setting Other Parameters
After adjusting these parameters, user can press the task swift key on the panel to return to the main interface. Press the key and “ ”, to check the effects of the parameter BECS-D19 User’s Manual... -
Page 71: Initialize Machine Parameters
General user, having the lowest authorization, can only modify the embroidery parameters of the machine, while machine administrator can also modify managing parameters, but only the manufacturer user can modify all parameters. Press “Machine Authorization Management” to enter the following interface. BECS-D19 User’s Manual... -
Page 72: Unlock/Change Administrator Password
After password setting, general user can’t modify the machine application parameters. The administrator has to input the right password before modification. 1. Press in the main interface to enter machine parameter management interface, move the cursor to “unlock/change administrator password”, and press “ ” to enter. BECS-D19 User’s Manual... -
Page 73: Administrator Unlocks The Machine
“machine parameter authorization management”, and press “ ” to enter. 2. Move the cursor to “unlock/change password by administrator”, and press “ ”. BECS-D19 User’s Manual... -
Page 74: Administrator Saves And Recovers Optimized Parameters
The details of it are similar to the “Unlock/Change Administrator Password”. 5.4.5 Unlock Manufacturer Password The method is similar to that of unlocking administrator password. 5.4.6 Manufacturer Saves and Recovers Optimized Paremeters The method is similar to that by which administrator saves and recovers parameters. BECS-D19 User’s Manual... -
Page 75: Initialize Machine Parameters
5.8 Adjust XY Parameters of Servo Frame This type of parameters is used for the machine whose main shaft uses Dahao servo motor and driver. Only the manufacturer can modify these parameters. For machine with encryption function, you must input the manufacturer password before adjusting the parameters or performing the corresponding operation to the machine. -
Page 76: Set Parameters
The setting is similar to that of other normal parameters, please refer to Appendix 1. 5.8.2 Inquire Driver Status This operation can inquire the Dahao servo driver status. System will display the windows of X/Y servo driver status after user carries out this operation. User should turn off power and adjust Dahao servo driver if the following interface appears. -
Page 77: Save Driver Parameters
And the parameters can be saved even power is off. 5.8.4 Recover Default Driver Parameters The X/Y parameters of servo driver in the controller will be restored to their default values if you operate this function. BECS-D19 User’s Manual... -
Page 78: Chapter 6 Assistant Functions
If the current pattern has start point, user can use this function to move the frame to the start point saved before. 1. Follow the above instruction and enter assistant embroidery operation interface. 2. Move the cursor to “Resume pattern origin” and press BECS-D19 User’s Manual... -
Page 79: Save Pattern Origin
3. Move the cursor to “Save pattern origin” and press to display the hint window. 4. Press the key “ ” to save the current frame position as the origin; press “ ” to cancel the operation. BECS-D19 User’s Manual... -
Page 80: Pattern Origin Auto Search
This function is only available in embroidery confirmation status. 1. Follow the above instruction and enter assistant embroidery operation interface. 2. Move the cursor to “Needle stops down” and press BECS-D19 User’s Manual... - Page 81 If you press “ ”, the operation will be cancelled. 5. System returns to the main interface. User can fix the embroidery fabric, operate the main shaft to 100° and then pull bar to continue embroidering. BECS-D19 User’s Manual...
-
Page 82: Set Another Start
B. After threading, pull bar to right to let the frame return to the stop point. Then the embroidery can go on. A. Setting Procedure 1. Set the absolute origin, see 6.2.3 for details. 2. Follow the above instruction and enter assistant embroidery operation interface. BECS-D19 User’s Manual... - Page 83 (1) If B point is above the line, the frame will return to B point after pressing slow moving key. There will be a long distance to go to the stop point after threading. (2) If B point is under the line, threading will be greatly influenced. BECS-D19 User’s Manual...
-
Page 84: Operation Of Air Frame, Sequin And Coiling Devices
6.2 Other Assistant Management Operation These operations include machine maintenance, statistic information inquiry and other system settings. Press in the main interface to enter the interface for other assistant management operation, where user can press corresponding keys to realize certain functions. BECS-D19 User’s Manual... -
Page 85: Check Embroidery Parameter
2. Move the cursor to “check embroidery parameter” and press “ ”. 3. System will display parameters of current pattern. These parameters include: pattern number, total embroidery stitch, free memory, cyclic BECS-D19 User’s Manual... -
Page 86: Check Statistic Data
So after machine installation or maintenance, it’s necessary to set the frame origin. 1. Press in the main interface to enter the interface of other assistant manangement operation. 2. Move the cursor to “check statistic data” and press “ ”. BECS-D19 User’s Manual... -
Page 87: Frame Recovery
1. Press in the main interface to enter the interface of other assistant manangement operation. 2. Move the cursor to “frame resume” and press “ ”. BECS-D19 User’s Manual... -
Page 88: Set Embroidery Scope In Software
2. Move the cursor to “set embroidery scope in software” and press “ ”. 3. If software protection has been set, system will ask user to clear original settings. 4. Press “ ” to set the coordinates of top-right corner. BECS-D19 User’s Manual... - Page 89 5. Move frame and input the coordinates of bottom-left corner. Use frame-moving key to move the frame, after you confirm the bottom-left corner of soft limit, press “ ” to confirm. 5. System will save the frame software protection. BECS-D19 User’s Manual...
-
Page 90: Set System Clock
6.2.7 Select Language System supports Chinese, English, Spanish, Turkish and various other languages. 1. Press in the main interface to enter the interface of other assistant manangement operation. 2. Move the cursor to “display language” and press “ ”. BECS-D19 User’s Manual... -
Page 91: Machine Software Information
” to confirm or press “ ” to quit. 6.2.8 Machine Software Information 1. Press in the main interface to enter the interface of other assistant manangement operation. 2. Move the cursor to “machine software information” and press “ ”. BECS-D19 User’s Manual... -
Page 92: Help
This operation contains some mechanical work. Please pay attention to personal and equipment safety. This function is mainly used for machine test, maintenance and problem diagnosis, including: Test optical encoder Main shaft auto test BECS-D19 User’s Manual... - Page 93 Cyclic embroidery color-changing position adjustment Test D-axis motor Test H-axis motor Test chained main shaft rotation speed Test chained main shaft encoder Test chained trimming motor Test chained loosing motor Detect thread breakage of cyclic embroidery test BECS-D19 User’s Manual...
-
Page 94: Chapter 7 Other Operations
7.1.1 Input and Repeat Color-changing Order In the color-changing order operation interface, move the cursor to “input and repeat color-changing order” and press “ ” to enter the interface. BECS-D19 User’s Manual... -
Page 95: Modify Color-Changing Order
” to save the color-changing order or press “ ” to exit without saving. 7.1.2 Modify Color-changing Order In the color-changing order operation interface, move the cursor to “modify color-changing order” and press “ ” to enter the interface. BECS-D19 User’s Manual... -
Page 96: Replace Color-Changing Needle Position
” to save the color-changing order or press “ ” to exit without saving. 7.1.3 Replace Color-changing Needle Position In the color-changing order operation interface, move the cursor to “replace color-changing position” and press “ ” to enter the interface. BECS-D19 User’s Manual... -
Page 97: Set Pattern Display Color
The needle bar color can be saved with the color-changing order. In the color-changing order operation interface, move the cursor to “set pattern display color” and press “ ” to enter the interface. BECS-D19 User’s Manual... -
Page 98: Pattern Border Operation
After setting, press “ ” to save the needle bar color setting and return, or press the key “ ” to return without saving. 7.2 Pattern Border Operation Press in the main interface, to enter pattern border operation interface. BECS-D19 User’s Manual... -
Page 99: Check The Pattern Border Range
Press “ ” or “ ” to close the window. 7.2.2 Move the Frame along the Pattern Border This function can drive the frame move along the border. If it touches any limit, system BECS-D19 User’s Manual... -
Page 100: Generate Pattern From Pattern Outline
Press “ ” to cancel. After finishing the movement, system will return to the pattern border operation interface. 7.2.3 Generate Pattern from Pattern Outline This operation can generate a new pattern from the outline of the current pattern. BECS-D19 User’s Manual... -
Page 101: Generate Patch Position By Frame-Moving, Then Embroider
This function can help user create that kind of pattern, and then use this pattern as positioning reference. 1. In preparation status, move the cursor to “generate patch position by frame-moving, then embroider” and press “ ” to enter the interface. BECS-D19 User’s Manual... -
Page 102: Embroider A Cross At Current Position
1. In pattern border operation interface, move the cursor to “embroider a cross at current position” and press “ ”. The system will enter the following interface, where user can set the length of the cross at X and Y directions: BECS-D19 User’s Manual... -
Page 103: Embroider A Line From Frame-Moving End To Start
7.2.6 Embroider a Line from Frame-moving End to Start 1. In pattern border operation interface, move the cursor to “embroider a line from frame-moving end to start” and press “ ”. System will display the start point of the frame-moving. BECS-D19 User’s Manual... -
Page 104: Embroider Along Outline Of Current Pattern
7.2.7 Embroider Along Outline of Current Pattern The function can measure pattern border data and generate a temporary data for users. This function should be performed in embroidery preparation status. BECS-D19 User’s Manual... -
Page 105: Embroider Real Outline Of Current Pattern
System will generate temporary outline data according to the current pattern. Pull bar to embroider. In pattern border operation inrerface, move the cursor to “embroider real outline of current pattern” and press “ ” to enter confirmation interface: BECS-D19 User’s Manual... -
Page 106: Positioning Idling
Press in the main interface to enter the positioning idling interface, where there is a list of function keys. You can press these keys to perform different idling functions. BECS-D19 User’s Manual... -
Page 107: Positioning Idling By Forward Stitches
1. Move the cursor to “forward stitches”, and press “ ”. 2. Input the number of “forward stitches”. System enters the interface of “forward stitches”. User can press “ ” to confirm or press “ ” to cancel. BECS-D19 User’s Manual... -
Page 108: Positioning Idling By Backward Stitches
The other three positioning idling functions have the similar operation method. 7.4 Clear XY Displacements This function is to clear current value of X/Y displacements. Press “ ” on the keyboard and system will display the confirmation window. BECS-D19 User’s Manual... - Page 109 Chapter 7 Other Operations Press “ ” to clear the value to 0 or press “ ” to cancel the operation. User can check the value in the main interface. BECS-D19 User’s Manual...
-
Page 110: Chapter 8 Pattern Edit
Press “ ” to edit the current pattern or press “ ” to edit a new pattern. Note: no combined pattern can be selected, or the system will report error. BECS-D19 User’s Manual... -
Page 111: Pattern Editing Operation
4. Stitch positioning: to position the current stitch (to be checked and edited) 5. Stitch editing function: used to switch stitch code, insert stitch, delete stitch and move stitch position. 6. Help: press this key to display the instruction window for each key. BECS-D19 User’s Manual... -
Page 112: Document And View Operation
100&1000, satin, stop, color-changing, jump, and sequin”. 2. Stitch Editing : to insert one stitch of appointed type at current position, press “ ” to change the stitch type, then press “ ” to confirm the addition or press “ ” to cancel. BECS-D19 User’s Manual... - Page 113 Press “ ” to switch coordinate index speed among high speed, intermidiate speed and low speed. After editing, click “ ” and input pattern name and number. Press “ ” to confirm or “ ” to cancel. BECS-D19 User’s Manual...
-
Page 114: Chapter 9 Letter Pattern Operation
After entering parameter inputting interface, move the cursor to certain parameter and press “ ” to make corresponding setting. After setting the value, user need press “ ” to save it. The following picture is the letter string inputting interface. BECS-D19 User’s Manual... - Page 115 5. “Letter Angle”: in case of arc arrangement, whether each letter changes its angle according to its position at the arc. 6. “Letter String Rotation Angle”: the rotation angle of the whole letter string. 7. “Letter Height Adjustment”: increase or decrease the letter height. BECS-D19 User’s Manual...
- Page 116 And then, select one letter to adjust its arrangement parameter (by buttons at right side of the screen). Letter pattern display area: the central cross means coordinate, and the intersection is origin (0, 0). The letters will arrange around the origin automatically. B. View and Document Operation BECS-D19 User’s Manual...
- Page 117 “Fixed Letter Direction”: when letter string is arranged in arc, the letter angle will not change along with the arc rather remain at fixed angle, e.g. “Angle Follow”: when letter string is arranged in arc, the letter angle will change BECS-D19 User’s Manual...
- Page 118 Repeat clicking this key to make the same selection circulation. “Enlarge Letter”: used to adjust the size of the selected letter. Pres “ ” to increase height, press “ ” to decrease height, press “ ” to increase width and press BECS-D19 User’s Manual...
-
Page 119: Save Letter Pattern
In this case, all adjustments made for each letter in this interface will be canceled. 9.3 Save Letter Pattern After finishing letter pattern edit, press and then press “ ” at the pop-up BECS-D19 User’s Manual... - Page 120 Chapter 9 Letter Pattern Operation window; input the pattern number and name, and then press “ ” to save. Press “ ” to confirm the saving and in case of no more editing, press “ ” to quit. BECS-D19 User’s Manual...
-
Page 121: Chapter 10 Jf Type Sequin Embroidery
Note: do not touch air valve switch during embroidery, or it may cause damage to the sequin feeding device. 10.3 Input Sequin Pattern Press in the main interface, to enter the “disk selection” interface, where user need select the target disk and target pattern, and press to enter the “pattern input” interface, BECS-D19 User’s Manual... -
Page 122: Sequin Embroidery Parameter Setting
This section is about how to debug sequin embroidery device and set related parameters in case of multi-sequin embroidery. Press in the main interface, to enter machine parameter management interface, and then select “sequin embroidery parameter” to enter the setting interface. BECS-D19 User’s Manual... - Page 123 When set as “Yes”, sequin presser foot will automatically lift in case of thread breakage, when set as “No”, manual operation is needed to lift the sequin presser foot after thread breakage. (6) Independent Action of Sequin Device BECS-D19 User’s Manual...
-
Page 124: Manual Operation Of Sequin Embroidery
“sequin start” and press “ ” to confirm; at this time, all presser feet will go down; (2) Press in the main interface, move the cursor to “sequin feed” and press “ ” BECS-D19 User’s Manual... -
Page 125: Sequin Applique
User can pull bar again to let the patch sequin device go down for applique. When it reaches the thread-breakage point, machine stops, then other sequin devices will go down to continue normal embroidery. “Patch stitch number” in machine parameter setting is ineffective in sequin applique. BECS-D19 User’s Manual... -
Page 126: Chapter 11 Instructions On Coiling, Taping And Zigzag Embroidery
2. Speed of special Embroidery: 300~600rpm, by increment of 10r/m. BECS-D19 User’s Manual... -
Page 127: Parameters And Settings
“special embroidery parameter” and then presses “ ” to enter the interface. Press to shift page. “ ” Move cursor to the corresponding parameter and press to input or select the value. BECS-D19 User’s Manual... - Page 128 9. D41 Swing Rod Starting Angle Adjustment: 1~3 It is the starting angle of the rod, which indicates the relative position of the needle bar and tape. It is used for adjusting the embroidery quality. “1” means the swing starts at an early BECS-D19 User’s Manual...
-
Page 129: Related Operations Of Special Embroidery
: Z2 embroidery, lever swinging once at every stitch and lever swinging once at every two stitches take place alternately. : Z3 embroidery, lever swings once at every stitch. : Z4 embroidery, lever swings once at every stitch but its swing direction is opposite to the one of Z3. BECS-D19 User’s Manual... - Page 130 Press corresponding icon to select corresponding embroidery mode you need, and ress “ ” to save the change, or press “ ” to exit. After saving the change, system will display the following interface: BECS-D19 User’s Manual...
-
Page 131: M-Axis Operation Of Special Embroidery
“pressor foot up”. Then press “ ” to display the dialogue window, where user can press “ ” to lift the presser foot or press “ ” to quit the operation. BECS-D19 User’s Manual... -
Page 132: Special Embroidery Debugging
E axis swings once at every one or two stitch to make the Zigzag embroidery. Presser foot axis is used for lifting and lowering the presser foot. 1. M Axis BECS-D19 User’s Manual... - Page 133 There is no holding force when the presser foot stays at the upper point or bottom point at power-off. No proximity switch is needed for positioning. As default setting, the controller sets the foot at the bottom position when user BECS-D19 User’s Manual...
- Page 134 (6) Transmitted by pneumatic motor separately, without proximity switch In this mode, the presser foot working height relies on the rotation of the cam and the presser foot is raised to the limited height by pneumatic motor that drives the heads separately. BECS-D19 User’s Manual...
-
Page 135: Chapter 12 Instructions On Loop Embroidery
Operation Procedure: (1) When machine stops, press (current head is loop embroidery head) or (current head is flat embroidery head) in the main interface, to enter the following interface for manual head switch and color-changing: BECS-D19 User’s Manual... - Page 136 H represents off position, which can be used to shut all heads automatically. (5) Press “Back” to exit. Embroidery machine will make corresponding changes according to the set value of shuttle position, stitch type and looping needle height and display the final results. BECS-D19 User’s Manual...
-
Page 137: Loop Embroidery Main Interface Introduction
Chapter 12 Instructions on Loop Embroidery 12.2.2 Loop Embroidery Main Interface Introduction The above picture is the main interface after switch to flat embroidery head. BECS-D19 User’s Manual... -
Page 138: Loop Embroidery Procedure
(3) Check loop embroidery head: to ensure normal work status; (4) Pull bar to embroider. 12.4 Parameters and Settings Press in the main interface and press the icons at the low-right corner to select BECS-D19 User’s Manual... -
Page 139: Machine Debugging
(current head is loop embroidery head) or (current head is flat embroidery head) in the main interface, to enter head switch interface and change the head into loop embroidery head. Then return to the main interface, press to enter “other assistant BECS-D19 User’s Manual... -
Page 140: Thread Loosing Position Adjustment
The loosing position is determined by the value change of the resistance of singlg-circle precision potentiometer. To adjust the value of potentiometer can locate the motor at proper position. BECS-D19 User’s Manual... -
Page 141: Needle Height Adjustment
Operation: (1) Use left or right direction keys on the keyboard to move the red box to select “ ” at the low-right corner, then user up or down keys to select desired BECS-D19 User’s Manual... -
Page 142: Color-Changing Position Adjustment
(1) Select the shuttle position from the drop-down list of “select color-changing position”, to realize manual color-changing; (2) Adjust color-changing speed; (3) Adjust value of potentiometer to return from the abnormal position to normal position; (4) Adjust value of potentiometer for different shuttle position. BECS-D19 User’s Manual... -
Page 143: Test D-Axis Motor
(1) Use left or right direction keys on the keyboard to move the red box to select and then press up or down keys to select direction, angle, curve and rotation speed. Pull bar to start test; (2) Press to return to origin; (3) Press “ESC” to exit. 12.5.5 Text H-axis Motor BECS-D19 User’s Manual... -
Page 144: Test Main Shaft Of Chained Embroidery
Operation: Use left or right direction keys on the keyboard to move the red box to select and then press up or down keys to adjust the trimming angle and speed for test. Pull bar to execute trimming. Press to display the following interface: BECS-D19 User’s Manual... -
Page 145: Test Thread Breakage Detection
12.5.9 Test Thread Breakage Detection This function is used to test the installation and sensibility of the thread breakage detection device. BECS-D19 User’s Manual... -
Page 146: Manual Operation
When setting color-changing order before embroidery, user can set the color-changing needle position to realize auto shift during embroidery. Press in the main interface, and select “input and repeat color-changing order” or “change color-changing order”, to enter the interface for inputting color-changing order: BECS-D19 User’s Manual... - Page 147 After setting, press “OK” on the keyboard to finish the color-changing setting. After setting the embroidery mode and color-changing order, the following interface will be displayed: BECS-D19 User’s Manual...
-
Page 148: Manual Switch Of Loop Embroidery Head
The return stitch number can be set in the loop embroidery parameter setting menu. 12.9 Mechanical Device and Drive Mode of Loop Embroidery Apart from the motor for main shaft and frame control, loop embroidery system also BECS-D19 User’s Manual... - Page 149 2N-1, 2N for two loop embroidery heads. OFF: high level 1, ON: low level 0 Table 2: DIP10 Divided as up/down head board Up head board: to control needle height, head light and switch control Down head board: to control trimming motor and thread breakage detection BECS-D19 User’s Manual...
-
Page 150: Appendix 1 Parameter Setting List
After embroidery, the setting will automatically change to “No”. Slow stitches after 0~500 patching Speed of slow stitches Max. 80~Max. after patching Stop to Color when No, Yes Change stop codes into loading pattern color-changing codes at loading BECS-D19 User’s Manual... - Page 151 No, Yes pattern in 3D form? Whether to skip short No, Yes It is fit for high-speed machine using stitch? dahao servo-motor driver. It only gets effective after user reconfirm the embroidery. Length of skipped short 0.2mm 0.1 mm~0.6mm The same as above...
- Page 152 250, 300, 350 … 1000 Min. speed 250, 300, 350 … Shift stitch length (mm) 1.0~10.0 When the stitch length is longer than (normal type the set value, the machine will lower machine), the speed. 3.0~6.0 (all-servo high-speed BECS-D19 User’s Manual...
- Page 153 If the value is incorrect, the set rotation speed will be different from the virtual speed. Thick cloth embroidery compensation Needle stop at down 0~30 position adjustment Lock shaft at stop Yes, No Thread Trimming Parameters Jump trimming 3 stitches No trimming, BECS-D19 User’s Manual...
- Page 154 Hook motor drive ratio 1:12 1:9,1:10,1:12, adjustment 1:15,1:18,1:20 Trimming off No, Yes temporarily Trimming availability No, Yes Locked stitch length 0.3~2.0 before trimming Locked stitch number before trimming Trimming angle 0~20 For trimming by stepping motor BECS-D19 User’s Manual...
- Page 155 1 means sequin sequin device driven by 1 motor Set 3MM of R Sequin Single-way 6~40 steps; Dual-way 6~40 steps Set 4MM of R Sequin Single-way 6~40 steps; Dual-way 6~40 steps Set 5MM of R Sequin Single-way 6~40 steps; Dual-way 6~40 steps BECS-D19 User’s Manual...
- Page 156 Set 6.75MM of L Single-way Sequin 6~40 steps; Dual-way 6~40 steps Set 9MM of L Sequin Single-way 6~40 steps; Dual-way 6~40 steps Size&Color of L 3/4/5/6.75/9mm Sequin Device A yellow Yellow/Purple/B lue/Green/ Red/ Golden/ Silver/Cyan Special Embrordery Parameters BECS-D19 User’s Manual...
- Page 157 Machine Configuration and Maintenance Parameters Needle Number 1,2,…,MAXNE Set the value according to the EDLE machine situation. E.g. the value should be 9 for 9-needle machine. If the value is different from the machine needles, the color-changing BECS-D19 User’s Manual...
- Page 158 IP address when it connects to PC. Gateway It is used for setting the gateway of machine when machine connects to X Quilt Gap 0~1.0 Compensation Y Quilt Gap 0~1.0 Compensation Time for one 1~10 lubricating (sec) BECS-D19 User’s Manual...
- Page 159 Parameter 8 10~50 Parameter 9 10~50 Parameter 10 10~50 Parameter 11 10~50 Mechanical Return 0~50 Difference Compensation Gear Ratio Numerator 0~100 Gear Ratio 0~255 Denominator X/Y Parameter for Servo Frame Adjustment (Y Parameter, Same as X Parameter) BECS-D19 User’s Manual...
-
Page 160: Appendix 2 U Disk Operation Specification
Reading & writing error/change U pattern management menu, disk plug in the disk again. Multi-logical disks in one U disk Support Formatting U disk Support Installing letter library Not support Software update Support Special character in filename Support, except “$” BECS-D19 User’s Manual... -
Page 161: Appendix 3 Error List
Pattern name is invalid Pattern file damaged Fail to read/write pattern Not open pattern file FLASH media read/write error Device not existed No floppy disk Invalid disk type Disk sector error File not found Not a file File damaged BECS-D19 User’s Manual... - Page 162 Not stop in position EC13 Frame over limit EC14 Main control board memory lost EC16 Stepping motor error Color changing overtime EC17 EC18 Color-changing half return error EC19 Needle position error EC20 Main shaft motor overtime EC21 Color changing over-limit BECS-D19 User’s Manual...
- Page 163 Special embroidery head action overtime EC41 File not exist EC42 File directory full EC43 Memory is full EC44 File fat error EC45 File directory error EC46 Physical sector damaged EC95 Thread is broken, press continue key EC101 Transfer CRC Error BECS-D19 User’s Manual...
-
Page 164: Appendix 4 Loop Embroidery Parameter List
When set as “No’, only head with thread Patching at All No, Yes breakage will do patching; when set as “Yes”, Heads all working heads will do patching. Patching Stitch 0 0~7 stitches Only appointed head will do patching. After BECS-D19 User’s Manual... - Page 165 Compensation mechanical inertia. The larger the value, the more backwards the stop angle moves. Setting range: 0~6. Rotation Speed Adjust this parameter by software can make -15%~15% Compensation actual rotation speed comply with set rotation BECS-D19 User’s Manual...
- Page 166 Appendix 4 Loop Embroidery Parameter List speed. Only effective for Dahao servo driver. Main Shaft Slow Set the rotation speed of slow action of main 80~150 Speed shaft when pull bar, by increment of 10 rpm. The larger the value, the faster the speed of...
- Page 167 Main Shaft Lock Yes Yes, No servo main shaft). Set the position of AC color-changing box for Color-changing Left Left, Right looping embroidery. Box Position Blowing Parameters Stop Loops Blowing Interval 0~200 Looping Valve Blowing Time Looping 1~50 Valve BECS-D19 User’s Manual...
-
Page 168: Appendix 5 Loop Embroidery Error List
Needle height potentiometer inquiry over-time Knife back to origin over-time Color-changing position abnormal Thread loosing position abnormal Needle height disconformity AC color-changing motor over-time (for AC color-changing machine) Semi-return rotation abnormal (for AC color-changing machine) Non-loop embroidery position BECS-D19 User’s Manual... -
Page 169: Appendix 6 Network Connection Instructions
Other pins are connected to the corresponding pins. Cable made in this way is called “crossover cable”. Pin Number Corresponding Pin Number white white white white Pin Color green blue orange brown green orange blue brown Shown as below: BECS-D19 User’s Manual... - Page 170 A: the first number represents network and the following 3 numbers represent computer. B: the first two numbers represent network and the following 2 numbers represent computer. C: the first three numbers represent network and the last one represents computer. BECS-D19 User’s Manual...
- Page 171 So when the computers are not in the same network segment, the gateway also has to be set properly in setting computers. Otherwise computers don’t know where to deliver the data packet. BECS-D19 User’s Manual...
- Page 172 Setting Network Parameters of Embroidery Machine 1. MAC Address of Embroidery Machine Set MAC address of NIC of embroidery machine. Each embroidery machine has its sole address. The range of this parameter is 000000000000~00FFFFFFFFFF. 2. IP Address of Server BECS-D19 User’s Manual...
- Page 173 Within one sub-network, the subnet masks of embroidery machines and PCs have to be the same. 6. Gateway Address If embroidery machines are from two different sub-networks, the gateway address has to be set. Otherwise there’s no need to set it. BECS-D19 User’s Manual...