Table of Contents
Table of Contents

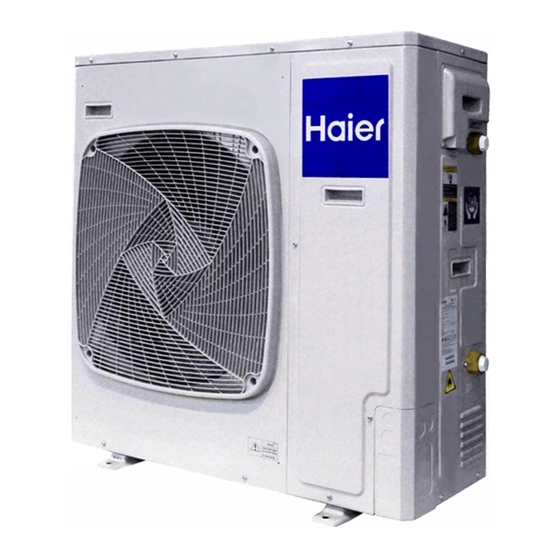
Related Manuals for Haier AU082FYCRA(HW)


Summary of Contents for Haier AU082FYCRA(HW)
- Page 1 ATW Service Manual SYJS-03-2019REV.A Edition: 2019-03...
-
Page 2: Table Of Contents
CONTENTS 1. Outdoor Units Lineup.........................1 2. Nomenclature ..........................2 3. Feature ............................3 4. Description Of Main Components....................4 5. Specifications ..........................6 6. Dimensions ..........................9 7. Piping Diagram ........................11 8. Wiring Diagram ........................14 9. Electric Characteristics ......................16 10. Capacity Tables ........................17 11. Operation Limits Delivery-Leaving ..................23 12. -
Page 3: Outdoor Units Lineup
1. Outdoor Units Lineup Power Supply Compressor Heat Hydraulic Model Capacity A/C mode Refrigerant (V/Ph/Hz) type exchanger module AU082FYCRA(HW) 220-240/1 /50/60 DC Inverter Coaxial Heat pump Built-in Power Supply Compressor Heat Hydraulic Model Capacity A/C mode Refrigerant (V/Ph/Hz) type exchanger module AU112FYCRA(HW) 220-240/1/50/60 11kW... -
Page 4: Nomenclature
2. Nomenclature (HW) Hot water DC inverter Chassis MRV-S (220~240V,50Hz) Heating capacity Outdoor unit Air conditioner... -
Page 5: Feature
3. Feature 3.1 Monobloc Air-to-Water Heat pump System Full DC inverter mini Heat pump adopts highly intelligent inverter-driven compressor. This advanced technology enables the output of the outdoor unit to be modulated by the real heat load demands.. This advanced system ensures precise temperature regulation and highly efficient energy usage, making a significant contribution to limiting the impact on the environment. -
Page 6: Description Of Main Components
4. Description Of Main Components Structure Panels and base are made from galvanized steel plate painted with epoxy power to ensure total resistance to atmospheric pollution, condensate collection pan as standard. Air cooled coils: The coils are made from high performance and seamless copper tuber and high surface area aluminum fins to ensure optimum heat exchange capability. - Page 7 AU112/162 FYCRA (HW) 1.Electrical panel 2.Discharge valve 3.Differential pressure switch 4.Axial-flow fan 5.Condenser 6.Electronic expansion valve 7.Shell-and-tube heat exchanger 8.Accumulator 9.Compressor 10.Safety valve 11.Buffer tank 12.High pressure switch 13.Pump 14.4-Ways valve...
-
Page 8: Specifications
5. Specifications Model AU082FYCRA(HW) Power supply V-Ph-Hz 1PH, 220-240V~,50/60Hz Cooling*(1) Capacity 5.50 Input 2.34 Cooling*(2) Capacity 7.00 Input 2.06 Heating*(3) Capacity 7.50 Input 2.34 Heating*(4) Capacity 7.80 Input 1.77 EER*(1) kW/kW 2.35 EER*(2) kW/kW 3.40 Max.input consumption 4.90 Max.input current 21.3 Model SVB200FKMMC... - Page 9 Model AU112FYCRA(HW) Power supply V-Ph-Hz 1PH, 220-240V~,50/60Hz Cooling*(1) Capacity 11.50 Input 3.83 Cooling*(2) Capacity 13.50 Input 2.94 Heating*(3) Capacity 10.5 Input 3.37 Heating*(4) Capacity 11.00 Input 2.61 EER*(1) kW/kW 3.00 EER*(2) kW/kW 4.60 Max.input consumption 5.60 Max.input current 24.3 Model TVB306FKMMC Type ROTARY...
- Page 10 Model AU162FYCRA(HW) Power supply V-Ph-Hz 1PH, 220-240V~,50/60Hz Cooling*(1) Capacity 14.50 Input 4.92 Cooling*(2) Capacity 16.00 Input 3.64 Heating*(3) Capacity 15.00 Input 4.62 Heating*(4) Capacity 16.00 Input 3.86 EER*(1) kW/kW 2.95 EER*(2) kW/kW 4.40 Max.input consumption 7.30 Max.input current 31.7 Model MVB40FKMMC Type ROTARY...
-
Page 11: Dimensions
6. Dimensions AU082FYCRA(HW) (Unit: mm) 405~410... - Page 12 AU112/162FYCRA(HW) (Unit: mm)
-
Page 13: Piping Diagram
7. Piping Diagram AU082FYCRA(HW) - Page 14 AU112/162FYCRA(HW)
- Page 15 Part name Model Sign Function Date SVB200FKMMC Motor resistance (at AU082FYCRA(HW) 20°C): 1.94Ω TVB306FKMMC Capacity control, meet indoor load Motor resistance (at Compressor Comp AU112FYCRA(HW) request by adjusting the frequency 20°C): 1.53Ω MVB40FKMMC Motor resistance (at AU162FYCRA(HW) 20°C): 0.72Ω Pressure range:0 to High pressure detection 4.15MPa Pressure...
-
Page 16: Wiring Diagram
8. Wiring Diagram AU082FYCRA(HW) 0150531727 【 】 Electrical wiring diagram Wire controller B CN11 Docking connector CN13 BL CN10 CN37 CN19 AC-N N-OUT Inverter module FUSE1 Main board T25A/250VAC Connect to water board CN57 CN15 CN34 CN35 L-OUT AC-L AC-N AC-L W CN10 PUMP... - Page 17 AU112/162FYCRA(HW) 0150531728 【 】 Electrical wiring diagram ACL-OUT AC-N CN13 DCFAN1 AC-L 6.3A 250VAC DCPL1 CN12 DCFAN2 FUSE1 ACN-OUT CN11 DCPL2 CN27 Inverter module CN18 CN16 COMP Docking CN17 connector W CN51 G CN46 CN25 Water Tfin board HEATER 1 2 3 4 5 6 7 8 BL CN53 Y CN58 BL CN57 B CN56 SMG2 SMG1...
-
Page 18: Electric Characteristics
9. Electric Characteristics Outdoor Unit Power Supply Compressor Model Voltage Phase Min. Max. AU082FYCRA(HW) 50Hz 220~240V 1Ph 198V 264V 21.3 0.18 AU112FYCRA(HW) 50Hz 220~240V 1Ph 198V 264V 24.3 0.18+0.18 0.8+0.8 AU162FYCRA(HW) 50Hz 220~240V 1Ph 198V 264V 31.7 0.18+0.18 0.8+0.8 Remark: MCA: Min. -
Page 19: Capacity Tables
10. Capacity Tables 10.1 Cooling capacity AU082FYCRA(HW) Capacity(kW) Capacity(kW) Capacity(kW) EER(EN14511) EER(EN14511) EER(EN14511) Air temp. Nom. Min. Max. Nom. Min. Max. Water flow temperature 20℃ 6.75 2.03 7.43 3.95 4.05 3.81 7.86 2.36 8.65 3.42 5.70 3.47 8.69 2.61 9.56 5.13 8.24 4.90... - Page 20 AU112FYCRA(HW) Capacity(kW) Capacity(kW) Capacity(kW) EER(EN14511) EER(EN14511) EER(EN14511) Air temp. Nom. Min. Max. Nom. Min. Max. Water flow temperature 20℃ 12.78 3.83 13.42 3.66 4.51 3.25 13.91 4.17 14.60 4.87 6.56 4.25 15.64 4.69 16.42 6.55 9.84 5.78 17.19 5.16 18.05 9.13 10.71 7.33...
- Page 21 AU162FYCRA(HW) Capacity(kW) Capacity(kW) Capacity(kW) EER(EN14511) EER(EN14511) EER(EN14511) Air temp. Nom. Min. Max. Nom. Min. Max. Water flow temperature 20℃ 15.05 4.64 15.80 3.15 4.34 3.15 16.80 5.18 17.64 4.62 6.34 3.97 19.05 5.88 20.00 5.88 9.56 5.09 20.95 6.46 21.99 8.29 11.35 6.46...
- Page 22 10.2 Heating capacity AU082FYCRA(HW) Capacity(kW) Capacity(kW) Capacity(kW) COP(EN14511) COP(EN14511) COP(EN14511) Air temp. Nom. Min. Max. Nom. Min. Max. Water flow temperature 25℃ 13.06 4.81 14.14 7.05 7.61 6.75 12.26 4.01 13.34 6.61 7.19 6.03 11.46 3.21 12.54 6.20 6.67 5.35 9.20 2.66 10.06...
- Page 23 AU112FYCRA(HW) Capacity(kW) Capacity(kW) Capacity(kW) COP(EN14511) COP(EN14511) COP(EN14511) Air temp. Nom. Min. Max. Nom. Min. Max. Water flow temperature 25℃ 18.30 5.49 19.58 8.09 8.22 7.28 17.50 5.25 18.73 7.36 7.47 6.62 16.30 4.89 17.44 6.69 6.80 6.02 13.90 4.17 14.88 5.11 5.19 4.59...
- Page 24 AU162FYCRA(HW) Capacity(kW) Capacity(kW) Capacity(kW) COP(EN14511) COP(EN14511) COP(EN14511) Air temp. Nom. Min. Max. Nom. Min. Max. Water flow temperature 25℃ 26.30 6.31 28.93 7.32 7.84 6.74 24.90 5.97 27.39 6.90 7.40 6.35 23.61 5.67 25.97 6.51 6.98 5.99 18.84 4.52 20.72 5.05 5.33 4.65...
-
Page 25: Operation Limits Delivery-Leaving
11. Operation Limits Delivery-Leaving a)Ethylene Glycol Solutions Water and ethylene glycol solutions used as a thermal vector in the place of water reduce the performance of the unit. Multiply the performance figures by the values given in the following table. Freezing point ( C) Percentage of ethylene glycol in weight 0.98... - Page 26 Note: 1. During winter leaving the unit unused, please drain water out completely from unit if no anti-freeze were charged into pipeline, or keep power on (at standby or off status) and ensure that water is contained inside of unit. 2.
-
Page 27: Water Pressure Drop
12. Water Pressure Drop... -
Page 29: Sound Level
13. Sound Level measuring surface outdoor unit 0.5c Model Noise level (dB) AU082FCYRA(HW) AU112FCYRA(HW) AU162FCYRA(HW) Note: It is tested 1 meter(d) away from the machine in a semi-anechoic room (sound power). -
Page 30: Installation
14. Installation EUROPEAN REGULATIONS IMPORTANT INFORMATION REGA- CONFORMITY FOR THE MODELS RDING THE REFRIGERANT USED All the products are in conformity with the following European provision: -Low voltage Directive -Electomagnetic Compatibility ROHS The products are fulfilled with the requirements in the directive 2011/65/EU of the European parliament and of council on the Restriction of the use of Certain Hazardous This product contains fluorinated greenhouse gases... - Page 31 • The air conditioner can not be discarded or scrapped Randomly If you need please contact customer service personnel of Haier to scrap in order to obtain the correct disposal methods. • Reusable mechanical connectors and flared joints are not allowed indoor.
- Page 32 WARNING The installation, maintenance, service and repair operations of this product shall be carried out by professional personnel, who have been trainedand certified by national training organizations that areaccredited to teach the relevant national competency standards that may be set in legislation. Improper installation may cause water leakage, electrical shock, fire, or explosion.
- Page 33 Loading and Unloading/Transporting Management/Storage Requirements Loading and Unloading Requirements 1) The products shall be carefully handled during loading and unloading. 2) Rude and barbarous handling such as kicking, throwing, dropping, bumping, pulling and rolling is not allowed. 3) The workers engaged in loading and unloading must be subject to necessary trainings on the potential hazards caused by barbarous handling.
- Page 34 Unpacking Inspection 1.Indoor unit: nitrogen is sealed during the delivery of indoor units (inside the evaporator), and the red sign at the top of the green plastic seal cap on the evaporator air pipes of the indoor unit shall be checked first after unpacking. In case the sign is raised, the nitrogen sealed still exists.
- Page 35 Fixing The support of the outdoor unit shall be fixed onto the wall surface, and then the outdoor unit shall be fixed onto the support horizontally. In case the outdoor unit is wall-mounted or roof-mounted, the support shall be firmly fixed, to avoid the damage of strong wind.
- Page 36 Inspection on Maintenance Environment • Before operation, the refrigerant leaked in the room is not allowed. • The area of the room in which maintenance is made shall be in line with this manual. • Continuous ventilation shall be maintained during maintenance. •...
- Page 37 Safety Principles • The power supply should be cut off before the maintenance. • During product maintenance, favorable ventilation shall be guaranteed at the maintenance site, and the close of all the doors/windows is not allowed. • Operation with open fire is not allowed, including welding and smoking. The use of phones is also not allowed. The user shall be informed that cooking with open fire is not allowed.
- Page 38 Removal and Vacuumizing • The maintenance or other operations of the refrigeration circuit shall be made as per conventional procedures. Moreover, the flammability of refrigerant shall also be mainly considered. The following procedures shall be followed: • Refrigerant cleaning; • Pipeline purification with inert gas; •...
- Page 39 Scrapping and Recovery Scrapping Before scrapping, the technician shall be completely familiar with the equipment and all its features. The safe recovery of refrigerant is recommended. In case the refrigerant recovered needs to be reused, before which the sample of refrigerant and oil shall be analyzed. (1) The equipment and operation shall be well known;...
- Page 40 Carefully read the following information in order to operate the air conditioner correctly. Below are listed three kinds of Safety Precautions and Suggestions. WARNING Incorrect operations may result in severe consequences of death or serious injuries. CAUTION Incorrect operations may result in injuries or machine damages; in some cases may cause serious consequences.
- Page 41 WARNING • Place the unit on a stable, level surface that withstands • Be sure to carefully follow each step in this the weight of the unit to prevent the unit from tipping over handbook when installing the unit. or falling causing injury as a result. Improper installation may result in water leak, electric shock, smoke or fire.
- Page 42 Precautions for Handling Units for Use with R32 CAUTION Do not use the existing refrigerant piping Use a vacuum pump with a reverse-flow check valve. • The old refrigerant and refrigerator oil in the existing • If other types of valves are used, the vacuum pump piping contain a large amount of chlorine, which will oil will flow back into the refrigerant cycle and cause the refrigerator oil in the new unit to deteriorate.
- Page 43 Before Installing (Relocating) the Unit or Performing Electric Work CAUTION Ground the unit. Do not spray water on the air conditioners or • Do not connect the grounding on the unit to gas immerse the air conditioners in water. pipes,water pipes, lightning rods, or the grounding •...
-
Page 44: General Information
For the entire system to operate correctly, HAIER offers an "intelligent" system Manager capable of identifying the most economical energy source at a given time and therefore choose the right appliance to activate. - Page 45 14.3 Transportation and lifting Lifting Over 60 degrees In front of the unit shipped from unpacking location as close as possible. rope CAUTION •Do not place anything on the device. rope •Two ropes shall be used for lifting the outdoor unit.
-
Page 46: Installation Instruction
14.4 Installation instruction (1) Installation place selection Air-conditioner can't be installed in The unit should be installed at the The unit should be installed at the the place with inflammable gas. Or it place with good ventilation. No strong enough place. Or it will cause will cause fire hazard. - Page 47 (2)Installation and maintenance space Selection of installation location of outdoor (1)Single-unit installation (unit: in.(mm)) The top and two side surfaces must be exposed to open space, and barriers on at least one side of the front and back shall be lower than the outdoor unit. (2)Multi-unit installation (unit: in.(mm)) (3)Multi-unit installation in front and back (unit: in.(mm)) The top and two side surfaces must be exposed...
- Page 48 (3)Precautions on installation NOTICE If drain holes of the outdoor unit are covered by a mounting base or by floor surface, raise the unit in order to provide a free space of more than 5in.(130mm) under the outdoor unit. Selection of installation location of outdoor (1)Single-unit installation (unit: in.(mm)) Foundation work •Check the strength and level of the installation...
- Page 49 If the coating on the fastening area is stripped off, the nuts rust easily. Dimensions (bottom view) (unit of measurement: mm) A 600 A leg pitch1 B leg pitch2 C Front grill (air outlet side) D Drain hole E Bottom frame F Knock-out hole (for piping line) (4)Drain work of the outdoor unit In case drain work on your outdoor unit is neccessary, follow the guidelines below.
- Page 50 Hydraulic circuit The maximum piping length depends on the maximum pressure availability in the water outlet pipe. Please check the pump curves. Q (m Q (m AU082FYCRA(HW) AU112FYCRA(HW) AU162FYCRA(HW) Air purging •The hydraulic system should be equipped with an air purger at the highest location of the system. If this location is not the highest of the water installation, air might be trapped inside the water pipes, which could cause system malfunction.
- Page 51 Ensure that the water volume is equal or greater than those shown below, in order to lower ON/OFF frequency of HAIER unit at no load or extreme light load. When water volume is less than the volume indicated (minimum water volume), compressor operation frequently stops at light load, which should result in shorter life or failure.
- Page 52 Water control It is necessary to analyse the quality of water by checking pH, electrical conductivity, ammonia ion content, sulphur content, and others. The following is the recommended standard water quality. Chilled Water System Tendency Item Circulating Water Supply Water Corrosion Deposits of Scales (20°C Less than) Standard Quality pH(25°C)
- Page 53 •Make sure that the following conditions related to power supply installation are satisfied:The power capacity of the electrical installation is large enough to support the power demand of the HAIER system. The power supply voltage is within ±10% of the rated voltage.
- Page 54 Communication wiring figure Outdoor ATW-A01(options) wired controller The outdoor and ATW-A01 units are in parallel through 2 non-polar wires. Power wiring figure Outdoor power source: 1PH, 220-240V~, 50/60Hz ATW-A01 and outdoor use their individual power source...
- Page 55 Outdoor power source and power cable Item Rated current of residual Ground wire Power cable Circuit Power circuit breaker (A) section breaker source Ground fault interruptor (mA) (mm2) Section Model response time (S) Screw (mm2) AU082FYCRA(HW) 32A 30mA below 0.1S 1PH, Individual 220-...
- Page 56 Outdoor unit electrical wiring diagram Power Wiring Terminal Ground wire Power cord Water pipe Connecting the Wired-Controller Fixing the communication line and Power Wiring Distribution Hole Wired-controller line with a wire clip Fixing the power line with a wire clip Communication line Power lines and communication Wierd-Controller line...
-
Page 57: Pcb Photo
15. PCB Photo PCB code: 0151800423... -
Page 58: Dip Switch Setting
16. Dip Switch Setting BM1 introduction OFF Wired controller control (default) BM1_1 Control type selection ON IO board control Outdoor unit Model selection BM1_2 OFF OFF ON OFF AU082FYCRA(HW) BM1_3 Outdoor unit Model selection BM1_4 OFF ON OFF OFF AU112FYCRA(HW) BM1_5 OFF ON OFF ON AU162FYCRA(HW) -
Page 59: Digital Tube Display
17. Digital Tube Display Main function instruction: By setting the rotary switch, the digital tube will display the unit parameters, the data is inform of decimal integer. During the process of installation, adjustion and maintenance, the whole system’s operating parameters can be tested conveniently which can help to check and solve problems quickly and correctly. - Page 60 SW1 SW2 SW3 Segment digital tube display content LD2~4 Actual frequency of compressor(Hz): 90 means 90Hz •Frequency of compressor can be set through pressing “ENTER(SW7)” with 3 seconds, in which “111” will be displayed and the frequency showed. Frequence can be increased one Hz through pressing “UP”...
-
Page 61: Startup & Running & Maintenance
18. Startup & Running & Maintenance a)Preparing for first start up Restarting after shutting down for long periods The Heat pump must be started up for the first time by the Technical Service. Before starting up the Heat pumps, make sure that: -All safety conditions have been respected. - Page 62 Fan speed control For correct operation of the unit with different outside temperatures, the microprocessor controls the fan speed based on the pressure reading from the pressure probe, thus enabling heat exchange to be increased and/or decreased, maintaining the condensing or evaporation temperature practically constant. The fan functions independently of the compressor.
- Page 63 Chemical washing You are recommended to chemically wash the plate heat exchanger after every 3 years of operation. Refrigerant gas content The Heat pumps are filled with R32 refrigerant gas and tested in the factory. In normal conditions, there should be no need for the Technical Assistance Service to intervene to check the refrigerant gas.
-
Page 64: Yr-E27(Optional Wired Controller)
19. YR-E27(Optional wired controller) 19.1 Interface Display (1)Standard Version TIMER icon Six periods of timer Clock Week Timer Error icon ON/OFF LINKAGE Outlet water temperature Child Lock / Error code Auto mode Cooling mode PUMP Heating mode Tank mode Energy Saving Setting QUIET... - Page 65 19.2 Key and Icon On/Off key. Mode key: Press this key to switch mode. Up key: Press this key to adjust temperature in the main interface and other parameter value in other interface. Down key: Press this key to adjust temperature in the main Interface and other parameter value in other interface.
- Page 66 Note: 1. Setting range: 1) Tank mode: 25°C~75°C (the default is 42°C). 2) Cooling mode of air conditioning: water temperature 5°C~20°C (the default is 9°C). 3) Heating mode of air conditioning: water temperature 25°C~55°C (the default is 40°C).Setting accuracy is 0.5°C. 2.
- Page 67 Setting special functions In the state of on, press the key , then swich among ECO ,QUIET and TURBO by pressing key, finally press key to confrim.If there is no key is pressed for 10 seconds,it will automatically exit and the previous setting is invalid.
- Page 68 (4) If there is no reply from the air-condition, theparemeter display will be “ --”. If the communication returns that defrost, check or antifreeze is running, relevant icon will dispaly Category Function code Function description Set/ Query ON/OFF Can be queried and set Setting mode Can be queried and set temperature setting...
- Page 69 Category Function code Function description Set/ Query Pressure difference switch Query only Two-way valve chain Query only Low voltage switch Query only Internal machine regulating valve target overheating Query only (undercooling) degree PMV opening degree Query only Heat exchange unit antifreeze temperature Tz Query only Heat exchange unit inlet water temperature Twi Query only...
- Page 70 Category Function code Function description Set/ Query Horse power Query only Compressor target operating frequency Query only Actual operating frequency of the compressor Query only Speed of fan 1 Query only Speed of fan 2 Query only Electronic expansion valve opening degree Query only Target Pd Query only...
- Page 71 Category Function code Function description Set/ Query Historical error 1 of outdoor unit Query only Historical error 2 of outdoor Unit Query only Historical error 3 of outdoor Unit Query only Reserved function, does not participate in the loop when 64-FF Reserved Query only the function code loops...
- Page 72 Week icon Time period Default start time Default switch Default temperature Cooling mode: 9°C; 13:00 Heating mode: 40°C; Hot water: 42°C. Cooling mode: 9°C; 18:00 Heating mode: 40°C; Hot water: 42°C. Cooling mode: 9°C; 22:00 Heating mode: 40°C; Hot water: 42°C. Cooling mode: 9°C;...
- Page 73 19.4 Week and clock function settings Note: This function is not available when the dial code is simple. Enter the week and clock setting by pressing and holding the key for 10 seconds. After you enter this function, icon and the current value in flashes, pressing UP and DOWN keys to change the week value.
- Page 74 2. Fix backplane and then connect communication wire to CN1 port of wired controller. Finally put the front cover of wired controller to backplane to complete the installation. Fixed backplane...
-
Page 75: Error Code
20. Error Code Error code Error code definitionerror Notes In water temp.sensor(Twi)failure Out water temp.sensor(Two)failure In refrigerant temp.sensor(Thi)failure Restorable Out refrigerant temp.sensor(Tho) failure Communication fault with wired controller Flow rate too low failure Restorable, 3 times fault an hour lock Antifreeze fault Heat exchange unir HU in/out water remp. -
Page 76: Troubleshooting
21. Troubleshooting [1,2,3,4 ,20-24,69] Temperature sensor failure If sensor terminal is fixed well Reconnect If sensor resistor Replace sensor /characteristic is proper Check if PCB is faulty, if yes, replace it... - Page 77 08,10: System water flow protection LED displays 08E/10E System water flow protection or anti-idling protection for water pump Whether system water flow Repair the leaks and add leaks. the water again. To configure external water Whether the water pipe is too pump long and not connected to water pump.
- Page 78 [28, 29] High/low pressure sensor failure If sensor terminal is fixed well Reconnect If voltage between red terminal and black terminal is 5V Replace PCB when testing pressure sensor by multimeter If voltage between white terminal and black terminal is 0.5V~3.5V when Replace pressure sensor testing pressure sensor by multimeter...
- Page 79 [30] High pressure switch failure If connection between pressure switch and connecting board is Re-connect good If the system pressure meets the Replace pressure switch condition that pressure switch shuts off Make pressure switch close, measure if terminal Replace pressure switch is conductive by multimeter If the system is clogged Check the piping system...
- Page 80 [33] Outdoor EEPROM failure If the EEPROM is fixed well Reconnect Replace EEPROM [34] Protection of discharging temp. too high If sensor terminal is fixed well Reconnect If sensor resistor/characteristic Replace sensor is proper If the system is lack of Charge refrigerant refrigerant Replace connecting board...
- Page 81 [35] 4-way valve reversing failure, or Temperature sensor Two, Twi, Thi, Tho of Hydraulic module is wrong installed If Temperature sensor Two, Reinstall the Temperature Twi, Thi, Tho of Hydraulic sensor of Hydraulic module module is wronginstalled If connection between 4-way valve Re-connect and connecting board is good If system meets condition of...
- Page 82 [39-0, 39-1] Low pressure too low and compression ratio too high If actual pressure is in conformance with the measured Replace pressure sensor data by sensor Check if stop valve is open fully Open stop valve Check if system is lack of Recharge refrigerant refrigerant Check if terminal of electronic...
- Page 83 [39-2] Compression ratio too low If actual pressure is in conformance with the measured Replace pressure sensor data by sensor Check if compressor running Check compressor current is normal Check compressor Replace 4-way valve interconnected...
- Page 84 [40] High pressure too high failure If characteristic of high pressure Replace pressure sensor sensors are normal If stop valve opens fully Open stop valve If in cooling outdoor fan motor Check fan motor runs normally If in heating indoor fan motor runs Check indoor normally and if filter is clogged Check if piping...
- Page 85 [43] Discharging temp. sensor Td too low protection If the sensor characteristic Replace the sensor is correct If the terminal of Reconnect sensor is fixed well In cooling mode, when the indoor unit off if the EEV can't Replace of adjustment the completely close indoor unit EEV Check if refrigerant is too much...
- Page 86 [46] Communication with inverter module failure Check if communication wire between connecting board and Re-connect module is connected normally In cooling mode, when the indoor Replace wire unit off if the EEV can't completely close Measure if voltage of CN28 on connecting board changes Replace connecting board by multimeter...
- Page 87 [53] CT Current too low or current sensor failure Check if where between connecting board and CT Re-connect board is connected well (CN9) Check if CT wire is conductive Replace wire Check if it is normal after Replace connecting board replacing CT board CT board is broken down...
- Page 88 [64] CT current too high Check if wire between connecting board and module is Re-connect connected normally Replace wire Check if CT wire is conductive If temperature on top of fixed If AC If normal after frequency compressor is too contactor work replacing CT detector high...
- Page 89 [71-0,71-1 ] DC motor blocked Rotate fan motor by hand to Replace fan motor check if there is obviously fiction Check the motor and PCB Re-connect connection is well Forced the fan in low speed, measure if it has alternating Replace the motor voltage between FG and GND Replace the...
- Page 90 [75-0, 75-4] Pressure difference between high pressure and low pressure is abnorma Check if high/ low pressure Re-connect sensor is connected well Check if compressor wire is Correct compressor connected normally wire If wire of inverter compressor Correct compressor wire are connected oppositely If 4-way valve is interconnected Replace 4-way valve...
- Page 91 [82] Compressor current protection [108] Transient over current in IPM module rectifier side software [110] IPM module hardware over current [123] Transient over current in IPM module rectifier side hardware Check if voltage of power Improver power supply circuit supply in normal Check if wire of electric box is correct Correct the wiring due to and if compressor wire is fixed well...
- Page 92 [111] Compressor out of control [118] The compressor start failure Check if voltage of power Improve power supply circuit supply is normal Check the wires among U, V, W of Replace the wires compressor are normal If compressor is normal (compressor coil resistor, Replace the compressor insulation)
- Page 93 [112] Radiator temp. of transducer too high; [81] IPM module temp. too high Check the temperature sensor Replace the sensor characteristic is correct Check the radiator is blocked Clean the radiator If screw of module is fixed well, and if radiating silica gel is Fix it well and daub gel again, daubed enough and evenly, if clean the radiator...
- Page 94 [113] Protection of overload Check if voltage of power Improve power supply circuit supply is normal Check if wire of electric box is Correct the wiring due to correct diagram If compressor is normal (compressor coil resistor, Replace compressor insulation) If power module is normal Replace power module Compress load too...
- Page 95 [114] Voltage too low of DC bus line of transducer Check if voltage of power Improve power supply circuit supply is normal Check if wire of electric box is Correct the wiring due to correct diagram If AC contactor or relay acts well Adjust or replace relay Measure if DC bus line voltage Circuit of DC bus line voltage...
- Page 96 [115] Voltage too high of DC bus line of transducer Check if voltage of power supply is Improve power supply circuit normal Check if wire of electric box is correct Correct the wiring due to diagram Measure if DC bus line voltage Check rectifier, reactor, between P and N of module is electrolytic capacitor in...
- Page 97 [116] Communication abnormal between transducer (inverter module board) and control PCB Check if wire between control PCB Adjust communication wire and inverter board is abnormal Check if communication circuit of main control PCB is abnormal Replace main control board (if signal LED flashes abnormally) Detecting circuit on inverter If inverter module board is board broken down, replace...
- Page 98 [117] Transducer over current (software protection) Check voltage of power supply Improve power supply circuit is normal Check if wire of electric box is Correct the wiring due to correct diagram If compressor is normal (compressor coil resistor, Replace compressor insulation) Replace power module If power module is normal...
- Page 99 [119] Current detection circuit of transducer is abnormal Check if wire between DCCT and Correct the wiring due to control board wire between IPM and compressor are correct; if diagram wiring direction of DCCT is normal Check if current sensor is normal Replace current sensor Replace inverter PCB...
- Page 100 [120] Power supply of transducer abnormal Check if voltage of power Improve power supply circuit supply is normal Check if wire of electric box is Correct the wiring due to correct diagram If relay or AC contactor acts well Adjust or replace relay or AC contactor Measure if DC bus line voltage between P and N on...
- Page 101 [121] Power supply of inverter board is abnormal Check if voltage of power supply Improve power supply circuit on inverter control board is normal Check if wire between control PCB Adjust communication wire and inverter board is abnormal If circuit of inverter control board Replace power module is abnormal Solve the failures due to...
- Page 102 [122] Radiator temp. sensor of transducer abnormal Check if connection between temp. Adjust connection sensor and inverter board Measure if temp. sensor resistor is Replace sensor normal Replace inverter control board...
-
Page 103: Appendix Sensor Resistance Table
22. APPENDIX Sensor Resistance Table Model Name Characteristic TAO ambient temp. sensor R25=10KΩ TD compressor discharge temp. sensor R80=50KΩ TE1 defrosting temp. sensor R25=10KΩ AU082FRCRA(HW) TS compressor suction temp. sensor R25=10KΩ AU112FRCRA(HW) THI in refrigerant temp. sensor R25=10KΩ AU162FRCRA(HW) THO out refrigerant temp. sensor R25=10KΩ... - Page 104 R80=50kΩ±3% B25/80=4450K±3% Temp Resistance (kΩ) % (Resist. Tol) (°C) Rmax R (t) Normal Rmin MAX (+) MIN (-) 1749.014 1921.993 2094.972 1651.431 1813.265 1975.099 8.93 8.93 1560.165 1711.646 1863.127 8.85 8.85 1474.737 1616.593 1758.449 8.78 8.78 1394.709 1527.611 1660.513 1319.683 1444.25 1568.817 8.63...
- Page 105 R80=50kΩ±3% B25/80=4450K±3% Temp Resistance (kΩ) % (Resist. Tol) (°C) Rmax R (t) Normal Rmin MAX (+) MIN (-) 272.329 290.407 308.485 6.23 6.23 260.427 277.493 294.559 6.15 6.15 249.104 265.216 281.328 6.08 6.08 238.329 253.541 268.753 228.073 242.437 256.801 5.93 5.93 218.308 231.873...
- Page 106 R80=50kΩ±3% B25/80=4450K±3% Temp Resistance (kΩ) % (Resist. Tol) (°C) Rmax R (t) Normal Rmin MAX (+) MIN (-) 64.988 67.415 69.842 62.613 64.901 67.189 3.53 3.53 60.337 62.493 64.649 3.45 3.45 58.154 60.185 62.216 3.38 3.38 56.06 57.973 59.886 54.051 55.852 57.653 3.23...
- Page 107 R80=50kΩ±3% B25/80=4450K±3% Temp Resistance (kΩ) % (Resist. Tol) (°C) Rmax R (t) Normal Rmin MAX (+) MIN (-) 20.067 21.049 22.031 4.67 4.67 19.408 20.372 21.336 4.73 4.73 18.773 19.72 20.667 18.162 19.091 20.02 4.87 4.87 17.573 18.485 19.397 4.93 4.93 17.005 17.9...
- Page 108 R25=10kΩ±3% B25/50=3700K±3% Temp Resistance (kΩ) % (Resist. Tol) (°C) Rmax R (t) Normal Rmin MAX (+) MIN (-) 145.819 135.018 124.217 138.071 129.126 120.181 6.93 6.93 131.793 123.339 114.885 6.85 6.85 125.665 117.684 109.703 6.78 6.78 119.706 112.18 104.654 6.71 6.71 113.933 106.843...
- Page 109 R25=10kΩ±3% B25/50=3700K±3% Temp Resistance (kΩ) % (Resist. Tol) (°C) Rmax R (t) Normal Rmin MAX (+) MIN (-) 24.742 23.687 22.632 4.45 4.45 23.61 22.619 21.628 4.38 4.38 22.538 21.607 20.676 4.31 4.31 21.522 20.647 19.772 4.24 4.24 20.559 19.737 18.915 4.16 4.16...
- Page 110 R25=10kΩ±3% B25/50=3700K±3% Temp Resistance (kΩ) % (Resist. Tol) (°C) Rmax R (t) Normal Rmin MAX (+) MIN (-) 5.36 5.151 4.942 4.06 4.06 5.166 4.961 4.756 4.13 4.13 4.978 4.778 4.578 4.19 4.19 4.799 4.603 4.407 4.25 4.25 4.625 4.434 4.243 4.31 4.31...
- Page 111 R25=10kΩ±3% B25/50=3700K±3% Temp Resistance (kΩ) % (Resist. Tol) (°C) Rmax R (t) Normal Rmin MAX (+) MIN (-) 1.676 1.578 1.48 6.19 6.19 1.626 1.53 1.434 6.25 6.25 1.578 1.484 1.39 6.31 6.31 1.531 1.439 1.347 6.38 6.38 1.486 1.396 1.306 6.44 6.44...
- Page 112 Haier Commercial Air Condition ADDRESS: No.1 Haier Road, Hi-tech Zone,Qingdao 266101 P.R.China Web: Http://www.haier.com Haier reserves the right to make change without any notice.