
Related Manuals for GE Moisture Target Series 6


Summary of Contents for GE Moisture Target Series 6
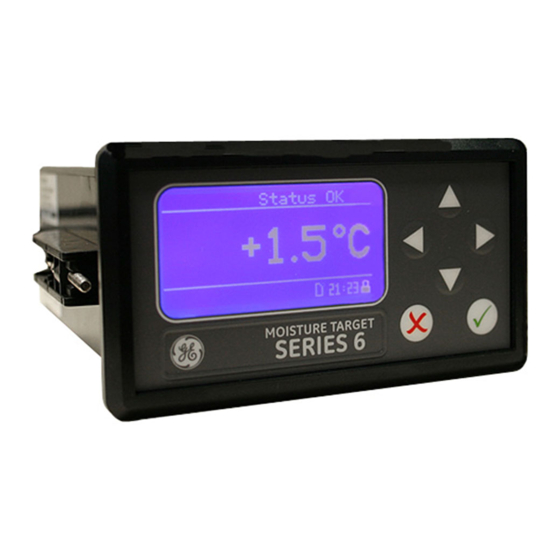
- Page 1 Measurement & Control Moisture Moisture Target™ Series 6 Hygrometer User’s Manual 910-291 Rev. E August 2014...
- Page 3 Measurement & Control Moisture Target™ Series 6 Hygrometer User’s Manual 910-291 Rev. E August 2014 www.ge-mcs.com ©2014 General Electric Company. All rights reserved. Technical content subject to change without notice.
- Page 4 [no content intended for this page]...
- Page 5 If you do, serious injury can result. WARNING! Make sure that power to the auxiliary equipment is turned OFF and locked out before you perform maintenance procedures on the equipment. Moisture Target Series 6 Hygrometer User’s Manual...
- Page 6 Environmental Compliance Waste Electrical and Electronic Equipment (WEEE) Directive GE Measurement & Control is an active participant in Europe’s Waste Electrical and Electronic Equipment (WEEE) take-back initiative, directive 2002/96/EC. The equipment that you bought has required the extraction and use of natural resources for its production.
-
Page 7: Table Of Contents
2.6.6 Installing the DC Power Cable........31 Moisture Target Series 6 Hygrometer User’s Manual... - Page 8 3.6.4 Setting Calibration Data 1 ........60 Moisture Target Series 6 Hygrometer User’s Manual...
- Page 9 C.3 Setting Up the Files ..........103 Appendix D. The Non-Enclosure MTS6 Package Moisture Target Series 6 Hygrometer User’s Manual...
- Page 10 Contents viii Moisture Target Series 6 Hygrometer User’s Manual...
-
Page 11: Chapter 1. Features And Capabilities
The MTS6 accepts any calibration range provided with GE probes (see Chapter 5, Specifications for more information). It comes equipped with two standard alarm relays, one fault alarm relay, and a single analog output. -
Page 12: Probes
The moisture probe is the part of the system that comes in direct contact with the process. The MTS6 uses any GE M Series (see Figure 2) or a VeriDri probe (see Figure 3) to measure dew point temperature in °C or °F. -
Page 13: Chapter 2. Installation
Also, be sure to follow all applicable local safety codes and regulations for installing electrical equipment. For the non-enclosure MTS6 package, please refer to Appendix D for Note: mounting and installation. Moisture Target Series 6 Hygrometer User’s Manual... -
Page 14: Selecting The Recorder Output
The MTS must be isolated or disconnected from all voltage WARNING! sources before changing the recorder output. Remove the screw at the top of the back panel (see Figure 4). Figure 4: Back Panel Moisture Target Series 6 Hygrometer User’s Manual... - Page 15 Lift the back edge of the cover (see Figure 5), slide the cover back (see Figure 6), and lift it from the enclosure (see Figure 7 on page 6). Figure 5: Lifting the Back Edge of the Cover Figure 6: Sliding the Cover Back Moisture Target Series 6 Hygrometer User’s Manual...
- Page 16 Chapter 2. Installation 2.2 Selecting the Recorder Output (cont.) Figure 7: Lifting the Cover Moisture Target Series 6 Hygrometer User’s Manual...
- Page 17 Set switch to the desired position: for voltage or for current. Figure 8: Switch S1 on the Main PC Board After setting the switch, replace the cover and reinsert the rear enclosure screw. Moisture Target Series 6 Hygrometer User’s Manual...
-
Page 18: Mounting The Electronics Unit
To mount the MTS6 in a panel with a basic 94 mm (3.69”) x 46 mm (1.81”) opening, refer to the following figures and complete the following steps: Remove the side panel mount label prior to installation. Figure 9: Removing Side Panel Mount Label Moisture Target Series 6 Hygrometer User’s Manual... - Page 19 Slide the small gasket along the MTS6 and place it around the back of the display (see Figure 10). Figure 10: Installing the Gasket Behind the Display Slide the MTS6 into the panel cutout (see Figure 11). Figure 11: Sliding the MTS6 into the Panel Cutout Moisture Target Series 6 Hygrometer User’s Manual...
- Page 20 Figure 12: Installing the Mounting Brackets Hold the chassis and lock each mounting bracket in place by sliding it toward the rear of the MTS6 (see Figure 13). Figure 13: Locking the Mounting Brackets in Place Moisture Target Series 6 Hygrometer User’s Manual...
- Page 21 Figure 14: Securing the MTS6 to the Panel Using a feeler gauge behind the gasket, check the compression, and tighten the bracket screws until the gap is 0.028” ±0.002” (see Figure 15). Figure 15: Checking the Gasket Compression Moisture Target Series 6 Hygrometer User’s Manual...
-
Page 22: Adapter Plate Mounting
Chapter 2. Installation 2.3.2 Adapter Plate Mounting Some customers may need to retrofit an MTS6 into a cut-out sized for GE’s previous OEM panel-mount hygrometers: MTS5, MTS4 or PanaDry models. The previous generations were of a larger size requiring a 5.40”... - Page 23 Fit the adapter plate into the panel cutout (see Figure 17). Figure 17: Inserting the Adapter Plate Behind the panel, place the metal backing plate over the four adapter plate mounting screws (see Figure 18). Figure 18: Applying the Backing Plate Moisture Target Series 6 Hygrometer User’s Manual...
- Page 24 Figure 19 and Figure 20). Use a feeler gauge behind the gasket, check the compression, and tighten the nuts until the gap is 0.032” ±0.002”. Figure 19: Securing the Assembly to the Panel Figure 20: Plate Assembly Mounting Complete Moisture Target Series 6 Hygrometer User’s Manual...
- Page 25 Re-verify the adapter plate gap after the MTS6 is mounted to the adapter plate. The installation should appear similar to Figure 21 and Figure 22. Figure 21: MTS6 Installation with Adapter Plate - Rear Figure 22: MTS6 Installation with Adapter Plate - Front Moisture Target Series 6 Hygrometer User’s Manual...
-
Page 26: Mounting The Sample System
Chapter 2. Installation 2.4 Mounting the Sample System Figure 23: Typical Sample System Moisture Target Series 6 Hygrometer User’s Manual... -
Page 27: Installing The Probe
(see the following section). 2.5 Installing the Probe GE probes are usually installed in a sample system to protect the probe from any damaging elements in the process. The probe is mounted in a cylindrical container called the... -
Page 28: Wiring The System
To ensure safe operation, the MTS6 must be installed and WARNING! operated as described in this manual. Also, be sure to follow all applicable local safety codes and regulations for installing electrical equipment. Moisture Target Series 6 Hygrometer User’s Manual... - Page 29 The CAUTION! symbol is a reminder that MTS6 components can be damaged if electrical connections are not correctly made. Figure 25: MTS6 Rear Panel Connections - AC Version Figure 26: MTS6 Rear Panel Connections - DC Version Moisture Target Series 6 Hygrometer User’s Manual...
- Page 30 Chapter 2. Installation 2.6 Wiring the System (cont.) Figure 27: MTS6 Wiring Diagram Moisture Target Series 6 Hygrometer User’s Manual...
-
Page 31: Connecting A Standard Probe
Chapter 2. Installation 2.6.1 Connecting a Standard Probe The probe must be connected to the MTS6 with a continuous run of GE two-wire shielded cable. When connecting the probe, protect the cable from excessive strain (bending, pulling, etc.) and avoid subjecting the cable to temperatures above 65°C (149°F) or below –50°C (–58°F). - Page 32 Finally, after the wiring is complete, push the connector straight onto the terminal block (not at an angle). Figure 30: Bottom Connector Removed Moisture Target Series 6 Hygrometer User’s Manual...
- Page 33 Chapter 2. Installation 2.6.1 Connecting a Standard Probe (cont.) Figure 31: Making Probe Cable Connections to the Connector Figure 32: Reinserting the Connector into the Terminal Block Moisture Target Series 6 Hygrometer User’s Manual...
-
Page 34: Connecting A Veridri Probe
Figure 33: Four-Wire, VeriDri Probe Cable Insert the end of probe cable with the connector onto the probe and twist the connector head clockwise until it is secure. Ensure that the power is off before proceeding. IMPORTANT: Moisture Target Series 6 Hygrometer User’s Manual... - Page 35 Finally, after the wiring is complete, push the connector straight onto the terminal block (not at an angle). Figure 34: Bottom Connector Removed Moisture Target Series 6 Hygrometer User’s Manual...
- Page 36 Figure 36: Reinserting the Connector into the Terminal Block When there is a No Link error for the VeriDri, check the wiring to Note: ensure proper connections and make sure there is no short between the +15V and RTN. Moisture Target Series 6 Hygrometer User’s Manual...
-
Page 37: Connecting The Recorder Outputs
• Normally Open ( • Common ( • Normally Closed ( Table 2: Pin Designations for Relay Contacts Fault Alarm A Alarm B Normally Open Common Normally Closed Moisture Target Series 6 Hygrometer User’s Manual... - Page 38 (not at an angle), make cable connections while the connector is away from the unit, and push the connector straight on (not at an angle) when the wiring is complete. Figure 37: Removing the Upper Connector Moisture Target Series 6 Hygrometer User’s Manual...
- Page 39 (not at an angle), make cable connections while the connector is away from the unit, and push the connector straight on (not at an angle) when the wiring is complete. Moisture Target Series 6 Hygrometer User’s Manual...
-
Page 40: Installing The Ac Power Cable
MTS6 (see Figure 25 on page 19, Figure 38 and Figure 39). Figure 38: Inserting the AC Power Cable Figure 39: The AC Power Cable Installed Moisture Target Series 6 Hygrometer User’s Manual... -
Page 41: Installing The Dc Power Cable
Use the following instructions to connect the cable to the MTS6. Figure 40: MTS6 Rear Panel Connections - DC Version Remove the DC Connector from the rear panel (see Figure 41). Figure 41: Removing the DC Connector Moisture Target Series 6 Hygrometer User’s Manual... - Page 42 Ensure that the chassis ground connection is properly IMPORTANT: grounded. Reinsert the DC connector into the rear panel (see Figure 42). [no content intended for this page] Figure 42: Reinserting the DC Connector Moisture Target Series 6 Hygrometer User’s Manual...
-
Page 43: Chapter 3. Operation And Programming
In most instances; use the Enter key to save an entry and/or move Note: ahead to the following screen; use the Cancel key to reject an entry and/or return to the previous screen. Moisture Target Series 6 Hygrometer User’s Manual... -
Page 44: Accessing The Menus
Menu items displayed with an ellipsis (shown as a series of three dots Note: after the menu item) will bring up more choices, while those without take immediate action. Figure 43: Main Menu Moisture Target Series 6 Hygrometer User’s Manual... -
Page 45: Entering Numeric Values
(maximum/minimum value), the digit will not change. Press Enter to save the new value and return, or Cancel to return, leaving the original value intact. Figure 44: Numeric Entry Moisture Target Series 6 Hygrometer User’s Manual... -
Page 46: Setting Up The Display
Display Menu. If the VeriDri probe is being used, FH Note: replaces MH. If the ppmv software version was purchased, PPMv, mg/m , g/m Note: and kg/m will be available. Moisture Target Series 6 Hygrometer User’s Manual... -
Page 47: Setting Decimal Places
Use the Right/Left arrow keys to increase/decrease display contrast. Press Enter to save the changes, or press Cancel to return to the previous setup. The screen returns to the Display Menu. Moisture Target Series 6 Hygrometer User’s Manual... -
Page 48: Setting Up The Output
. The screen returns to the Output Menu: If the VeriDri probe is being used, FH Note: replaces MH. If the ppmv software version was purchased, PPMv, mg/m , g/m Note: and kg/m will be available. Moisture Target Series 6 Hygrometer User’s Manual... -
Page 49: Selecting An Output Type
Press Enter to save (or Cancel to keep the previous value), and return to Output Menu. Moisture Target Series 6 Hygrometer User’s Manual... -
Page 50: Changing The Lower Output Span
Output Menu. Check your output wiring. If the reading on your SCADA or DCS is off slightly, then you may use the Trim feature to trim the output zero or span. Moisture Target Series 6 Hygrometer User’s Manual... -
Page 51: Trimming The Outputs
Zero Trim value, as follows: Since you cannot trim 0 mA or 0 V for negative offsets, trim for the Note: lower end of the scale is at the 4 mA or 0.4 V output level. Moisture Target Series 6 Hygrometer User’s Manual... - Page 52 SCADA or DVM. Using the Test Menu, the operator verifies that a test value of 0% now reads 4.000 mA at the SCADA equipment, and a test value of 100% now reads 20.000 mA. Moisture Target Series 6 Hygrometer User’s Manual...
-
Page 53: Setting Up Alarms
To select the alarm status, from the Alarm Menu select Status and press Enter . The following screen appears: Use the arrow keys to select OFF or ON and press Enter . The display returns to the Alarm Menu. Moisture Target Series 6 Hygrometer User’s Manual... -
Page 54: Selecting Alarm Units
Menu select Type and press Enter screen similar to the following appears: Use the arrow keys to select an alarm type. Press Enter to save (or Cancel keep the previous value), and return to the Alarm Menu. Moisture Target Series 6 Hygrometer User’s Manual... -
Page 55: How The Alarm Types Work
Inner Band: Alarm activates when parameter is between upper and lower limits. • Outer Band: Alarm activates when parameter is outside upper and lower limits. 3.4.5 How the Alarm Types Work Figure 45: Example of Alarm Types Moisture Target Series 6 Hygrometer User’s Manual... -
Page 56: Changing The Upper Alarm Span
Press Enter to save (or Cancel to keep the previous value), and return to the Alarm Menu. Moisture Target Series 6 Hygrometer User’s Manual... -
Page 57: Testing The Alarm Relays
Logging Menu select Status and press Enter . A screen similar to the following appears. The current data log status is displayed. After about 10 seconds, the screen returns to the Logging Menu. Moisture Target Series 6 Hygrometer User’s Manual... -
Page 58: Log Settings Menu
Use the arrow keys to select the unit to log, and press Enter . The following screen appears. To change the unit setting, select Modify and press Enter . The following screen appears. Moisture Target Series 6 Hygrometer User’s Manual... - Page 59 Press Enter to save (or Cancel to keep the previous value), and return to the Set Log Params menu. Moisture Target Series 6 Hygrometer User’s Manual...
- Page 60 . The following screen appears. Use the arrow keys to select OFF or ON and press Enter . The screen returns to the Set Log Params menu. Press Cancel to return to the Logging Menu. Moisture Target Series 6 Hygrometer User’s Manual...
-
Page 61: Managing Log Files
May 1 at 4:37 pm will be named 05011637. After about 10 seconds, the screen returns to the Manage Log Files menu. When a new log is created, the Manage Log Files menu changes to Note: the following screen. Moisture Target Series 6 Hygrometer User’s Manual... - Page 62 If a log is running and it reboots due to a power failure, it will always Note: return to the previous state prior to the power failure. If it was running, it will continue to run. If it was paused, it will stay paused and can be resumed. Moisture Target Series 6 Hygrometer User’s Manual...
- Page 63 Use the arrow keys to move from one listing to another. To return to the Manage Log Files menu, press Cancel Moisture Target Series 6 Hygrometer User’s Manual...
- Page 64 File Listing. If YES was selected, the particular number is gone. If NO was selected, the number is still present. Press the Cancel key to return to the Manage Log Files menu. Moisture Target Series 6 Hygrometer User’s Manual...
-
Page 65: Ejecting The Sd Card
Any MicroSD card reader may be used to read the MicroSD card. The log file is in text format, therefore, any word processing or spreadsheet program may be used to read the data. Refer to Appendix C for examples on how to work with log files. Moisture Target Series 6 Hygrometer User’s Manual... -
Page 66: Setting Other Information
Use the left and right arrow keys to select each digit to be changed and the up and down arrow keys to increase or decrease its value. Once the passcode has been entered, press Enter and the following screen appears. Moisture Target Series 6 Hygrometer User’s Manual... - Page 67 Type and press Enter . The following screen appears. To change the type of fault relay, select the other option and press Enter . The screen returns to the Fault Alarm menu. Moisture Target Series 6 Hygrometer User’s Manual...
- Page 68 . The following screen appears. To reset the fault alarm, select Reset and press Enter . To trip the fault alarm, select Trip and press Enter . Press Cancel twice to return to the Settings Menu. Moisture Target Series 6 Hygrometer User’s Manual...
-
Page 69: Setting Autocal
Enter . A screen similar to the following appears. To accept AutoCal, select Yes. To reject AutoCal select No. Press Enter confirm your selection and return to the AutoCal Settings menu. Moisture Target Series 6 Hygrometer User’s Manual... -
Page 70: Setting Calibration Data 1
Once the passcode has been entered, press Enter and the following screen appears. If you are using a standard M Series probe, the MH/DP Cal will be highlighted. Press Enter . The following screen appears. Moisture Target Series 6 Hygrometer User’s Manual... - Page 71 Press Enter to save (or Cancel to keep the previous value), and return to the Edit MH/DP Cal menu. Moisture Target Series 6 Hygrometer User’s Manual...
- Page 72 Press Enter to save (or Cancel to keep the previous value), and return to the Edit MH/DP Cal menu. Press Cancel to return to the Cal Data menu. Moisture Target Series 6 Hygrometer User’s Manual...
-
Page 73: Setting Calibration Data 2
Press Enter to save (or Cancel to keep the previous value), and return to the Edit MH/DP Cal menu. Moisture Target Series 6 Hygrometer User’s Manual... - Page 74 . The following screen appears. The DP value is for viewing only. When you are ready, press Cancel to return to the Read FH/DP Calibration menu. Press Cancel twice to return to the Settings Menu. Moisture Target Series 6 Hygrometer User’s Manual...
-
Page 75: Reading And Setting The Calibration References
MH values. These values are generated from a factory lab calibration and should not be changed without first consulting GE technical support. Changes to these values will alter the accuracy of the unit measurements. To update calibration data, from the Settings Menu select Cal Data and press Enter The following screen appears. - Page 76 Once the changes have been made, press Enter . The screen returns to the Edit Cal Refs menu. Moisture Target Series 6 Hygrometer User’s Manual...
-
Page 77: Entering The M Series Probe Serial Number
Once the changes have been made, press Enter . The screen returns to the Cal Data menu. Moisture Target Series 6 Hygrometer User’s Manual... -
Page 78: Setting The Volume Mixing Ratio
Press Enter to save (or Cancel to keep the previous value), and return to the previous menu. Moisture Target Series 6 Hygrometer User’s Manual... - Page 79 Press Enter to save (or Cancel to keep the previous value), and return to the previous menu. Moisture Target Series 6 Hygrometer User’s Manual...
-
Page 80: Resetting The Time
Press Enter to save (or Cancel to keep the previous value), and return to the previous menu. Moisture Target Series 6 Hygrometer User’s Manual... - Page 81 Press Enter to save (or Cancel to keep the previous value), and return to the previous menu. Moisture Target Series 6 Hygrometer User’s Manual...
- Page 82 Enter and return to the previous menu, then press Cancel return to the Settings Menu. The Service menu is accessible only to service engineers and Note: requires the use of a Factory-Level passcode. Moisture Target Series 6 Hygrometer User’s Manual...
-
Page 83: Selecting The Probe Type
Once the passcode has been entered, press Enter and the following screen appears. Use the left or right arrow key to select the correct probe type and press Enter . The MTS6 reboots in 5 seconds. Moisture Target Series 6 Hygrometer User’s Manual... -
Page 84: Setting A Constant Dp °C Offset
Press Enter to save (or Cancel to keep the previous value), and return to the previous menu. Moisture Target Series 6 Hygrometer User’s Manual... -
Page 85: Viewing System Information
About menu select Status and press Enter . A screen similar to the following appears. The information includes the amount of space being used and that which is free. To return to the About MTS6 menu, press Cancel Moisture Target Series 6 Hygrometer User’s Manual... -
Page 86: Checking The Software Version
Data when using an M Series probe. To return to the About MTS6 menu, press Cancel Data when using a VeriDri probe. To return to the About MTS6 menu, press Cancel Moisture Target Series 6 Hygrometer User’s Manual... -
Page 87: Checking The Wiring
To lock the ability to make changes to the menu, select LOCK and press Enter . The screen returns to the normal reading. To unlock the menu, refer to Starting Up on page 36. Note: Moisture Target Series 6 Hygrometer User’s Manual... - Page 88 Chapter 3. Operation and Programming [no content intended for this page] Moisture Target Series 6 Hygrometer User’s Manual...
- Page 89 Chapter 3. Operation and Programming Your passcode is 2719. Please remove this page and put it in a safe place for future reference. Moisture Target Series 6 Hygrometer User’s Manual...
- Page 90 Chapter 3. Operation and Programming Moisture Target Series 6 Hygrometer User’s Manual...
-
Page 91: Chapter 4. Service And Maintenance
Some of the most common problems and recommended maintenance procedures are discussed in this chapter. If you cannot find the information you need in this chapter, please consult GE for help. Do not attempt to troubleshoot the MTS 6 beyond CAUTION! the instructions in this chapter. - Page 92 Response: Reads too wet or too dry Sensor is corroded Action: Return probe to factory for evaluation. Response: Reads too wet or too dry. Stream particles Action: Return probe to factory for evaluation. causing abrasion. Moisture Target Series 6 Hygrometer User’s Manual...
-
Page 93: Replacing/Recalibrating Moisture Probes
However, under very mild conditions, less frequent calibrations are necessary. Contact a GE applications engineer for your specific recommended calibration frequency All new or recalibrated moisture probes must be installed in accordance with the instructions in Chapter 2, Installation. -
Page 94: Cleaning The Mts6 Front Panel
Cleaning solution (soap and warm water) To clean the front panel: Moisten the cloth with the cleaning solution. Gently wipe the front panel clean. Use a dry cloth to dry the front panel. Moisture Target Series 6 Hygrometer User’s Manual... -
Page 95: Chapter 5. Specifications
Chapter 5. Specifications Chapter 5. Specifications 5.1 Electronics Input: moisture signal from GE thin-film aluminum oxide moisture sensor on an M Series probe or a VeriDri probe Intrinsic Safety: external safety barrier for moisture input (optional) Analog Output: single, isolated recorder output for dew point, internally optically isolated, 10-bit (0.1%) resolution... - Page 96 °C or °F, or sensor signal MH or FH Input Power: option 1, AC: universal power 100-240 VAC @ 50-60 Hz option 2, DC: 24 VDC nominal ±10% Power Dissipation: AC units: 5 W maximum DC units: 5 W maximum Moisture Target Series 6 User’s Manual...
-
Page 97: Moisture Measurement
5.2 Moisture Measurement Sensor Type: thin-film aluminum oxide moisture sensor probe Moisture Probe Compatibility: compatible with all GE M-Series aluminum oxide moisture probes and VeriDri transmitters Traceability: All moisture probe calibrations are traceable to National Institute of Standards and Technology (NIST) standards or National Physical Lab, U.K. - Page 98 Standard: –80° to 20°C with data to –110°C Extended High: –80° to 60°C with data to –110°C Accuracy: ±2°C from –65° to 60°C ±3°C from –110° to -66°C Repeatability: ±0.5°C from –65° to 60°C ±1.0°C from –110° to -66°C Moisture Target Series 6 User’s Manual...
-
Page 99: Appendix A. Outline And Installation Drawings
Appendix A. Outline and Installation Drawings Appendix A. Outline and Installation Drawings Moisture Target Series 6 Hygrometer User’s Manual... - Page 100 Appendix A. Outline and Installation Drawings Figure 46: MTS6 Outline and Mounting (ref. dwg #712-1550) Moisture Target Series 6 Hygrometer User’s Manual...
- Page 101 Appendix A. Outline and Installation Drawings Figure 47: MTS6 Optional Adapter Plates (ref. dwg #705-1297) Moisture Target Series 6 Hygrometer User’s Manual...
- Page 102 Appendix A. Outline and Installation Drawings Figure 48: Interconnection Diagram (ref. dwg #702-1015) Moisture Target Series 6 Hygrometer User’s Manual...
-
Page 103: Appendix B. Menu Maps
Appendix B. Menu Maps Appendix B. Menu Maps Moisture Target Series 6 Hygrometer User’s Manual... - Page 104 Appendix B. Menu Maps Figure 49: Main Menu Map Using M Series Probe Moisture Target Series 6 Hygrometer User’s Manual...
- Page 105 Appendix B. Menu Maps Figure 50: Main Menu Map Using VeriDri Probe Moisture Target Series 6 Hygrometer User’s Manual...
- Page 106 Appendix B. Menu Maps [no content intended for this page Moisture Target Series 6 Hygrometer User’s Manual...
-
Page 107: Appendix C. Reading The Microsd Card
Locate the memory card in the lower center of the rear panel and pull the flexible cover from the left. The cover hangs from the right side (see Figure 51 and Figure 52). Figure 51: Pulling the Flexible Cover Figure 52: The Opened Memory Card Holder Moisture Target Series 6 Hygrometer User’s Manual... - Page 108 Push in the memory card until it clicks and pull it from the MTS6 chassis (see Figure 53 and Figure 54). Figure 53: Pushing in on the MicroSD Card Figure 54: Removing the MicroSD Card Moisture Target Series 6 Hygrometer User’s Manual...
- Page 109 Plug the memory card into a card reader and insert the reader into a computer (see Figure 55 and Figure 56). Figure 55: Plugging the Reader into a PC Figure 56: The Reader Plugged In Moisture Target Series 6 Hygrometer User’s Manual...
-
Page 110: Accessing The Files
From the PC, open My Computer and find the device (see Figure 57). Figure 57: Locating the Device Click on Removable Disk and a screen similar to Figure 58 on page 101 appears. Moisture Target Series 6 Hygrometer User’s Manual... - Page 111 Appendix C. Reading the MicroSD Card C.2 Accessing the Files (cont.) Figure 58: List of Log Files Click on the desired file and a screen similar to Figure 59 appears. Figure 59: Log File Notepad Moisture Target Series 6 Hygrometer User’s Manual...
- Page 112 C.2 Accessing the Files (cont.) Log files can be opened with a text editor. Open Excel and select Open. Figure 60: Importing Log Files to Excel Figure 61: Selecting the Log File to Open Moisture Target Series 6 Hygrometer User’s Manual...
-
Page 113: Setting Up The Files
The following screen appears (see Figure 62). Figure 62: Excel Import Wizard 1 Follow the directions on the screen, make changes if necessary, and click on Next >. The following screen appears (see Figure 63 on page 104). Moisture Target Series 6 Hygrometer User’s Manual... - Page 114 Appendix C. Reading the MicroSD Card C.3 Setting Up the Files (cont.) Figure 63: Excel Import Wizard 2 Set the desired data delimiters, and click on Next >. The following screen appears (see Figure 64 on page 105). Moisture Target Series 6 Hygrometer User’s Manual...
- Page 115 Figure 64: Excel Import Wizard 3 Select each column and set the data format for it (see Figure 64). When the setup is complete, click on Finish, and a screen similar to Figure 65 on page 106 appears. Moisture Target Series 6 Hygrometer User’s Manual...
- Page 116 Appendix C. Reading the MicroSD Card C.3 Setting Up the Files (cont.) Figure 65: Successful Excel Import The log file is now properly formatted for graphing or analysis. Moisture Target Series 6 Hygrometer User’s Manual...
-
Page 117: Appendix D. The Non-Enclosure Mts6 Package
Caution! Risk of electric shock. Mount the MTS6 package in an enclosed panel where no hazardous live wires are exposed. See Figure 66 for dimensions. Figure 66: MTS6 Non-Enclosure Package Outline (ref. dwg #712-1687) Moisture Target Series 6 Hygrometer User’s Manual... - Page 118 Appendix D. The Non-Enclosure MTS6 Package Ground the MTS6 baseplate using the provided ground lug. Connect the MTS6 unit according to the local electrical code. Moisture Target Series 6 Hygrometer User’s Manual...
- Page 119 Contrast, Setting ..........37 Moisture Target Series 6 User’s Manual...
- Page 120 Input Power ............86 Moisture Target Series 6 User’s Manual...
- Page 121 Moisture Meaasurement ..........87 Moisture Target Series 6 User’s Manual...
- Page 122 Primary Units, Selecting ..........36 Moisture Target Series 6 User’s Manual...
- Page 123 Software Version, Checking ......... 76 Moisture Target Series 6 User’s Manual...
- Page 124 Warranty ............117 Moisture Target Series 6 User’s Manual...
- Page 125 VeriDri Probe..........24 Moisture Target Series 6 User’s Manual...
- Page 126 Index Moisture Target Series 6 User’s Manual...
- Page 127 Warranty Warranty Each instrument manufactured by GE Sensing is warranted to be free from defects in material and workmanship. Liability under this warranty is limited to restoring the instrument to normal operation or replacing the instrument, at the sole discretion of GE Sensing. Fuses and batteries are specifically excluded from any liability.
- Page 128 AUTHORIZATION NUMBER (RAN), and shipping instructions for the return of the instrument to a service center will be provided. If GE Sensing instructs you to send your instrument to a service center, it must be shipped prepaid to the authorized repair station indicated in the shipping instructions.
- Page 129 DECLARATION Sensing CONFORMITY DOC-0006, Rev. HB GE Sensing 1100 Technology Park Drive Billerica, MA 01821 declare under our sole responsibility that the Moisture Target™ Series 6 Hygrometer to which this declaration relates, is in conformity with the following standards: • EN 61326-1: 2006, Class A, Table 2, Industrial Locations •...
- Page 132 Customer Support Centers U.S.A. The Boston Center 1100 Technology Park Drive Billerica, MA 01821 U.S.A. Tel: 800 833 9438 (toll-free) 978 437 1000 E-mail: [email protected] Ireland Sensing House Shannon Free Zone East Shannon, County Clare Ireland Tel: +35 361 470291 E-mail: [email protected] An ISO 9001:2008 Certified Company www.ge-mcs.com/en/about-us/quality.html...