
Related Manuals for Samsung 136S


Summary of Contents for Samsung 136S
- Page 1 Lithium Ion Battery System for UPS Installation Manual (136S) ET003222373 English 4/2018. Rev 0.0...
- Page 2 Read this manual carefully before starting to install the battery system. Keep these instructions for future reference. ET003222373 English 4/2018. Rev 0.0...
- Page 3 Copyright © 2017 SAMSUNG SDI Co., Ltd. All rights reserved. This document contains information that is the property of SAMSUNG SDI Co., Ltd., and provides for the sole purpose of the installation, operation, and maintenance of products of SAMSUNG SDI Co., Ltd.
- Page 4 ET003222373 English 4/2018. Rev 0.0...
-
Page 5: Important Safety Instructions
Important Safety Instructions Important Safety Instructions Read and follow these instructions! The following precautions are intended to ensure your safety and prevent property damage. Before installing this product, be sure to read all safety instructions in this document for proper installation. DANGER Failure to comply with the instructions with this symbol may result in a serious accident, causing death or a severe injury. -
Page 6: General Instructions
Important Safety Instructions General Instructions Please be aware that a battery presents a risk of electrical shock including high short-circuit current. Follow all safety precautions while operating the batteries. Remove watches, rings, and other metallic accessories. Use tools with insulated handles in order to avoid inadvertent short circuits. ... -
Page 7: Personnel And Equipment Warnings
Important Safety Instructions Personnel and Equipment Warnings Personnel in contact with the battery system should be aware of the following hazards: WARNING—SHOCK HAZARD Do not contact system connectors or terminals. Do not open the enclosure doors unless proper lock out/tag out procedures and related trainings are followed in accordance with the local codes and regulations. -
Page 8: Lock Out/Tag Out Guidelines
ESS. The lock out/tag out procedures must meet or exceed the requirements of all guidelines presented in SAMSUNG SDI safety documentation. Before entering potentially hazardous areas or beginning work on the ESS, complete the following tasks: Identify and wear protective clothing and shoes. -
Page 9: Table Of Contents
Table of Contents Table of Contents Important Safety Instructions ..................... i General Instructions..........................ii Safety Precautions ..........................ii Personnel and Equipment Warnings ....................iii Dangerous Voltages ..........................iii Lock Out/Tag Out Guidelines ....................... iv General Warnings ..........................iv Table of Contents ......................... i Tables ............................ -
Page 10: Table Of Contents
Table of Contents 3.9.7 SMPS Assembly AC Input Connection ................. 78 3.9.8 Rack Fuse and Additional Module Signal Cable Connection ........80 3.9.9 DC Link Cable Connection ................... 85 3.9.10 AC Input Commissioning ....................87 4. Performance .......................... 88 Operating Conditions ......................... 88 Control Power Requirements ..................... -
Page 11: Tables
Table of Contents Tables Table 3-1: Ground Wire Specifications ......................11 Table 3-2: Ground Wire Fastener Specification .................... 11 Table 3-3: Rack Fastener Specifications ...................... 11 Table 3-4: Rack Fastener Specifications (Side by side) ................11 Table 3-5: Recommended Tools and Instruments ..................12 Table 3-6: Module Voltage and Internal Impedance .................. -
Page 12: Figures
Table of Contents Figures Figure 2-1: Battery Modules (Type A and Type B)..................4 Figure 2-2: Switchgear Assembly ........................5 Figure 2-3: Front View of the Switchgear Assembly ..................5 Figure 2-4: SMPS Assembly (Type A and Type B) ..................6 Figure 2-5: Rack Frame .......................... - Page 13 Table of Contents Figure 3-54: Remove Module #13’s Front Cover ..................51 Figure 3-55: Connect Battery Module #12B+ and Battery Module #13 B-............ 52 Figure 3-56: Assemble Module #12’s Front Cover..................53 Figure 3-57: Remove Battery Module #14’s Front Cover ................53 Figure 3-58: Connect Battery Module #13 B+ and Battery Module #14 B-.
-
Page 15: About This Manual
About this Manual 1. About this Manual To make sure that you understand the proper procedures for safe operation, this section briefly describes the purpose, audience, organization, revision history, and acronyms and abbreviations. 1.1 Purpose The purpose of this manual is to provide information for the safe and successful assembly of the product. -
Page 16: Revision History
About this Manual 1.4 Revision History Rev. Description Author Date First Release (customer facing) 2018.04.08 1.5 Acronyms and Abbreviations The following acronyms and abbreviations are used in this manual. Abbreviations Full Name Automated External Defibrillator Battery Management System Environmental Health and Safety Energy Storage System LOTO LOCK OUT/TAG OUT... -
Page 17: Product Description
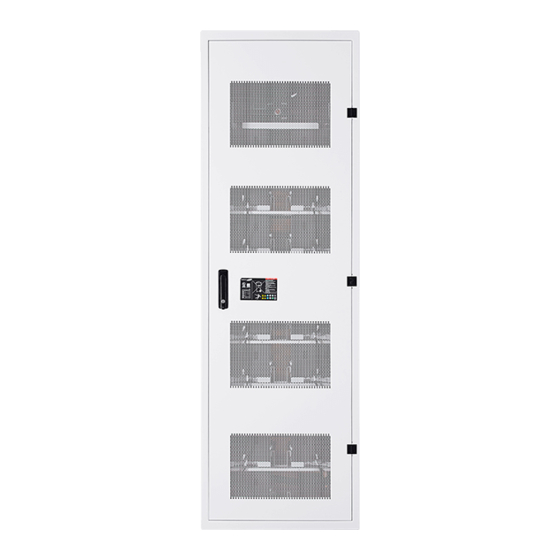
Product Description 2. Product Description Before operating the battery system, users must be familiar with its components. 2.1 Major Components Samsung SDI’s Lithium Ion Battery System has the following components: Battery Module (Type A / Type B) Switchgear Assembly ... -
Page 18: Battery Module (Type A / Type B)
Product Description 2.1.1 Battery Module (Type A / Type B) The battery module consists of battery cells. Each battery module has a module BMS (Battery Management System). There are two types of Battery Modules. The model number for each type is determined by the position of polarity. -
Page 19: Switchgear Assembly
Product Description 2.1.2 Switchgear Assembly The Switchgear Assembly consists of a protective circuit and a rack BMS. It is connected to the UPS using the positive and negative power terminals on the front of switchgear. Figure 2-2: Switchgear Assembly The switchgear provides an auxiliary breaker switch that can be connected to an external building monitoring system. -
Page 20: Smps Assembly (Type A / Type B)
Product Description 2.1.3 SMPS Assembly (Type A / Type B) The SMPS Assembly provides data to the external systems (i.e., building management system, UPS, etc.) while controlling and monitoring all connected Rack BMS’s. There are two types of SMPS Assemblies: Type A has a System BMS; Type B does not. Front SMPS Assembly Type A Front SMPS Assembly Type B Figure 2-4: SMPS Assembly (Type A and Type B) -
Page 21: Rack Frame
Product Description 2.1.4 Rack Frame The Rack Frame is used to mount the Battery Modules, Switchgear Assembly and SMPS Assembly. It facilitates grounding of the installed components. Grounding cable/busbar for the rack frame is necessary for the Switchgear and SMPS Assemblies because they are grounded to the rack frame when installed. An equipment grounding conductor is required to ground the rack frames together and to the UPS module. -
Page 22: Assembling The Product
Ground connections and ground wire routing vary significantly depending on system configuration and equipment layout. Samsung provides two grounding strips on each rack, one on top of the rack and the other on the bottom of the rack. See Figure 3-109: Grounding Points (2 EA). -
Page 23: Installation And Assembly Procedure
Assembling the Product 3.2 Installation and Assembly Procedure This product must be installed and assembled by following the procedure below: 3. Rack 1. Preparation 2. Rack Anchoring 4. System Installation Stage Stage Installation Stage Stage Figure 3-1: Installation Procedure Preparation Stage Procedure ... -
Page 24: Preparation Stage-Procedure
Assembling the Product 3.3 Preparation Stage—Procedure For the preparation stage, perform the following steps: 1. Create the installation plan and check the equipment and instruments for installation. 2. Check the arrival schedule of the parts required. 3. Unpack the equipment. 4. -
Page 25: Preparation Stage - Unpacking
Assembling the Product 3.4 Preparation Stage - Unpacking Check the parts during unpacking: 3.5 Preparation Stage - Ground Wire and Tools Ground wires for the racks must be provided by the installer. Installer-supplied ground wires must meet the specifications below. 3.5.1 Ground Wires Use ground wire that is #1AWG. -
Page 26: Preparation Stage-Recommended Tools/Instruments
Assembling the Product 3.6 Preparation Stage—Recommended Tools/Instruments Installers must provide these tools for installing the battery: Table 3-5: Recommended Tools and Instruments Items Usage Appearance To fasten switchgear and SMPS Power Screwdriver/Drill assemblies to the rack frames (Max torque: 26Nm/270 kgf/cm) (5.1–6.1Nm/50–60 kgf/cm) Torque Limiter For use with torque wrench... - Page 27 Assembling the Product Items Usage Appearance Measure battery module’s voltage Battery Tester and internal impedance ET003222373 English 4/2018. Rev 0.0...
-
Page 28: Preparation Stage - Visual Inspection
Guide Rail Incorrect Orientation Figure 3-2: Faulty Cases CAUTION If any defects are found during the inspection, contact the SAMSUNG SDI customer service department. 3.7.1 Inspecting the Rack Frame After transporting the rack frame to the installation location, check for: ... -
Page 29: Visual Inspection Of The Modules
Assembling the Product 3.7.2 Visual Inspection of the Modules After transporting the modules to the installation location, check for: Physical damage to the exterior Damaged or protruding screws Proper voltage and internal impedance of the battery modules using the battery tester. Table 3-6: Module Voltage and Internal Impedance Items Value... -
Page 30: Rack Anchoring Stage
Assembling the Product 3.8 Rack Anchoring Stage Install the rack frame on a flat, level surface. To attach the rack and perform the related works CAUTION Use a proper transportation method considering the weight of the rack frame. Ensure that the safety of the working place is maintained. -
Page 31: Figure 3-3: Clearance Distance For Single Rack Frame
Assembling the Product Two anchor points (not rated for seismic event) Four anchor points (Telcordia Zone 3) Figure 3-3: Clearance Distance for Single Rack Frame Two anchor points (not rated for seismic event) Four anchor points (Telcordia Zone 3) Figure 3-4: Clearance Distance for Multiple Rack Frames ET003222373 English 4/2018. -
Page 32: Figure 3-5: Clearance Distance For Multiple Rack Frames Installed Rear-To-Rear
Assembling the Product Two anchor points (not rated for seismic event) Four anchor points (Telcordia Zone 3) Figure 3-5: Clearance Distance for Multiple Rack Frames Installed Rear-to-Rear 1. After unpacking the rack frame, transport it to its installation location. 2. Arrange the rack frame after verifying that the holes in the frame and anchoring points are aligned. 3. -
Page 33: Figure 3-6: Rack Anchoring Points (4 Ea)
Assembling the Product Figure 3-6: Rack Anchoring Points (4 EA) 5. Connect the racks, using M10 hardware through holes in the sides (―SCREW M10 X 25mm,‖ ―M10 FLAT WASHER‖ and ―NUT M10‖). Torque the bolts to 30Nm (22 ft lbs). Figure 3-7: Holes on the sides of the rack 6. -
Page 34: Figure 3-9: Reattaching The Rear Panels
Assembling the Product 7. If removed reattach the rear panels to the rack frames using four M5 Screws ―SCREW M5 X 10 mm‖ for each rear panel. Fasten the screws using torque of 5.1–6.1 Nm (45–54 in lbs). Figure 3-9: Reattaching the Rear Panels ET003222373 English 4/2018. -
Page 35: Rack Installation Stage
Assembling the Product 3.9 Rack Installation Stage WARNING Arc Flash and Shock Hazard Insulated tools are required for any work on this energized equipment. WARNING Sharp Edges Wear gloves and other protective gear to prevent injury. WARNING Pinch Point Use caution when working in the enclosure to prevent injury. CAUTION Heavy Object Can cause muscle strain or back injury. -
Page 36: Switchgear And Smps Assembly Installation
Assembling the Product 3.9.1 Switchgear and SMPS Assembly Installation Figures may show other assemblies to indicate relative position. Those assemblies will be installed at a later time. Important Attach each Switchgear to its rack frame with four M5 x 10 mm screws. (Torque: 5.1– ... -
Page 37: Figure 3-12: Ground Cable Connection To The Switchgear Assembly
Assembling the Product 3. After each Switchgear Assembly is inserted into the rack frame, connect the ground cable (Wire Assembly Earth). NOTICE Connect a ground cable between the Switchgear Assembly and the Rack Frame (SCREW M5 x 10 mm). (Torque: 5.1–6.1 Nm [45–54 in lbs]) Verify that the torque setting is correct. -
Page 38: Figure 3-13: Inserting Smps Assembly
Assembling the Product 4. Insert SMPS Assembly into the rack frames designated for SMPS Assembly as shown in Figure 3-13: Inserting SMPS Assembly Important Attach the inserted SMPS Assemblies to the rack frames by fastening each with four M5 x 10 mmscrews (Torque: 5.1–6.1 Nm [45–54 in lbs]) ... -
Page 39: Figure 3-15: Ground Cable Connection To The Smps Assembly
Assembling the Product NOTICE Connect a ground cable between the SMPS Assembly and the Rack Frame with an M5 x 10 mm screw. (Torque: 5.1–6.1 Nm [45–54 in lbs]) Verify that the torque setting is correct. Figure 3-15: Ground Cable Connection to the SMPS Assembly ET003222373 English 4/2018. -
Page 40: Battery Module Installation
Assembling the Product 3.9.2 Battery Module Installation 1. Measure the voltage and internal impedance of each module. All modules in one rack frame must be near the same state of charge. Refer to Table 3-6: Module Voltage and Internal Impedance. 2. -
Page 41: Figure 3-17: Battery Module Arrangement On Eighth And Ninth Shelves
Assembling the Product Two Type B Battery Modules Two Type A Battery Modules Figure 3-17: Battery Module Arrangement on Eighth and Ninth Shelves Two Type B Battery Modules Two Type A Battery Modules Two Type B Battery Modules Two Type A Battery Modules Two Type B Battery Modules Two Type A Battery Modules Two Type B Battery Modules... -
Page 42: Figure 3-19 : Module Number
Assembling the Product Module #17 Module #1 Module #16 Module #2 Module #3 Module #15 Module #4 Module #14 Module #5 Module #13 Module #6 Module #12 Module #7 Module #11 Module #10 Module #8 Module #9 Figure 3-19 : Module Number Important The bottom shelf (#1) has one Type B module in the left slot, as shown in Figure 3-20. -
Page 43: Busbar Installation
Assembling the Product 3.9.3 Busbar Installation Connect the power busbars between modules Verify with a voltmeter that no power is present on the system. Use lock out/tag out procedures to secure the UPS and batteries. CAUTION Please follow the instructions to protect the module BMS against damage. ... -
Page 44: Figure 3-21: Removing The Module #1'S Cover And Switchgear B- Terminal Cover
Assembling the Product 1. Remove Battery Module #1’s front cover and the Switchgear B- terminal cover. Figure 3-21: Removing the Module #1’s Cover and Switchgear B- Terminal Cover 2. Connect Switchgear B- and Module #1 B- using ―BUSBAR_BUSBAR M TO SG.‖ Switchgear B- terminal is connected using an M12 screw and Battery Module #1 B- terminal is connected using an M8 screw. -
Page 45: Figure 3-23: Restore Switchgear's B- Terminal
Assembling the Product 3. Reattach Switchgear’s B- terminal cover. Figure 3-23: Restore Switchgear’s B- Terminal 4. Remove Battery Module #2’s front cover. Figure 3-24: Remove Battery Module #2’s Front Cover ET003222373 English 4/2018. Rev 0.0... -
Page 46: Figure 3-25: Connect Battery Module #1 B+ And Battery Module #2 B
Assembling the Product 5. Connect Battery Module #1 B+ and Module #2 B- using ―BUS-BAR MAIN.‖ Connect using an M8 screw. Figure 3-25: Connect Battery Module #1 B+ and Battery Module #2 B-. ET003222373 English 4/2018. Rev 0.0... -
Page 47: Figure 3-26: Reattach Battery Module #1'S Front Cover
Assembling the Product 6. Reattach Battery Module #1’s front cover and remove Battery Module #3’s front cover. Figure 3-26: Reattach Battery Module #1’s Front Cover Figure 3-27: Remove Battery Module #2’s Front Cover ET003222373 English 4/2018. Rev 0.0... -
Page 48: Figure 3-28: Connect Battery Module #2 B+ And Battery Module #3 B
Assembling the Product 7. Connect Battery Module #2 B+ and Battery Module #3 B- using ―BUS-BAR MAIN.‖ Connect using an M8 screw. Figure 3-28: Connect Battery Module #2 B+ and Battery Module #3 B-. ET003222373 English 4/2018. Rev 0.0... -
Page 49: Figure 3-29: Reattach Battery Module #2'S Front Cover
Assembling the Product 8. Reattach Battery Module #2’s front cover and remove Battery Module #4’s front cover. Figure 3-29: Reattach Battery Module #2’s Front Cover Figure 3-30: Remove Battery Module #4’s Front Cover ET003222373 English 4/2018. Rev 0.0... -
Page 50: Figure 3-31: Connect Battery Module #3 B+ And Module #4 B
Assembling the Product 9. Connect Battery Module #3 B+ and Module #4 B- using ―BUS-BAR MAIN.‖ Connect using an M8 screw. Figure 3-31: Connect Battery Module #3 B+ and Module #4 B-. ET003222373 English 4/2018. Rev 0.0... -
Page 51: Figure 3-32: Reattach Battery Module #3'S Front Cover
Assembling the Product 10. Reattach Battery Module #3’s front cover and remove Battery Module #5’s front cover. Figure 3-32: Reattach Battery Module #3’s Front Cover Figure 3-33: Remove Battery Module #5’s Front Cover ET003222373 English 4/2018. Rev 0.0... -
Page 52: Figure 3-34: Connect Battery Module #4 B+ And Battery Module #5 B
Assembling the Product 11. Connect Battery Module #4 B+ and Battery Module #5 B- using ―BUS-BAR MAIN.‖ Connect using an M8 screw. Figure 3-34: Connect Battery Module #4 B+ and Battery Module #5 B-. ET003222373 English 4/2018. Rev 0.0... -
Page 53: Figure 3-35: Reattach Battery Module #4'S Front Cover
Assembling the Product 12. Reattach Battery Module #4’s front cover and remove Battery Module #6’s front cover. Figure 3-35: Reattach Battery Module #4’s Front Cover Figure 3-36: Remove Battery Module #6’s Front Cover ET003222373 English 4/2018. Rev 0.0... -
Page 54: Figure 3-37: Connect Battery Module #5 B+ And Battery Module #6 B
Assembling the Product 13. Connect Battery Module #5 B+ and Battery Module #6 B- using ―BUS-BAR MAIN.‖ Connect using an M8 screw. Figure 3-37: Connect Battery Module #5 B+ and Battery Module #6 B-. ET003222373 English 4/2018. Rev 0.0... -
Page 55: Figure 3-38: Reattach Battery Module #5'S Front Cover
Assembling the Product 14. Reattach Battery Module #5’s front cover and remove Battery Module #7’s front cover. Figure 3-38: Reattach Battery Module #5’s Front Cover Figure 3-39: Remove Battery Module #7’s Front Cover ET003222373 English 4/2018. Rev 0.0... -
Page 56: Figure 3-40: Connect Battery Module #6 B+ And Battery Module #7 B
Assembling the Product 15. Connect Battery Module #6 B+ and Battery Module #7 B- using ―BUS-BAR MAIN.‖ Connect using an M8 screw. Figure 3-40: Connect Battery Module #6 B+ and Battery Module #7 B- ET003222373 English 4/2018. Rev 0.0... -
Page 57: Figure 3-41: Reattach Battery Module #6'S Front Cover
Assembling the Product 16. Reattach Battery Module #6’s front cover and remove Battery Module #8’s front cover. Figure 3-41: Reattach Battery Module #6’s Front Cover Figure 3-42: Remove Battery Module #8’s Front Cover ET003222373 English 4/2018. Rev 0.0... -
Page 58: Figure 3-43: Connect Battery Module #7 B+ And Battery Module #8 B
Assembling the Product 17. Connect Battery Module #7 B+ and Battery Module #8 B- using ―BUS-BAR MAIN.‖ Connect using an M8 screw. Figure 3-43: Connect Battery Module #7 B+ and Battery Module #8 B- Connecting Battery Modules #8 and #9 will be done in 3.9.8 Rack Fuse and Additional Module Signal Cable Connection. -
Page 59: Figure 3-44: Reattach Battery Modules #7 And #8'S Front Covers
Assembling the Product 18. Reattach the front covers to Battery Modules #7 and #8 and remove the front covers from Battery Modules #9 and #10. Figure 3-44: Reattach Battery Modules #7 and #8’s Front Covers Figure 3-45: Remove Front Covers from Battery Modules #9 and #10 ET003222373 English 4/2018. -
Page 60: Figure 3-46: Connect Battery Module #9 B+ And Battery Module #10 B
Assembling the Product 19. Connect Battery Module #9 B+ and Battery Module #10 B- using ―BUS-BAR MAIN.‖ Connect using an M8 screw. Figure 3-46: Connect Battery Module #9 B+ and Battery Module #10 B-. ET003222373 English 4/2018. Rev 0.0... -
Page 61: Figure 3-47: Reattach Battery Module #9'S Front Cover
Assembling the Product 20. Reattach Battery Module #9’s front cover and remove Battery Module #11’s front cover. Figure 3-47: Reattach Battery Module #9’s Front Cover Figure 3-48: Remove Battery Module #11’s Front Cover ET003222373 English 4/2018. Rev 0.0... -
Page 62: Figure 3-49: Connect Battery Module #10 B+ And Battery Module #11 B
Assembling the Product 21. Connect Battery Module #10 B+ and Battery Module #11 B- using ―BUS-BAR MAIN.‖ Connect using an M8 screw. Figure 3-49: Connect Battery Module #10 B+ and Battery Module #11 B-. ET003222373 English 4/2018. Rev 0.0... -
Page 63: Figure 3-50: Reattach Battery Module #10'S Front Cover
Assembling the Product 22. Reattach Battery Module #10’s front cover and remove Module #12’s front cover. Figure 3-50: Reattach Battery Module #10’s Front Cover Figure 3-51: Remove Battery Module #12’s Front Cover ET003222373 English 4/2018. Rev 0.0... -
Page 64: Figure 3-52: Connect Battery Module #11 B+ And Battery Module #12 B
Assembling the Product 23. Connect Battery Module #11 B+ and Battery Module #12 B- using ―BUS-BAR MAIN.‖ Connect using an M8 screw. Figure 3-52: Connect Battery Module #11 B+ and Battery Module #12 B-. ET003222373 English 4/2018. Rev 0.0... -
Page 65: Figure 3-53: Assemble Module #11'S Front Cover
Assembling the Product 24. Reattach Battery Module #11’s front cover and remove Battery Module #13’s front cover. Figure 3-53: Assemble Module #11’s Front Cover Figure 3-54: Remove Module #13’s Front Cover ET003222373 English 4/2018. Rev 0.0... -
Page 66: Figure 3-55: Connect Battery Module #12B+ And Battery Module #13 B
Assembling the Product 25. Connect Battery Module #12 B+ and Battery Module #13 B- using ―BUS-BAR MAIN.‖ Connect using an M8 screw. Figure 3-55: Connect Battery Module #12B+ and Battery Module #13 B-. ET003222373 English 4/2018. Rev 0.0... -
Page 67: Figure 3-56: Assemble Module #12'S Front Cover
Assembling the Product 26. Reattach Battery Module #12’s front cover and remove Battery Module #14’s front cover. Figure 3-56: Assemble Module #12’s Front Cover Figure 3-57: Remove Battery Module #14’s Front Cover ET003222373 English 4/2018. Rev 0.0... -
Page 68: Figure 3-58: Connect Battery Module #13 B+ And Battery Module #14 B
Assembling the Product 27. Connect Battery Module #13 B+ and Battery Module #14 B- using ―BUS-BAR MAIN.‖ Connect using an M8 screw. Figure 3-58: Connect Battery Module #13 B+ and Battery Module #14 B-. ET003222373 English 4/2018. Rev 0.0... -
Page 69: Figure 3-59: Reattach Battery Module #13'S Front Cover
Assembling the Product 28. Reattach Battery Module #13’s front cover and remove Battery Module #15’s front cover. Figure 3-59: Reattach Battery Module #13’s Front Cover Figure 3-60: Remove Battery Module #15’s Front Cover ET003222373 English 4/2018. Rev 0.0... -
Page 70: Figure 3-61: Connect Battery Module #14 B+ And Battery Module #15 B
Assembling the Product 29. Connect Battery Module #14 B+ and Battery Module #15 B- using ―BUS-BAR MAIN.‖ Connect using an M8 screw. Figure 3-61: Connect Battery Module #14 B+ and Battery Module #15 B-. ET003222373 English 4/2018. Rev 0.0... -
Page 71: Figure 3-62: Assemble Battery Module #14'S Front Cover
Assembling the Product 30. Reattach Battery Module #14’s front cover and remove Battery Module #16’s front cover. Figure 3-62: Assemble Battery Module #14’s Front Cover Figure 3-63: Remove Battery Module #16’s Front Cover ET003222373 English 4/2018. Rev 0.0... -
Page 72: Figure 3-64: Connect Battery Module #15 B+ And Battery Module #16 B
Assembling the Product 31. Connect Battery Module #15 B+ and Battery Module #16 B- using ―BUS-BAR MAIN.‖ Connect using an M8 screw. Figure 3-64: Connect Battery Module #15 B+ and Battery Module #16 B-. ET003222373 English 4/2018. Rev 0.0... -
Page 73: Figure 3-65: Reattach Battery Module #15'S Front Cover
Assembling the Product 32. Reattach Battery Module #15’s front cover and remove Battery Module #17’s front cover. Figure 3-65: Reattach Battery Module #15’s Front Cover Figure 3-66: Remove Battery Module #17’s Front Cover ET003222373 English 4/2018. Rev 0.0... -
Page 74: Figure 3-67: Connect Battery Module #15 B+ And Battery Module #16 B
Assembling the Product 33. Connect Battery Module #16 B+ and Battery Module #17 B- using ―BUS-BAR MAIN‖. Connect using M8 screw. Figure 3-67: Connect Battery Module #15 B+ and Battery Module #16 B-. ET003222373 English 4/2018. Rev 0.0... -
Page 75: Figure 3-68: Reattach Battery Module #15'S Front Cover
Assembling the Product 34. Reattach Battery Module #16’s front cover and remove Switchgear’s B+ terminal cover. Figure 3-68: Reattach Battery Module #15’s Front Cover Figure 3-69: Remove Switchgear B+ Terminal Cover ET003222373 English 4/2018. Rev 0.0... -
Page 76: Figure 3-70: Connect Switchgear B+ And Module #17 B
Assembling the Product 35. Connect Switchgear B+ and Battery Module #17 B+ using ―BUSBAR_BUSBAR M TO SG.‖ Switchgear B+ terminal is connected using an M12 screw and Module #17 B+ terminal is connected using an M8 screw. Figure 3-70: Connect Switchgear B+ and Module #17 B+. 36. -
Page 77: Module And Switchgear Signal Cable Connection
Assembling the Product 3.9.4 Module and Switchgear Signal Cable Connection Connect the signal cables for Switchgear and Module BMS’s for each module. NOTICE Use the proper signal cables as specified by the part numbers below. WARNING Rack BMS / Module BMS Damage Do not insert both ends of the signal cable WIRE ASSY MODULE TO MODULE #1 or WIRE ASSY MODULE TO MODULE #2 into the same Battery Module. -
Page 78: Figure 3-73: Opening For Cable Installation
Assembling the Product Figure 3-73: Opening for Cable Installation Connect the signal cable ―WIRE ASSY MODULE TO MODULE #1" from Module #1 ―IN‖ to Module #2 ―OUT.‖ Figure 3-74: Module #1 to Module #2 Signal Cabling ET003222373 English 4/2018. Rev 0.0... -
Page 79: Figure 3-75: Module #2 To Module #3 Signal Cabling
Assembling the Product Connect the signal cable ―WIRE ASSY MODULE TO MODULE #1" from Module #2 ―IN‖ to Module #3 ―OUT.‖ Figure 3-75: Module #2 to Module #3 Signal Cabling Connect the signal cable ―WIRE ASSY MODULE TO MODULE #1" from Module #3 ―IN‖ to Module #4 ―OUT.‖... -
Page 80: Figure 3-77: Module #4 To Module #5 Signal Cabling
Assembling the Product Connect the signal cable ―WIRE ASSY MODULE TO MODULE #1" from Module #4 ―IN‖ to Module #5 ―OUT.‖ Figure 3-77: Module #4 to Module #5 Signal Cabling Connect the signal cable ―WIRE ASSY MODULE TO MODULE #1" from Module #5 ―IN‖ to Module #6―OUT‖. -
Page 81: Figure 3-79: Module #6 To Module #7 Signal Cabling
Assembling the Product Connect the signal cable ―WIRE ASSY MODULE TO MODULE #1" from Module #6 ―IN‖ to Module #7 ―OUT.‖ Figure 3-79: Module #6 to Module #7 Signal Cabling Signal cables connecting Module #7 to #8, #8 to #9 and #9 to #10 will be installed in 3.9.8 Rack Fuse and Additional Module Signal Cable Connection. -
Page 82: Figure 3-81: Module #11 To Module #12 Signal Cabling
Assembling the Product Connect the signal cable ―WIRE ASSY MODULE TO MODULE #1" from Module #11 ―IN‖ to Module #12 ―OUT.‖ Figure 3-81: Module #11 to Module #12 Signal Cabling Connect the signal cable ―WIRE ASSY MODULE TO MODULE #1" from Module #12 ―IN‖ to Module #13 ―OUT.‖... -
Page 83: Figure 3-83: Module #13 To Module #14 Signal Cabling
Assembling the Product Connect the signal cable ―WIRE ASSY MODULE TO MODULE #1" from Module #13 ―IN‖ to Module #14 ―OUT.‖ Figure 3-83: Module #13 to Module #14 Signal Cabling Connect the signal cable ―WIRE ASSY MODULE TO MODULE #1" from Module #14 ―IN‖ to Module #15 ―OUT.‖... -
Page 84: Figure 3-85: Module #15 To Module #16 Signal Cabling
Assembling the Product Connect the signal cable ―WIRE ASSY MODULE TO MODULE #1" from Module #15 ―IN‖ to Module #16 ―OUT.‖ Figure 3-85: Module #15 to Module #16 Signal Cabling Connect the signal cable ―WIRE ASSY MODULE TO MODULE #1" from Module #16 ―IN‖ to Module #17 ―OUT‖. - Page 85 Assembling the Product Connect the signal cable ―WIRE ASSY MODULE TO MODULE #1" from Module #15 ―IN‖ to Module #16 ―OUT.‖ Figure 3-87: Module #15 to Module #16 Signal Cabling ET003222373 English 4/2018. Rev 0.0...
- Page 86 Assembling the Product NOTICE See the examples for correct signal cable wire connections for both left and right rack alignments. 16. For a multiple rack system, connect the signal cables ―WIRE ASSY RACK TO RACK #2‖ between each rack’s Switchgear. Push the pre-punched hole to pass the cable through a circular hole in the side of the rack frame and through the opening above Module #1 and Module #16.
- Page 87 Assembling the Product Figure 3-89: Signal Cabling Examples of Left Alignment of Switchgear Figure 3-90: Openings for Cable 20. Turn the termination resistor switch on for the last Switchgear in the CANbus loop. Figure 3-91: Termination Resistor Setting for Last Switchgear ET003222373 English 4/2018.
- Page 88 Assembling the Product NOTICE Factory-provided cables are adequate for systems with Rack Frames bolted together. Different configurations may require cable modification. ET003222373 English 4/2018. Rev 0.0...
-
Page 89: Smps Assembly And Switchgear Power Cable Connection
Assembling the Product 3.9.5 SMPS Assembly and Switchgear Power Cable Connection Connect the Switchgear DC power cables. Figure 3-92: DC Power Cables from SMPS Assembly Type A to Switchgear Figure 3-93: DC Power Cables from SMPS Assembly Type B to Switchgear ET003222373 English 4/2018. -
Page 90: Smps Assembly And Switchgear Signal Cable Connection
Assembling the Product 3.9.6 SMPS Assembly and Switchgear Signal Cable Connection The following steps are only for an SMPS Assembly Type A. 37. Connect the signal cable from the SMPS Assembly to Switchgear ―WIRE ASSY RACK TO SYSTEM.‖ Figure 3-94: CAN Signal Cable Connection from SMPS Assembly to Switchgear 2. - Page 91 Assembling the Product 3. Connect the SMPS Assembly Dry Contact Cable. Figure 3-96: Dry Contact Cable Connection to SMPS Assembly 4. Connect the Switchgear MCCB Cable. Figure 3-97: MCCB Extra Auxiliary Connection ET003222373 English 4/2018. Rev 0.0...
-
Page 92: Smps Assembly Ac Input Connection
Assembling the Product 3.9.7 SMPS Assembly AC Input Connection 1. Remove the protective covers from the AC input terminals. Figure 3-98: AC Input Terminals 2. Connect each AC input in the SMPS Assembly. Make sure the AC cables are not energized. Figure 3-99: AC Input Terminals with Cables Attached AC Cables are not factory-provided. - Page 93 Assembling the Product 3. Reattach the protective covers to the AC input. Figure 3-100: AC Input Terminals Protective Covers ET003222373 English 4/2018. Rev 0.0...
-
Page 94: Rack Fuse And Additional Module Signal Cable Connection
Assembling the Product 3.9.8 Rack Fuse and Additional Module Signal Cable Connection NOTICE The rack fuse cover must be installed over the fuse to prevent the exposure of live electrical parts. 4. Remove the front covers from Battery Modules #8 and #9. Figure 3-101: Remove Front Covers from Battery Modules #8 and #9 ET003222373 English 4/2018. - Page 95 Assembling the Product 5. Assemble the Rack fuse Bus-bar assembly. Rack fuse bus-bar assembly is comprised of one ―RACKFUSE BUSBAR_R_136S‖, one ―RACKFUSE BUSBAR_L_136S‖, two ―SCREW M12 X 16‖ and one ―FUSE‖ NOTICE Rack Fuse Busbar Assembly is assembled at the installation location. M12 X 16L screws are used to assemble the busbars and fuse.
- Page 96 Assembling the Product 6. Assemble Rack Fuse Cover ―FUSE COVER.‖ Figure 3-103: Rack Fuse Cover Figure 3-104: Rack Fuse Cover (Fully Assembled; Front View) ET003222373 English 4/2018. Rev 0.0...
- Page 97 Assembling the Product 7. Reattach the front covers to Battery Modules #8 and #9. Figure 3-105: Reattach Front Covers to Battery Modules #8 and #9 8. Connect the signal cable ―WIRE ASSY MODULE TO MODULE #1" from Battery Module #7 ―IN‖ to Battery Module #8 ―OUT.‖...
- Page 98 Assembling the Product 9. Connect the signal cable ―WIRE ASSY MODULE TO MODULE #2" from Battery Module #8 ―IN‖ to Battery Module #9 ―OUT.‖ Figure 3-107: Battery Module #8 to Battery Module #9 Signal Cabling (WIRE ASSY MODULE TO MODULE #2) 10.
-
Page 99: Dc Link Cable Connection
Assembling the Product 3.9.9 DC Link Cable Connection 1. Connect the ground cables. 45 mm (1.75 in) Pitch between Holes Figure 3-109: Grounding Points (2 EA) Ground connections are provided on the bottom and on the top of the rack. Either may be used for grounding. NOTICE Connect the rack ground wire with an M12 x 30 mm screw. - Page 100 Assembling the Product 2. Connect the DC link high-voltage cables from the UPS. CAUTION Verify with a voltmeter that no power is present on the system. Disconnect all input power supplies. Use lock out/tag out procedures to secure the UPS and battery system before beginning this step.
-
Page 101: Ac Input Commissioning
Assembling the Product Screw fastening torque by sampling High-voltage cable connection Module connections Switchgear connections 3.9.10 AC Input Commissioning When the installation and assembly of the battery system is complete, notify the system supplier for system commissioning. Special tools and training are required for commissioning. CAUTION Do not energize the input or control power prior to commissioning. -
Page 102: Table 4-1: Control Power Range Of Operation
Performance 4. Performance 4.1 Operating Conditions For operating conditions, consult your supplier. 4.2 Control Power Requirements The control power table is based on nominal operating conditions. For other operating conditions consult your supplier. Control power must be continuously maintained for the ESS to remain on-line. Loss of control power will result in the automatic isolation of the ESS from the UPS. - Page 103 Memo...
- Page 104 Memo...
- Page 105 Memo...
- Page 106 www.SamsungSDI.com...