
Related Manuals for Yamaha YP-D6


Summary of Contents for Yamaha YP-D6
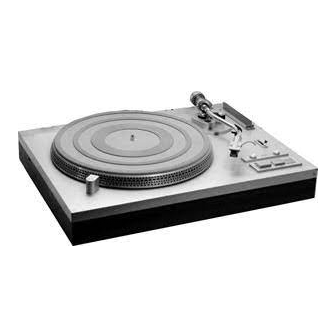
- Page 2 OWNER’S GUIDE direct drive turntable...
-
Page 3: Table Of Contents
Direct Drive 12-Pole 24-slot DC Servomotor The Names and Functions of the Parts ........... 4 Low Wow and Flutter (0.035% wrms) Cautions - Read This Before Operating Your YP-D6 ......5 Auto Return and Auto Cut Features Designed for Assembly and Adjustments ............6 Optimum Operating Convenience Connections to Your Amplifier or Receiver ........ -
Page 5: The Names And Functions Of The Parts
YP-D6 features special bearings and unusually high sensitivity in both horizontal and vertical directions, effect, giving steady, even rotation. In the YP-D6 the central shaft is integral with the motor, for top performance with all types of cartridges. which rotates at the actual speed of the the turntable... -
Page 6: Cautions - Read This Before Operating Your Yp-D6
This manual is required reading if you dirt with chemical solvents (such as alcohol or rear of the YP-D6, it must be set for your local are to get the best from it. benzene). Wipe only with a clean, completely mains voltage BEFORE plugging in the AC dry cloth. - Page 7 Further rotation clockwise direc- tion will draw forward smppthly, coun- ter-clockwise rotation draws backwards. 3. Push the ring counterweight onto the long coun- terweight and secure it with the hexagonal key half- way along the long counterweight. Fitting the Headshell and Cartridge 1.
-
Page 8: Assembly And Adjustments
THE ACRYLIC DUST COVER The completely detachable acrylic dust cover is wrapped separately in the original packing from the Yamaha factory, and should be attached as shown in the diagram. Align the studs on both hinges with the grooves, and slip them first (1) and then along (2). - Page 9 ADJUSTING THE STYLUS TRACKING FORCE Some cartridges have detachable stylus guards, and others have hinged protection. The cartridge shoud be in the same state it would be for actu- al record audition, with the stylus fully exposed. Take care not to “snag” the stylus while it is un- protected.
- Page 10 ADJUSTING THE INSIDE-FORCE CANCELER This adjustment is very simple in the YP-D6: note the maker’s recommended stylus tracking force, which should agree with the reading on the counterweight dial, and set the same number on the dial of the inside-force canceler at the side of the tonearm bearing assembly.
-
Page 11: Connections To Your Amplifier Or Receiver
1.Plug the right- and left-hand channel leads from 7. Depress the PLAY/CUT push-button. The the back of the YP-D6, clearly identified by record will start to rotate, the tonearm both letters and colors, L (white, left) and R... -
Page 12: Changing Cartridge Stylus
USE OF THE CUEING LEVER CARTRIDGE STYLUS REPLACEMENT This lever, located immediately above the 33 A worn stylus can cause permanent damage to SPEED CONTROL knob, is convenient when rais- precious records long before the sound quality ing and lowering the tonearm and cartridges for has seriously deteriorated. -
Page 13: Specifications
SP E C IFIC ATIONS... -
Page 14: Trouble Shooting
TR O UBLE S H OOTING...