Samsung SF-650 User Manual
Sf-650 fax machine
Hide thumbs
Also See for SF-650:
- Manual del usuario (88 pages) ,
- User manual (83 pages) ,
- Quick reference manual (4 pages)

Related Manuals for Samsung SF-650


Summary of Contents for Samsung SF-650
- Page 2 This user’s guide is provided for information purposes only. All information included herein is subject to change without notice. Samsung Electronics is not responsible for any direct or indirect damages, arising from or related to use of this user’s guide.
-
Page 3: Table Of Contents
Contentds ABOUT THIS USER’S GUIDE Convention ............15 Finding more information . -
Page 4: Contentds
COPYING Basic copy ............31 Changing the settings for each copy . - Page 5 Handling instructions ..........51 Use of non-Samsung and refilled toner cartridge ..... . . 51 Estimated cartridge life .
-
Page 6: Safety Information
Safety information These warnings and precautions are included in order to prevent injury to you and others, as well as preventing any potential damage to your machine. Be sure to read and understand all of these instructions before using the machine. Use common sense for operating any electrical appliance and whenever using your machine. - Page 7 If the machine gets overheated, it releases smoke, makes strange noises, or generates an odd odor, immediately turn off the power switch and unplug the machine. ► This could result in electric shock or fire. Caution During an electrical storm or for a period of non-operation, remove the power plug from the electrical outlet.
- Page 8 Installation / Moving Warning Do not place the machine in an area with dust, humidity or water leaks. ► This could result in electric shock or fire. Caution When moving the machine, turn the power off and disconnect all cords; then lift the machine with at least two people.
- Page 9 ► This could result in electric shock or fire. Do not remove any covers or guards that are fastened with screws. ► The machine should only be repaired by Samsung service technician. Supply usage Caution Do not disassemble the toner cartridge.
-
Page 10: Regulatory Information
However, it is advisable that the machine be operated in a well ventilated area. If you need additional information about ozone, request your nearest Samsung dealer. PERCHLORATE WARNING This Perchlorate warning applies only to primary CR (Manganese Dioxide) Lithium coin cells in the product sold or distributed ONLY in California USA. - Page 11 Recycling Recycle or dispose of the packaging material for this product in an environmentally responsible manner. China only Correct Disposal of This Product (Waste Electrical & Electronic Equipment) (Applicable in the European Union and other European countries with separate collection systems) This marking on the product, accessories or literature indicates that the product and its electronic accessories (e.g.
-
Page 12: Radio Frequency Emissions
Radio Frequency Emissions FCC Information to the User This device complies with Part 15 of the FCC Rules. Operation is subject to the following two conditions: • This device may not cause harmful interference, and • This device must accept any interference received, including interference that may cause undesired operation. -
Page 13: Ringer Equivalence Number
The Telephone Company may make changes in its communications facilities, equipment operations or procedures where such action is reasonably required in the operation of its business and is not inconsistent with the rules and regulations in FCC Part 68. If such changes can be reasonably expected to render any customer terminal equipment incompatible with telephone company communications facilities, or require modification or alteration of such terminal equipment, or otherwise materially affect its use or performance, the customer shall be given adequate notice in writing, to allow the customer an opportunity to maintain... -
Page 14: Approvals And Certifications
(PSTN) in accordance with Directive 1999/5/EC. The product has been designed to work with the national PSTNs and compatible PBXs of the European countries: In the event of problems, you should contact the Euro QA Lab of Samsung Electronics Co., Ltd. in the first instance. - Page 15 China only Regulatory information_ 14...
-
Page 16: About This User's Guide
A bout this user’s guide This user’s guide provides information about basic understanding of the machine as well as detailed explanation on each step during actual usage. Valuable for both novice and professional users can refer to this as a guide for installing and using the machine. •... -
Page 17: Finding More Information
This guide provides information on setting up your machine and this requires that you follow Quick Install Guide the instructions in the guide to prepare the machine. If you have Internet access, you can get help, support, manuals, and order information from Samsung website the Samsung website, www.samsung.con/printer. DESCRIPTION About this user’s guide_ 16... -
Page 18: Features Of Your New Product
Features of your new product Your new machine is equipped with a number of special features that improve the quality of the documents you print. Special Features Print with excellent quality and speed • You can print with a resolution of up to 600 x 600 dpi. •... -
Page 19: Introduction
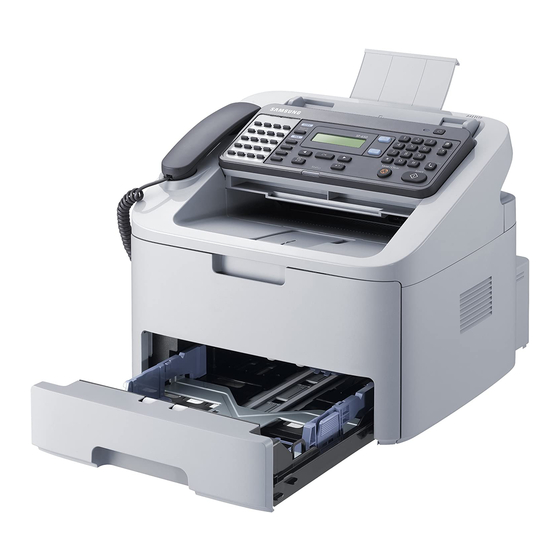
I ntroduction This chapter gives you an overview of your machine: This chapter includes: • Machine overview • Control panel overview • Understanding the Status LED • Introducing the useful button • Turning on the machine Machine overview Front view Document feeder Document width guides Control panel... -
Page 20: Rear View
Rear view Extension telephone socket (EXT) Telephone line socket Power receptacle Rear door Rear door handle Introduction_ 19... -
Page 21: Control Panel Overview
Control panel overview Stores frequently-dialed fax number (See "Storing a number for One-touch Dialing" on one-touch dial page 39). Makes a copy smaller or larger than the original. Reduce/Enlarge Allows you to send a fax at a later time when you will not be present (See "Delaying a Delay Send fax transmission"... -
Page 22: Understanding The Status Led
ISO/IEC 19752. The number of pages may be affected by operating environment, printing interval, media type, and media size. Some amount of toner may remain in the cartridge even when End of life Replace new cart appears and the printer stops printing (See www.samsung.com/printer for current information). -
Page 23: Basic Setup
B asic setup You may want to set the machine’s default settings. Refer to the next section if you would like to set or change values. This chapter gives you step-by-step instructions for setting up the machine. This chapter includes: •... -
Page 24: Changing The Display Language
8. Turn the machine on. This equipment will be inoperable when mains power fails. Changing the display language To change the language that appears on the display, follow the steps below: 1. Press Menu until Machine Setup appears. 2. Press the left/right arrow until Language appears and press OK. 3. -
Page 25: Entering Characters Using The Number Keypad
1. Press (Fax) on the control panel. 2. Press On Hook Dial. A dial tone sounds from the speaker. 3. Press the left/right arrow until you hear the volume you want. 4. Press On Hook Dial to save the change and return to ready mode. To adjust the volume using the handset: 1. -
Page 26: Using The Save Modes
Using the save modes Using toner saving feature Toner save mode allows your machine to use less toner on each page. Activating this mode extends the life of the toner cartridge beyond what one would experience in the normal mode, but it reduces print quality. 1. -
Page 27: Media And Tray
M edia and tray This chapter provides information on how to load originals and print media into your machine. This chapter includes: • Preparing originals • Loading originals • Selecting print media • Changing the tray size • Loading paper in the tray •... -
Page 28: Selecting Print Media
3. Load the original face down into the document feeder. Make sure that the bottom of the original stack matches the paper size marked on the document input tray. 4. Adjust the document width guides to the paper size. Selecting print media Always use print media that meet the guidelines for use with your machine. -
Page 29: Media Sizes Supported In Each Mode
The amount of paper put into the tray may differ according to media type used (See "Print media specifications" on page 71). Media sizes supported in each mode MODE Letter, A4, Legal, Folio, Executive, JIS B5, Copy mode Letter, A4, Legal Fax mode Changing the tray size The tray is preset to Letter or A4 size, depending on your country. -
Page 30: Loading Paper In The Tray
4. Squeeze the paper width guides and slide them to the desired paper size marked at the bottom of the tray. • Do not push the paper width guide too far causing the media to warp. • If you do not adjust the paper width guide, it may cause paper jams. •... -
Page 31: Letterhead/ Preprinted Paper
Letterhead/ Preprinted paper SINGLE-SIDED Tray1 Face down • Letterhead/ Preprinted paper must be printed with heat-resistant ink that will not melt, vaporize, or release hazardous emissions when subjected to the machine’s fusing temperature for 0.1 second. Check your machine’s specification to view the fusing temperature (about 170°C (338 °F)). -
Page 32: Basic Copy
C opying This chapter gives you step-by-step instructions for copying documents. This chapter includes: • Basic copy • Changing the settings for each copy • Changing the default copy settings • Setting copy timeout Basic copy This is the normal and usual procedure for copying your originals. 1. -
Page 33: Changing The Default Copy Settings
5. Press the left/right arrow until the size setting you want appears and press OK. 6. Press Stop/Clear to return to ready mode. To scale the copy by directly entering the scale rate: 1. Press (Copy) on the control panel. 2. -
Page 34: Faxing
F axing This chapter gives you information about using your machine as a fax machine. This chapter includes: • Preparing to fax • Sending a fax • Receiving a fax • Adjusting the document settings • Forwarding a fax to other destination •... -
Page 35: Sending A Fax Manually
5. Press Start on the control panel. The machine starts to scan and send a fax to destinations. When you want to cancel a fax job, press Stop/Clear before the machine start transmission. Sending a fax manually This method is sending a fax using On Hook Dial on the control panel. 1. -
Page 36: Sending A Priority Fax
You can press speed dial numbers or select group dial number using Address book button. For details, see "Setting up address book" on page 39. 6. The display asks you to enter another fax number to send the document. 7. To enter more fax numbers, press OK when Yes appears and repeat steps 5. You can add up to 10 destinations. Once you entered a group dial number, you cannot enter another group dial numbers anymore. -
Page 37: Receiving A Fax
Receiving a fax This part explains how to receive a fax, and the special receiving methods available. Changing the receive modes Your machine is preset to Fax mode at the factory. When you receive a fax, the machine answers the call on a specified number of rings and automatically receives the fax. -
Page 38: Receiving Faxes Using Drpd Mode
Receiving faxes using DRPD mode Distinctive Ring is a telephone company service which enables an user to use a single telephone line to answer several different telephone numbers. The particular number someone uses to call you is identified by different ringing patterns, which consist of various combinations of long and short ringing sounds. -
Page 39: Adjusting The Document Settings
Adjusting the document settings Before starting a fax, change the following settings according to your original’s status to get the best quality. Resolution The default document settings procedure good results when using typical text-based originals. However, if you send originals that are of poor quality, or contain photographs, you can adjust the resolution to produce a higher quality fax. 1. -
Page 40: Setting Up Address Book
7. Enter the ending time using left/right arrow or numeric keypad and press OK. 8. Press Stop/Clear to return to ready mode. Subsequent received faxes will be forwarded to the specified fax machine. Setting up address book You can set up Address Book with the fax numbers you use most frequently. Your machine provides you with the following features for setting up Address Book: Before beginning to store fax numbers, make sure that your machine is in Fax mode. -
Page 41: Group Dial Numbers
Group dial numbers If you frequently send the same document to several destinations, you can group these destinations and set them under a group dial number. You can then use a group dial number to send a document to all of the destinations within the group. You can set up to 250 (0 through 249) group dial numbers using the destination’s existing speed dial numbers. -
Page 42: Printing Sent Fax Report Automatically
1. Press (Fax) on the control panel. 2. Press Address Book on the control panel. 3. Press the left/right arrow until Print appears and press OK. The machine begins printing. Printing sent fax report automatically You can set the machine to print a report with detailed information about the previous 50 communication operations, including time and dates. -
Page 43: Machine Status And Advanced Feature
M achine status and advanced feature This chapter explains how to browse the current status of your machine, and the method of setting for the advanced machine setup. Read this chapter carefully in order to use your machine's diverse features. This chapter includes: •... -
Page 44: Using The Advanced Fax Settings
OPTION When receiving a fax containing pages as long as or longer than the paper in your Discard Size machine, you can set the machine to discard a specific length from the end of the received fax. The machine will print the received fax on one or more sheets of paper, minus the data that would have been on the specified discard segment. -
Page 45: Copy Setup
OPTION This mode helps with poor line quality and makes sure any faxes you send are sent ECM Mode smoothly to any other ECM-equipped fax machine. Sending a fax using ECM may take more time. Copy setup Changing the copy setup options For copy output, you can set up several options in advance. - Page 46 3. Press the left/right arrow until the item you want to clear appears and press OK. 4. Press OK when Yes appears to confirm clearing. 5. Repeat steps 3 through 4 to clear another item. 6. Press Stop/Clear to return to ready mode. Some menus may not appear in the display depending on options or models.
-
Page 47: Menu Overview
Menu overview The control panel provides access to various menus to set up the machine or use the machine’s functions. These menus can be accessed by pressing Menu. Some menus may not appear in the display depending on options or models. If so, it is not applicable to your machine. - Page 48 ITEMS Machine Setup Machine ID Date & Time Clock Mode Dial Mode Language Toner Save Power Save Clear Toner Maintenance Clean Drum Notify Toner Clear Memory Clear All Mem. Paper setting Copy Setup Fax Setup Fax Feature Advanced Fax Sound/Volume Machine Setup Sent Report RCV Report...
-
Page 49: Maintenance
M aintenance This chapter provides information for maintaining your machine and the toner cartridge. This chapter includes: • Cleaning a machine • Storing the Toner cartridge • Tips for moving & storing your machine Cleaning a machine If printing quality problems occur or if you use your machine in a dusty environment, you need to clean your machine regularly to keep the best printing condition and use your machine longer. -
Page 50: Cleaning The Scan Unit
3. With a dry, lint-free cloth, wipe away any dust and spilled toner from the toner cartridge area. While cleaning the inside of the machine, be careful not to damage the transfer roller or any other inside parts. Do not use solvents such as benzene or thinner to clean. Printing quality problems can occur and cause damage to the machine. - Page 51 The right end of the white roller has a plastic bush that is snapped shut with small tab on it. Pull the tab inward slightly then lift the tab until the roller is released. Lift the roller upwards and to the right, releasing the left end of the roller, then rotate the bushing until it reach a slot.
-
Page 52: Cleaning The Drum
Samsung Electronics does not recommend or approve the use of non-Samsung brand toner cartridges in your printer including generic, store brand, refilled, or remanufactured toner cartridges. Samsung’s printer warranty does not cover damage to the machine caused by the use of a refilled, remanufactured, or non-Samsung brand toner cartridge. -
Page 53: Tips For Moving & Storing Your Machine
Tips for moving & storing your machine • When moving the machine, do not tilt or turn it upside down. Otherwise, the inside of the machine may be contaminated by toner, which can cause damage to the machine or bad print quality. Maintenance_ 52... -
Page 54: Troubleshooting
Troubleshooting This chapter gives helpful information for what to do if you encounter an error. This chapter includes: • Redistributing toner • Clearing original document jams • Tips for avoiding paper curls • Tips for avoiding paper jams • Clearing paper jams •... -
Page 55: Clearing Original Document Jams
correct position until it locks into place completely. 5. Close the front door. Ensure that the cover is securely closed. Clearing original document jams When an original jams while passing through the document feeder, a warning message appears on the display screen. To avoid tearing the document, remove the jammed document slowly and gently. -
Page 56: Exit Misfeed
Exit Misfeed 1. Remove any remaining pages from the document feeder. 2. Open the control panel by gripping it on the bottom edge and pulling it. 3. Pull the document gently out of the document feeder. 4. Close the control panel. Then load the documents back into the document feeder. Tips for avoiding paper curls 1. -
Page 57: Tips For Avoiding Paper Jams
Tips for avoiding paper jams By selecting the correct media types, most paper jams can be avoided. When a paper jam occurs, refer to the next guidelines. • Ensure that the adjustable guides are positioned correctly (See "Loading paper in the tray" on page 29). •... -
Page 58: Inside The Machine
Inside the machine Click this link to open an animation about clearing a jam. The fuser area is hot. Take care when removing paper from the machine. 1. Open the front door and pull the toner cartridge out, lightly pushing it down. 2. - Page 59 2. Gently pull the paper out of the output tray. If you do not see the jammed paper or if there is any resistance when you pull, stop and go to the next step. 3. Open the rear door. 4. Pull the pressure levers down and remove the paper. If you do not see the jammed paper, go to next step.
-
Page 60: Understanding Display Messages
(See "Setting up address book" on page 39). Load paper in the paper tray (See "Loading paper in the tray" on page 29). Install the corresponding toner cartridge with a Samsung-genuine cartridge (See "Replacing the toner cartridge" on page 68). Troubleshooting_ 59 SUGGESTED SOLUTIONS... - Page 61 You may temporarily increase the printing quality by redistributing the toner (See "Redistributing toner" on page 53). Troubleshooting_ 60 SUGGESTED SOLUTIONS Samsung does not recommend using non-genuine Samsung toner cartridge such as refilled or remanufactured. Samsung cannot guarantee non-genuine Samsung toner cartridge's quality.
-
Page 62: Solving Other Problems
Solving other problems The following chart lists some conditions that may occur and the recommended solutions. Follow the suggested solutions until the problem is corrected. If the problem persists, call for service. Paper feeding problems CONDITION Clear the paper jam (See "Clearing paper jams" on page 56). Paper jams during printing. - Page 63 CONDITION • If a vertical white streak or faded area appears on the page, the toner supply is low. You Light or faded print may be able to temporarily extend the toner cartridge life (See "Redistributing toner" on page 53). If this does not improve the print quality, install a new toner cartridge. •...
- Page 64 CONDITION If the amount of background shading becomes unacceptable: Black background • Change to a lighter weight paper (See "Print media specifications" on page 71). • Check the environmental conditions: very dry conditions or a high level of humidity (higher than 80% RH) can increase the amount of background shading.
- Page 65 CONDITION • Ensure that the paper is loaded properly. Page skew • Check the paper type and quality (See "Print media specifications" on page 71). • Ensure that the guides are not too tight or too loose against the paper stack. •...
-
Page 66: Copying Problems
CONDITION • Clean the inside of the machine (See "Cleaning the inside" on page 48). Loose toner • Check the paper type and quality (See "Print media specifications" on page 71). • Remove the toner cartridge and then, install a new one (See "Replacing the toner cartridge"... -
Page 67: Fax Problems
CONDITION • Frequent copy paper jams occur. • • • Toner cartridge produces fewer copies than • expected before running out of toner. Fax problems CONDITION • The machine is not • working, there is no display, or the buttons are not working. -
Page 68: Supplies And Accessories
Samsung does not recommend using non-genuine Samsung toner cartridge such as refilled or remanufactured. Samsung cannot guarantee non-genuine Samsung toner cartridge's quality. Service or repair required as a result of using non-genuine Samsung toner cartridges will not be covered under the machine warranty. -
Page 69: Replacing The Toner Cartridge
PARTS Document feeder rubber pad White roller Fuser unit Pickup roller Cassette pad unit a. It will be affected by media type, media size and job complexity. To purchase maintenance parts, contact the source where you bought the machine. Replacing maintenance parts can be performed only by an authorized service provider, dealer, or the retailer where you bought the machine. - Page 70 5. Locate the sealing tape at the end of the toner cartridge. Carefully pull the tape completely out of the cartridge and discard it. • The sealing tape should be longer than 60 cm when correctly removed. • Holding the toner cartridge, pull the sealing tape straight to remove it from the cartridge. Be careful not to cut the tape.
-
Page 71: Specifications
This chapter include: • Hardware specifications • Environmental specifications • Electrical specifications • Print media specifications The specification values here are based on preliminary data. See www.samsung.com/printer for current information. Hardware specifications ITEM Height Dimension Depth Width Machine with consumables... -
Page 72: Print Media Specifications
Print media specifications TYPE SIZE Letter Plain paper Legal US Folio Oficio JIS B5 ISO B5 Executive Refer to the Thick paper Plain paper section Refer to the Thin paper Plain paper section Minimum size (custom) Maximum size (custom) a. If media weight is over 120 g/m (32 lb), load a paper into the tray one by one. - Page 73 Contact SAMSUNG worldwide If you have any comments or questions regarding Samsung products, contact the Samsung customer care center. COUNTRY/REGION 0800-333-3733 ARGENTINE 1300 362 603 AUSTRALIA 0810-SAMSUNG (7267864, € 0.07/min) AUSTRIA 02 201 2418 BELGIUM 0800-124-421 BRAZIL 4004-0000 1-800-SAMSUNG (726-7864)
- Page 74 COUNTRY/REGION 02 261 03 710 LUXEMBURG 1800-88-9999 MALAYSIA 01-800-SAMSUNG (726-7864) MEXICO 0900-SAMSUNG (0900-7267864) (€ 0,10/min) NETHERLANDS 0800 SAMSUNG (0800 726 786) NEW ZEALAND 00-1800-5077267 NICARAGUA 3-SAMSUNG (7267864) NORWAY 800-7267 PANAMA 1800-10-SAMSUNG (726-7864) PHILIPPINES 1-800-3-SAMSUNG (726-7864) 02-5805777 0 801 1SAMSUNG (172678)
-
Page 75: Control Panel
Glossary The following glossary helps you get familiar with the product by understanding the terminologies commonly used with printing as well as mentioned in this user’s guide. 802.11 802.11 is a set of standards for wireless local area network (WLAN) communication, developed by the IEEE LAN/MAN Standards Committee (IEEE 802). - Page 76 Comma Separated Values (CSV). A type of file format, CSV is used to exchange data between disparate applications. The file format, as it is used in Microsoft Excel, has become a pseudo standard throughout the industry, even among non-Microsoft platforms. DADF A Duplex Automatic Document Feeder (DADF) is a mechanism that will automatically feed and flip over an original sheet of paper so that the machine can scan on both sides of the paper.
-
Page 77: Fuser Unit
Ethernet Ethernet is a frame-based computer networking technology for local area networks (LANs). It defines wiring and signaling for the physical layer, and frame formats and protocols for the media access control (MAC)/data link layer of the OSI model. Ethernet is mostly standardized as IEEE 802.3. It has become the most widespread LAN technology in use during the 1990s to the present. - Page 78 The Images Per Minute (IPM) is a way of measuring the speed of a printer. An IPM rate indicates the number of single-sided sheets a printer can complete within one minute. The Internet Printing Protocol (IPP) defines a standard protocol for printing as well as managing print jobs, media size, resolution, and so forth.
-
Page 79: Printer Driver
Modified Modified READ (MMR) is a compression method recommended by ITU-T T.6. Modem A device that modulates a carrier signal to encode digital information, and also demodulates such a carrier signal to decode transmitted information. Modified Read (MR) is a compression method recommended by ITU-T T.4. MR encodes the first scanned line using MH. -
Page 80: Subnet Mask
PRN file An interface for a device driver, this allows software to interact with the device driver using standard input/output system calls, which simplifies many tasks. Protocol A convention or standard that controls or enables the connection, communication, and data transfer between two computing endpoints. -
Page 81: Toner Cartridge
Toner Cartridge A kind of bottle within a machine like printer which contains toner. Toner is a powder used in laser printers and photocopiers, which forms the text and images on the printed paper. Toner can be melted by the heat of the fuser, causing it to bind to the fibers in the paper. - Page 82 Index adjusting tray size answering machine/fax authentication printing a report cleaning inside outside cleaning a machine control panel convention copy setup copy timeout setting copying adjusting darkness basic copying changing the copy setup reducing or enlarging copies selecting the size of originals date setting default settings setting a fax header...
- Page 83 Index_ 82...