Table of Contents
Table of Contents

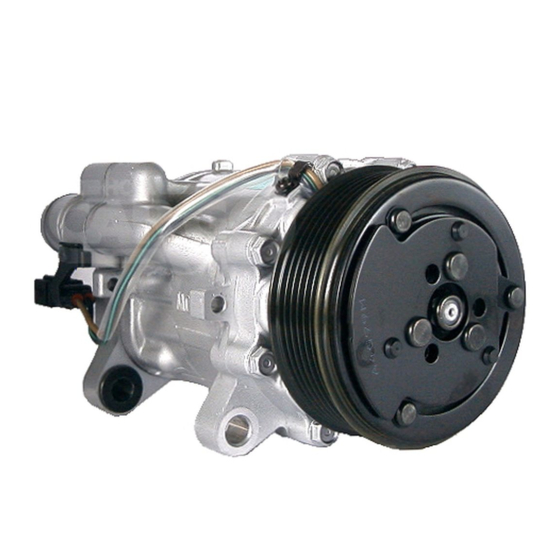
Related Manuals for Sanden SD-505

Summary of Contents for Sanden SD-505
- Page 1 SD Compressor Service Manual...
-
Page 2: Table Of Contents
10.7 Valve Plate Test ** Service Oil Information This service manual has been prepared by Sanden International (USA), Inc. It Includes information on application, troubleshooting, and repair of automotive air conditioning compressors manufactured by Sanden Corporation and its subsidiaries, in accordance with the appropriate SAE standards for mobile air conditioning. -
Page 3: Compressor Models Covered
Compressor Models 1. Model Conversions TYPE R-12 R134a 5 Cylinder SD-505 SD7B10 / SD5H09 SD-507 SD5H11 SD-508 SD5H14 SD-510 SD7H15HD and SD5H14HD 7 Cylinder SDB-706 SD7B10 SD-708 SD7H13 SD-709 SD7H15 SDB-709 SD7B15 COMPRESSOR NOMENCLATURE 2. Identification R-12 Compressors ... -
Page 4: Cautionary Information
Do not introduce compressed air into an A/C system due to the danger of contamination. 3.6 Warranty for Recycled Refrigerant The warranty offered by Sanden International (U.S.A.), Inc., on air conditioning compressors when used with recycled refrigerant will be the same as for new refrigerant provided that the following SAE standards... -
Page 5: Table Of Saturation Temperatures And Pressures
3. Never mix R134a with other refrigerants or A/C systems failure is likely to occur. 4. Use only Sanden specified PAG lubricants for R134a systems using Sanden compressors. If other lubricants are used, A/C system failure is likely to occur. -
Page 6: Compressor Identification
COMPRESSOR IDENTIFICATION 5.1 Label 5.2 Manufacturing Date Codes Stamped on Compressor - Manufactured in USA Only... -
Page 7: Compressor Specifications
COMPRESSOR SPECIFICATIONS 6.1 Belt Tension Grooves Tension, lb (kgf) 121 ± 5 (55 ± 2) 132 ± 5 (60 ± 2) 132 ± 5 (60 ± 2) 132 ± 5 (60 ± 2) 132 ± 5 (60 ± 2) 198 ± 5 (90 ± 2) (PolyVee tension based on 33 lb (15kgf) per groove). -
Page 8: Assembly Torques
6.4 Assembly Torques Item ft -lb kgf-cm Armature retaining nut, 1/2" - 20 22.4 ± 2.9 30.4 ± 3.9 310 ± 40 Armature retaining nut, M8 13.0 ± 2.2 17.7 ± 2.9 180 ± 30 Cylinder head bolts, M6 10 ± 2.2 13.7 ±... -
Page 9: Cylinder Head / Porting Guide
Pad-M10 x 1.25 Bolt Pad-M10 x 1.25 Bolt A) Sanden R134a compressors do not offer the option of charging valves on the compressor. B) * Indicates that a compressor featuring this cylinder head should not be mounted with the suction port... -
Page 10: Special Service Tools
SERVICE TOOLS 8.1 Special Service Tools These tools can be obtained from your local tool supplier. 1. Oil Dipstick 5. Lip Seal / SD7 Seal Plate Tool 9. Rotor Installation Driver 2. Armature Plate Spanner 6. Armature Driver 10. O-Ring Hook 3. -
Page 11: Service Procedures
SERVICE PROCEDURES 9. TROUBLESHOOTING CHART This chart refers specially to the Sanden compressor. During diagnosis follow the inspection procedures in the sequence shown until a defect is found. Then perform the repair in the Cause and Remedy Section. If this repair does not fully solve the problem, proceed to the next inspection step. -
Page 12: Inspection Procedures
Leak check procedures should be in accordance with SAE J1628. 4. Leak Detection Dyes - The use of leak detection dyes is not recommended by Sanden as their chemical compositions are proprietary and their effects on Sanden oils and elastomers are unknown at this time. - Page 13 10.2 (Cont.) 4. Remove the oil filler plug. Using a socket wrench on the armature retaining nut, turn the shaft clockwise until the counterweight is positioned as shown. 5. Insert oil dipstick up to the stop, as shown in the figure above, with the angle pointing in the correct direction.
-
Page 14: Shaft Turning Smoothness Inspection
10.3 Shaft Turning Smoothness Inspection 1. If on vehicle, remove refrigerant from A/C system and disconnect hoses. 2. If on bench, uncap fittings. 3. Using a socket wrench on the armature retaining nut, turn the shaft clockwise only. 4. If severe rough spots or catches are felt while turning shaft, the compressor has been damaged internally and must be replaced. -
Page 15: Unusual Noise Due To Compressor
10.6 Unusual Noises Due to Compressor 1. Suction pressure less than about 5 psig can cause unusual noise. Charge refrigerant to proper amount and test by applying heat to evaporator to increase suction pressure. 2. Clutch bearing--See clutch Inspection in section 10.4 3. -
Page 16: Compressor Parts
11.2 Clutch 20A. Armature Dust Cover Screw (SD-5) 23. Armature Plate* 27. Rotor Assembly* 20B. Armature Dust Cover Screw (SD-7) 24. Clutch Shims* 28. Field Coil Assembly Snap Ring* 21A. Armature Dust Cover (SD-5) 25. Rotor Snap Ring* 29. Field Coil Assembly 21B. -
Page 17: Oil Charging
Service Operations - Oil Charging 13.1 Compressor Repaired Internally and Reinstalled in the System 1. Before any internal repair is done, drain the oil from the compressor. • Remove the oil plug and drain as much oil as possible into a suitable container. •... - Page 18 This section applies to replacement of another manufacturer's compressor or to the replacement of a Sanden compressor by a different model Sanden compressor. In this case, the procedure of Section 13.2 should be followed, except that the oil quantity must be confirmed after installation of the new compressor to the...
-
Page 19: Oil Charge Determination For Long Hose Application
13.4 Oil Charge Determination for Long Hose Applications 13.4.1 TXV Systems, Less than 56 oz. (1600g) Refrigerant Charge 1. The desired oil charge for the systems with unusually long hoses, such as trucks, tractors, etc., can be determined based on the total refrigerant charge when less than 56 oz. (1600g) refrigerant is used. - Page 20 13.4.2 (Cont.) 8. Drain oil from the suction and discharge ports into a suitable container while turning the shaft clockwise only with a socket wrench on the armature retaining nut. 9. Measure and record the volume of the oil drained from the compressor.
-
Page 21: Oil Retained In System Components
13.5 Oil Retained in System Components Typical oil amount Component fl. oz. For reference, the amount of oil typically retained in other Evaporator system components after running at 100 rpm compressor speed is shown at right. These volumes will of course vary Condenser with different designs of the components and compressor Receiver - Drier... -
Page 22: Armature Assembly Removal
14.1b Spline Shaft Armature Removal (Note: Spline shaft can be identified in that the holes for the armature plate spanner will not have threads in them.) 1. If armature dust cover is present, remove the 3 or 6 bolts holding it in place and remove cover. -
Page 23: Rotor Assembly Removal
14.2 Rotor Assembly Removal 1. If bearing dust cover has not been removed, remove it now. See step 6 of Section 14.1, for Armature Assembly Removal. 2. If internal snap ring for bearing is visible above the bearing, remove it with internal snap ring pliers. 3. -
Page 24: Rotor Assembly Installation
14.5 Rotor Assembly Installation 1. Place compressor on support stand, supported at rear end of compressor. If the compressor must be clamped in a vise, clamp only on the mounting ears, never on the body of the compressor. 2. Set rotor squarely over the front housing boss. 3. - Page 25 14.6 (Cont.) 3. Align keyway in armature assembly to shaft key. Using driver and a hammer or arbor press, drive the armature assembly down over the shaft until it bottoms on the shims. A distinct sound change will be noted if driving with a hammer.
- Page 26 SERVICE OPERATIONS - SHAFT SEAL 15. Replacement of Lip Type Shaft Seal (SD5H14, SD7B10, SD7H13, SD7H15) Note: Lip seal assembly and felt ring must never be reused. Always replace these components. 1. Be sure all gas pressure inside the compressor has been relieved. 2.
- Page 27 15. (Cont.) 5. Use lip seal removal and installation tool to remove lip seal assembly. Twist the tool until the 2 lips on the tool engage the slots in the lip seal housing and pull the seal out with a twisting motion. 6.
-
Page 28: Cylinder Head Removal
SERVICE OPERATIONS - CYLINDER HEAD / VALVE PLATE 16.1 Cylinder Head Removal 1. Be sure all internal compressor pressure has been relieved. 2. Inspect cylinder head for fitting or thread damage. Replace if damaged 3. Remove cylinder head bolts. 4. Use a small hammer and gasket scraper to separate the cylinder head from the valve plate. -
Page 29: Valve Plate Removal
16.2 Valve Plate Removal 1. Using a small hammer and gasket scraper, carefully separate valve plate from cylinder block. Be careful not to damage sealing surface of cylinder block. 2. Inspect reed valves and retainer. Replace valve plate assembly if any part is damaged. -
Page 30: Tps Testing
SERVICE OPERATIONS - HIGH PRESSURE RELIEF VALVE 18. HPRV Replacement Some models of Sanden compressors are fitted with a high pressure relief valve (HPRV) to protect against damage from abnormally high discharge pressures. 1. Note: When replacing a failed HPRV with a new one, be sure to identify whether the A/C system is for R-12 or R134a. -
Page 31: Converting R-12 Systems To R134A
R-12. However Sanden recognizes the realities of the automotive service markets and consumer preferences. If a retrofit is required, please follow the vehicle manufacturer's published retrofit procedures. Ensure all work done complies with SAE recommended practices as described in J1660 &J1661: •... - Page 32 22. Replace all R-12 compressor labels with retrofit labels per SAE J1660 in order to provide information on the R134a retrofit which has been performed. Retrofit PAG oil amount fluid ounces (cc) Model Expansion valve systems Orifice tube systems SD-505 3.4±0.5 (100±15) No Standard SD-507 5.5±0.5 (165±15) No Standard SD-508 7.2±0.5 (210±15)
- Page 33 Cans are packed in "six-packs" and available through your Sanden representative. Material safety data is also available. Sanden limits the warranty of SD compressors for field service with the condition that only Sanden-approved SP-20 is utilized. "Six-Pack" of 250 cc cans of SP-20 oil -Sanden Number 7803-1997.