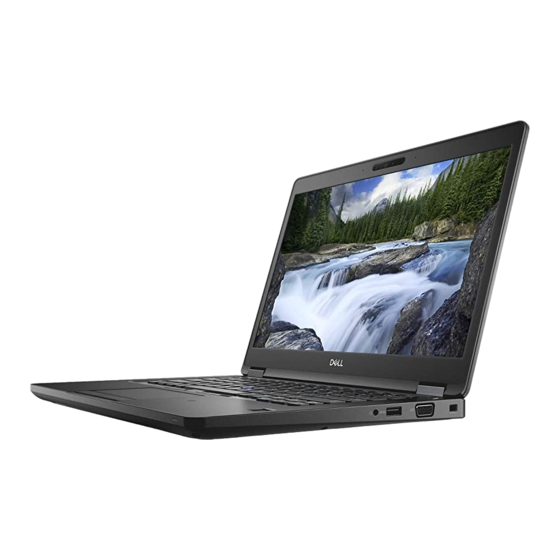
Dell Latitude 5491 Service Manual
Hide thumbs
Also See for Latitude 5491:
- Service manual (65 pages) ,
- Setup and specifications manual (37 pages) ,
- Setup and specifications (20 pages)
Table of Contents
Quick Links
Table of Contents

Related Manuals for Dell Latitude 5491


Summary of Contents for Dell Latitude 5491
-
Page 1: Service Manual
Latitude 5491 Service Manual Regulatory Model: P72G Regulatory Type: P72G002... - Page 2 A WARNING indicates a potential for property damage, personal injury, or death. © 2018 Dell Inc. or its subsidiaries. All rights reserved. Dell, EMC, and other trademarks are trademarks of Dell Inc. or its subsidiaries. Other trademarks may be trademarks of their respective owners.
-
Page 3: Table Of Contents
Contents 1 Working on your computer..........................6 Safety instructions................................6 Turning off your computer — Windows 10........................6 Before working inside your computer..........................6 After working inside your computer..........................7 2 Technology and components..........................8 Power adapter..................................8 DDR4....................................8 DDR4 Details.................................8 Memory Errors................................9 HDMI 1.4.................................... - Page 4 Installing the SSD frame............................20 Hard drive..................................20 Removing hard drive..............................20 Installing hard drive ..............................22 Coin-cell battery................................22 Removing the coin cell battery..........................22 Installing coin cell battery............................23 WLAN card..................................23 Removing WLAN card............................... 23 Installing WLAN card..............................24 WWAN card – optional..............................24 Removing the WWAN card............................24 Installing the WWAN card............................25 Memory modules................................
- Page 5 Installing the display back cover assembly ......................60 Palm rest................................... 60 Removing palm rest..............................60 Installing palm rest..............................61 4 Troubleshooting............................63 Enhanced Pre-Boot System Assessment — ePSA diagnostics................63 Running the ePSA Diagnostics..........................63 Real Time Clock reset..............................63 5 Getting help..............................65 Contacting Dell.................................65 Contents...
-
Page 6: Working On Your Computer
Damage due to servicing that is not authorized by Dell is not covered by your warranty. Read and follow the safety instructions that came with the product. -
Page 7: After Working Inside Your Computer
After you complete any replacement procedure, ensure that you connect any external devices, cards, and cables before turning on your computer. CAUTION: To avoid damage to the computer, use only the battery designed for this particular Dell computer. Do not use batteries designed for other Dell computers. Replace the battery. -
Page 8: Technology And Components
Technology and components This chapter details the technology and components available in the system. Topics: • Power adapter • DDR4 • HDMI 1.4 • USB features • USB Type-C Power adapter This laptop is shipped with 7.4mm barrel plug on 90 W or 130 W power adapter. WARNING: When you disconnect the power adapter cable from the laptop, grasp the connector, not the cable itself, and then pull firmly but gently to avoid damaging the cable. -
Page 9: Memory Errors
Figure 1. Notch difference Increased thickness DDR4 modules are slightly thicker than DDR3, to accommodate more signal layers. Figure 2. Thickness difference Curved edge DDR4 modules feature a curved edge to help with insertion and alleviate stress on the PCB during memory installation. Figure 3. -
Page 10: Hdmi 1.4 Features
HDMI 1.4 Features • HDMI Ethernet Channel - Adds high-speed networking to an HDMI link, allowing users to take full advantage of their IP-enabled devices without a separate Ethernet cable • Audio Return Channel - Allows an HDMI-connected TV with a built-in tuner to send audio data "upstream" to a surround audio system, eliminating the need for a separate audio cable •... -
Page 11: Speed
• Increased maximum bus power and increased device current draw to better accommodate power-hungry devices • New power management features • Full-duplex data transfers and support for new transfer types • Backward USB 2.0 compatibility • New connectors and cable The topics below cover some of the most commonly asked questions regarding USB 3.0/USB 3.1 Gen 1. -
Page 12: Compatibility
that with 5-10 times the bandwidth available, USB video solutions should work that much better. Single-link DVI requires almost 2Gbps throughput. Where 480Mbps was limiting, 5Gbps is more than promising. With its promised 4.8Gbps speed, the standard will find its way into some products that previously weren't USB territory, like external RAID storage systems. -
Page 13: Usb Power Delivery
USB Power Delivery The USB PD specification is also closely intertwined with USB Type-C. Currently, smartphones, tablets, and other mobile devices often use a USB connection to charge. A USB 2.0 connection provides up to 2.5 watts of power — that'll charge your phone, but that's about it. A laptop might require up to 60 watts, for example. -
Page 14: Disassembly And Reassembly
Disassembly and reassembly Subscriber Identity Module(SIM) board Removing the Subscriber Identification Module card CAUTION: Removing the SIM card when the computer is on may cause data loss or damage the card. Ensure your computer is turned off or the network connections are disabled. Insert a paperclip or a SIM card removal tool into the pinhole on the SIM card tray [1]. -
Page 15: Sd Card - Optional
SD card – optional SD card is an optional component. You will see a SD card only in systems shipped with a WWAN card. Removing the SD card – WWAN models Follow the procedure Before working inside your computer Push the SD card so that the SD card pops out from its slot [1], and then remove it from the system [2]. Installing the SD card –... - Page 16 Loosen the 8 (M2.0x6) captive screws that secure the base cover to the system [1]. b Pry the base cover from the recess at the top edge [2] and continue prying throughout the outer sides of the base cover in clockwise direction to release the base cover.
-
Page 17: Installing The Base Cover
Installing the base cover Place the base cover to align with the screw holders on the system and press the sides of the base cover. Tighten the 8 (M2.0x6) captive screws to secure the base cover to the system. Follow the procedure in After working inside your computer. -
Page 18: Installing The Battery
Installing the battery Insert the battery into the slot on the system. Route the battery cable through the routing channel. Tighten the M2x6 captive screw to secure the battery to the system. Connect the battery cable to the connector on the system board. Install the base cover. -
Page 19: Installing The Ssd Card
NOTE: This applies only to the SATA M.2 2280 version of the SSD Installing the SSD card Insert the SSD card into the connector on the system. Replace the M2x3 screw that secures the SSD card to the system. Place the Mylar shield over the SSD. Install the : battery base cover... -
Page 20: Installing The Ssd Frame
To remove the SSD frame: Remove the M2x3 screw that secures the SSD frame to the system [1]. b Lift the SSD frame from the system [2]. Installing the SSD frame Place the SSD frame into the slot in the system. Replace the M2x3 screw that secures the SSD frame to the system. - Page 21 Disconnect the hard drive cable from the connector on the system board [1]. b Remove the four (M2 x 2.7) screws that secure the hard drive to the system [2]. Lift the hard drive from the system. Disassembly and reassembly...
-
Page 22: Installing Hard Drive
Installing hard drive Insert the hard drive into the slot on the system. Replace the four (M2 x 2.7) screws to secure the hard drive to the system. Connect the hard drive cable to the connector on the system board. Install the : battery base cover... -
Page 23: Installing Coin Cell Battery
Installing coin cell battery Affix the coin cell battery on the system board. Connect the coin cell battery cable to the connector on the system board. Install the : battery base cover Follow the procedure in After working inside your computer. -
Page 24: Installing Wlan Card
Installing WLAN card Insert the WLAN card into the connector on the system board. Connect the WLAN antenna cables to the connectors on the WLAN card. Place the WLAN card bracket to secure the WLAN cables. Replace the M2x3 screw to secure the WLAN card to the system. Install the : battery base cover... -
Page 25: Installing The Wwan Card
Disconnect the WWAN antenna cables from the connectors on the WWAN card [1]. b Remove the M2x3 screw that secures the WWAN card to the system [2] Slide and lift the WWAN card from the system [3]. Installing the WWAN card Insert the WWAN card into the slot on the system. -
Page 26: Installing The Memory Module
Pry the clips securing the memory module until the memory module pops-up [1]. b Lift the memory module from the connector [2]. Installing the memory module Insert the memory module into the memory connector at a 30 degree angle until the contacts are fully seated into the slot. Then, press the module until the clips secure the memory module. -
Page 27: Installing Keyboard Lattice
Installing keyboard lattice Place the keyboard lattice on the keyboard and press along the edges and in between the rows of keys until the lattice clicks in place. Follow the procedure in After working inside your computer. Removing the keyboard Follow the procedure in Before working inside your computer. - Page 28 Turn over the system and open the laptop in front view mode. d Remove the five (M2x2.5) screws that secure the keyboard to the system [1]. Flip the keyboard from the bottom and lift it from the system along with the keyboard cable and the keyboard back light cable [2].
- Page 29 Disassembly and reassembly...
-
Page 30: Installing The Keyboard
Installing the keyboard Hold the keyboard and route the keyboard cable and the keyboard backlight cables through the palmrest in the system. Align the keyboard with the screw holders on the system. Replace the screws to secure the keyboard to the system. Turn the system over and connect the keyboard cable and the keyboard backlight cable to the connector in the system. -
Page 31: Installing The Heat Sink
Installing the heat sink Place the heat sink on the system board. Replace the four (M2x3) screws that secure the heat sink on the system board. NOTE: • Replace the heat sink screws in sequential order as indicated on the heat-sink. Install the : battery base cover... -
Page 32: Installing The System Fan
chassis frame To remove the system fan: Disconnect the system fan cable from the connector on the system board [1]. b Lift the system fan away from the computer [2]. Installing the system fan Place the system fan into the slot on the computer. Connect the system fan cable to the connector on the system board. -
Page 33: Power Connector Port
Power connector port Removing the power connector port Follow the procedure in Before working inside your computer. Remove the : base cover battery To remove the power connector port: Remove the M2x3 screw that secures the adhesive tape of the display cable to the power connector bracket [1], and peel off the adhesive tape. -
Page 34: Chassis Frame
Affix the adhesive tape of the display cable to the power connector bracket and replace the M2x3 screw to secure another end of the power connector bracket. Install the : battery base cover Follow the procedure in After working inside your computer. -
Page 35: Installing The Chassis Frame
To remove the chassis frame: Remove the five (M2x3) screws and eight (M2x5) screws that secure the chassis frame to the system [1]. b Lift the chassis frame from the system [2]. Installing the chassis frame Place the chassis frame into the slot on the system. NOTE: Gently pull the keyboard cable and keyboard back light cables through the spacing in the chassis frame before placing the chassis frame in the slot on the system. -
Page 36: Led Board
LED board Removing LED board Follow the procedure in Before working inside your computer. Remove the . base cover battery hard drive SSD card SSD frame WLAN card WWAN card (optional) chassis frame To remove the LED board: Lift the latch and remove the LED cable connected to the connector on the LED board [1] b Remove the (M2.0x2.0) screw that secures the LED board to the system [2]. -
Page 37: Installing Led Board
Installing LED board Place the LED board in its slot on the system. Replace the M2.0x2.0 screw to secure the LED board to the system. Connect the LED cable to its connector on the LED board. Install the: chassis frame WWAN card (optional) WLAN card SSD frame... - Page 38 To remove the smart card reader board: Remove the 2 (M2x3) screws that secure the smart card reader board to the palmrest [1]. b Slide and lift the smart card reader from the slot in the system [2]. Disassembly and reassembly...
-
Page 39: Installing Smart Card Reader Board
Installing smart card reader board Insert the smart card reader board to align with the tabs on the chassis. Replace the 2 (M2x3) screws to secure the smart card reader board to the system. Affix the smart card reader board cable and connect the cable to the connector. Install the: chassis frame WWAN card (optional) -
Page 40: Touchpad Panel
Touchpad panel Removing the touchpad Follow the procedure in Before working inside your computer. Remove the: base cover battery SSD card SSD frame WLAN card WWAN card chassis frame To remove the touchpad panel: Disconnect the touchpad panel cable from the connector on the system board [1]. b Remove the two M2x3 screws that secure the touchpad panel to the system. -
Page 41: System Board
Connect the touchpad panel cable to the connector on the system board. Install the: chassis frame SSD frame SSD card WWAN WLAN card battery base cover Follow the procedure in After working inside your computer. System board Removing system board Follow the procedure in Before working inside your computer. - Page 42 To release the system board: Flip over the system and remove the two M2x3 screw that secure the display cable bracket in place [1]. b Lift the metal display cable bracket from the system [2]. Disconnect the display cables from the connectors on the system board [3,4] and peel the adhesive tape securing the display cable to the system.
- Page 43 To remove the system board: NOTE: Ensure SIM card tray is removed Remove the four (M2x3) screws that secure the system board in place [1]. b Lift the system board away from the system [2]. Disassembly and reassembly...
-
Page 44: Installing System Board
Installing system board Align the system board with the screw holders on the computer. NOTE: Insert the cables through the openings in the keyboard area while placing the system board in the computer. Replace the four (M2x3) screws to secure the system board to the system. Place the metal bracket to secure the DisplayPort over USB Type-C. -
Page 45: Speaker
WLAN card SSD frame SSD card hard drive memory module battery base cover SIM card Follow the procedure in After working inside your computer. Speaker Removing the speaker Follow the procedure in Before working inside your computer. Remove the: base cover battery memory module hard drive... -
Page 46: Installing The Speaker
Installing the speaker Insert the speaker module aligning it with the nodes on the chassis. Route the speaker cable through the routing channels. Install the: system board chassis frame keyboard keyboard lattice WLAN card SSD frame SSD card hard drive memory module battery base cover... -
Page 47: Installing Display Hinge Cover
base cover battery To remove the display hinge cover: Remove the M2x3 screw that secures the display hinge cover to the chassis [1]. b Lift the display hinge cover away from the display hinge [2]. Repeat step a and step b to remove the other display hinge cover. Installing display hinge cover Place the display hinge cover on the display hinge. - Page 48 base cover battery WLAN card WWAN card (optional) display hinge cover To disconnect the display cable: Release the WLAN and WWAN cables from the routing channels [1]. b Remove the two (M2x3) screws that secure the display cable bracket in place [2]. Remove the display cable bracket that secures the display cable from the system [3].
- Page 49 Turn over the computer. To remove the display assembly: Remove the two M2x5 screws that secure the display assembly to the computer [1]. b Open the display [2]. Disassembly and reassembly...
- Page 50 Lift the display assembly from the computer. Disassembly and reassembly...
-
Page 51: Installing Display Assembly
Installing display assembly Place the chassis on a plane surface. Align the display assembly with the screw holders on the system and place it on the chassis. Close the display. Replace the two screws that secure the display assembly. Flip over the system and replace two screws to secure the display assembly to the system. Replace the single screw that secure the power connector bracket and the display cable to the system. -
Page 52: Display Bezel
Display bezel Removing display bezel Follow the procedure in Before working inside your computer. Remove the: base cover battery WLAN card WWAN card (optional) Display hinge cover display assembly To remove the display bezel: Pry the display bezel at the base of the display [1]. NOTE: When removing or reinstalling the display bezel from the display assembly, technicians should note that the display bezel is secured to the LCD panel with a strong adhesive and care must be taken to avoid damage to LCD. -
Page 53: Installing Display Bezel
Installing display bezel Place the display bezel on the display assembly. NOTE: Remove the protective covering on the adhesive on the LCD bezel before placing on the display assembly. Starting from a top corner, press on the display bezel and work around the entire bezel until it clicks on to the display assembly. Install the: display assembly display hinge cover... - Page 54 To remove the display panel: Peel the conductive tape [1]. b Remove the adhesive strip that secures the display cable [2]. Lift the latch and disconnect the display cable from the connector on the display panel [3] [4]. Disassembly and reassembly...
-
Page 55: Installing Display Panel
Installing display panel Connect the display cable to the connector and affix the adhesive strip. Affix the conductive tape to secure the display cable. Replace the display panel to align with the screw holders on the display assembly. Replace the four M2x3 screws to secure the display panel to the display back cover. Install the: display bezel display assembly... -
Page 56: Display (Edp) Cable
Display (eDP) cable Removing display cable Follow the procedure in Before working inside your computer. Remove the: base cover battery WLAN card WWAN card (optional) display hinge cover display assembly display bezel display panel Disconnect the camera cable from the connector on the camera module [1]. Peel the display cable to release it from adhesive and lift the display cable from the display back cover [2]. -
Page 57: Camera
WLAN card WWAN card (optional) battery base cover Follow the procedure in After working inside your computer. Camera Removing camera Follow the procedure in Before working inside your computer. Remove the: base cover battery WLAN card WWAN card (optional) display hinge cover display assembly display bezel display panel... -
Page 58: Installing Camera
Installing camera Insert the camera into the slot on the display back cover. Connect the camera cable to the connector on the camera module. Install the : display panel display bezel display assembly display hinge cover WLAN card WWAN card (optional) memory module battery base cover... -
Page 59: Installing Display Hinge
Installing display hinge Place the display hinge on the display assembly. Replace the 3 (M2.5x3) screws to secure the display hinge to the display assembly. Repeat step 1 and step 2 to install the other display hinge. Install the: display bezel display assembly display hinge cover WLAN card... -
Page 60: Installing The Display Back Cover Assembly
base cover battery WLAN card WWAN card (optional) display hinge cover display assembly display bezel display panel display hinge display cable camera The display back cover assembly is the remaining component, after removing all the components. Installing the display back cover assembly Place the display back cover assembly on a flat surface. -
Page 61: Installing Palm Rest
SIM card base cover battery memory module hard drive SSD card SSD frame WLAN card WWAN card (optional) keyboard lattice keyboard heat sink chassis frame system fan system board display hinge cover display assembly The palm rest is the remaining component after removing all the components. Installing palm rest Place the palm rest on a flat surface. - Page 62 heat sink assembly keyboard keyboard lattice WWAN card (optional) WLAN card SSD frame SSD card hard drive memory module battery base cover SIM card Follow the procedure in After working inside your computer. Disassembly and reassembly...
-
Page 63: Troubleshooting
Real Time Clock reset The Real Time Clock (RTC) reset function allows you to recover your Dell system from No POST/No Boot/No Power situations. To initiate the RTC reset on the system make sure system is in a power-off state and is connected to power source . Press and hold the power button for 25 seconds and then release the power button. - Page 64 NOTE: If AC power is disconnected from the system during the process or the power button is held longer than 40 seconds, the RTC reset process is aborted. The RTC reset will reset the BIOS to Defaults, un-provision Intel vPro and reset the system date and time. The following items are unaffected by the RTC reset: •...
-
Page 65: Getting Help
Dell product catalog. Dell provides several online and telephone-based support and service options. Availability varies by country and product, and some services may not be available in your area. To contact Dell for sales, technical support, or customer service issues: Go to Dell.com/support.