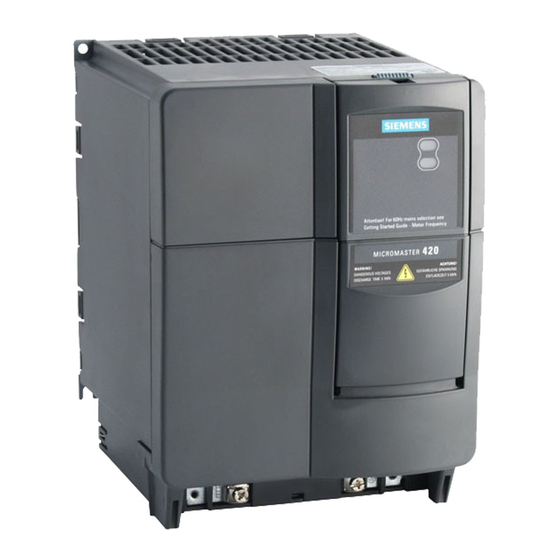
Siemens MICROMASTER 420 Operating Instructions Manual
Canopen option module
Hide thumbs
Also See for MICROMASTER 420:
- Operating instructions manual (190 pages) ,
- Operating instruction (130 pages) ,
- Reference manual (94 pages)

Related Manuals for Siemens MICROMASTER 420


Summary of Contents for Siemens MICROMASTER 420
- Page 1 MICROMASTER 420/430/440 CANopen Option Module Operating Instructions Issue 01/05 User Documentation 6SE6400-5BC00-0BP0...
-
Page 3: Data Transfer Using Canopen
Description General CAN/CANopen definitions Data transfer using CANopen MICROMASTER 420/430/440 Connecting to CANopen Option Module CANopen Commissioning with CANopen Commissioning using a commissioning (start-up) tool Diagnostics and troubleshooting Attachment Valid for Issue 01/05 Drive converter type MICROMASTER 420/430/440 Issue 01/05... - Page 4 © Siemens AG 2002, 2004. All rights reserved. checked and necessary corrections will be included in subsequent editions. We are grateful for any MICROMASTER ® is a registered trademark of Siemens AG. recommendations for improvement. Siemens Manuals are printed on chlorine-free paper from professionally managed forests.
- Page 5 Issue 01/05 Definitions and Warning Information Definitions and Warning Information Safety Guidelines This documentation contains notes which you should observe to ensure your own personal safety and also to prevent material damage. The information and instructions for your personal safety are identified by a warning triangle. Information and instructions on general material damage do not have a warning triangle.
-
Page 6: Intended Use
Definitionen und Warnhinweise Issue 01/05 Qualified personnel For the purpose of these Operating Instructions and on the product label, "qualified personnel" are those familiar with the installation, mounting, start-up and operation of the equipment and the hazards involved. He or she must have the following qualifications: Trained and authorized to energize, de-energize, clear, ground and tag circuits and equipment in accordance with established safety procedures. -
Page 7: Table Of Contents
Issue 01/05 List of contents List of contents Description ......................9 General CAN/CANopen definitions ..............11 CAN (Controller-Area-Network) ................11 CANopen ........................ 13 Data transfer using CANopen................17 MICROMASTER object directory ................17 CANopen communication services................. 31 3.2.1 NMT (Network Management) services ..............31 3.2.2 Communication monitoring services............... - Page 8 List of contents Issue 01/05 Commissioning using a commissioning (start-up) tool ......... 103 Assigning process data..................103 Parameter "P0927" – change source for parameters........... 106 Parameter settings for the modes................. 107 6.3.1 Velocity Mode ....................... 107 6.3.2 Profile Torque Mode ..................... 110 Diagnostics and troubleshooting..............
-
Page 9: Description
Issue 01/05 Description Description The CANopen communications module (CANopen option module) is used to connect MICROMASTER 420/430/440 drives to higher-level automation systems with a CAN-bus. DIP switch (OFF) only for internal use LED Inverter status see Operating Instructions for inverter... - Page 10 SYNC loss detection (using communication cycle time. • The CANopen option module offers an SDO->parameter channel with which all of the MICROMASTER 420/430/440 parameters can be read or written into. In this case, it does not involve CANopen objects, as the numbering of the sub- indices differs with respect to CAN-open (subindex 0 does not contain the number of objects, but already the first object).
-
Page 11: General Can/Canopen Definitions
Issue 01/05 General CANopen definitions General CAN/CANopen definitions CAN (Controller-Area-Network) Apart from its use in mobile systems, the Controller-Area-Network (CAN) protocol is also deployed in other applications when allied to additional specific and standardized higher protocol and profile specifications. Alongside its use as an internal bus in mobile systems, its other main applications are in internal communication between plant and machinery. - Page 12 General CANopen definitions Issue 01/05 Multi-Master capability Bus access rights are not issued by a meta-level control unit (bus master) per network. Each participant can rather start to send a message with equal rights as soon as the bus has become free. If several participants access the bus at the same time, an arbitration process allocates each participant the bus access right in line with the priority of the message they want to send at that particular moment.
-
Page 13: Canopen
Issue 01/05 General CANopen definitions CANopen CANopen is a standardized application for distributed industrial automation systems based on CAN as well as the CAL communication Standards. CANopen is a CAN Standard in automation (CiA), and just shortly after it became available, enjoyed widespread use. -
Page 14: General Information
MICROMASTER types, different CANopen modes from the DSP 402 profile (Drives and Motion Control). For MICROMASTER 420/430), only the Velocity Mode is available. The MICROMASTER 440 supports the Velocity Mode and Profile Torque Mode modes. When transferring net data via CANopen, a differentiation is made between process data (PDO) and parameter data (SDO). - Page 15 Issue 01/05 General CANopen definitions The COB IDs of the PDOs can be changed by changing the node address or by writing into the communication objects. If the COB ID is changed in a communications object, then this is only saved in the volatile memory. This means that if the MICROMASTER drive unit is isolated from the supply voltage, these settings are lost and, after run-up, must be re-set via the bus.
- Page 16 General CANopen definitions Issue 01/05 CANopen Option Module Operating Instructions 6SE6400-5BC00-0BP0...
-
Page 17: Data Transfer Using Canopen
Issue 01/05 Data transfer using CANopen Data transfer using CANopen MICROMASTER object directory All of the objects of the object directory are listed in the following table. The table contains the index and subindex of the object as well as a brief description of the functionality and the data type as well as the default value. - Page 18 Data transfer using CANopen Issue 01/05 O-Ind Object name Description Transf. D-type / Default value / comment using access Standard Error code of the error field previous error which occurred 1005H COB-ID Identifier of the SYNC U32 / COB_ID = 8000080H / SYNC telegram Changes can be permanently saved in the...
- Page 19 Object Number of No. of sub-indices U8 / ro 4 / entries Vendor-ID CiA assigns the U32 / 6000053H / manufacturer's Siemens A&D Drives (vendor) number Product code Drive U32 / converter/inverter Value from r0203 type Revision Revision number with...
- Page 20 Data transfer using CANopen Issue 01/05 O-Ind Object name Description Transf. D-type / Default value / comment using access COB-ID Identifier of the SDO U32 / 600H + node-ID / Client>Server task (CANopen The default node number is 3 master to MICROMASTER) COB-ID Identifier of the SDO...
- Page 21 Issue 01/05 Data transfer using CANopen O-Ind Object name Description Transf. D-type / Default value / comment using access Transmission Setting parameter of U8 / Type the data transfer type (value also corresponds to object 27F9*.01 bit Caution! After power-up, under certain circumstances, the value of this CAN parameter does not correspond to the value in the converter.
- Page 22 Data transfer using CANopen Issue 01/05 O-Ind Object name Description Transf. D-type / Default value / comment using access First mapped First mapped object. U32 / object Mapping can be changed via CANopen (can also be set using the low byte of parameter 27F9.04 H) Second Second mapped...
- Page 23 Issue 01/05 Data transfer using CANopen O-Ind Object name Description Transf. D-type / Default value / comment using access Transmission Setting parameter for U8 / Type the data transfer type (can also be set using the high byte of parameter 27F9.00 H) Caution! After power-up, under certain circumstances, the value of this CAN parameter does not correspond to the value in...
- Page 24 Data transfer using CANopen Issue 01/05 O-Ind Object name Description Transf. D-type / Default value / comment using access 1A00H Transmit Object to enter mapped objects into Mapping transmit PDO1 Parameters Number of No. of the mapped U8 / ro 1 / mapped objects Mapping cannot be changed...
- Page 25 Issue 01/05 Data transfer using CANopen O-Ind Object name Description Transf. D-type / Default value / comment using access Third mapped Third mapped object. U32 / 0H / object Mapping can be changed via CANopen (can also be set using the high byte of parameter 27F9.03 H) Fourth Fourth mapped...
- Page 26 Data transfer using CANopen Issue 01/05 O-Ind Object name Description Transf. D-type / Default value / comment using access Free Object Free object which can SDO/ I16 / into drive be used to send non- Values are directly written into P2050.5. (only defined process data MICROMAST...
- Page 27 Issue 01/05 Data transfer using CANopen O-Ind Object name Description Transf. D-type / Default value / comment using access 6040H Control word CANopen control SDO/ U16 / word This is converted and mapped to the MICROMASTER control word 1 (r0054) when being transferred to the MICROMASTER.
- Page 28 Data transfer using CANopen Issue 01/05 O-Ind Object name Description Transf. D-type / Default value / comment using access Vl_velocity_m Absolute value of the U32 / 1500 / ax_amount maximum velocity (P1082 . 60 / r0313) RPM / limiting Acts on P1082 (243AH*). When this object changes, this effects the gradient (rate-of-fall) of the down ramp.
- Page 29 6060H Modes_of_ Object to select the SDO/ I8 / wo 2 / MICROMASTER 420/430 only supports the operation operating mode. Velocity Mode. MICROMASTER 440 can support the Velocity Mode and the Profile Torque Mode. (It is possible to toggle, for MICROMASTER...
- Page 30 In order to use this object, several BICO connections must be set. Refer to Section 6.3.2. Object not available in MICROMASTER 420/430. Additional BICO connections must be established in order to use the object NOTE CANopen will always write to the active data set.
-
Page 31: Canopen Communication Services
Issue 01/05 Data transfer using CANopen CANopen communication services 3.2.1 NMT (Network Management) services The Network Management is structured according to nodes and follows a master- slave structure. NMT Master NMT Slave(s) Indication(s) Request Node-ID Indication COB-ID = 0 Indication Indication Fig. - Page 32 Reset_Communication instruction (CS = 130) With a Reset Node instruction, all objects of the node are reset to the state after power-up. For MICROMASTER 420/430/440, this function is only available with some restrictions. MICROMASTER only resets the objects from the communications profile (1000H - 1FFFH) as well as from the device profile (6000H - 9FFFH).
- Page 33 Issue 01/05 Data transfer using CANopen sent to object 1011H is available in CANopen to reset to the original Power On values (refer to Page 95 DS301 V4.02). For a Reset Communication instruction, all of the communication objects (1000H - 1FFFH) are reset to the state after power-up. The Reset Communication instruction can only be executed if the object changes were only saved in the RAM (P0014=0) and no "save"...
-
Page 34: Communication Monitoring Services
• Sync loss detection Node Guarding: MICROMASTER 420/430/440 supports Node Guarding and Life Guarding. With Node Guarding, the CANopen master sends, to each slave, an RTR telegram with the COB-ID 700H + node-ID. The slave responds, with the same COB-ID, with its communications state. - Page 35 Data transfer using CANopen Heartbeat: The MICROMASTER 420/430/440 also supports the Heartbeat protocol as Heartbeat Producer. With the Heartbeat protocol, a Heartbeat Producer cyclically sends its NMT state to the CAN bus. The message does not contain a Toggle bit.
-
Page 36: Boot Up Telegram
Data transfer using CANopen Issue 01/05 SYNC Producer COB-ID = 80H SYNC Consumer Indication Request SYNC SYNC Producer time Consumer time Request Indication SYNC Consumer time SYNC loss Event Fig. 3-5 SYNC monitoring protocol NOTE After powerup, Node Guarding and SYNC loss detection only become active after reception of the first Node-Guarding message and/or the first SYNC message. -
Page 37: Sdo (Service Data Object) Services
Downloading SDO protocol The download SDO protocol is used to write the values of the object directory into the drive. MICROMASTER 420/430/440 only supports the "expedited SDO download" for up to 4 bytes of data (e =1,s = 1). CLIENT SERVER 7 ... - Page 38 Dword data Index Subindex n = 2 (Word) If the MICROMASTER 420/430/440 cannot correctly process the task, it acknowledges the download SDO protocol with a response telegram according to the following table: Table 3-4 Significance of the bytes in the SDO download protocol (MICROMASTER to CANopen...
- Page 39 Abort SDO transfer protocol In this case, there are various abort codes. The abort codes, which occur in the MICROMASTER 420/430/440, are listed in the following table. Most of the faults occur due to communication errors between the CANopen option module and MICROMASTER.
- Page 40 Data transfer using CANopen Issue 01/05 Abort Name Abort Code Description SDO protocol time 05040000H MICROMASTER had not responded within xxxs to a parameter task of overflow the option module. The CANopen module cancels the request. Illegal access 06010001H This parameter can only be write accessed (write only) (parameter value cannot be read) Illegal access 06010002H...
- Page 41 Issue 01/05 Data transfer using CANopen You must proceed as follows to write into a MICROMASTER parameter via the SDO<->parameter channel: Firstly, the parameter number of the PKW object, specified as a decimal number, must be converted into a hexadecimal value. After this, 2000H must be added to the hexadecimal parameter value.
- Page 42 Data transfer using CANopen Issue 01/05 Using two examples, the following two sections show the read and write access operations using SDO on two PKW objects. Example 1: Reading parameter r0964.02 Parameter number (964) must be converted into a hexadecimal number in order to read the value of parameter r0964.02: 964dec = 3C4H.
- Page 43 Issue 01/05 Data transfer using CANopen Example 2: Writing into parameter P1203 In order to write the value 99 (decimal) into parameter P1203.00, the parameter number must first be converted into a hexadecimal number: 1203dec = 4B3H Then, 2000H must be added: 04B3H + 2000H = 24B3H The numerical sequence after the point in the specification of the PKW object (in this case: 0 in P1203.00) corresponds to the subindex number of the CANopen...
- Page 44 Data transfer using CANopen Issue 01/05 CANopen MICROMASTER response telegram Table 3-10 MICROMASTER response to the issued SDO write request Byte 0: Bytes 1,2 Byte 3 Bytes 4,5 Bytes 6,7 Bits 7-5 Bit 4-0 = 0 24B3H reserved = 0 SCS = 3 (index) (sub-index)
-
Page 45: Pdo (Process Data Object) Services
PDO to the PDO consumer. There can be 0 or more consumers in the network - but always only one Producer. This service is used for the normal process data transfer between MICROMASTER 420/430/440 and one of the other CANopen nodes (e.g. CANopen master). Regarding Receive PDOs, MICROMASTER is the consumer and regarding Transmit PDOs, is the Producer. - Page 46 Data transfer using CANopen Issue 01/05 Read PDO service The read PDO service is an acknowledged service. One or several PDO consumers send a Remote Transmission Request (RTR) message to the network. After it has received the RTR message, the PDO producer sends the requested PDO.
- Page 47 Issue 01/05 Data transfer using CANopen PDO data transfer types CANopen makes a differentiation between various data transfer types (trigger events for the PDOs). The various data transfer types for PDOs is shown in the following table: Table 3-11 PDO data transfer types Data transfer type PDO data transfer Cyclic...
- Page 48 Transmission Type. The data of an asynchronous PDO are always directly transferred to the application. For receive PDOs, the MICROMASTER 420/430/440 only makes a differentiation between synchronous and non-synchronous PDOs. The factor is not saved in the MICROMASTER.
-
Page 49: Synchronization Service
Issue 01/05 Data transfer using CANopen 3.2.6 Synchronization service A SYNC producer sends the synchronization object cyclically as broadcast telegram. The SYNC telegram defines the basic clock cycle of the network. The time between the SYNC telegrams is set using the object Communication Cycle Period (1006H). -
Page 50: Emergency Object Service
Data transfer using CANopen Issue 01/05 3.2.7 EMERGENCY object service The EMERGENCY object is used to transfer an error message to the CANopen master, or also to another node which can process the error message. The node fault which last occurred is indicated in the object 1003H Predefined Error Field. - Page 51 Using the object 1015H (Inhibit Time EMCY), it is possible to set a delay time for sending the EMCY message. MICROMASTER 420/430/440 sends an Emergency message if an fault has occurred in either the option module or in the inverter.
- Page 52 Data transfer using CANopen Issue 01/05 The following table indicates all CANopen error codes and the associated MICROMASTER faults. A precise description is provided in the MICROMASTER documentation. Table 3-14 Assignment of the CANopen error codes to MICROMASTER errors. Comment: Additional error numbers were introduced here that are not defined in CANopen in order to be able to more precisely specify the fault/error.
- Page 53 Issue 01/05 Data transfer using CANopen Error Fault Sub Fault Meaning Description Code number number (Bytes 1/2) (Bytes 3/4) (Bytes (Hex) Dec/Hex 5/6) 5530 Data storage/EEPROM F0051/0033H 0000 Parameter EEPROM fault 5531 Data storage/EEPROM F0052/0034H 0000 Powerstack fault (I2C read / invalid data) 5532 Data storage/EEPROM...
- Page 54 Data transfer using CANopen Issue 01/05 Error Fault Sub Fault Meaning Description Code number number (Bytes 1/2) (Bytes 3/4) (Bytes (Hex) Dec/Hex 5/6) 7332 FAN failure F0030/0029H 0000 FAN failure 7510 Communication/serial F0071/0047H 0000 USS/BOP link setpoint timeout interface No. 1 7520 Communication/serial F0072/0048H 0000...
-
Page 55: Controlling Micromaster Drive Converters Via Canopen
Issue 01/05 Data transfer using CANopen Controlling MICROMASTER drive converters via CANopen The state machine for drives - as is supported by MICROMASTER - is shown in the diagram below. The state machine defines the various stati of the drives and the possible transitions between them. -
Page 56: Canopen Control Word
Data transfer using CANopen Issue 01/05 3.3.1 CANopen control word The CANopen control word is used in order to execute the state transitions described in the previous Chapter. Parameter P0700 (object:0x22BC*) must be set to 6 in order to transfer the CANopen control word to the appropriate internal parameters. -
Page 57: Canopen Status Word
Issue 01/05 Data transfer using CANopen This means that it is not possible to stop the drive using the stop bit of the CANopen control word. Bits 4, 5 and 6 are specific to the operation mode and only exist in the velocity mode. The bit combinations which result in the various state machine transitions are shown in the following table. - Page 58 Data transfer using CANopen Issue 01/05 The assignment of the bits of the CANopen status word to the MICROMASTER status word are shown in the following table. Table 3-17 Assignment of CANopen status word bits to MICROMASTER status word bits CANopen Status Word Drive Status Word Ready to Switch ON...
- Page 59 Issue 01/05 Data transfer using CANopen The status messages of the CANopen status word are listed in the following table. Table 3-18 Status word bits in the various states State Bit 6 Bit 5 Bit 4 Bit 3 Bit 2 Bit1 Bit 0 Switch on...
-
Page 60: Micromaster Control And Status Word 2
Data transfer using CANopen Issue 01/05 3.3.3 MICROMASTER control and status word 2 In addition to the CANopen control and status word, for Micromaster, there are also the so-called control and status words 2. If so required, these can be used to enable additional Micromaster functions. - Page 61 1 = YES Fixed Frequency Bit 3 0 = NO P1023.0 = 2091.3 Act Curr. >= P2170 0 = NO (not MICROMASTER 420) 1 = YES 1 = YES Drive data set (DDS) Bit 0 0 = NO P0820.0 = 2091.4 Act Freq >...
-
Page 62: Modes Of Operation And Modes Of Operation Display
P1501 and r2091.12. In CANopen this means writing the value 282B00C into object 0x25DD*. MICROMASTER 420/430 only supports the Velocity Mode; MICROMASTER 440 additionally supports the Profile Torque Mode. The definition and the interpretation of the option module for this object is as follows:... - Page 63 Issue 01/05 Data transfer using CANopen If "modes-of-operation" is set to the value 4, then, bit 12 (Torque Control) is automatically SET from control word 2 - and a transition made into the Torque Control Mode. If the value of "modes-of-operation" is set to 2, bit 12 (Torque Control) is RESET and a change/transition made to closed-loop speed control (Velocity mode).
- Page 64 Data transfer using CANopen Issue 01/05 CANopen Option Module Operating Instructions 6SE6400-5BC00-0BP0...
-
Page 65: Connecting To Canopen
The drive converter/drive inverter must be powered-down (brought into a no- voltage condition) before installing or removing the CANopen communications module from a MICROMASTER 420/430/440. Installing the module Introduce the CANopen communications module at the lower end and engage the guide lugs in the unit and then move the top of the module towards the unit until it latches into place. - Page 66 Information for the CANopen master Issue 01/05 Fig. 4-1 Installing the communications module on MICROMASTER 4 Sizes A, B, C CANopen Option Module Operating Instructions 6SE6400-5BC00-0BP0...
-
Page 67: Installing The Canopen Module For Sizes D, E, F
Issue 01/05 Information for the CANopen master Installing the CANopen module for Sizes D, E, F WARNING The drive converter/drive inverter must be powered-down (brought into a no- voltage condition) before the CANopen communications module is installed or withdrawn from a MICROMASTER 430/440. Installing the communications module For these Sizes, the CANopen communications module is installed in the drive converter/drive inverter housing. - Page 68 Information for the CANopen master Issue 01/05 We recommend the following procedure when installing the communications module: First insert the bus cable through the appropriate cable gland (the cable should not have a connector). Then assemble the CANopen connector Mount the connector on the communications module Remove the Display Interface Module (DIM) Snap the communications module onto the drive converter/drive inverter (into the appropriate recess)
-
Page 69: Installing The Canopen Module For Sizes Fx, Gx
Issue 01/05 Information for the CANopen master Installing the CANopen module for Sizes FX, GX WARNING The drive converter/drive inverter must be powered-down (brought into a no- voltage condition) before the CANopen communications module is installed or withdrawn from a MICROMASTER 430/440. Installing the communications module For these Sizes, the CANopen communications module is installed in the drive converter/drive inverter housing. -
Page 70: Bus Connection
Information for the CANopen master Issue 01/05 Bus connection Pin assignment of the bus connection 9-pin SUB-D plug connectors are used to connect the CANopen option module to the CAN bus. Table 4-1 Assignment of CANopen sub-D9 connector Function Description –... - Page 71 The maximum cable lengths for a CANopen network with a CANopen master and a MICROMASTER 420/430/440 are calculated in the following example. It is as- sumed that the CANopen MASTER has the same delay times as MICROMASTER 420/430/440.
- Page 72 ⋅ Baudrate The following approximate cable lengths are obtained from this formula: Table 4-3 Maximum cable lengths between two bus nodes with the delay times of MICROMASTER 420/430/440 Baud rate (kbit/s) Maximum network range (m) 1000 1633 4183 8433...
-
Page 73: Commissioning With Canopen
Issue 01/05 Information for the CANopen master Commissioning with CANopen When commissioning a system for the first time via CANopen, it is important for the master that it knows the default values of the Node ID (in this case: 3) and the baud rate (in this case: 10kbit/s) of a new node. -
Page 74: Important Parameters When Commissioning The System For The First Time
Information for the CANopen master Issue 01/05 Important parameters when commissioning the system for the first time NOTE The CANopen option module can only be connected if the inverter was previously disconnected/isolated from the power supply. When commissioning the CANopen option module for the first time, the settings of the following parameters must be checked: CANopen Description... -
Page 75: Parameter "P2040" (Object 0X27F8*), Telegram Failure Time
Issue 01/05 Information for the CANopen master Parameter "P2040" (object 0x27F8*), telegram failure time Parameter "P2040" (object 0x27F8*) is used to activate the monitoring of the telegram failure time. This parameter is used to set the time for cyclic monitoring of the master (life guarding and SYNC ). -
Page 76: Setting-Up The Pdos
180H + node ID Status_word Cannot be mapped Fixed mapping R_PDO_5 300H + node ID MICROMASTER 420/430: Mapping via CANopen master Default: No mapping or with the low byte from parameter P2041.02 Refer to Section 5.6 T_PDO_5 280H + node ID... - Page 77 Issue 01/05 Information for the CANopen master In order to set the mapping for PDO 5 or PDO 6 via the CANopen master, the usual sequence must be maintained (also refer to DS 301): 1/ Set the number of mapping entries in the subindex 0 to 0 2/ Write new mapping entries - one after the other - into sub-indices 1 to 4 3/ Set the number of mapping entries in subindex 0 to the number of the now newly mapped objects (2 for 2 mapping entries, 4 for 4 mapping entries...)
- Page 78 Information for the CANopen master Issue 01/05 Initially, values that correspond to the lowest bit numbers must be mapped. As example, here, the following mapping should be set for RPDO_5: Control word, free object 2802.03, setpoint (reference) torque and modes of operation.
-
Page 79: Timing Of The Pdos
Setpoints, that are sent in a shorter cycle than the 8ms, can be overwritten. Only the last setpoint telegram before the data transfer between the CANopen option module and MICROMASTER 420/430/440 is valid. PDO properties in parameter "P2041" Instead of using the usual CANopen mechanisms, the properties of the PDOs can be set and checked using the indexed parameter P2041(object 27F9*).This... - Page 80 Information for the CANopen master Issue 01/05 Table 5-1 Parameterizing the communications module using parameter (object 27F9*) Para- Content Comment MICRO- meter MASTER 420/430 2041.00 Low Byte = Transmission Type for T_PDO_1 and T_PDO_5 Transmission See Table 5-2 for definition of Transmission Type. Type for Example.
- Page 81 Individual bits in these bytes are used select objects to be mapped. Significant Byte The mapping is outlined below in the mapping Table 5-3 = Mapping for (MICROMASTER 420/430) and Table 5-4 (MICROMASTER 440). R_PDO_5 As an example, it is necessary to map PDO 5 so that it : Most •...
- Page 82 Information for the CANopen master Issue 01/05 Para- MICRO- Content Comment meter MASTER 420/430 2041.04 Least Reaction to Comm Error: Significant Digit If CAN Overflow, bus-off, node guarding error or Sync (ones) loss go to the following state: = CAN Pre-operational Statemachine No state change...
- Page 83 Issue 01/05 Information for the CANopen master Para- MICRO- Content Comment meter MASTER 420/430 2041.04 Most Baud Rate : Significant Digit 0 = 10 kbit/s (hundreds): 1 = 20 kbit/s Baudrate 2 = 50 kbit/s 3 = 125 kbit/s 4 = 250 kbit/s 5 = 500 kbit/s 6 = 800 kbit/s 7 = 1...
- Page 84 The following tables indicate the significance of the various bits in parameters P2041.02 (object 27F9*sub 2) and P2041.03 (object 27F9*sub 3). Table 5-3 Significance of the bits for MICROMASTER 420/430 in parameters P2041.02 and P2041.03 MICROMASTER 420/430 SET Bit Direction...
- Page 85 Issue 01/05 Information for the CANopen master Table 5-4 Significance of the bits for MICROMASTER 440 in parameters P2041.02 and P2041.03 MICROMASTER 440 SET Bit Direction Object Dictionary Drive Description Number Index Table Data into Drive : Transferred from CANopen bus to CANopen objects to Drive parameters 2050.x Bit 0 R_PDO 6040H...
- Page 86 (RPM, 6044H) SET: if bit 9 set, map to vl_percentage_demand (per-unit, 6053H) if bit 14 set, map to vl_actual_percentage (per-unit, 6054H) MICROMASTER 420/430 MICROMASTER 420/430 PDO mapping via PDO mapping via P2041.02 and P2041.03 P2041.02 and P2041.03 Take objects for PDO Take objects for PDO from Table 5.3...
- Page 87 Issue 01/05 Information for the CANopen master MICROMASTER 420/430 MICROMASTER 420/430 PDO mapping via PDO mapping via P2041.02 and P2041.03 P2041.02 and P2041.03 Take objects for PDO Take objects for PDO from Table 5.3 from Table 5.4 Bit 0 (6040H) in PDO = 1...
- Page 88 Information for the CANopen master Issue 01/05 Example of a PDO configuration via parameter P2041 The TPDO 5 is to be configured for the MICROMASTER 440. To do this, the PDO mapping must be set, the data transfer type selected and the COB-ID set with which the PDO is to be transferred.
-
Page 89: First Commissioning In The Velocity Mode
Issue 01/05 Information for the CANopen master First commissioning in the velocity mode The first commissioning in the velocity mode is described in this Chapter. All of the necessary settings and CAN messages are documented here in order that the drive can be moved: Firstly, the following BICO connections must be set using the BOP link or commissioning (start-up) tool:... - Page 90 Information for the CANopen master Issue 01/05 Parameter P1501.0 = P2091.12 (12 bit from parameter 2091) BICO connection allows the operating modes to be changed-over (selected) CANopen object 0x6060 is activated Write 082B000C into object 0x25DD* sub 0 T0 00:01:44,4977: 0x603 8-Data: 22 dd 25 00 0c 00 2b 08 R0 00:01:44,5263: 0x583 8-Data: 60 dd 25 00 00 00 00 00...
- Page 91 Issue 01/05 Information for the CANopen master 5.7.1.1 Execute the mapping for RPDO 4 Set the number of mapped objects to 0 Write 0 into object 0x1604 sub 0 T0 00:01:50,4900: 0x603 8-Data: 2f 04 16 00 00 00 00 00 R0 00:01:50,5034: 0x583 8-Data: 60 04 16 00 00 00 00 00 The control word is the first mapped object:...
- Page 92 Information for the CANopen master Issue 01/05 Set the number of mapped objects to 2 Write 2 into object 0x1A04 sub 0 T0 00:01:52,9377: 0x603 8-Data: 2f 04 1a 00 02 00 00 00 R0 00:01:54,5864: 0x583 8-Data: 60 04 1a 00 00 00 00 00 5.7.1.3 Execute the mapping for RPDO 5 Set the number of mapped objects to 0...
- Page 93 Issue 01/05 Information for the CANopen master 5.7.1.4 Execute the mapping for TPDO 5 Set the number of mapped objects to 0 Write 0 into object 0x1A05 sub 0 T0 00:01:56,7626: 0x603 8-Data: 2f 05 1a 00 00 00 00 00 R0 00:01:56,7748: 0x583 8-Data: 60 05 1a 00 00 00 00 00 The status word is the first mapped object:...
- Page 94 Information for the CANopen master Issue 01/05 Receive the three PDOs: R0 00:01:59,1942: 0x183 2-Data: 37 fe R0 00:01:59,2027: 0x283 4-Data: 37 fe 00 00 R0 00:01:59,2103: 0x383 3-Data: 37 fe 02 The drive is now in the "operational“ state Enter velocity 1000 and control word 7F using PDO4 ->...
-
Page 95: Additional Helpful Commands For The Velocity Mode
Issue 01/05 Information for the CANopen master 5.7.2 Additional helpful commands for the velocity mode Setting the baud rate to 500 kbit/s: Write 500 into object 0x27DA sub 0: T0 00:00:36,4500: 0x603 8-Data: 2b da 27 00 f4 01 00 00 R0 00:00:38,2083: 0x583 8-Data: 60 da 27 00 00 00 00 00 The new baud rate becomes active after the drive is re-started... -
Page 96: First Commissioning In The Profile Torque Mode
Information for the CANopen master Issue 01/05 First commissioning in the Profile Torque Mode A first commissioning in the velocity mode is described in this Chapter. All of the necessary settings and CAN messages are documented here in order to move the drive: When commissioning in the Profile Torque Mode, the baud rate for CANbus communications must be set to 500kbit/s:... - Page 97 Issue 01/05 Information for the CANopen master Select the frequency setpoint, P1000=6 Write 6 into object 0x23E8* sub 0 T0 00:01:44,2375: 0x603 8-Data: 2b e8 23 00 06 00 00 00 R0 00:01:44,2642: 0x583 8-Data: 60 e8 23 00 00 00 00 00 Parameter P719 =0 so that P700 and P1000 are used Write 0 into object 0x22CF* sub 0 T0 00:01:44,3815: 0x603...
- Page 98 Information for the CANopen master Issue 01/05 Set the data transfer type of all PDOs to non-synchronous data transfer: Write FF into object 0x1400 sub 2 T0 00:01:44,7392: 0x603 8-Data: 2f 00 14 02 ff 00 00 00 R0 00:01:46,4598: 0x583 8-Data: 60 00 14 02 00 00 00 00 Write FF into object 0x1404 sub 2 T0 00:01:46,5702: 0x603...
- Page 99 Issue 01/05 Information for the CANopen master 5.8.1.1 Execute the mapping for TPDO 4 Set the number of mapped objects to 0 Write 0 into object 0x1A04 sub 0 T0 00:01:52,5891: 0x603 8-Data: 2f 04 1a 00 00 00 00 00 R0 00:01:52,6020: 0x583 8-Data: 60 04 1a 00 00 00 00 00 The status word is the first mapped object:...
- Page 100 Information for the CANopen master Issue 01/05 Set the number of mapped objects to 2 Write 2 into object 0x1605 sub 0 T0 00:01:54,9624: 0x603 8-Data: 2f 05 16 00 02 00 00 00 R0 00:01:56,6833: 0x583 8-Data: 60 05 16 00 00 00 00 00 5.8.1.3 Execute the mapping for TPDO 5 Set the number of mapped objects to 0...
- Page 101 Issue 01/05 Information for the CANopen master Run-through the drive state machine: Send 6 using PDO 1 T0 00:01:58,9832: 0x203 2-Data: 06 00 Send 7 using PDO 1 T0 00:01:59,0533: 0x203 2-Data: 07 00 Receive the three PDOs: R0 00:01:59,0953: 0x183 2-Data: 33 fe R0 00:01:59,1038: 0x283 4-Data: 33 fe 00 00...
-
Page 102: Additional Helpful Commands For The Profile Torque Mode
Information for the CANopen master Issue 01/05 5.8.2 Additional helpful commands for the profile torque mode Setting the baud rate: Write 500 into object 0x27DA sub 0 T0 00:00:36,4500: 0x603 8-Data: 2b da 27 00 f4 01 00 00 R0 00:00:38,2083: 0x583 8-Data: 60 da 27 00 00 00 00 00 The new baud rate becomes active after the drive has restarted Setting the NodeID (CANopen node name):... -
Page 103: Commissioning Using A Commissioning (Start-Up) Tool
The indexed parameter P2051 is used to make this selection. NOTE Only 4 PZD words are shown for the MICROMASTER 420 in Table 6-1. This corresponds to the maximum capacity of the MICROMASTER 420. MICROMASTER 430/440 have higher capacities. The CANopen option module can process up to 6 PZD words. - Page 104 Information for the CANopen master Issue 01/05 The following tables contain the specific parameters which are used to connect process data for the CANopen option module: Table 6-1 BICO connections for P2050 (PZD from CB) Parameter Data Comment BICO connection 2050.00 Control word 1 From CANopen control word in object...
- Page 105 Issue 01/05 Information for the CANopen master Process data is sent from the drive to the network in parameter P2051 as follows: Table 6-2 BICO connections for P2051 (PZD to CB) Parameter Data Comment BICO connection 2051.00 Status word 1 To CANopen status word object BICO connection from r0052.
-
Page 106: Parameter "P0927" - Change Source For Parameters
1: Yes Bit 3 Local RS485 interface (terminal 14/15 0: No (MICROMASTER 420) and 29/30 1: Yes (MICROMASTER 440) with USS) The pre-setting (default setting) for all bits is 1; this means that the parameters of all of the sources can be changed. -
Page 107: Parameter Settings For The Modes
BICO connection: P2050.0 CANopen control word P0700 = 6 6040H to MICROMASTER Drive control word Control Word r2090 Fig. 6-1 Process Data transfer from CAN object dictionary to MICROMASTER 420/430/440 using RPDO5 or RPDO6 CANopen Option Module Operating Instructions 6SE6400-5BC00-0BP0... - Page 108 MICROMASTER Status Word 6041H P2051.0 (0) BICO connection: status word to r0052 P0700 = 6 CAN status word Fig. 6-2 Process Data transfer from MICROMASTER 420/430/440 to CAN object dictionary using TPDO5 or TPDO6 CANopen Option Module Operating Instructions 6SE6400-5BC00-0BP0...
- Page 109 Issue 01/05 Information for the CANopen master Typical parameter edits for the Velocity Mode Parameter Value Comment 2041.0 65535 PDO1, PDO5 Transmit if data changes 2041.1 0 = default value on powerup, so user does not need to change no change required this.
-
Page 110: Profile Torque Mode
Information for the CANopen master Issue 01/05 6.3.2 Profile Torque Mode RPDO5 P2041.2 bit 05 RPDO6 P2041.3 bit 05 free object to Free connection MICROMASTER P2050.5 2802.6H RPDO5 P2041.2 bit 06 RPDO6 P2041.3 bit 06 Modify bit 12 modes of operation If 6060H = 2 bit 12 = 0 6060H If 6060H = 4 bit 12 = 1... - Page 111 Issue 01/05 Information for the CANopen master TPDO5 P2041.2 bit 14 TPDO6 P2041.3 bit 14 Convert to Modes of Modes of operation Operation Display display Control word 2 If bit 12 = 0, 6061H = 2 from CB 6061H P2051.6 (0) = velocity mode BICO connection: r0055...
- Page 112 Information for the CANopen master Issue 01/05 Typical parameter edits for the Profile Torque Mode allowing switchover between speed and torque control Parameter Value Comment 2041.0 65535 PDO1, PDO5 Transmit if data changes 2041.1 0 = default value on powerup, so user does not need to change no change required this.
-
Page 113: Diagnostics And Troubleshooting
CAN physical layer and indicates errors due to missing CAN messages (SYNC, NODE-GUARDING, etc). The MICROMASTER 420/430/440 will support the following mandatory states of the RED part of the LED and an MICROMASTER 420/430/440 specific option as follows: CANopen Option Module... - Page 114 MICROMASTER specific: Fatal error on Card. In the CANopen specification the GREEN part of the LED indicates the status of the CANopen network state machine. The MICROMASTER 420/430/440 will support the following mandatory states of the GREEN part of the LED as follows: Table 7-3...
-
Page 115: Alarms (Warnings And Faults)
The cause of this error is that the bus loading is too high. Reduce the rate at which messages are sent to the MICROMASTER 420/430/440. Allow at least 1ms between 2 consecutive messages to the MICROMASTER 420/430/440. Note that within the drive CANopen module PDO message data is transferred to the drive every 8 ms, so writing to the same location (i.e. - Page 116 Further Information: If object 1006H > 0, then sync checking is enabled on the MICROMASTER 420/430/440. If a sync is not received within 1.5 time the communication cycle period then this warning will occur. In response to a sync loss the user has options to ignore the error, trip the Drive, stop the drive, and/or send an emcy message.
- Page 117 2 ms. Therefore if receive > 10 messages in 2 ms may get a CAN overrun. Drive Cycle Time: This is 8 ms. If the MICROMASTER 420/430/440 receives the data for the same variable within 8 ms the previous data will be overwritten.
- Page 118 Diagnostics and troubleshooting Issue 01/05 Faults Table 7-5 Fault messages displayed at the drive converter Fault No. Description F0070 Cause: The communications failure monitoring time, set in parameter P2040 has expired. The drive monitors this time. Supplementary information: Also refer to alarms A0700, A0701, A0702. Remedy: Check whether the CANopen master has stopped operation.
-
Page 119: Diagnostic Parameters
Issue 01/05 Diagnostics and troubleshooting Diagnostic parameters Parameter r2054 The indexed parameter r2054 provides detailed information if the MICROMASTER displays a warning (alarm) generated by the CANopen option module. Index Content Configuration or other errors no error Invalid slave address (low byte of P0918) Invalid PDO Transmission Type (P2041.00 - P2041.01) Invalid T_PDO Transmission Type (P2041.00 - P2041.01) Invalid R_PDO Transmission Type (P2041.01 high byte) - Page 120 Diagnostics and troubleshooting Issue 01/05 430: Hardware fault 431: Parameter incompatible 432: Unknown SDO error 433: SDO command specifier invalid 434: Invalid SDO block size 435: Invalid SDO block crc sum 436: No resources available for SDO connection 437: Bad requested error control mechanism 438: SDO timed out 439:...
-
Page 121: Software Release And Information
Issue 01/05 Diagnostics and troubleshooting Software release and information The software release and other software information on the communications module are displayed in the indexed parameter r2053. Parameter Description r2053.00 Module type (3 = CANopen) r2053.01 Version (11 = Version 1.1); this is the same version which is output at CANopen r2053.02 Firmware details r2053.03... -
Page 123: Attachment
Issue 01/05 Attachment Attachment Technical data Table 8-1 Technical data Order No. 6SE6400-1CB00-0AA0 Size (Height x Width x Depth) 161 mm x 73 mm x 43.5 mm Degree of pollution Degree of pollution 2 according to IEC 60 664-1 (DIN VDE 0110/T1), moisture condensation during operation is not permissible Mechanical strength... -
Page 124: Emc Information
Attachment Issue 01/05 EMC information The module fulfills the following Standards regarding noise emission and noise immunity: Noise emission according to EN55011 (1991) Class A Noise immunity according to IEC 60 801-3 and EN61000-4-3 CANopen Option Module Operating Instructions 6SE6400-5BC00-0BP0... -
Page 125: List Of Abbriviations
Issue 01/05 Attachment List of Abbriviations Alternating current Analog digital converter Analog digital converter Address Additional frequency modification Analog input Advanced operator panel AOUT Analog output Analog setpoint ASVM Asymmetric space vector modulation Block check character Binary-coded decimal code Binector input BICO Binector / connector Binector output... - Page 126 Attachment Issue 01/05 Clockwise Digital analog converter Digital analog converter Direct current Drive data set Digital input DIP switch DOUT Digital output Drive state European Economic Community EEPROM Electrical erasable programmable read-only ELCB Earth leakage circuit breaker Electro-magnetic compatibility Electromotive force Electro-magnetic interference Frequently asked questions Flux current control...
- Page 127 Issue 01/05 Attachment Motor potentiometer Normally closed Normally open Node-ID Node address Operating instructions Process Data Object Power drive system PID controller (proportional, integral, derivative) Parameter ID Parameter ID value Programmable logic controller Parameter list Parameter process data object Positive temperature coefficient Parameter value Pulse-width modulation Parameter number...
- Page 128 Attachment Issue 01/05 Transistor-transistor logic Universal serial interface Vector control Variable torque write only Status word CANopen Option Module Operating Instructions 6SE6400-5BC00-0BP0...
- Page 129 Issue 01/05 Attachment CANopen Option Module Operating Instructions 6SE6400-5BC00-0BP0...
- Page 130 Attachment Issue 01/05 CANopen Option Module Operating Instructions 6SE6400-5BC00-0BP0...
- Page 131 Recommendations and/or corrections Recommendations Corrections Siemens AG For the document/Manual: Automation & Drives Group MICROMASTER 420/430/440 SD SM 5 CANopen Option Module P.O. Box 3269 D-91050 Erlangen Federal Republic of Germany Email: [email protected] User Documentation From Name: Order No.: 6SE6400-5BC00-0BP0...
- Page 132 Siemens AG Automation and Drives Group (A&D) Standard Drives (SD) Division Postfach 3269, D-91050 Erlangen © Siemens AG, 2002, 2004 Germany We reserve the right to make changes Siemens Aktiengesellschaft Order No.: 6SE6400-5BC00-0BP0 Printed in Germany...