Jacuzzi J-315 Owner's Manual
Led series hot tub
Hide thumbs
Also See for J-315:
- Installation manual and use & maintenance (112 pages) ,
- Owner's manual (64 pages) ,
- Manual (63 pages)
Table of Contents
www.guillens.com - (800) 222-7855
BLK
J21
WHT
J12
BRN
J14
BRN
Circ.
J16
Pump
J11
BLU
U
J13
BRN
J6
F1
BRN
20A
250V
SC-20
TB1
2
230 VAC, 3-Wire Connection
USE COPPER CONDUCTORS ONLY. WIRE SIZE MUST
Transformer
230 VAC
J20
K1
K2
K3
K4
F1
J15
J5
LO
Main
Pump
LED Series Hot Tub Owner's Manual
J-315
J-355
2530-398, Rev. C
J4
K5
J17
BLK
BLU
HI
, J-325
, J-335
TM
TM
, J-365
Models
TM
TM
Guillen's Enterprises, inc
jacuzziparts.com
800-222-7855
JP1
8
7
6
5
4
3
2
1
K7
Heater IN
J7
J8
BRN
BLU
, J-345
,
TM
TM
Control
J1
J2
J3
K8
Heater OUT
J9
J10
BRN
Table of Contents

Related Manuals for Jacuzzi J-315


Summary of Contents for Jacuzzi J-315
- Page 1 Circ. Pump Heater IN Heater OUT 250V Main SC-20 Pump LED Series Hot Tub Owner’s Manual J-315 , J-325 , J-335 , J-345 J-355 , J-365 Models 2530-398, Rev. C 230 VAC, 3-Wire Connection USE COPPER CONDUCTORS ONLY. WIRE SIZE MUST...
- Page 2 Attention New Spa Owner! Congratulations on the purchase of your new Jacuzzi® spa! The following is a list of automated functions performed by your spa. These functions are listed below in an attempt to suppress any operational concerns you may have during the first 24-hours of ownership! Also listed below are important maintenance recommen- dations you should observe on a regular basis to protect your new investment.
-
Page 3: Table Of Contents
Spa Features And Controls ..........20 Operating Instructions ..........21 Setting Water Temperature ..........21 Activate Pumps ............... 21 Light Operation (J-315/J-325 Models) ......22 Light On/Off Button (J-335/J-345/J-355/J-365 Models) .. 23 Light Mode Button (J-335/J-345/J-355/J-365 Models) ... 23 Selecting Desired Massage Action ......... 24 Adjusting Individual Jet Flow .......... - Page 4 Poor Jet Action ............... 37 14.4 Water Is Too Hot ............. 38 14.5 No Heat ................38 15.0 J-315 Convertible Circuit Diagram (60Hz) ....39 16.0 J-325/J-335/J-345/J-355/J-365 Circuit Diagram (60Hz) ............. 40 17.0 J-315 Export Circuit Diagram (50Hz) ......41 18.0...
-
Page 5: Important Spa Owner Information
Jacuzzi insulating cover in place at all times when the spa is not in use. Read and carefully follow the requirements for your spa’s support base found in the section 3.0 titled, “Choosing A Location”... -
Page 6: Important Safety Instructions
2.0 IMPORTANT SAFETY INSTRUCTIONS READ AND FOLLOW ALL INSTRUCTIONS CAREFULLY When installing and using this electrical equipment, basic safety precau- tions should always be followed, including: 1. WARNING: To reduce the risk of injury, do not permit children to use this product unless they are closely supervised at all times. - Page 7 National Electrical Code/USA, ANSI/NFPA 70. The disconnect must be readily accessible and visible to the spa occupant but installed at least 5 feet (1.5m), from the spa water. 8. WARNING: To Reduce the Risk of Injury: 9. The water in the spa should never exceed 104°F (40°C). Water temperatures between 100°F (38°C) and 104°F (40°C) are consid- ered safe for a healthy adult.
- Page 8 IMPORTANT CSA SAFETY INSTRUCTIONS (CANADA ONLY) When using this electrical equipment, basic safety precautions should always be followed, including the following: 1. READ AND FOLLOW ALL INSTRUCTIONS. 2. A green colored terminal or a terminal marked G, Gr, Ground, Grounding or the symbol* is located inside the supply terminal box or compartment.
- Page 9 WARNING: Water temperature in excess of 40°C (104°F) may be injuri- ous to your health. WARNING: Before entering the spa, measure the water temperature with an accurate thermometer. WARNING: Do not use a spa immediately following strenuous exercise. WARNING: Prolonged immersion in a spa may be injurious to your health.
-
Page 10: Choosing A Location
A warning sign is provided in your warranty packet. Please install it at a location near your spa, where it is visible to the user of the spa. For additional or replacement signs please con- tact your local Jacuzzi dealer and reference item number #6530- 082. CAUTIONS 1. -
Page 11: Outdoor Location
spa is placed on a surface which does not meet these requirements, damage to the skirt and/or the spa shell may result. Damage caused by improper support is not covered under warranty. It is the responsibility of the spa owner to assure the integrity of the support at all times. We recommend a poured, reinforced concrete slab with a minimum thickness of 4 inches (10cm). - Page 12 roofs or other platforms not specifically tied into the main structural support, you should consult a professional Structural Engineer with experience in this type of application. • Proper Drainage: It is extremely important to have in place mea- sures to sufficiently handle excessive water spillage. Be sure the flooring in which the spa rests on has adequate drainage and can handle the entire contents of the spa.
-
Page 13: General Electrical Safety Instructions
4.0 General Electrical Safety Instructions Your new Jacuzzi® spa is equipped with a “state-of-the-art” equipment system. It contains the most advanced safety and self-protective equip- ment in the industry. Nonetheless, this spa must be installed properly to insure dependable usage. Please contact your dealer or local building department should you have any questions regarding your installation. -
Page 14: Power Requirements
5.0 Power Requirements Jacuzzi® spas are designed to provide optimum performance and flex- ibility of use when connected to the maximum electrical service listed in the tables below. If you prefer, your qualified technician can perform a minor circuit board modification that allows the hot tub to operate on a different electrical service (see table footnotes below). - Page 15 Note: pump 2 runs only in high speed. This is the factory setting. *** In 60A configuration, the heater will operate while both jets pumps are running in high speed. Note: pump 2 runs only in high speed. Export J-315/J-325 1-Pump Models (50Hz) 230V/20A* 230V/30A** Voltage:...
-
Page 16: Electrical Wiring Instructions
Convertible J-315 120/240V 60Hz Power Models A. 120V “Plug-in” Operation: This spa must operate on the supplied 120V GFCI cord at its original length or must be hard-wired for lon- ger runs. - Page 17 Article 680-42. To gain access to the spa’s power terminal block, remove the screws securing the cabinet panel on the side of the spa under the control panel (Figure-A). Then remove the four control box door screws and door (Figure-B). Select the power supply inlet you want to use (Figure-A).
-
Page 18: Spa Fill Up Procedure
Clear all debris from the spa. (Although the spa shell has been polished at the factory, you may want to treat it with a specially for- mulated spa cleaner. Consult your authorized Jacuzzi dealer for additional information prior to filling spa. - Page 19 5. Add Start-Up Chemicals Add the spa water chemicals as recommended by your authorized Jacuzzi dealer. See section 12.0 “Water Quality Maintenance” (page 33) for general guidance. Establish A Stable Sanitizer Reading Establish a stable sanitizer reading between 3.0-4.0 ppm Chlorine or 2.0-4.0 ppm Bromine.
- Page 20 ture increases or decreases by one degree each time one of these buttons is pressed. • The heater will turn off when the temperature corresponding to the thermostat setting is achieved. Important Heater Details: • The maximum temperature for which the spa can be set is 104°F (40°C) and the minimum is 80°F (27°C).
- Page 21 Jacuzzi dealer. 13. Consult your authorized Jacuzzi dealer for chemical recommenda- tions, then add chemicals to spa water to achieve a constant sani-...
-
Page 22: Control Functions
2-Pump J-335/J-345/J-355/J-365 Control Panel B. Warmer ( + ) Button: Increases water tempera- ture set point. C. Cooler ( - ) Button: Decreases water tempera- ture set point. 1-Pump J-315/J-325 Control Panel Page 18... - Page 23 D. Light On/Off Button • J-335/J-345/J-355/J-365 Models: Turns waterfall, footwell light, lighted cup holders and backlit pillows on in unison. Press once for high intensity; press a second time for medium intensity; press a third time for low intensity; press a fourth time to turn off. The dis- played color is changed using the light mode button (E) below.
-
Page 24: Spa Features And Controls
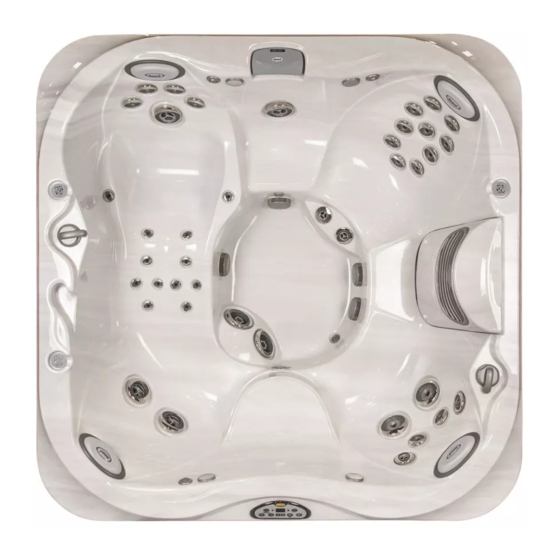
Receiver (J-335/J-345/J-355/ Therapy Seat J-365 Models Only) Spa Light 16. Calf Jets Vertical Jets (Foot Jets) 17. Backlit Pillows* 10. Footwell Suction Fittings 18. Lighted Cup Holders* and Filters. *Light features not offered on 11. Waterfall Feature J-315/J-325 Models. 12. Heater Return Fitting Page 20... -
Page 25: Operating Instructions
9.0 Operating Instructions The spa control system has automatic functions that operate upon start- up and normal operation to protect the system. Upon power up, the readout displays the following information: Control panel displays current software release (e.g. 3.56), then; Control panel displays “888”... -
Page 26: Light Operation (J-315/J-325 Models)
9.3 Light Operation (J-315/J-325 Models Only) The spa light offers 6 constant color variations and a unique random mode for enhanced spa enjoyment. Press the LIGHT button once to turn the spa light on in “Random” mode, then repeatedly press the but- ton to turn the light off or to select one of 6 constant colors illustrated below. -
Page 27: Light On/Off Button (J-335/J345/J-355/J-365 Models)
9.4 Light On/Off Button (J-335/J345/J-355/J-365 Models) Pressing this button activates the logo, footwell IX Jet light, and waterfall lights in sequence as follows: high - medium - low - off. Note: lights automatically turn off after 2 hours. 9.5 Light Mode Button (J-335/J345/J-355/J-365 Models) This button offers 5 light modes for your enjoyment. -
Page 28: Selecting Desired Massage Action
Note: The operation of the waterfall light feature is covered in sections 9.4-9.5 (page 23). Waterfall Operation Details: • J-315/J-325 Models: move control lever next to the waterfall body inward to start or increase flow or move lever outward to slow or turn off flow. •... -
Page 29: Air Controls
Logo down to open or press the opposite side of the button to close. Note: To minimize heat loss, close all air controls (Jacuzzi logos up) when spa is not in use. Certain jets may not draw air when jets pump 1 is running in low speed;... -
Page 30: Lock Modes
warm climates where heat up times are minimized due to higher ambi- ent temperatures. In these modes, the water temperature is regulated by the set temperature, 24-hour circulation pump, and heater only while a programmed filter cycle is running (unless in summer logic; see section 13.1, page 34). -
Page 31: Spa Maintenance
11.1 Cleaning The Filters Your Jacuzzi spa is equipped with a skimmer bag and two high performance filter cartridges located inside the filter skimmer. Fine debris are filtered by the circulation pump drawing water through the skimmer bag and circulation pump cartridge. - Page 32 pump #2’s plumbing network. They should be cleaned every 2 months, or when weak pump #2 performance is observed. To ensure optimum performance, clean and reuse both main filter cartridges once a month. ALWAYS TURN POWER TO SPA OFF BEFORE CLEANING THE FILTER CARTRIDGES! Note: when replacing the filter cartridges, the chemical feeder must remain on the circulation pump inlet. The circulation pump inlet will have a grid across the wall fitting. Refer to the filter cleaning/replacement procedure below: Lift cover approx.
-
Page 33: Draining And Refilling
“F”, followed by soaking the filter overnight in a plastic container filled with a solution of water and specially formulated filter cleanser available from your authorized Jacuzzi dealer. The chemical feeder should be removed during this process. The average life expectancy of each filter is approximately two years with proper care and water quality maintenance. -
Page 34: Cleaning The Spa Interior
If you are not certain as to the suitability of a particular cleanser, consult your authorized Jacuzzi dealer. Regardless of the cleanser used, use extreme care to assure that no soap residue is left on the surface. -
Page 35: Pillow Care
11.5 Maintaining The Cover Using the Jacuzzi insulating spa cover anytime the spa is not in use will significantly reduce your operating costs, heat-up time and maintenance requirements. To prolong the life of the cover, handle it with care and clean it regularly using mild soap and water. -
Page 36: Winterizing
11.7 Winterizing Your Jacuzzi® spa is designed to automatically protect itself against freezing when operating properly. During periods of severe freezing temperatures, you should check periodically to be certain that the elec- trical supply to the spa has not been interrupted. In extreme, bitter cold weather less than -20°F (-29°C), choose the F3 “Standard”... -
Page 37: Water Quality Maintenance
For specific guidance on main- taining water quality, consult your authorized Jacuzzi dealer who can recommend appropriate chemical products for sanitizing and maintaining your spa. -
Page 38: Optional Cd Ozone Water Maintenance System
Some are necessary to compensate for out-of-balance water, some aid in cosmetic water treatment and others simply alter the feel or smell of the water. Your authorized Jacuzzi dealer can advise you on the use of these additives. CAUTION: Do not use Chlorine tablets (Trichlor) in your spa. -
Page 39: Overheat Condition
Program the filter settings for Economy Mode (F4-F6), page 26. Raise water temperature setting to cancel Summer Logic condition (page 34). If the condition persists, contact your authorized Jacuzzi dealer. 13.3 Panel Displays SN1 Open sensor (heater is disabled) or shorted sensor (spa is deactivated). -
Page 40: Panel Displays Col
Jacuzzi dealer. 14.0 Troubleshooting Procedures In the event your Jacuzzi® spa is not working the way it should, please first review all the installation and operating instructions in this manual and check the message on the panel display. If you are still not satis- fied it is working properly, please follow the appropriate troubleshooting instructions. -
Page 41: None Of The Components Operate
Check the following: Is there power to the spa? Is the household circuit breaker tripped? Call your authorized Jacuzzi dealer. 14.2 Pump Does Not Operate but Light Does Press the Jets 1 Button: If no water movement is detected, make sure power is going to the spa and check the water level. -
Page 42: Water Is Too Hot
Your input as a Jacuzzi spa owner is a cherished part of this process. If you have any comments or suggestions, or if you wish to be informed on any new products for your spa, please write to us. -
Page 43: J-315 Convertible Circuit Diagram (60Hz)
15.0 J-315 Convertible Circuit Diagram (60Hz) This wiring diagram is used for the J-315, US/Canada 120/240 VAC (60Hz) convertible power model. Page 39... -
Page 44: J-325/J-335/J-345/J-355/J-365 Circuit Diagram (60Hz)
16.0 J-325/J-335/J-345/J-355/J-365 Circuit Diagram (60Hz) This wiring diagram is used for all J-325/J-335/J-345/J-355/J-365 US/Canada 240 VAC (60Hz) dedicated power models. Page 40... -
Page 45: J-315 Export Circuit Diagram (50Hz)
17.0 J-315 Export Circuit Diagram (50Hz) This wiring diagram is used for the J-315 Export 230 VAC (50Hz) dedicated power model. Page 41... -
Page 46: J-325/J-335/J-345/J-355/J-365 Circuit Diagram (50Hz)
18.0 J-325/J-335/J-345/J-355/J-365 Circuit Diagram (50Hz) This wiring diagram is used for all J-325/J-335/J-345/J-355/J-365 Export 230 VAC (50Hz) dedicated power models. Page 42... -
Page 47: Optional Stereo Receiver Functions
19.0 Optional Stereo Receiver Functions 16 17 To start enjoying your new Stereo Receiver, please read the following operation instructions in their entirety. Power Button: Press PWR (Power) to turn deck on or off. Equalization Button: Repeatedly press EQ/LD to choose from DSP Off, Jazz, Pop, Classic, Rock or Vocal equalization options. - Page 48 16 17 A/PS Button: Press A/PS to scan station presets. The tuner will scan up, wait for a few seconds, then continue. Once a desired sta- tion is found, press A/PS a second time to cancel scan. To automatically scan and store station presets, simply press and hold A/PS for several seconds, then release.
- Page 49 the sound level of the front speakers press - (Volume Down). Note: Bass and Treble settings are available only if EQ is set to DSP Off. 10. Preset 1/Pause Play Button: In tuner mode, any station can be stored as preset 1 by pressing and holding this button for 2 seconds.
- Page 50 16 17 17. Tuning UP/DOWN Buttons: Press Track Up to manually adjust station frequency up. Press and hold Track Up to scan for next higher station. Scan mode stops as soon as a strong station is found. Press Track Down to manually adjust frequency down.
- Page 51 21. Setting The Clock (Unit Must be Off): To set the current time, press and hold Display (6) for 3 seconds until the clock display starts to blink, then set hours using the Track Up and/or Track Down button (17). Press Display a second time to set minutes, using the Track Up and/or Track Down buttons.
- Page 52 Maximum number of folder levels: 8 Maximum number of characters for MP3 file name and folder name: 32 Sampling frequency: 16 kHz, 22.05 kHz, 24 kHz, 32 kHz, 44.1 kHz, 48kHz Bit rates: 8-320 kbps MP3 decoding format: MPEG 1 & 2 Audio Layer 3 Folder names and file names can be displayed with up to 8 characters (see Display key).
- Page 53 Page 49...
-
Page 54: Audio System Remote Control Functions
19.1 Audio System Remote Control Functions A remote control is supplied on all spas with the optional stereo system. This remote provides control over all radio and CD playback functions. External MP3 Playback The supplied remote control provides no control over external MP3 player operation of any kind with the exception of volume control and source selection. -
Page 55: External Mp3 Player Connection
19.2 External MP3 Player Connection A. Connecting An External MP3 Player (Purchased Separately) Any battery powered MP3 player can be connected to your new spa stereo system to enhance and personalize your spa experience! Connection Procedure 1. Connect MP3 Player to the auxiliary port located inside stereo enclosure using the supplied Mini RCA cable as... - Page 56 The following UL requirements must be observed for all spas with optional stereo components installed. “CAUTION - Risk of Electric Shock. Do not leave compartment door open”; “CAUTION - Risk of Electric Shock. Replace components only with identical components”; and Do not operate the audio/video controls while inside the spa.”...