Table of Contents
Quick Links
User Guide IM/4690–EN Rev. A
4690 Series
Turbidity systems
Accurate, reliable turbidity
measurement
Introduction
An ABB Turbidity system comprises a 4690 / 4695 analyzer
and a 7998 turbidity sensor.
The analyzer provides the operator interface and
communications to other devices.
The signal from the turbidity sensor is converted by the
analyzer and the information is presented on a large,
custom-designed, easy-to-read, backlit liquid crystal display
(LCD).
The analyzer can be programmed to work with any of the 7998
series sensors and the operating range can also be configured
to meet users' requirements.
Available in wall- / pipe-mount or
the analyzer is protected to IP66, ensuring reliable operation in
the most demanding situations. The same level of protection is
maintained during programming and calibration.
1
/
DIN panel-mount versions,
4
Table of Contents

Related Manuals for ABB 4690


Summary of Contents for ABB 4690
- Page 1 Turbidity systems Accurate, reliable turbidity measurement Introduction An ABB Turbidity system comprises a 4690 / 4695 analyzer and a 7998 turbidity sensor. The analyzer provides the operator interface and communications to other devices. The signal from the turbidity sensor is converted by the...
- Page 2 We are an established world force in the design and manufacture of measurement products for industrial process control, flow measurement, gas and liquid analysis and environmental applications. As a part of ABB, a world leader in process automation technology, we offer customers application expertise, service and support worldwide.
-
Page 3: Table Of Contents
12.1 Maintenance Kits ........... 39 12.2 Accessories ............39 12.3 Upgrade Kits ............39 5 Controls and Display ............ 18 12.4 Strategic Spares ............ 39 Display ..............18 12.5 Software ..............40 Control Familiarization ..........18 12.6 De-bubbler ............40 IM/4690–EN Rev. A... -
Page 4: Safety
Note. The following only applies to European customers. ABB is committed to ensuring that the risk of any environmental damage or pollution caused by any of its products is minimized as far as possible. The European Waste Electrical and Electronic Equipment (WEEE) Directive (2002/96/EC) that came into force on August 13 2005 aims to reduce the waste arising from electrical and electronic equipment;... -
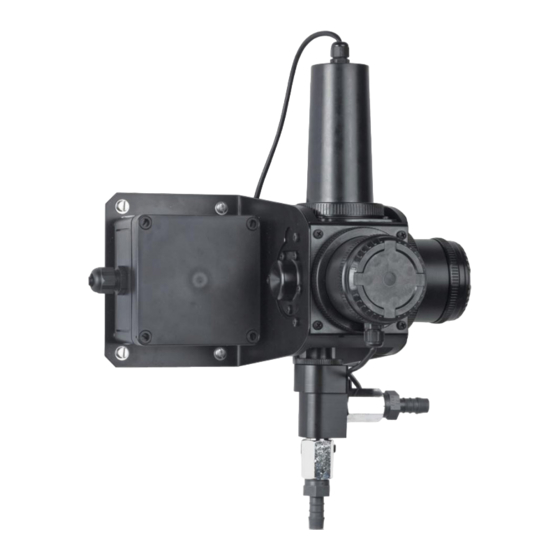
Page 5: Turbidity Systems
7998 006, 007, 016 and 017 7998 006, 007, 016 and 017 4695 500 4690 500 Flow-through sensor (without wiper unit) Flow-through sensor (without wiper unit) and wall- / panel-mount analyzer and panel-mount analyzer Fig. 2.1 System Arrangements IM/4690–EN Rev. A... - Page 6 Optical Sample Outlet Emitter Optical Emitter Flow Chamber Flow Chamber Optical Optical Receiver Receiver Inlet/Isolating Valve Drain Inlet/Isolating Valve Valve Drain Valve With Optional wiper unit Without Optional wiper unit Fig. 2.2 Turbidity Sensors – Main Components IM/4690–EN Rev. A...
-
Page 7: Installation
20 m (65.6 ft) A – Maximum Distance between Analyzer and Sensor 55 °C (131 °F) Max. –20 °C (–4 °F) Min. B – Within Temperature Limits IP66 C – Within Environmental Limits Fig. 3.1 Siting Requirements – Analyzer IM/4690–EN Rev. A... -
Page 8: Mounting The Analyzer
Mark fixing centers (see Fig. 3.2). Position 'U' bolts on pipe. Drill suitable holes. Position plates over 'U' bolts. Secure analyzer to wall using suitable fixings. Secure plates. Secure analyzer to mounting plate. Fig. 3.3 Wall-mounting Fig. 3.5 Pipe-mounting IM/4690–EN Rev. A... -
Page 9: Panel-Mounting
Secure the analyzer by tightening the panel clamp retaining screws. Caution. The clamp must fit flat on the analyzer casing. If the clamp is bowed, the securing screw is overtight and sealing problems may occur. Fig. 3.7 Panel-mounting IM/4690–EN Rev. A... -
Page 10: Mounting The Turbidity Sensor
(12 mm [0.5 in] internal diameter) Fig. 3.8 Sensor Dimensions (With Optional Wiper Unit) Note. Allow a further 30 mm (1.2 in) (approximately) clearance above the wiper unit for the bend in the wiper unit cable. IM/4690–EN Rev. A... -
Page 11: Sample Flowrate
An optional debubbler (part number 7997 500) is available to eliminate gas bubbles – refer to Section 3.4, page 10. Fig. 3.10 7998 Series – Sample Outlet Connector Location IM/4690–EN Rev. A... -
Page 12: Installing The Optional De-Bubbler
Drain Outlet Disconnect Fittings – 12 (0.5) i.d. Ø 6.5 (5.9) (0.25) (21.3) Tube (rotatable through 360°) Sample Outlet Removable Fitting 12 (0.5) Internal Diameter Tubing Sample Inlet Fig. 3.11 De-Bubbler Mounting Information (Debubbler Part Number 7997 500) IM/4690–EN Rev. A... -
Page 13: Set Up Procedure For De-Bubbler
1. To prevent degassing of the sample and very erratic readings, do not exceed this measurement. 2. This is the minimum installation distance that ensures adequate flowrate through the sensor. Increase this distance as necessary if using long or small-bore tubing. IM/4690–EN Rev. A... -
Page 14: Electrical Connections
Remove securing nuts. Release captive screws. Remove cover. Remove protection cover. Remove mains terminals protection cover. Earth (Ground) Studs Fig. 4.2 Access to Terminals – Panel-mount Analyzer Fig. 4.1 Access to Terminals – Wall- / Pipe-mount Analyzer IM/4690–EN Rev. A... -
Page 15: Safety Information
AC applications or diodes for DC applications. These components can be connected either across the load or directly across the relay contacts. On 4690 / 4695 analyzers, fit the RFI components to the relay terminal block together with the supply and load wires – see Fig. 4.3. -
Page 16: Connections
4690 Se rie s Turbidity systems 4 Electrical Connections 4.3 Connections Mounting Terminal Number Wall Panel +12 V +12 V Cleaner Cleaner Switched emitter Cleaner / Receiver Signal input initiate pulse detect signal common supply supply Link Table 4.1 Analyzer Input Connections 4.3.1 Wall- / Pipe-mount Analyzer Connections... -
Page 17: Panel-Mount Analyzer Connections
Fig. 4.5 Panel-mount Analyzer Connections Note. 1. A second retransmission output is available if the RS485 serial communications facility is not used. is set to YES (see page 28), Relay 2 becomes 'Failed Wiper Alarm' relay. 2. If Test Cleaner IM/4690–EN Rev. A... -
Page 18: Selecting The Mains Voltage
Remove front panel. Set voltage selector switch as required. 230 V AC 110 V AC Fig. 4.6 Selecting Mains Voltage – Wall- / Pipe-mount Analyzer 230 V AC 110 V AC Fig. 4.7 Selecting Mains Voltage – Panel-mount Analyzer IM/4690–EN Rev. A... -
Page 19: Turbidity Sensor Connections
4 Electrical Connections 4.5 Turbidity Sensor Connections Blue Yellow Link Screen Emitter Blue Green Blue Green Receiver 4690 /4695 Analyzer Screen Screen Blue White Wiper Unit Screen Black (Optional) Green Yellow Fig. 4.8 Turbidity Sensor Junction Box Connections IM/4690–EN Rev. A... -
Page 20: Controls And Display
New value is stored automatically Fig. 5.1 Controls and Display C – Adjusting and Storing a Parameter Value Parameter X Select New value is stored automatically D – Selecting and Storing a Parameter Choice Fig. 5.2 Membrane Key Functions IM/4690–EN Rev. A... -
Page 21: Operation
Manual Clean Yes is displayed for one minute. The Press the automatic clean sequence is then reset and Manual Clean No displayed. - - - - - Advance to page – see Section 7, page 20. Calibration SENSOR CAL. IM/4690–EN Rev. A... -
Page 22: Calibration
Turbidity systems 7 Calibration 7 Calibration A key feature of the 4690 Series Turbidity system is the dry 7.1 Care and Maintenance of Secondary Standards secondary calibration standard. This is designed to simplify ABB's secondary standards may be used repeatedly but must routine calibration verification and minimizes the need for be monitored for deterioration. -
Page 23: Performing A Calibration Verification With A Secondary Standard
(see Figs 7.2 or 7.3) facing the optical receiver, Locating ensuring the locating lug engages correctly – see Fig. 7.4. Optical Emitter Optical Receiver Fig. 7.4 Inserting Dry Standard 7. Note the reading on the display. IM/4690–EN Rev. A... -
Page 24: Performing A Calibration With A Primary Standard
6. Insert the dry calibration standard with the zero NTU indication (see Figs 7.5 or 7.6, page 23) facing the optical receiver, ensuring the locating lug engages correctly – see Fig. 7.7. Note. Do not touch the light reflecting parts of the standard. IM/4690–EN Rev. A... - Page 25 NTU value Indication Indication Locating Optical Emitter Optical Receiver Fig. 7.5 Dry Calibration Standard for Low Range Sensors Fig. 7.7 Inserting Dry Standard NTU value Indication Zero NTU Indication Fig. 7.6 Dry Calibration Standard for High Range Sensors IM/4690–EN Rev. A...
- Page 26 If Cal Fail is displayed, remove the dry standard and ensure the emitter and receiver lenses are clean and dry. Refit the dry standard, ensuring it is fitted correctly (see step 6, page 22) and repeat the procedure. Note. Do not touch the light reflecting parts of the standard. Continued on next page. IM/4690–EN Rev. A...
- Page 27 Repeat the calibration procedure ensuring that an in-date or fresh formazine solution is used and that the parameter is set to the NTU value of the Fill Span Solution formazine span solution. Advance to pages – see Section 8.1, page 26. Access to Configuration IM/4690–EN Rev. A...
-
Page 28: Configuration And Electrical Calibration
Language Using the keys, select the required language. Espanol Francais Deutsch English Advance to page – see Section 8.3, page 27. - - - - - Set Up Parameter SET UP PARAMETER IM/4690–EN Rev. A... -
Page 29: Set Up Parameter Page
The display span also sets the correct output span. Alarm values cannot be set outside this range. Correction Factor is set to mg/l or ppm Note. Displayed only if Units Using the keys, select the required correction factor to between 0.2 and 5.0. Continued on next page. IM/4690–EN Rev. A... - Page 30 YES, set a value of 4 seconds for optimum performance. Note. If Bubble Rej. - - - - - Advance to page – see Section 8.4, page 29. Set Up Outputs SET UP OUTPUTS IM/4690–EN Rev. A...
-
Page 31: Set Up Outputs Page
0 to 10, 0 to 20 or 4 to 20 mA. The current output range is assigned to the selected display span – see on page 27. Display Span Continued on next page. IM/4690–EN Rev. A... - Page 32 0 0 0 0 0 Alter Calibration Security Code Set the security code to a value between 00000 and 19999. Alter Cal. Code - - - - - Advance to page. Set Up Serial Interface SERIAL INTERFACE IM/4690–EN Rev. A...
-
Page 33: Set Up Serial Interface Page
Parity keys, select the parity required, None, Odd or Even. Using the Parity NONE EVEN - - - - - Advance to page – see Section 8.6.3, page 33. Electrical Calibration ELECTRICAL CAL IM/4690–EN Rev. A... -
Page 34: Electrical Calibration
Ensure the earth on the millivolt source is connected to the earth stud. 3. Switch on the supply and allow ten minutes for the circuits to stabilize. 4. Select page and proceed as in Section 8.6.3, following. ELECTRICAL CAL IM/4690–EN Rev. A... -
Page 35: Electrical Calibration Page
Set the milliammeter reading to 20 mA. Adjust RTX Span Note. The retransmission range selected in the page does not affect the reading. Set Up Outputs Return to the page – see Section 6.2.1, page 19. Operating 4 5 17 Turbidity (FNU) IM/4690–EN Rev. A... -
Page 36: Maintenance
9.1.2 Sensors With Wiper Unit The required automatic cleaning frequency of the flow chamber and optical windows of the sensors can be determined only by plant experience. It is recommended that checks are made at appropriate intervals. IM/4690–EN Rev. A... -
Page 37: Fault Finding
Indicates that the contents of the nonvolatile memory has not been read correctly during power up. To rectify the problem, switch off the power, wait 10 seconds and switch on again. If the problem persists contact the Company. Table 10.1 Error Messages IM/4690–EN Rev. A... -
Page 38: Unstable Or Erratic Readings
Increasing the flowrate through the flowcell may reduce this remove short-term spikes from the readings – see page 28. For build up. Ultimately the flowcell needs to be cleaned manually. optimum operation, operate the wiper unit frequently to prevent bubbles building up on the windows. IM/4690–EN Rev. A... -
Page 39: Specification
Tested in accordance with IEC 61298 Parts 1-4: Edition 2.0 2008-10. Tested in accordance with MCERTS: Performance Standards and Test Procedures for Continuous Water Monitoring Equipment. Version 3.1: Environment Agency 2010. Tested in accordance with BS ISO 15839: 2003. IM/4690–EN Rev. A... - Page 40 96 mm (3.78 in.) wide x 96 mm (3.78 in.) high x 191 mm (7.52 in.) deep Weight 1.5 kg (3¼ lb) +0.8 +0.8 Panel cut-out: mm x – – +0.03 +0.03 3.62 in. x 3.62 in.) – – DS/4690–EN Rev. A IM/4690–EN Rev. A...
-
Page 41: Spares And Consumables
Cal record card kit 1 x 0219319 – Vispass bespoke 1 x STT3367 – 250 mm (10 in.) cable tie 1 x 7998140 – wiper unit 7998049 Wiper unit replacement 1 x 7998023 – wiper blade pack IM/4690–EN Rev. A... -
Page 42: Software
1 x 46803002 MODBUS 7998043 7998 Turbidity EPROM (PROFIBUS) 1 x 46803003 PROFIBUS 12.6 De-bubbler Item Description Part Number O-ring large (3 off) 0211 322 O-ring small (2 off) 0211 138 Quick-fit connector (2 off) 7997 511 IM/4690–EN Rev. A... - Page 43 Operating Page Calibration Page Security Page (page 19) (page 24) (page 26) Start 45. 1 7 3. 3 74 15. 0 0 0. 0 Dry Standard Operating Parameters Formazine Electrical Calibration Page Set Up Serial Interface Page Set Up Outputs Page Set Up Parameters Page Language Page (page 33)
- Page 44 Oldends Lane notice. With regard to purchase orders, the agreed — Drive Systems Stonehouse ABB Inc. particulars shall prevail. ABB does not accept any — Force Measurement Gloucestershire GL10 3TA responsibility whatsoever for potential errors or Tel: +1 215 674 6000 —...