Table of Contents
3M Personal Safety Division
3M
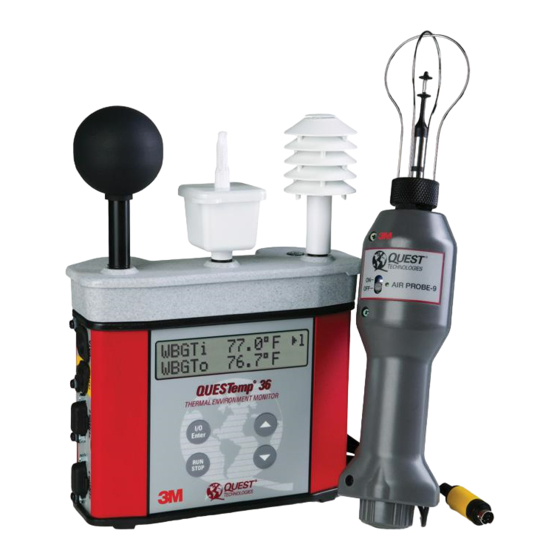
QUESTemp°
™
™
Robust Construction
Distributed by:
Air-Met Scientific Pty Ltd
Air-Met Sales/Service
P: 1800 000 744
F: 1800 000 774
Work with Confidence
Heat Stress Monitors
From the
From the
Market Leader
QUESTemp
Air-Met Rental
P: 1300 137 067
W: www.airmet.com.au
34 and QUESTemp
o
36 User Manual
o
Table of Contents

Related Manuals for 3M QUESTempo 34


Summary of Contents for 3M QUESTempo 34
- Page 1 3M Personal Safety Division QUESTemp° Heat Stress Monitors ™ ™ Robust Construction From the From the Market Leader QUESTemp 34 and QUESTemp 36 User Manual Distributed by: Air-Met Scientific Pty Ltd Air-Met Sales/Service Air-Met Rental P: 1800 000 744 P: 1300 137 067 F: 1800 000 774 E: [email protected]...
- Page 2 Contents Table of Contents Table of Contents Introduction ........................1 QUESTempº Models ......................1 Getting Started ........................2 Up and Running overview ....................2 Keypad Operation ......................3 I/O Enter key…………………………………………………………………………………..3 Up Arrow key………………………………………………………………………………….3 Down Arrow key………………………………………………………………………………3 Run Stop key………………………………………………………………………………….3 Escaping/moving back one screen…………………………………………………………3 Turning On/Off and Basic Operation .................
- Page 3 Run ...........................11 Displayed Items ........................11 Stay Time .........................13 Data Logging ........................13 Printing ..........................14 Serial ..........................14 Parallel ..........................14 Air Flow functionality .......................16 Operating sequence ......................17 Data Logging Air Flow ......................17 Batteries for Air Probe ......................17 Operational Check ......................17 Power options ........................18 9-Volt Alkaline Battery Replacement ................18 Approved 9-Volt Batteries ....................18 NiMH Battery Pack ......................19...
- Page 4 Customer service ......................32 Contacting 3M Instrumentation ..................32 International customers ....................32 Calibration .........................32 Warranty ..........................32 List of Figures and Tables Figure 1-1: QUESTempº 36 model ....................... 1 Figure 1-2: Keypad explained ......................3 Figure 1-3: Main menu of the QUESTempº 34 & 36 ................4 Figure 1-4: Filling wet bulb reservoir ....................
-
Page 5: Introduction
WBGT indoor index, WBGT outdoor index, relative humidity, and Heat Index or Humidex. These models support RS- 232 communications and works with the optional software analysis program, 3M Detection Management Software (DMS). With the QUESTempº 36, you have the capability to display stay times in order to manage work/rest regimens. -
Page 6: Getting Started
Getting started Getting Started Up and Running overview Getting Started Up and Running overview 1. Make sure the wet bulb wick is clean. Fill reservoir with distilled water. • See “check wick and fill natural wet bulb”, pg 5. Place the QUESTempº 34 & 36 in the work area in a safe location approximately 3.5 feet off the ground. -
Page 7: Keypad Operation
Getting Started Keypad Operation Keypad Operation The unit operates using a keypad with 4 keys. The I/O Enter key responds when the key is released while all other keys respond when the key is pressed. I/O Enter key The unit turns on with a single key press. The unit turns off by holding the key down while a countdown of 3-2-1 occurs in the lower right corner of the display. -
Page 8: Turning On/Off And Basic Operation
Placement for Monitoring/Testing Turning On/Off and Basic Operation Turning On/Off and Basic Operation To quickly get you started with the QUESTempº 34 & 36 model, the following section explains how to turn on the instrument, run, and stop your session. 1. -
Page 9: Sensors
Sensors Sensors Natural Wet Bulb Thermometer A. Globe thermometer Sensors B. Natural wet bulb thermometer C. Dry bulb thermometer Natural Wet Bulb Thermometer The natural wet bulb thermometer gives an indication of the effects of humidity on an individual. Relative humidity and wind speed are taken into account by measuring the amount of evaporative cooling taking place at a thermometer covered with a moistened wick. -
Page 10: Tri-Sensor Calculation And Remote Cable
Remote Tri-sensor Calculation and Remote Cable Tri-sensor Weighted Average Tri-sensor Calculation and Remote Cable The top sensor bar (sensor 1) may be removed from the instrument and used through a remote cable. Shelter the instrument and remote the sensor bar if the measured environment is expecting heavy rain or if temperatures are above 60°C. -
Page 11: Wet Bulb Globe Temperature
Measurements Tri-sensor Calculation and Remote Cable Wet Bulb Globe Temperature Measurements The QUESTemp° 34 & 36 data logging area heat stress monitor directly senses the four parameters: ambient or dry bulb temperature (DB), natural wet bulb temperature (WB), globe temperature (G), and relative humidity (RH). The QT°... -
Page 12: Heat Index/Humidex
Tri-sensor Calculation and Remote Cable Heat Index/Humidex Heat Index/Humidex The Heat Index is determined using the dry bulb temperature and relative humidity. Based upon charts available from the U.S. National Weather Service, Heat Index represents how an average person feels relative to climate conditions. For a given temperature, the higher the humidity, the higher the heat index. -
Page 13: Operating Questempº 34 & 36
Operating Operating QUESTempº 34 & 36 View Operating QUESTempº 34 & 36 Use the Up Arrow and Down Arrow keys to move the marker in the display in front of the desired mode. Pressing the I/O Enter key will select the mode. View Displays the measured data but does not log it. -
Page 14: Print
Operating QUESTempº 34 & 36 Print • Flow: On, Off . Index: none, ACGIH, Navy, EPRI and select either: WBGTi (indoor), • WBGTo (outdoor) for Index setting. Index Settings Explanation TLV and action limit These index settings only apply to the ACGIH Index. -
Page 15: Displayed Items
Displayed items Displayed Items The run mode begins a session in memory and logs the data. Begin a session by pressing the Run/Stop key from the view mode (or measurement view). An asterisk in the lower right corner indicates the run mode. -
Page 16: Figure 1-10: Globe Screen
H.I. or HU H.I. 84.3º F (Heat Index or Humidex) Figure 1-12: RH and H.I/HU screen FLOW 0.3m/s 1 Screen 5: Air Flow (If turned ON via setup with QUESTempº 36 only) Figure 1-13: Air Flow screen H VH ... -
Page 17: Stay Time
Data Logging Stay Time Stay Time The screen(s) displaying stay time data appear different for each of the possible indices (available with QUESTempº 36 model only). If ACGIH is selected, the recommended working minutes per hour are shown for each of the workload categories Light (L), Moderate (M), Heavy (H), and Very Heavy (VH). -
Page 18: Printing
The recorded data can be sent to a computer through the serial RS-232 port or to a parallel printer. Serial transmission requires 3M cable #54-715. Parallel transmission requires 3M cable #56-875. With the cable plugged into the RS-232 auxiliary port, select Print from the menu and press the I/O Enter key to enter the Print mode. -
Page 19: Figure 1-20: Sample Printout (Page 2)
Printing Session: 3 Page 2 Sensor: 1 Degrees Fahrenheit Stay Times: ACGIH, Acclimated, WBGTi, clo correction = 1.0 C TIME WBGTi WBGTo GLOBE FLOW ----- ----- ----- ----- ----- ----- --- --- ----- --- --- --- --- 11:08 68.7 67.9 59.4 82.4 90.7... -
Page 20: Air Flow Functionality
Air Flow functionality Air Flow functionality (Available using 3M’s Air Probe on QUESTempº 36 model.) Air flow is measured in meters per second over a range of 0 to 20m/s in 0.1m/s increments. The sensor should be placed or held perpendicular in the air stream. -
Page 21: Operating Sequence
Continuous charging is not a safety concern. Operational Check A verification module, 3M model 053-923, may be used to check the operation of the QUESTemp. Remove the top sensor bar and plug the verification module into the top of the unit. -
Page 22: Power Options
Power options 9-Volt Alkaline Battery Replacement Power options There are 3 options for powering the QUESTempº 36: a 9-volt alkaline battery, a NiMH (Nickel Metal Hydride) rechargeable 6-cell battery pack, and an AC adapter. A door on the back of the unit allows the user access to the 9-volt battery. The rechargeable battery pack is located inside of the unit. -
Page 23: Nimh Battery Pack
WARNING: Recharge batteries only in a non-hazardous environment. The NiMH rechargeable battery pack is charged in the instrument using 3M’s AC 120V AC to 9V DC adapter (part #015-910) or 220V AC to 9V DC adapter (part #015-680). A discharged battery pack requires an “overnight” charge of 16 hours (for the 120V adapter). -
Page 24: Appendix A: Specifications
Appendix A Appendix A: Specifications Appendix A: Specifications Measurements Globe temperature, dry bulb temperature, wet bulb temperature, % relative humidity, WBGTin, WBGTout, WBGT weighted average (if 3 sensor sets), and Heat Index / Humidex. Temperatures given in Celsius or Fahrenheit. Data Logging Records and prints all measurements at user selected interval of 1, 2, 5, 10, 15, 30, or 60 minutes. - Page 25 Appendix A: Specifications Remote Sensor Bars 2 x 15pin D-sub jacks are located on the side of the unit for plugging in 1 or 2 additional sensor bars by using remote cables up to 200 feet (61m). The top sensor bar can also be remote with a cable.
-
Page 26: Product Markings And Special Conditions
Product markings and special conditions Product markings and special conditions KEMA 04ATEX1072 XII 2 G EEx ia IIC T3 Compliance with Essential Health and Safety Requirements has been assured by compliance with: EN 50014 : 1997 and EN 50020 : 2002 The year of manufacture is determined by the third character in the instrument’s serial number. -
Page 27: Appendix B: Heat Exposure Tables
Appendix B Appendix B: Heat Exposure Tables Appendix B: Heat Exposure Tables ACGIH Screening Criteria for Heat Stress Exposure. WBGT values in °C. NOTE: according to the ACGIH’s guidelines, the temperature values represent a work and rest process which is explained in the standards. Please refer to the ACGIH TLVs and BEIs for specific details. -
Page 28: Acgih Clothing Corrections
Appendix B: Heat Exposure Tables ACGIH Clothing Corrections The following clothing corrections are in degrees Celsius. When a clothing correction is entered into the setup portion of the QUESTemp° 36, the value is added to the WBGT only for looking up the stay times. The WBGT value displayed by the unit does not reflect corrections. - Page 29 Appendix B: Heat Exposure Tables WBGT(F) 92.0 4:50 4:10 3:30 2:55 2:15 1:30 93.0 4:25 3:50 3:15 2:40 2:00 1:25 94.0 4:05 3:35 3:00 2:25 1:50 1:15 95.0 3:45 3:15 2:45 2:15 1:45 1:10 96.0 3:25 3:00 2:30 2:05 1:35 1:05 97.0 3:10...
-
Page 30: Electrical Power Research Institute (Epri)
Appendix B: Heat Exposure Tables Electrical power research institute (EPRI) The recommended working hours are shown based on a maximum of four hours. A time of 4:01 indicates greater than 4 hours WBGT°C Light Moderate Heavy 4:01 4:01 3:00 4:01 4:00 2:00 4:01... -
Page 31: Appendix C: Accessories
Appendix C Appendix C: Accessories Air Probe Accessories Appendix C: Accessories Sensor array with 2 inch globe 56-795 Sensor array with 6 inch globe 56-780 6 Foot shielded remote sensor cable 53-924 25 Foot shielded remote sensor cable 53-925 100 Foot shielded remote sensor cable 53-926 200 Foot shielded remote sensor cable 53-927... -
Page 32: Appendix D: Detection Management Software Dms
1. Download the DMS software. (Note: you may have purchased this with your instrument.) 2. Using a 3M cable, part number 054-715, plug the cable into the computer and plug the opposite end into the side jack of the QT⁰34/36 data port. -
Page 33: Figure 1-25: Downloading With The Qt⁰34/36
Appendix D: Detection Management Software DMS Downloading your sessions in DMS 3. Power on the QUESTempº 36 by pressing and holding the I/O Enter key. 4. Open DMS and click on button. 5. Select Heat Stress and then select the Model Type by clicking on QT⁰34 or QT⁰36. -
Page 34: Viewing/Analyzing And Quick Reporting In Dms
Appendix D: Detection Management Software DMS Viewing/Analyzing and Quick Reporting in DMS Viewing/Analyzing and Quick Reporting in DMS In the Data Finder page, your heat stress data is stored by instrument family and then by model. There are two options in the data finder page which include analyzing and printing a quick report. -
Page 35: Reporting And Printing
Appendix D: Detection Management Software DMS Reporting and Printing Reporting and Printing If you are in the Data finder page, you have the option to select button and this will give you a report instantaneously using a standard template of graphs and charts (also called panels.). -
Page 36: Customer Service
Customer service Contacting 3M Instrumentation Should your 3M equipment need to be returned for repair or for recalibration, please contact the service department at the following number or access the online form via the website. For technical issues, please contact Technical Support. - Page 37 The 3M Detection brand of instrumentation is used by safety and industrial hygiene professionals to help comply with applicable occupational standards and regulations.