Table of Contents
CAUTION:
Before servicing this chassis, it is important that the service person read the "SAFETY PRECAUTIONS" and
"PRODUCT SAFETY NOTICE" contained in this manual.
• Power Input
• Light Engine
• Light Source
• Antenna Input
• Tuning
:
• Speakers
• See Page 5 for additional specifications.
• Design specifications are subject to change without notice.
MITSUBISHI ELECTRIC VISUAL SOLUTIONS AMERICA, INC.
Copyright © 2011 Mitsubishi Electric Visual Solutions America, Inc.
Version 3.0 10/13/11
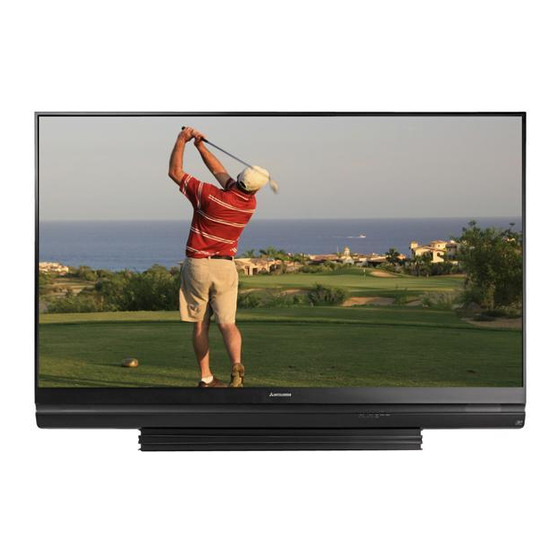
SPECIFICATIONS
: AC 120V, 60Hz
: DLP™ (1080p)
: VIP Lamp
: RF 75unbalanced
: NTSC/ATSC/QAM
Analog Cable - 1~125
Digital Cable - 1~135
: 10W x 2 (except V45++)
: 2W x 16 (V45++)
9351 Jeronimo Road, Irvine, CA 92618-1904
All Rights Reserved
Service
Manual
DLP PROJECTION HDTV
V45C
WD-73C11
V45+
WD-73740
WD-82740
• Analog Input
: Composite/Component
Level
(RCA Type)
Y/Video: 1.0 Vp-p, Cr, Cb: 700mVp-p
75 unbalanced
: AUDIO IN JACK (RCA Type)
-4.7dBm 43k unbalanced
• Analog Output : AUDIO / SUBWOOFER OUT JACK
Level
(RCA Type)
-4.7dBm 4.7kunbalanced
• Digital
: AC-3/PCM Digital Audio Output
Inputs/Outputs
(RCA Type)
: HDMI™
USB
:
: PC - use HMDI™
Wired IR Input/Output (V45++)
:
: Ethernet (V45CB, V45+, V45++)
: Bluetooth (V45++)
2011
V45
V45CA
WD-73640
WD-73CA1
V45++
V45CB
WD-73840
WD-82CB1
WD-82840
WD-92840
Table of Contents

Related Manuals for Mitsubishi Electric WD-73C1


Summary of Contents for Mitsubishi Electric WD-73C1
-
Page 1: Specifications
• Design specifications are subject to change without notice. : Ethernet (V45CB, V45+, V45++) : Bluetooth (V45++) MITSUBISHI ELECTRIC VISUAL SOLUTIONS AMERICA, INC. 9351 Jeronimo Road, Irvine, CA 92618-1904 Copyright © 2011 Mitsubishi Electric Visual Solutions America, Inc. All Rights Reserved... -
Page 3: Table Of Contents
MODELS: WD-73640 / WD-73740 / WD-73840 / WD-73C11 / WD-73CA1 / WD-82740 / WD-82840 / WD-82CB1 / WD-92840 CONTENTS INTRODUCTION ..........................5 Dimensions, weight, power usage, etc..................... 5 PRODUCT SAFETY NOTICE ......................5 SAFETY PRECAUTIONS ........................6 DISASSEMBLY & PARTS REPLACEMENT ..................7 Back Cover Removal ........................ -
Page 4: Wd-82740 / Wd-82840 / Wd-82Cb1 / Wd
MODELS: WD-73640 / WD-73740 / WD-73840 / WD-73C11 / WD-73CA1 / WD-82740 / WD-82840 / WD-82CB1 / WD-92840 Digital Light Processing®, Digital Micro Mirror Device and DLP® are Trademarks of Texas Instruments. HDMI, the HDMI logo and High-Definition Multimedia Interface are trademarks or registered trademarks of HDMI Licensing, LLC.. Page 4... -
Page 5: Introduction
MODELS: WD-73640 / WD-73740 / WD-73840 / WD-73C11 / WD-73CA1 / WD-82740 / WD-82840 / WD-82CB1 / WD-92840 INTRODUCTION This service manual provides service instructions for the V45C, V45, V45CA, V45+, V45CB and V45++ chassis types. The specific models for each chassis type, dimensions and weight are listed below. Service personnel should read this manual thoroughly before servicing these chassis. -
Page 6: Safety Precautions
MODELS: WD-73640 / WD-73740 / WD-73840 / WD-73C11 / WD-73CA1 / WD-82740 / WD-82840 / WD-82CB1 / WD-92840 SAFETY PRECAUTIONS NOTICE: Observe all cautions and safety related notes located inside the receiver cabinet and on the receiver chassis. WARNING: 1. Operation of this receiver outside the cabinet or with the cover removed presents a shock hazard from the receiver's power supplies. -
Page 7: Disassembly & Parts Replacement
MODELS: WD-73640 / WD-73740 / WD-73840 / WD-73C11 / WD-73CA1 / WD-82740 / WD-82840 / WD-82CB1 / WD-92840 DISASSEMBLY & PARTS REPLACEMENT BACK COVER REMOVAL Back Cover Removal 1. Remove screws (A) and remove the Lamp Cover. 2. Remove screws (B) from behind the Lamp Cover. 3. -
Page 8: Chassis Removal
MODELS: WD-73640 / WD-73740 / WD-73840 / WD-73C11 / WD-73CA1 / WD-82740 / WD-82840 / WD-82CB1 / WD-92840 CHASSIS - REMOVAL & DISASSEMBLY Chassis Removal 1. Remove screws (A). 2. Slide the chassis back and disconnect all cables. 3. Remove the chassis from the cabinet. Rear Terminal Cover Removal (To Replace PWB-MAIN) 1. -
Page 9: Pwb-Power Removal
MODELS: WD-73640 / WD-73740 / WD-73840 / WD-73C11 / WD-73CA1 / WD-82740 / WD-82840 / WD-82CB1 / WD-92840 PWB-POWER Removal 1. Disconnect all cables from the PWB-POWER. 2. Remove screws (A). 3. Pinch the Retainer to release the PWB. Retainer 4. -
Page 10: Pwb-Ballast Removal
MODELS: WD-73640 / WD-73740 / WD-73840 / WD-73C11 / WD-73CA1 / WD-82740 / WD-82840 / WD-82CB1 / WD-92840 PWB-BALLAST REMOVAL Note: To remove the PWB-BALLAST, it is not necessary to remove the Engine or Lamp Cartridge. 1. Release the Latch to lift the PWB-BALLAST up from the mounting bracket. 2. - Page 11 MODELS: WD-73640 / WD-73740 / WD-73840 / WD-73C11 / WD-73CA1 / WD-82740 / WD-82840 / WD-82CB1 / WD-92840 OPTICAL ENGINE ASSEMBLY REMOVAL (Continued) 1. Disconnect the PE and J12 connectors from the Engine. 2. Remove screws (A). 3. Slide the Engine Assembly back out of the cabinet. J12 (LVDS) (Engine Power) OPTICAL ENGINE ASSEMBLY - Disassembly...
- Page 12 MODELS: WD-73640 / WD-73740 / WD-73840 / WD-73C11 / WD-73CA1 / WD-82740 / WD-82840 / WD-82CB1 / WD-92840 Duct Interior Components Duct Interior Components are shown below. Notes: When replacing the Optical Engine, transfer all Duct and Duct Interior Components from the old Engine to the new Engine.
-
Page 13: Optical Engine Replacement
MODELS: WD-73640 / WD-73740 / WD-73840 / WD-73C11 / WD-73CA1 / WD-82740 / WD-82840 / WD-82CB1 / WD-92840 Lower Duct Removal 1. Remove the Lamp Cartridge, Top Cover, Exhaust Fan and Sirocco Fan. 2. Disconnect the HV Lamp Wiring from the Ballast and loosen it from the guides. 3. -
Page 14: Projection Lens Replacement
MODELS: WD-73640 / WD-73740 / WD-73840 / WD-73C11 / WD-73CA1 / WD-82740 / WD-82840 / WD-82CB1 / WD-92840 PROJECTION LENS REPLACEMENT CAUTION: Any dust or fingerprints in the optics can cause abnormalities in the picture. This procedure should be performed in a dust free environment. Wear lint free cotton or rubber gloves while performing this procedure. -
Page 15: Color Wheel Replacement
MODELS: WD-73640 / WD-73740 / WD-73840 / WD-73C11 / WD-73CA1 / WD-82740 / WD-82840 / WD-82CB1 / WD-92840 COLOR WHEEL REPLACEMENT CAUTION: This procedure should be performed in a dust free environment. Any dust entering into the optical compartment can cause abnormalities in the picture. 1. -
Page 16: Screen Replacement
MODELS: WD-73640 / WD-73740 / WD-73840 / WD-73C11 / WD-73CA1 / WD-82740 / WD-82840 / WD-82CB1 / WD-92840 SCREEN REPLACEMENT 73” Models Screen Assembly Removal and Replacement 1. V45C, V45, V45+ - Remove the Screw Caps to access screws (A). 2. - Page 17 MODELS: WD-73640 / WD-73740 / WD-73840 / WD-73C11 / WD-73CA1 / WD-82740 / WD-82840 / WD-82CB1 / WD-92840 SCREEN REPLACEMENT 73” Models (continued) Screen Removal From the Bezel-Front 1) Remove screws (A) and remove the top, bottom and side rails. NOTE: The number and location of screws vary by model.
- Page 18 MODELS: WD-73640 / WD-73740 / WD-73840 / WD-73C11 / WD-73CA1 / WD-82740 / WD-82840 / WD-82CB1 / WD-92840 SCREEN REPLACEMENT 73” Models (continued) CAUTION: Wear gloves when handling the Lenticular Screen and Fresnel Lens. This prevents cuts and finger prints. Do not place Fresnel Lens in the sun. This may cause fire and heat related injuries.
- Page 19 MODELS: WD-73640 / WD-73740 / WD-73840 / WD-73C11 / WD-73CA1 / WD-82740 / WD-82840 / WD-82CB1 / WD-92840 SCREEN REPLACEMENT 82” & 92” Models Screen Assembly Removal 1. Remove screws (A) around the bottom rear edge. 2. (V45+) Remove the Pedestal cover and remove screws (B). 3.
- Page 20 MODELS: WD-73640 / WD-73740 / WD-73840 / WD-73C11 / WD-73CA1 / WD-82740 / WD-82840 / WD-82CB1 / WD-92840 SCREEN REPLACEMENT 82” & 92” Models (continued) CAUTION: Wear gloves when handling the Lenticular Screen and Fresnel Lens. This prevents cuts and finger prints. Do not place Fresnel Lens in the sun. This may cause fire and heat related injuries.
- Page 21 MODELS: WD-73640 / WD-73740 / WD-73840 / WD-73C11 / WD-73CA1 / WD-82740 / WD-82840 / WD-82CB1 / WD-92840 SCREEN REPLACEMENT 82” & 92” Models (continued) Lenticular Screen and Fresnel Lens Disassembly 1. Remove the HOLDER-SCREEN from the top, bottom and sides. 2.
-
Page 22: Mirror Replacement
MODELS: WD-73640 / WD-73740 / WD-73840 / WD-73C11 / WD-73CA1 / WD-82740 / WD-82840 / WD-82CB1 / WD-92840 MIRROR REPLACEMENT MIRROR REPLACEMENT - 73” Models 1. To access the Mirror for replacement, remove the Screen Assembly (See Screen Assembly Removal). 2. -
Page 23: Service Procedures
MODELS: WD-73640 / WD-73740 / WD-73840 / WD-73C11 / WD-73CA1 / WD-82740 / WD-82840 / WD-82CB1 / WD-92840 SERVICE PROCEDURES REMOTE CONTROL NOTE: The Remote Controls differ between Type 1 and the Type 2 models. TYPE 2 TYPE 1 V45+ V45++ V45CB V45C... -
Page 24: Option Menu
MODELS: WD-73640 / WD-73740 / WD-73840 / WD-73C11 / WD-73CA1 / WD-82740 / WD-82840 / WD-82CB1 / WD-92840 OPTION MENU OPTION MENU 1. Press the - Page 25 MODELS: WD-73640 / WD-73740 / WD-73840 / WD-73C11 / WD-73CA1 / WD-82740 / WD-82840 / WD-82CB1 / WD-92840 DIGITAL SIGNAL INFORMATION Information on the currently selected digital channel can be displayed on screen. 1. Enter the Option / Service Menu
-
Page 26: Reset And Initialization
MODELS: WD-73640 / WD-73740 / WD-73840 / WD-73C11 / WD-73CA1 / WD-82740 / WD-82840 / WD-82CB1 / WD-92840 RESET / INITIALIZATION SERVICE TIP: Many symptoms that are customer generated, intermittent or cannot be verified can be resolved by using the various Reset and Initialization options. -
Page 27: Led Indications & Self Diagnostics
MODELS: WD-73640 / WD-73740 / WD-73840 / WD-73C11 / WD-73CA1 / WD-82740 / WD-82840 / WD-82CB1 / WD-92840 LED INDICATIONS AND SELF DIAGNOSTICS The front panel Status LED provides an indication of the set’s operation and the possible cause of a malfunction. NORMAL INDICATIONS STATUS LED Indication Condition... -
Page 28: Error Codes
MODELS: WD-73640 / WD-73740 / WD-73840 / WD-73C11 / WD-73CA1 / WD-82740 / WD-82840 / WD-82CB1 / WD-92840 ERROR CODES Error Codes, descriptions and the most likely cause of failure are listed below: ERROR CODES Code Description Most Likely Cause Loss of 12V from PWB-POWER to Engine / I2C Communication loss between TV Micro and Engine Check PE &... -
Page 29: Sound Projector Transducer Test
MODELS: WD-73640 / WD-73740 / WD-73840 / WD-73C11 / WD-73CA1 / WD-82740 / WD-82840 / WD-82CB1 / WD-92840 SPEAKER TRANSDUCER AND SPEAKER FREQUENCY TEST (V45++ Only) These procedures will test the TV’s speakers using an internal tone generator. 1. Press the -
Page 30: Service Adjustments
MODELS: WD-73640 / WD-73740 / WD-73840 / WD-73C11 / WD-73CA1 / WD-82740 / WD-82840 / WD-82CB1 / WD-92840 SERVICE ADJUSTMENTS Service Adjustments include Adjustment Procedures and Data Transfer Functions. Electrical Adjustments (there are no mechanical adjustments) • Horizontal and Vertical Centering Adjustment •... -
Page 31: Horizontal & Vertical Position Adjustment
MODELS: WD-73640 / WD-73740 / WD-73840 / WD-73C11 / WD-73CA1 / WD-82740 / WD-82840 / WD-82CB1 / WD-92840 ADJUSTMENT PROCEDURES Horizontal and Vertical Position Adjustment 1. Enter the Service Menu -
Page 32: Manual Geometry Alignment
MODELS: WD-73640 / WD-73740 / WD-73840 / WD-73C11 / WD-73CA1 / WD-82740 / WD-82840 / WD-82CB1 / WD-92840 Manual Geometry Alignment 1. Entering the Manual Geometry Alignment Mode 1. Activate the Service Mode -
Page 33
MODELS: WD-73640 / WD-73740 / WD-73840 / WD-73C11 / WD-73CA1 / WD-82740 / WD-82840 / WD-82CB1 / WD-92840 2. Manual Geometry Alignment Note: Upon entering the Manual Geometry Alignment Mode the first time, the geometry may appear distorted because all factory geometry correction is automatically disabled. Press
to quit and re-enable the factory geometry correction. - Page 34 MODELS: WD-73640 / WD-73740 / WD-73840 / WD-73C11 / WD-73CA1 / WD-82740 / WD-82840 / WD-82CB1 / WD-92840 Phase 3 - 4:3 and 16:9 Alignment 1. With the Manual Geometry Alignment activated, press
-
Page 35
MODELS: WD-73640 / WD-73740 / WD-73840 / WD-73C11 / WD-73CA1 / WD-82740 / WD-82840 / WD-82CB1 / WD-92840 /> Repeat the process of pressing
or < to display the 15 different preset amounts of correction to the Top-Center Red Line. When you find the pattern with the straightest line, press -
Page 36: Data Transfer Functions
MODELS: WD-73640 / WD-73740 / WD-73840 / WD-73C11 / WD-73CA1 / WD-82740 / WD-82840 / WD-82CB1 / WD-92840 DATA TRANSFER FUNCTIONS Data Transfer Service Data is duplicated and stored in separate EEPROMs in two locations. PWB-MAIN - Working Service Data for TV operation ... -
Page 37: Using Lead Free Solder
MODELS: WD-73640 / WD-73740 / WD-73840 / WD-73C11 / WD-73CA1 / WD-82740 / WD-82840 / WD-82CB1 / WD-92840 Using Lead Free Solder Pb Solder The symbol shown above indicates Lead (Pb) Free Solder was used during the construction of PWBs. Only Lead Free Solder should be used when servicing these PWBs. -
Page 38: Chip Parts Replacement
MODELS: WD-73640 / WD-73740 / WD-73840 / WD-73C11 / WD-73CA1 / WD-82740 / WD-82840 / WD-82CB1 / WD-92840 Chip Parts Replacement Some resistors, shorting jumpers (0 Ohm resistors), ceramic capacitors, transistors and diodes are chip parts. The fol- lowing precautions should be taken when replacing these parts. Cautions: 1. -
Page 39: Replacement Parts
MODELS: WD-73640 / WD-73740 / WD-73840 / WD-73C11 / WD-73CA1 / WD-82740 / WD-82840 / WD-82CB1 / WD-92840 REPLACEMENT PARTS Safety Critical Parts Designation Safety Critical Components are indicated in the Parts List by Bold Type and a Symbol. ... -
Page 40: Parts Quick Reference
MODELS: WD-73640 / WD-73740 / WD-73840 / WD-73C11 / WD-73CA1 / WD-82740 / WD-82840 / WD-82CB1 / WD-92840 [ # ] Model Legend: (a) WD-73640, (b) WD-73740, (c) WD-73840, (d) WD-73C11, (e) WD-73CA1, (f) WD-82740, (g) WD-82840, (h) WD-82CB1, (i) WD-92840 Safety Critical Part - Use exact replacement only Parts Quick Reference ... -
Page 41: Service Parts List
MODELS: WD-73640 / WD-73740 / WD-73840 / WD-73C11 / WD-73CA1 / WD-82740 / WD-82840 / WD-82CB1 / WD-92840 [#] Model Legend: (a) WD-73640, (b) WD-73740, (c) WD-73840, (d) WD-73C11, (e) WD-73CA1, (f) WD-82740, (g) WD-82840, (h) WD-82CB1, (i) WD-92840 [] Safety Critical Part - Use exact replacement only ... - Page 42 MODELS: WD-73640 / WD-73740 / WD-73840 / WD-73C11 / WD-73CA1 / WD-82740 / WD-82840 / WD-82CB1 / WD-92840 [#] Model Legend: (a) WD-73640, (b) WD-73740, (c) WD-73840, (d) WD-73C11, (e) WD-73CA1, (f) WD-82740, (g) WD-82840, (h) WD-82CB1, (i) WD-92840 [] Safety Critical Part - Use exact replacement only ...
- Page 43 MODELS: WD-73640 / WD-73740 / WD-73840 / WD-73C11 / WD-73CA1 / WD-82740 / WD-82840 / WD-82CB1 / WD-92840 [#] Model Legend: (a) WD-73640, (b) WD-73740, (c) WD-73840, (d) WD-73C11, (e) WD-73CA1, (f) WD-82740, (g) WD-82840, (h) WD-82CB1, (i) WD-92840 [] Safety Critical Part - Use exact replacement only ...
- Page 44 MODELS: WD-73640 / WD-73740 / WD-73840 / WD-73C11 / WD-73CA1 / WD-82740 / WD-82840 / WD-82CB1 / WD-92840 [#] Model Legend: (a) WD-73640, (b) WD-73740, (c) WD-73840, (d) WD-73C11, (e) WD-73CA1, (f) WD-82740, (g) WD-82840, (h) WD-82CB1, (i) WD-92840 [] Safety Critical Part - Use exact replacement only ...
- Page 45 MODELS: WD-73640 / WD-73740 / WD-73840 / WD-73C11 / WD-73CA1 / WD-82740 / WD-82840 / WD-82CB1 / WD-92840 [#] Model Legend: (a) WD-73640, (b) WD-73740, (c) WD-73840, (d) WD-73C11, (e) WD-73CA1, (f) WD-82740, (g) WD-82840, (h) WD-82CB1, (i) WD-92840 [] Safety Critical Part - Use exact replacement only ...
-
Page 46: Screen Parts
MODELS: WD-73640 / WD-73740 / WD-73840 / WD-73C11 / WD-73CA1 / WD-82740 / WD-82840 / WD-82CB1 / WD-92840 SCREEN PARTS - 73” MODELS REF # PART DESCRIPTION PART # MODELS SCREEN-LENTICULAR 491P243030 ALL 73” LENS-FRESNEL 491P242060 ALL 73” HOLDER-SCREEN-T 593B666010 ALL 73”... - Page 47 MODELS: WD-73640 / WD-73740 / WD-73840 / WD-73C11 / WD-73CA1 / WD-82740 / WD-82840 / WD-82CB1 / WD-92840 SCREEN PARTS - 82” & 92” MODELS REF # PART DESCRIPTION WD-82740 WD-82840 WD-82CB1 WD-92840 SCREEN-LENTICULAR 491P243040 491P231020 491P243040 491P247010 LENS-FRESNEL 491P232010 491P232010 491P232010 491P248010...
-
Page 48: Mirror Kits & Preparation
MODELS: WD-73640 / WD-73740 / WD-73840 / WD-73C11 / WD-73CA1 / WD-82740 / WD-82840 / WD-82CB1 / WD-92840 MIRROR KITS (73”) PART # REF # PART DESCRIPTION COMPONENT MIRROR (Rear View) 767D091030 HOLDER-MIRROR-EDGE 623D439040 KIT-MIR V45 73 HOLDER-MIRROR-EDGE 623D439080 STIFFENER, 1100mm 601D001040 10 1/4"... - Page 49 MODELS: WD-73640 / WD-73740 / WD-73840 / WD-73C11 / WD-73CA1 / WD-82740 / WD-82840 / WD-82CB1 / WD-92840 MIRROR KITS (82” & 92”) PART # REF # PART DESCRIPTION COMPONENT MIRROR (Rear View) 767D089A30 HOLDER-MIRROR-EDGE 623D512030 KIT-MIR V45 82 HOLDER-MIRROR-EDGE 623D512040 HOLDER-MIRROR-SIDE 623D515020...
-
Page 50: Circuit Block Diagrams
MODELS: WD-73640 / WD-73740 / WD-73840 / WD-73C11 / WD-73CA1 / WD-82740 / WD-82840 / WD-82CB1 / WD-92840 Page 50... - Page 51 MODELS: WD-73640 / WD-73740 / WD-73840 / WD-73C11 / WD-73CA1 / WD-82740 / WD-82840 / WD-82CB1 / WD-92840 Page 51...
- Page 52 MODELS: WD-73640 / WD-73740 / WD-73840 / WD-73C11 / WD-73CA1 / WD-82740 / WD-82840 / WD-82CB1 / WD-92840 Page 52...
- Page 53 MODELS: WD-73640 / WD-73740 / WD-73840 / WD-73C11 / WD-73CA1 / WD-82740 / WD-82840 / WD-82CB1 / WD-92840 Page 53...
- Page 54 MODELS: WD-73640 / WD-73740 / WD-73840 / WD-73C11 / WD-73CA1 / WD-82740 / WD-82840 / WD-82CB1 / WD-92840 Page 54...
- Page 55 MODELS: WD-73640 / WD-73740 / WD-73840 / WD-73C11 / WD-73CA1 / WD-82740 / WD-82840 / WD-82CB1 / WD-92840 Page 55...