Table of Contents
Quick Links
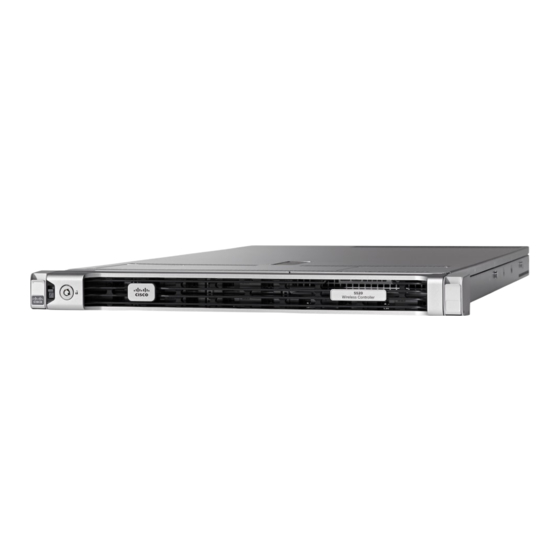
Installing the Cisco 5520 Wireless Controller
This chapter describes how to install the Cisco 5520 Wireless Controller.
Warning
IMPORTANT SAFETY INSTRUCTIONS
This warning symbol means danger. You are in a situation that could cause bodily injury. Before you
work on any equipment, be aware of the hazards involved with electrical circuitry and be familiar with
standard practices for preventing accidents. Use the statement number provided at the end of each warning
to locate its translation in the translated safety warnings that accompanied this device. Statement 1071
SAVE THESE INSTRUCTIONS
•
•
•
•
•
Unpacking and Inspecting the Controller
Caution
When handling internal controller components, wear an ESD strap and handle modules by the carrier
edges only.
Retain the shipping container in case the controller requires shipping in the future.
Tip
Unpacking and Inspecting the Controller, page 1
Preparing for Controller Installation, page 2
Installing the Controller in a Rack, page 3
Initial Controller Setup , page 8
System BIOS and Cisco Integrated Management Controller Firmware, page 9
Cisco 5520 Wireless Controller Installation Guide
1
Table of Contents

Related Manuals for Cisco 5520


Summary of Contents for Cisco 5520
- Page 1 Installing the Cisco 5520 Wireless Controller This chapter describes how to install the Cisco 5520 Wireless Controller. Warning IMPORTANT SAFETY INSTRUCTIONS This warning symbol means danger. You are in a situation that could cause bodily injury. Before you work on any equipment, be aware of the hazards involved with electrical circuitry and be familiar with standard practices for preventing accidents.
-
Page 2: Preparing For Controller Installation
Step 1 Remove the controller from its container and save all the packaging material. Step 2 Compare the shipment to the equipment list provided by your Cisco customer service representative. Verify that you have all the items. Step 3 Check for damage and report discrepancies or damage, if any, to your Cisco customer service representative. Before speaking to the representative, have the following information ready: •... -
Page 3: Installing The Controller In A Rack
The slide rails for this controller have an adjustment range of 24 to 36 inches (610 to 914 mm). Installing the Controller in a Rack Installing the Slide Rails This section describes how to install the controller in a rack using the rack kits that are sold by Cisco Systems. Cisco 5520 Wireless Controller Installation Guide... - Page 4 Installing the Cisco 5520 Wireless Controller Installing the Slide Rails To prevent bodily injury when mounting or servicing this unit in a rack, you must take special precautions Warning to ensure that the system remains stable. The following guidelines are provided to ensure your safety:This unit should be mounted at the bottom of the rack if it is the only unit in the rack.When mounting this unit...
- Page 5 Installing the Cisco 5520 Wireless Controller Installing the Slide Rails On the outside of the assembly, push the green arrow button towards the rear to open the securing plate. Figure 2: Front Securing Mechanism, Inside of Front End Front-mounting pegs...
-
Page 6: Installing The Cable Management Arm (Optional)
Installing the Cisco 5520 Wireless Controller Installing the Cable Management Arm (Optional) c) Slide the release clip toward the rear on both inner rails, and then continue pushing the controller into the rack until its front slam latches engage with the rack posts. - Page 7 Installing the Cisco 5520 Wireless Controller Installing the Cable Management Arm (Optional) Step 2 Slide the CMA tab that is closest to the controller over the end of the inner rail that is attached to the controller (see Attaching the Cable Management Arm to the Rear of the Slide Rails). Slide the tab over the end of the rail until it clicks and locks.
-
Page 8: Reversing The Cable Management Arm (Optional)
Installing the Cisco 5520 Wireless Controller Reversing the Cable Management Arm (Optional) Reversing the Cable Management Arm (Optional) Step 1 Rotate the entire CMA assembly 180 degrees. The plastic cable guides must remain pointing upward. Step 2 Flip the tabs at the end of each CMA arm so that they point toward the rear of the controller. -
Page 9: System Bios And Cisco Integrated Management Controller Firmware
When you upgrade the BIOS firmware, you must also upgrade the Cisco IMC firmware to the same version or the controller does not boot. Do not power off the controller until the BIOS and Cisco IMC firmware are matching or the controller does not boot. - Page 10 Installing the Cisco 5520 Wireless Controller Accessing System BIOS Cisco 5520 Wireless Controller Installation Guide...