Table of Contents
HTZ180DVD
DVD/CD Receiver | DVD/CD
XV-DV180
Speaker System |
S-DV180
HTZ181DVD
DVD/CD Receiver | DVD/CD
XV-DV181
Speaker System |
S-DV585
HTZ280DVD
DVD/CD Receiver | DVD/CD
XV-DV282
Speaker System |
S-DV280T / S-DV5SW
HTZ280DVD-AP
DVD/CD Receiver | DVD/CD
XV-DV282AP
Speaker System |
S-DV280T / S-DV5SW
HTZ282DVD
DVD/CD Receiver | DVD/CD
XV-DV282
Speaker System |
S-DV282T / S-DV5SW
HTZ282DVD-AP
DVD/CD Receiver | DVD/CD
XV-DV282AP
Speaker System |
S-DV282T / S-DV5SW
Operating Instructions
Chapters
Table of Contents

Related Manuals for Pioneer S-DV180


Summary of Contents for Pioneer S-DV180
-
Page 1: Operating Instructions
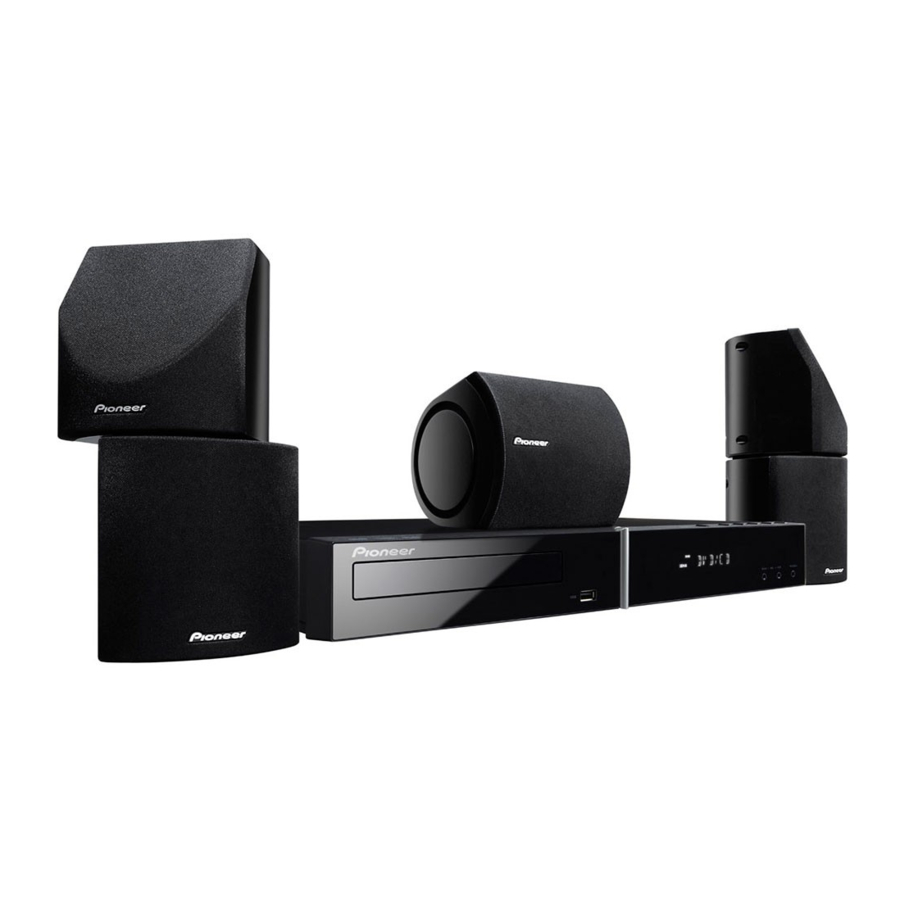
HTZ180DVD DVD/CD Receiver | DVD/CD XV-DV180 Speaker System | S-DV180 HTZ181DVD DVD/CD Receiver | DVD/CD XV-DV181 Speaker System | S-DV585 HTZ280DVD DVD/CD Receiver | DVD/CD XV-DV282 Speaker System | S-DV280T / S-DV5SW HTZ280DVD-AP DVD/CD Receiver | DVD/CD XV-DV282AP Speaker System |... - Page 2 IMPORTANT The lightning flash with arrowhead symbol, within an equilateral triangle, is intended to alert the user to the presence of uninsulated “dangerous voltage” within the product’s enclosure that may be of sufficient magnitude to constitute a risk of electric shock to persons.
- Page 3 A damaged power cord can cause a fire or give you an electrical shock. Check the power cord once in a while. When you find it damaged, ask your nearest PIONEER authorized service center or your dealer for a replacement. CLASS 1...
-
Page 4: Table Of Contents
Thank you for buying this Pioneer product. Please read through these operating instructions so that you will know how to operate your model properly. After you have finished reading the instructions, put them in a safe place for future reference. - Page 5 07 USB playback and Recording Using the USB interface ....31 Recording the tracks of a music CD on a USB device ......31 Recording all the tracks .
-
Page 6: Speaker Setup Guide
Speaker Setup Guide Chapter 1 Speaker Setup Guide Home theater sound setup Depending on the size and characteristics of your room, you can place your speakers in one of two ways using this system. For the speaker configuration, see the Setup Guide. 5 spot/4 spot speaker layout This is a standard multichannel surround sound speaker setup for optimal 5.1 channel... -
Page 7: Preparation Only For The Htz181Dvd
Always use a cord when stabilizing the speaker. • Pioneer disclaims all responsibility for any losses or damage resulting from improper assembly, installation, insufficient strength of the installation materials, misuse, or natural disasters. -
Page 8: Attaching The Brackets Only For The Htz180
CAUTION • If you are unsure of the qualities and strength of the wall, consult a professional for advice. • Pioneer is not responsible for any accidents or damage that result from improper installation. Mounting screw (not supplied) -
Page 9: Connecting Up
After completing all connections, connect the power cords to the wall socket. WARNING • Pioneer bears no responsibility for accidents resulting from faulty assembly or installation, insufficient mounting strength of walls, mounting fixtures (or other building fixtures), misuse or natural disasters. - Page 10 Connecting up Connect the AM and FM antennas. a. Pull off the protective shields of both AM antenna wires. Connect one wire of the AM loop antenna to each AM antenna terminal. For each terminal, press down on the tab to open;...
- Page 11 Connecting up b. Secure the speaker wire. After testing for the slack necessary to turn the speaker (see the following step), use the groove provided to secure the speaker wire. c. Turn the speakers towards the closest wall, lining the arrows up for optimal Front Surround.
- Page 12 Connecting up CAUTION • These speaker terminals carry HAZARDOUS LIVE voltage. To prevent the risk of electric shock when connecting or disconnecting the speaker cables, disconnect the power cord before touching any uninsulated parts. • Do not connect any speakers other than those supplied to this system.
-
Page 13: Controls And Displays
Controls and displays Chapter 3 Controls and displays Front panel STANDBY/ ON OPEN/CLOSE FUNCTION MAIN STANDBY/ON (page 17, 32, 43, 50, 52 and 54) OPEN/CLOSE (page 18, 32 and 53) Function VOLUME +/– (page 19) Disc tray (page 18) Remote Sensor (page 15) Display... -
Page 14: Remote Control
Controls and displays kHz/MHz (page 20) Indicates the frequency unit shown in the character display (kHz for AM, MHz for FM). 10 Character display (page 21) Lights when sleep timer is active. 12 Lights during playback. Note 1 Only the HTZ280/282DVD-AP models are equipped with the adapter port. Remote control The illustration shows the HTZ280/282DVD-AP. -
Page 15: Putting The Batteries In The Remote
SOUND (page 23 and 24) MP3 EXP/V.ENH (page 24) Playback controls (page 19 and 25) TV CONTROL buttons These control Pioneer flat screen TVs. 10 SHIFT 11 OPEN/CLOSE (page 18, 32 and 53) 12 PLAYLIST buttons (page 27) 13 MIC VOL +/– (page 33) -
Page 16: Using The Remote Control
Controls and displays • In order to prevent battery leakage, remove the batteries when not using the remote control for an extended period (one month or more). If leakage occurs, carefully wipe away any battery fluid inside the compartment, and replace the batteries with new ones. -
Page 17: Getting Started
Getting started Chapter 4 Getting started Setting Speaker Layout Select the speaker layout for the speaker setting you arranged to your listening area environment. First time you switch on the system, the following speaker layout setting appears. If you switch off the system without finishing this setting, the same appears again next time you switch on the system. -
Page 18: Using The On-Screen Displays
Getting started Use the VOLUME +/– to adjust the volume to an appropriate level. Use / to adjust the channel levels in turn. You should hear the test tone at the same volume from each speaker when seated in the main listening position. -
Page 19: Basic Playback Controls
Getting started • Please see Disc/content format playback compatibility on page 47 if you want to play a DualDisc (DVD/CD hybrid disc) Adjust the volume. Use the VOLUME +/– control. Basic playback controls The following table shows the basic controls on the remote for playing discs. -
Page 20: Listening To The Radio
Getting started You can play a PBC Video CD/Super VCD without having to navigate the PBC menu by starting playback using a number button to select a track, rather than the (play) button. Button What it does RETURN Displays the PBC menu. Numbers Selects numbered menu options. -
Page 21: Listening To Station Presets
Getting started Press ENTER. After pressing ENTER, the preset class and number stop blinking and the system memorize station. Listening to station presets You will need to have some presets stored to do this. Make sure the TUNER function is selected. -
Page 22: Listening To Your System
Listening to your system Chapter 5 Listening to your system Important • This unit’s audio function may be restricted depending on the sound source, HDMI audio setting (page 41) or karaoke mode with the microphone plugged in (page 33). In this event, the menus may not appear, or a message may be displayed instead (page 56). -
Page 23: Using Front Surround
Listening to your system • MUSIC (Dolby Pro Logic II Music) – Pro Logic II 5.1 channel surround sound, especially suited to music sources (use with any two-channel source) • DOLBY PL (Dolby Pro Logic) – 4.1 channel surround sound (use with any two-channel source) Using Front Surround The Front Surround mode and Extra Power... -
Page 24: Boosting The Bass Level
Effective Sound (for optimum sound) With the uniquely shaped high-quality speakers supplied with this unit, the Effective Sound mode enables the following Pioneer exclusive audio technologies designed to maximize the real experience of sound originally inherent in movies and music. -
Page 25: Disc Playback Features
Disc playback features Chapter 6 Disc playback features Important • Many of the functions covered in this chapter apply to DVD discs, Video CDs/ Super VCDs, CDs, DivX video/WMV and WMA/MP3/MPEG-4 AAC/JPEG discs, although the exact operation of some varies slightly with the kind of disc loaded. •... -
Page 26: Browsing Dvd Or Video Cd/Super Vcd Discs With The Disc Navigator
Disc playback features While the slideshow is running: Button What it does Pauses the slideshow (or audio); press again to restart. Jumps to the previous picture (or audio file with audio playback). Jumps to the next picture (or audio file with audio playback). -
Page 27: Browsing Windows Media Tm Audio (Wma), Mp3, Mpeg-4 Aac, Divx Video/Wmv And Jpeg Files With The Disc Navigator
Disc playback features Browsing Windows Media Audio (WMA), MP3, MPEG-4 AAC, DivX video/WMV and JPEG files with the Disc Navigator Use the Disc Navigator to find a particular file or folder by filename. Press HOME MENU and select ‘Disc Navigator’ from the on-screen menu. 00:00/ 00:00 0kbps Folder1... -
Page 28: Listening To Playlists
Disc playback features • To add files without the on-screen display, simply press PLAYLIST 1, 2 or 3 during normal playback of the file you want (except when a JPEG slideshow is playing at the same time as audio). Listening to playlists •... -
Page 29: Creating A Program List
Disc playback features • Use the following controls during random play: Button What it does Selects a new track/title/chapter at random. Returns to the beginning of the current track/title/chapter; further presses select another random track/title/chapter. • Random play remains in effect until you select Random Off from the random play menu options. -
Page 30: Switching Subtitles
Disc playback features Use the number buttons to enter a title, chapter or track number, or a time. • For a time search, enter the number of minutes and seconds into the currently playing title (DVD/DivX video/WMV) or track (CD/Video CD/Super VCD) you want playback to resume from. -
Page 31: Usb Playback And Recording
(MP3 players) of format FAT16/32. It is not possible to connect this unit to a personal computer for USB playback. • Pioneer cannot guarantee compatibility (operation and/or bus power) with all USB mass storage devices and assumes no responsibility for any loss of data that may occur when connected to this unit. -
Page 32: Recording Specific Tracks
1 Recording cannot be started if there is not enough free space on the USB device. In this case, “Available USB space is low” is displayed. 2 • When recording is finished, a folder named “PIONEER” is created automatically on the USB device. The recorded tracks are stored in this folder. -
Page 33: Singing Karaoke
Singing karaoke Chapter 8 Singing karaoke Singing karaoke Using the karaoke features you can plug in a microphone and mix the sound of your own voice with a backing track. You can select a backing track from audio sources such as CDs, DVDs, VCDs or USB devices. -
Page 34: Audio Settings And Video Adjust Menus
Audio Settings and Video Adjust menus Chapter 9 Audio Settings and Video Adjust menus Audio Settings menu The Audio Settings menu offers features for adjusting the way discs sound. Press HOME MENU and select ‘Audio Settings’ from the on-screen display. Audio Settings Select and change settings using // /... -
Page 35: Initial Settings Menu
Initial Settings menu Chapter 10 Initial Settings menu Using the Initial Settings menu The Initial Settings menu provides audio and video output settings, parental lock settings, and display settings, among others. If an option is grayed out it means that it cannot be changed at the current time. -
Page 36: Language Settings
Initial Settings menu Setting Option HDMI Resolution* 1920x1080p (See Connecting using 1920x1080i HDMI on page 41.) 1280x720p * Default changes with 720x480p (NTSC)/ TV format (PAL/NTSC). 720x576p (PAL) 720x480i (NTSC)/ 720x576i (PAL) HDMI Color* Full range RGB (See Connecting using HDMI on page 41.) * Default changes depending on device... -
Page 37: Display Settings
Initial Settings menu Display settings Setting Option OSD Language English Languages as displayed Angle Indicator Options settings Setting Option Parental Lock – DivX(R) VOD Display Speakers settings Setting Option Speaker Distance – Parental Lock • Default level: Off; Default password: none; Default Country/Area code: us (2119) To give you some control over what your children watch on your DVD player, some DVD-... -
Page 38: About Divx ® Vod Content
Initial Settings menu Setting/changing the Parental Lock Select ‘Level Change’. Use number buttons to enter your password, then press ENTER. Select a new level and press ENTER. • Press repeatedly to lock more levels (more discs will require the password); press ... -
Page 39: Speaker Distance
Initial Settings menu Speaker Distance • Default setting: 3.0m To get the best surround sound from your system, you should set up the speakers equal distances from your listening position. Press HOME MENU and select ‘Initial Settings’. Select ‘Speakers’, then ‘Speaker Distance’. Initial Settings Video Output Speaker Distance... -
Page 40: Other Connections
Connect using RCA pin-plug stereo cables. Outdoor antenna Indoor antenna (vinyl-coated wire) 5 m to 6 m AM loop antenna COMPONENT VIDEO VIDEO(TV) UNBAL 75 Ω AM LOOP HDMI OUT VIDEO OUT PAL connector HDMI input KURO LINK-compatible Pioneer flat screen TV... -
Page 41: Connecting Using The Component Video
Other connections Connecting using the component video output If your TV has component video inputs, you can use these instead of the standard video outputs for a better quality picture. For the connection diagram, see 2 on page 40. • Use a component video cable to connect the COMPONENT VIDEO OUT to a set of component inputs on your TV. -
Page 42: Resetting The Hdmi Connection
ADAPTER for Wireless Enjoyment of Music HTZ280/282DVD-AP models only Wireless music play When the Bluetooth ADAPTER (Pioneer Model No. AS-BT100) is connected to this unit, a product equipped with Bluetooth wireless technology (portable cell phone, digital music player, etc.) can be used to listen to music wirelessly. -
Page 43: Remote Control Operation
Other connections Remote control operation The remote control supplied with this system allows you to play and stop media, and perform other operations. Bluetooth wireless Bluetooth technology wireless enabled device: technology Digital music enabled device: player cell phone Music data ®... -
Page 44: Listening To Music Contents Of Bluetooth Wireless Technology Device With Your System
ENTER. When CLR OK appears, press ENTER. The Bluetooth registered trademarks owned by Bluetooth SIG, Inc. and any use of such marks by Pioneer Corporation is under license. Other trademarks and trade names are those of their respective owners. What it does Starts normal playback. -
Page 45: Kuro Link
KURO LINK Not applicable to the HTZ180/181DVD models By connecting this unit to a KURO LINK- compatible Pioneer flat screen TV with a HDMI cable, you can control this unit from the remote control of a connected flat screen TV,... -
Page 46: Before Using Synchronization
DVD/CD. The operations below can also be used on Pioneer KURO LINK-compatible flat screen TVs. • When the unit’s volume is adjusted or the sound is muted, the volume status is displayed on the flat screen TV’s screen. -
Page 47: Additional Information
Additional information Chapter 13 Additional information Disc/content format playback compatibility This player is compatible with a wide range of disc types (media) and formats. Playable discs will generally feature one of the following logos on the disc and/or disc packaging. Note however that some disc types, such as recordable CD and DVD, may be in an unplayable format. -
Page 48: About Dvd+R/Dvd+Rw Compatibility
Additional information Media Compatible formats Compressed • MPEG-1 Audio Layer 3 (MP3), audio Windows Media Audio (WMA), MPEG- 4 AAC • Sampling rates: 32 kHz/44.1 kHz/ 48 kHz • Bit-rates: Any (128 kbps or higher recommended) • VBR (variable bit rate) MP3/WMA/ MPEG-4 AAC playback: No •... -
Page 49: About Wmv
Additional information Group 3: Bulgarian (bg), Byelorussian (be), Macedonian (mk), Russian (ru), Serbian (sr), Ukrainian (uk) Group 4: Hebrew (iw), Yiddish (ji) Group 5: Turkish (tr) ® DivX is a registered trademark of DivX, Inc., and is used under license. About WMV WMV is an acronym for Windows Media Video and refers to a video compression technology... -
Page 50: Dvd Video Regions
— you could end up damaging the unit. This unit is designed for use with conventional, fully circular discs only. Pioneer disclaims all liability arising in connection with the use of shaped discs. -
Page 51: Screen Sizes And Disc Formats
Additional information Screen sizes and disc formats DVD-Video discs come in different screen aspects, ranging from TV programs, which are generally 4:3, to CinemaScope widescreen movies , with an aspect ratio of up to about 7:3. Televisions also come in different aspect ratios; ‘standard’... -
Page 52: Frequency Step Setting
Additional information Press ENTER while CHANGE is blinking. The system will automatically enter standby mode, then turn on again. You’ll see the new TV system setting in the display after seeing POWER ON. Media Type Format NTSC DVD/Super VCD/ NTSC Video CD/DivX video/WMV —... -
Page 53: Troubleshooting
Sometimes the trouble may lie in another component. Investigate the other components and electrical appliances being used. If the trouble cannot be rectified even after exercising the checks listed below, ask your nearest Pioneer authorized service center or your dealer to carry out repair work. -
Page 54: Dvd/Cd/Video Cd Player
Additional information DVD/CD/Video CD player Problem Remedy The disc is ejected • Clean the disc and align the disc properly in the disc guide. automatically after • If the region number on a DVD-video disc does not match the number on the loading. -
Page 55: Tuner
Additional information Problem Remedy Can’t play WMV files. • When the bit rate the file is more than 192 kbps, the file cannot be played back. Tuner Problem Remedy Considerable noise in • Connect the AM antenna (see Basic connections on page 9) and adjust the radio broadcasts. -
Page 56: Bluetooth Connection
Additional information Problem Remedy No picture or sound. • If the problem still persists when connecting your HDMI component directly to your monitor, please consult the component or monitor manual or contact the manufacturer for support. • See Switching the HDMI audio setting on page 41 to make sure that TV is No HDMI audio output. -
Page 57: Resetting The System
OVER TEMP • Try lowering the volume. If this problem is not fixed by removing and inserting the power cable, this unit may be damaged. In such an event, please contact a Pioneer- authorized service center or your nearest dealer. -
Page 58: Language Code List
Additional information Language code list Language (Language code letter), Language code Japanese (ja), 1001 Estonian (et), 0520 English (en), 0514 Basque (eu), 0521 French (fr), 0618 Persian (fa), 0601 German (de), 0405 Finnish (fi), 0609 Italian (it), 0920 Fiji (fj), 0610 Spanish (es), 0519 Faroese (fo), 0615 Dutch (nl), 1412... -
Page 59: Specifications
Power cord ......1 Setup Guide Operating instructions (This document) S-DV180 Speaker system • Front speakers Enclosure . -
Page 60: Center Speaker
Additional information S-DV585 Speaker system • Front/surround speakers Enclosure..Closed-box bookshelf type ....(magnetically shielded) System ....6.6 cm 1-way system Speakers . - Page 61 & pending. DTS and DTS Digital Surround are registered trademarks and the DTS logos and Symbol are trademarks of DTS, Inc. © 1996-2008 DTS, Inc. All Rights Reserved. Published by Pioneer Corporation. Copyright © 2009 Pioneer Corporation. All rights reserved. ®...
- Page 62 D3-4-2-1-1_A1_Zhtw D3-4-2-1-7c*_A1_Zhtw...
- Page 64 感謝您購買本台先鋒產品。 請徹底閱讀本操作手冊,以便正確地操作您的產品。在您閱讀完手冊後,請妥為保管以便將來參 考之用。 目錄 01 揚聲器安裝指南 家庭劇院音效設置 ..... 6 點 點揚聲器擺設 ....6 點...
- Page 65 07 USB 播放與錄製 使用 介面......31 在 裝置上錄製音樂 的曲目 ..31 錄製所有曲目...
-
Page 66: 揚聲器安裝指南
揚聲器安裝指南 第 1 章 揚聲器安裝指南 家庭劇院音效設置 視您房間的大小及特性而定,您可以在兩種方 式中選取其一來擺設您的揚聲器以使用本系 統。關於揚聲器配置,請參閱 「設定指南」 。 5 點 /4 點揚聲器擺設 這是一種能提供最佳 標準多聲道環繞聲揚聲器設定方式。 3 點 /2 點揚聲器擺設 此種設定方式在無法進行後環繞揚聲器的擺設 時,或您希望能避免在聆聽區內佈設過長的揚 聲器線時,相當的實用。 準備揚聲器 所有機型的相同準備工作 安裝防滑墊 將小片防滑墊貼到每個揚聲器的底座上 。 四 • 塊大片的防滑墊則請貼到重低音上。 使用 用隨附的膠水將 到 聲器的底座 (平坦表面)上。 HTZ280DVD/HTZ280DVD-AP/ HTZ282DVD/HTZ282DVD-AP 的準備 工作... -
Page 67: 僅適用於 Htz181Dvd 機型的準備工作
揚聲器安裝指南 注意 • 塑膠鉤不是固定配件 , 而且也不應使用此鉤 子直接將揚聲器掛在牆壁上 。 一律使用纜線 保持揚聲器的穩定。 • 對於因不當組裝、安裝、安裝材料強度不 足、誤用或天然災害造成的任何損失或損 壞,先鋒概不擔負任何責任。 • 放置本機時,請確定已牢牢固定本機,並避 免放置在可能因天然災害 (例如地震)而 掉落並造成人員受傷的區域。 僅適用於 HTZ181DVD 機型的準備工作 堆疊揚聲器並使用托架固定 每個揚聲器背面的機型標籤上都有協助識別的 顏色標示指示。請參照顏色指示並正確安裝揚 聲器。 如圖所示堆疊揚聲器。 如以下每張圖片所示, 將托架對齊各自的上側與下側螺絲孔,然後安 全地固定螺絲。 4 點 /3 點揚聲器配置: 附註 使用前置環繞聲模式時,請勿疊起環繞聲揚聲器,而是將它們放在前置揚聲器旁,然後朝外 佳音效。 2 點揚聲器配置: 注意 •... -
Page 68: 僅適用於安裝 Htz180/181Dvd 機型的
揚聲器安裝指南 • 安裝螺絲未附 。 請使用適合牆壁的材料及可 以支撐揚聲器的螺絲。 注意 • 如果您不確定牆壁的材質及強度 , 請洽詢專 業人員的意見。 • 先鋒對於因不正確安裝所造成的意外或損 壞,一概不負任何責任。 5 mm 7 mm 僅適用於安裝 HTZ180/181DVD 機型 的托架 • 在將托架安裝到揚聲器背面時 , 請確實儘量 將隨機附贈的螺絲上緊固定。 • 請勿將托架安裝到中置揚聲器。 Zhtw 揚聲器擺設之其他注意事項 • 將主要的左前置及右前置揚聲器安裝在電 視機兩側同等的距離上。 • 使用 在稍高於耳朵高度的位置以得到最佳效果 。 預防事項: •... -
Page 69: 接線
接線 第 2 章 接線 基本接線方式 為了得到最好的環繞音效,請如下所示設定您的揚聲器。左前置和右前置揚聲器應該相距約 1.8 m 2.7 m 至 。 HTZ180DVD 下圖中的揚聲器型號 LINE 1 FRONT CENTER AC IN SURROUND WOOFER SPEAKERS (4 Ω ) ANALOG AUDIO IN 重要提示 • 在連接本系統或變更接線方式時 , 請確實將 電源關閉並從牆壁插座拔下電源線。 完成所有接線後 , 請將電源線連接至牆壁插 座上。 警告... - Page 70 接線 連接 AM 及 FM 天線。 a. 請拉除 天線金屬線上的保護外皮 。 連接 環型天線的每股金屬線至各個 線端子上。 在各個端子上,將固定片往下壓打開;然後 插入金屬線,再放開、關上固定。 b. 把 天線 插頭壓入 腳內。 3-1 連接每只揚聲器。 • 連接金屬線至揚聲器上。 • 扭轉並扯下每條金屬線上的保護外皮。 附註 • 將天線放置在遠離接收器或其他連接線的位置。 • 如果使用所附天線的接收不良,則請參閱第 • 請勿將安裝隨附的環形天線以外的任何天線,或如第 • 請勿讓其接觸到金屬物體並避免擺在電腦、電視機或其他電氣設備的附近。 • 如果收音機接收不良,您可以將每條天線金屬線重新插入相對的端子內或可有所改善。 • 為了能有最佳的接收條件,請勿將 欲確保最佳的接收條件,請確實將 Zhtw •...
- Page 71 接線 b. 固定揚聲器線。 在測定揚聲器轉動所需的鬆緊度後 (請參閱接 下來之步驟) ,請利用所提供的凹槽來固定揚 聲器線。 c. 將揚聲器轉向最近的牆壁 , 令箭頭對齊以完 成最佳的 「前置環繞聲」設置。 關於 「前置環繞聲」模式,請轉動每個揚聲器 使底座上的 箭頭能對齊前置揚聲器上的 ( FRONT SURROUND)箭頭。關於 「加大 功率」模式,請將所有揚聲器朝向前面。如需 有關使用 「前置環繞聲」與 「加大功率」模式 的詳細資訊,請參閱 聆聽您的系統 注意 • 為了避免發生意外 , 請確定環繞揚聲器是正 確固定於前置揚聲器之上。 • 請勿將揚聲器安裝到牆上或揚聲器腳架上 來完成 點揚聲器擺設。 僅適用於...
- Page 72 接線 注意 • 這些揚聲器端子均帶有危險電壓 。 為避免在 連接或脫離揚聲器線時發生電擊危險 , 在觸 摸任何未絕緣部分之前 , 請先將電源線插頭 拔離。 • 請勿將隨機附贈以外的揚聲器連接至本系 統上。 • 請勿將隨附的揚聲器連接至不是隨本系統 一起附上的擴大器 。 連接至其他的擴大器上 可能會導致故障或起火。 • 連接插頭後 , 輕拉連接線以確定連接線端牢 牢連接至端子 。 連接不良可能造成雜訊和聲 音中斷。 • 如果連接線的線路正好退出端子外 , 讓線路 互相接觸,造成擴大器過大的額外負載。這 樣可能導致擴大器停止作用 , 甚至可能損壞 擴大器。 將其中一端連接至您的電視機的視頻輸入 插孔。...
-
Page 73: 控制與顯示
控制與顯示 第 3 章 控制與顯示 前面板 STANDBY/ ON OPEN/CLOSE FUNCTION MAIN STANDBY/ON (第 17、32、43、50、 52 以及 54 頁) OPEN/CLOSE (第 18、32 以及 53 頁) 功能 VOLUME +/– (第 19 頁) 碟盤 (第 18 頁) 遙控感應器... -
Page 74: 遙控器
控制與顯示 kHz/MHz (第 20 頁) 為指示字元顯示幕中所顯示的頻率單位 (kHz 適用於 ,MHz 適用於 10 字元顯示幕 (第 21 頁) 此燈在睡眠定時啟動時會亮起。 12 此燈在播放期間會亮起。 附註 HTZ280/282DVD-AP 只有 機型配備傳輸埠。 Zhtw 遙控器 下圖顯示 ) 。 STANDBY/ON (第 17、32、43、50、 52 以及 54 頁) 功能選取按鍵 數字鍵、CLEAR、DISPLAY、SLEEP 和 DVD 控制... -
Page 75: 安裝遙控器電池
控制與顯示 SHIFT+SUBTITLE (第 30 頁) SHIFT+ANGLE (第 30 頁) SHIFT+ZOOM (第 30 頁) TOP MENU (第 19 以及 30 頁) SHIFT+SETUP (第 17、20、41、43、44、 45、51、52 以及 57 頁) SHIFT+KARAOKE (第 33 頁) SHIFT+ECHO (第 33 頁) SHIFT+ / SHIFT+ (第 33 頁) 遊標按鍵... -
Page 76: 運用遙控器
控制與顯示 • 為了避免電池漏液,長時間 (一個月或更 久)不使用遙控器時,請取出遙控器的電 池。如果漏液,請小心擦掉電池槽內的任何 電池液,然後換用新電池。 • 請勿讓書本或其他物體壓在遙控器上 , 因為 這樣可能壓住按鍵 , 造成電池的電量更快耗 盡。 • 切勿在車內或加熱器附近等會受到陽光直 射或過熱的環境中使用或存放電池 。 過熱的 環境可能導致電池破漏、過熱、爆炸或起 火。還會減少電池的使用壽命或效能。 運用遙控器 遙控器的使用範圍為距離前面板感應器的 內,而且在 內。 ° • 如果遙控器和顯示裝置之間有障礙物 , 或如 果遙控器未以正確角度指向顯示裝置的遙 控感應器,則遙控器可能無法作用。 • 如果陽光直射或螢光燈等強制照到本機的 遙控感應器上,則遙控器可能無法正常作 用。 • 如果在靠近會發射紅外線的裝置 , 或其他裝 置的紅外線遙控器的位置使用本機... -
Page 77: 開始操作
開始操作 第 4 章 開始操作 設定揚聲器擺設 選擇您為您的聆聽區環境安排的揚聲器設定的 揚聲器擺設。 第一次開啟系統電源時,顯示下列的揚聲器擺 設設定。如果您未完成此設定即關閉系統電源, 下次開啟系統電源時會再次顯示相同內容。 按 STANDBY/ON,然後確認顯示幕顯示 WELCOME (歡迎使用) 。 SELECT SPEAKER LAYOUT 將在顯示幕上 執行約 10 秒鐘。 使用 / 選取適當的揚聲器擺設。 有兩種揚聲器擺設模式- 點揚聲器擺設和 點揚聲器擺設。 如需有關揚聲器擺設與模式說明的詳細資料, 請參閱 「設定指南」 。 • 5 SPOT -將兩個環繞揚聲器放置在聆聽位 置後面,最適用於 聲道家庭電影院的 聲音。... -
Page 78: 使用在屏顯示畫面 (Osd
開始操作 使用 VOLUME +/– 以調整音量至適度的範 圍。 使用 / 以輪流調整聲道的音量。 當坐在主要聆聽位置上,您應該會聽到來自每 個揚聲器同樣音量的測試音調。聲道音量範圍 10 dB 為 ± 。 在您完成時,按下 ENTER 以退出測試音調 設置。 使用在屏顯示畫面 (OSD) 為了使用方便,本系統採用了大量圖形化的在 屏顯示畫面 ( ) 。 所有畫面的導覽方式基本上並無不同,請使用 、、、 變更反白項目,並按下 ENTER 完成選取。 重要提示 • 整本手冊, 「選取」是指使用游標按鍵反白 在屏畫面中的項目,再按下 ENTER 之意。 按鍵 按鍵功能... -
Page 79: 基本播放控制
開始操作 DualDisc • 如果您要播放 ( 碟片/內容格式播 ,請參閱第 頁的 片) 放相容性 。 音量調整。 請使用 VOLUME +/– 來控制音量。 基本播放控制 以下表格所示為遙控器上用以播放碟片的基本 控制。 您在第 章中可以找到其他的播放功 能。 按鍵 按鍵功能 開始/恢復正常播放。 • 如果螢幕上顯示 RESUME(恢復)或 LAST MEM (最終記憶)的字樣,則播 放作業便會從恢復播放或最後記憶的位 恢復播放及最終 置開始 (請參閱下列 記憶播放 ) 。 暫停/繼續播放碟片。... -
Page 80: 聆聽收音機
開始操作 您可以直接利用數字鍵選取曲目,不用按下 (播放)按鍵來開始播放,而無須導覽 PBC VCD/ 選單,便可播放整張 按鍵 按鍵功能 顯示 選單。 RETURN 數字鍵 選取編有號碼的選單選項。按下 ENTER 按鍵以作出選取。 顯示前一個選單頁 (如果有的話) 。 顯示下一個選單頁 (如果有的話) 。 聆聽收音機 調諧器可以接收 及 記憶喜愛收聽的電台,使您無須每次要收聽時 還要手動調諧。 按下 TUNER 以切換調諧器,然後連續按以 選取 AM 或 FM 波段。 螢幕此時會顯示波段及頻率。 調選需要的頻率。 這裡有三種調諧模式-手動、自動及高速: •... -
Page 81: 收聽預設電台
開始操作 按下 ENTER。 按 ENTER 後,預設類別和編號停止閃爍,然後 系統記憶電台。 收聽預設電台 您必須先儲存一些預設值才能執行此操作。 確定已選取 TUNER 功能。 按下 CLASS 以選取儲存頻道所在的類別。 重覆按下可切換 A、B 和 C 類別。 使用 PRESET 按鍵以選取一預設電台。 • 您也可以使用數字鍵來選取預設電台。 聆聽其他來源 可將輔助來源 (電視機、衛星接收器等)連接 至本機上,透過揚聲器系統播放。與其相關的 更多資訊,請參閱第 頁的 備 。 • 要將一 裝置連接至 USB 播放與錄製 第 頁的 HTZ280/282DVD-AP •... -
Page 82: 聆聽您的系統
聆聽您的系統 第 5 章 聆聽您的系統 重要提示 • 本機音頻功能是否受限視音源 、 設置(第 頁)或有插入麥克風的伴唱模 式(第 頁)而定。此時選單可能不會顯 示,或改為顯示訊息 (第 選取聆聽模式 您可以使用各種聆聽模式享受不同的音效,及 根據您的喜好修正音場。您可以設定不同的聆 聽模式,視您在第 頁的 擇的揚聲器擺設而定。請閱讀以下內容並進行 每個設定。 5 點 /4 點揚聲器擺設 • 當您已選擇 點揚聲器配置時,請從環繞聲模 式中選擇一個聆聽模式。請參閱下列 聆聽 。 3 點 /2 點揚聲器擺設 • 當您已選擇將環繞揚聲器放在您前面的 聲器配置時,請從前置環繞聲模式中選擇一個 聆聽模式。請參閱第 頁的... -
Page 83: 使用前置環繞聲
聆聽您的系統 (Dolby Pro Logic II Music • MUSIC Pro Logic II 5.1 產生 聲道環繞音效,特別 適合音樂來源 (適用於雙聲道來源) (Dolby Pro Logic • DOLBY PL 聲道環繞音效 (適用於雙聲道來源) 使用前置環繞聲 選取 DVD/CD 或 USB 作為輸入來源並如第 家庭劇院音效設置 頁的 中所述使用 HTZ181DVD 點僅適用於 機型)揚聲器擺設 時,前置環繞聲模式和加大功率模式發揮作用。 重複按 SURROUND 以選取前置環繞聲模 •... -
Page 84: 加重低音音量
聆聽您的系統 加重低音音量 本機共有二種低音模式,您可用來增強來源中 的低音音量。 按下 SOUND。 使用 / 以選取 BASSMODE,然後按下 ENTER。 使用/調整聲音 , 然後按下ENTER確認 。 選取 OFF,MUSIC 或 CINEMA。 使用 MP3 擴展器 重現壓縮音樂的美聲 ( MPEG-4 AAC ) 。 重複按 MP3 EXP/V.ENH 選取 MP3 EXP。 • 使用聲音強化器模式 此模式可用於聆聽電影或對白中的台詞。 重複按 MP3 EXP/V.ENH 選取 VOICE E。 •... -
Page 85: 碟片播放功能
碟片播放功能 第 6 章 碟片播放功能 重要提示 • 即使某些功能的實際操作會因置入的碟片 種類而有些許上的差異 , 本章所涵蓋的許多 功能仍可適用於 碟片、 DivX /WMV 、 、 視頻 MP3/MPEG-4 AAC/JPEG • 有些 會限制某些功能(例如隨機或重 複播放)對碟片的部分或全部的使用。這並 不是故障。 VCD/ • 在播放 超級 時 , 某些功能在 播放期間並不適用。如果您想要使用這些 功能,請使用數字鍵選取曲目來開始碟片 的播放。 碟片掃描 您可以各種的速度向前或向後快速掃描碟片。 播放期間,按下 或 以開始掃描。 •... -
Page 86: 使用 「碟片導向」瀏覽 Dvd 或 Vcd/ 超級 Vcd 碟片
碟片播放功能 幻燈片秀播放時: 按鍵 按鍵功能 可暫停幻燈片秀 (或音頻)的播 放;再按時可再度開始播放。 可跳至前一張圖片 (或音頻檔案 的音頻播放) 。 可跳至下一張圖片 (或音頻檔案 的音頻播放) 。 /// 可暫停幻燈片秀的播放,並旋轉 /翻動所顯示的圖片 (按下 (播放)按鍵可重新開始播放 幻燈片秀) 。 SHIFT+ZOOM 可暫停幻燈片秀的播放,並將圖 片放大。再按時可切換一倍、二 倍及四倍的放大倍數 (按下 (播放)按鍵可重新開始播放 幻燈片秀) 。 可顯示 「碟片導向」畫面 (請 MENU 參閱以下說明) 。 使用... -
Page 87: 可利用 「碟片導向」功能瀏覽 Windows
碟片播放功能 可利用 「碟片導向」功能瀏覽 ™ Windows Media Audio (WMA)、MP3、MPEG-4 AAC、 DivX 視頻 /WMV 及 JPEG 檔案 使用 「碟片導向」按照檔名尋找一特定的檔案 或資料夾。 按下 HOME MENU 並從在屏顯示選單中選 取 「Disc Navigator (碟片導向) 」 。 00:00/ 00:00 0kbps Folder1 Folder2 Folder3 Folder4 使用 /// 及 ENTER 來瀏覽。 使用... -
Page 88: 聆聽播放清單
碟片播放功能 提示 • 要在沒有在屏顯示畫面的情況下加入檔 案,只需在正常播放所需檔案期間按下 PLAYLIST 1、2 或 3 即可 (除在播放音頻 JPEG 的同時,又播放 聆聽播放清單 播放停止時,按下 PLAYLIST 1、2 或 3。 • 播放期間,前面板顯示幕中的 PGM 指示燈會 起。若未設定任何播放清單,則顯示幕中會顯 示 NO LIST。 JPEG • 若播放清單內含有 則會開始播放幻燈片秀及音頻檔案。 清除播放清單上的檔案 開始播放您的播放清單。 從 「Disc Navigator (碟片導向) 」畫面 上,反白想從播放清單上清除的檔案並按下 CLEAR。 循環播放碟片某個片段... -
Page 89: 建立程序編輯清單
碟片播放功能 選取「Random(隨機) 」 ,然後選取選項。 • 播放 碟片時,可選取 Random Title (隨機播放標題) 或 Random Chapter(隨 機播放章) 。 VCD/ • 播放 及 超級 (開)或 Off (關)以開啟或關閉隨機播放 功能。 提示 • 隨機播放期間使用以下控制功能: 按鍵 按鍵功能 隨機播放下選取一新的曲目/標 題/章節。 可返回至目前曲目/標題/章節 的開頭;再按時可隨機選取其他 的曲目/標題/章節。 • 隨機播放會繼續執行 , 直到您從隨機播放選 單選項中選取了... -
Page 90: 切換字幕
碟片播放功能 選取 「Search Mode (搜索模式) 」 。 所呈現的搜索選項會視置入的碟片種類而定。 選取搜索模式。 • 碟片必須按序播放以便使用時間搜索功能 。 使用數字鍵輸入標題、章節或曲目編號,或 時間。 • 使用時間搜索時 , 請按照您想要恢復播放的 位置來輸入目前播放標題 ( /WMV CD/VCD/ 頻 )或曲目( 的分鐘數及秒數。例如,按下 4、5、0、0 即會從碟片上的第 想要輸入 小時、 按下 8、0、3、0。 按下 ENTER 開始播放。 切換字幕 DivX 某些 碟片及 視頻碟片擁有一種以上 語言的字幕;在碟片包裝上會清楚告訴您可以 使用的字幕語言種類。您可以在播放期間來切... -
Page 91: Usb 播放與錄製
USB 播放與錄製 第 7 章 USB 播放與錄製 使用 USB 介面 利用本機前面的 介面就可以聆聽雙聲道音 DivX /WMV/JPEG 頻 並觀看 視頻 圖方式連接一 大量儲存裝置 開啟播放器後,按下 USB。 確定電視機已開並設定為正確的視頻輸入。 連接您的 USB 裝置。 端子的位置就在前面板上。 按下 (播放)以開始播放。 JPEG 若是您的 裝置當中含有 幻燈片秀。與其相關的更多資訊,請參閱第 播放 JPEG 幻燈片秀 頁的 。 • 確定在脫離時(或系統在待機狀態下) ,前 面板顯示幕上顯示... -
Page 92: 錄製特定曲目
USB 播放與錄製 按 SHIFT+USB REC 以顯示 「CD -> USB Rec (CD -> USB 轉錄) 」畫面。 CD –> USB Rec Select Track 128kbps Bitrate Start 13 Selected Track 055:07 Total Time 按下 ENTER 開始錄製。 開始錄製。錄製時,顯示以下所示的畫面。 CD –> USB Rec Track Progress Total Progress Cancel Selected Track... -
Page 93: 卡拉 Ok 伴唱
卡拉 OK 伴唱 第 8 章 卡拉 OK 伴唱 卡拉 OK 伴唱 使用伴唱功能,您可以將麥克風插上後,將自 己的聲音溶入背景音樂當中。 自 、 、 或 裝置等音源的背景 音樂。請調整麥克風與背景相對的音量。 MAIN 插入麥克風。 如果只有使用一隻麥克風,請將它插上 MIC (MAIN) 插孔。MIC (SUB) 插孔只能在有接上 MIC (MAIN) 的情況下才能使用。 • 如果麥克風上有開關,請撥至開的位置。 置入有伴唱背景音樂的碟片。 您也可以利用 裝置的曲目作為背景音樂的 來源媒體。 調整 KARAOKE 模式設定。 按... -
Page 94: 音頻設置及視頻調整選單
音頻設置及視頻調整選單 第 9 章 音頻設置及視頻調整選單 「音頻設置」選單 「音頻設置」選單可提供調整碟片聲音的功能。 按下 HOME MENU 並從在屏顯示畫面選取 「Audio Settings (音頻設置) 」 。 Audio Settings 使用 /// 及 ENTER 來選取及變更 設定值。 Audio Settings Audio DRC High Medium 音頻 DRC (動態範圍控制) • 設置: High (高) 、Medium (中) 、 Low (低)... -
Page 95: 初始設置」選單
「初始設置」選單 第 10 章 「初始設置」選單 使用 「初始設置」選單 「初始設置」選單提供音頻及視頻輸出設定值、 成人鎖定,以及顯示設定值等。 如果選項呈現淡出的灰色,則表示此時無法接 受變更。此種情形通常是因為碟片正在播放的 緣故。請停止碟片的播放,再變更設定值。 視頻輸出設定值 設定值 選項 4:3 (Letter Box) TV Screen (電視機屏幕) 畫 (另請參閱第 頁的 4:3 (Pan & Scan) 面大小及碟片格式 。) 16:9 (Wide) 16:9 (Compressed) Component Out Interlace (隔行掃描) (色差視頻輸出) Progressive (逐行掃描) 連... -
Page 96: 語言設定值
「初始設置」選單 設定值 選項 1920 x 1080p HDMI Resolution (HDMI 解析度) * 1920 x 1080i 使用 (請參閱第 頁的 1280 x 720p HDMI 連接 。) 720 x 480p (NTSC)/ 預設值會配合電視格 720 x 576p (PAL) 式 ( PAL/NTSC )改變。 720 x 480i (NTSC)/ 720 x 576i (PAL) Full range RGB HDMI Color... -
Page 97: 顯示幕設定值
「初始設置」選單 顯示幕設定值 設定值 選項 OSD Language English (英語) (在屏顯示語言) 同顯示的語言 Angle Indicator On (開) (角度指示燈) Off (關) 選項設定值 設定值 選項 – Parental Lock (成人鎖定) DivX(R) VOD Display 揚聲器設置 設定值 選項 – Speaker Distance (揚聲器距離) 成人鎖定 • 預設等級: Off (關) ;預設密碼: 預設國家/地區代碼:... -
Page 98: 關於 Divx Vod 內容
「初始設置」選單 設置/改變成人鎖定 選取 「Level Change (改變級別) 」 。 使用數字鍵輸入您的密碼,然後按下 ENTER。 選取新的等級並按下 ENTER。 • 連續按 以鎖定在更高的層次(更多碟片 需要使用密碼) ; 按下 以取消鎖定層次 。 您不能鎖在等級 。 設置/變更國家/地區代碼 國家/地區代碼清單 您可以從第 頁的 找到。 選取 「Country Code (國家代碼) 」 ,輸 入密碼,然後按下 ENTER。 選取國家/地區代碼,然後按下 ENTER。 在此提供兩種設置的方法: •... -
Page 99: 揚聲器距離
「初始設置」選單 揚聲器距離 • 預設值: 3.0m 想要從您的系統中產生最佳的環繞音效,應將 相距聆聽位置兩側的揚聲器設定為同等距離。 按下 HOME MENU 並選取 「Initial Settings (初始設置) 」 。 選取 「Speakers (揚聲器) 」 ,然後是 「Speaker Distance (揚聲器距離) 」 。 Initial Settings Video Output Speaker Distance Language Display Options Speakers 使用 / 以選取一揚聲器。 Initial Settings Video Output 3.0m Language... -
Page 100: 其他接線
其他接線 第 11 章 其他接線 重要提示 • 在本機後面板連接或變更接線方式時,請確實將電源關閉並從牆壁插座拔下電源線。 完成所有接線後,請將電源線連接至牆壁插座上。 LINE 1 AC IN ANALOG AUDIO IN 連接輔助音頻設備 使用立體聲類比輸入可連接卡式錄音座或 播放器等外部設備,經由本系統播放。 關於接線圖,請參閱上述的 Zhtw CENTER FRONT SURROUND WOOFER SPEAKERS (4 Ω ) ADAPTER PORT Bluetooth ® 連接 (LINE 1) AUDIO IN 插孔至外部播放設 • 備的類比輸出上。... -
Page 101: 使用色差視頻輸出連接
其他接線 使用色差視頻輸出連接 如果您的電視機有色差視頻輸入,您可以使用 這些輸入取代標準視頻輸出以得到更好的畫 質。 關於接線圖,請參閱第 頁上的 使用色差視頻連接線連接 COMPONENT • VIDEO OUT 至您電視機上的色差輸入組。 關於逐行掃描視頻 相較隔行掃描視頻,逐行掃描視頻更能有效的 加倍影像的掃描頻率,產生相當穩定,無跳動 的影像。逐行掃描視頻僅可透過色差視頻輸出 端子輸出。 本機與逐行掃描及高傳真電視機之相容性。 Macro Vision • 本機與逐行掃描視頻 System Copy Guard 相容。 使用 HDMI 連接 HDMI HDCP 若配備 或 (結合 或顯示裝置,可利用一般市面上的 線將它連接至本播放器,以提供高品質的數位 視頻。 關於接線圖,請參閱第 頁上的 附註... -
Page 102: 重新設定 Hdmi 連接
其他接線 • TV – 從電視機或平面電視機出 聲音與 功能訊號。 重新設定 HDMI 連接 若出現錯誤訊息 (顯示幕屏示 HDMI ERR)或 若畫面一片空白 (如在變更解析度後) ,則請 參閱第 頁 的故障排除指南。若仍無法解決 問題,則請依下述步驟重新設定 按下 SHIFT+SETUP。 使用 / 以選取 INITIAL,然後按下 ENTER。 使用 / 選取 HDMIINIT,然後按下 ENTER。 INIT OK 閃爍時,按下 ENTER。 HDMI 系統會重新啟動且 回原廠預設值。欲了解與這些設定值相關的更 多資訊,請參閱第... -
Page 103: 遙控器操作
其他接線 遙控器操作 本系統隨附的遙控器允許您播放和停止媒體, 以及執行其他操作。 ® Bluetooth 連接選購的 Bluetooth 傳輸器 將系統切換至待機狀態,然後將 Bluetooth 傳輸器連接至位於後面板的 ADAPTER PORT。 關於接線圖,請參閱第 頁上的 附註 Bluetooth 無線技術啟用裝置可能須支援 • Bluetooth • 我們不保證使用遙控器可以操作 Bluetooth 在 傳輸器尚未插入 ADAPTER PORT 時,即使按下 ADAPTER PORT 也無法進入 BT AUDIO 輸入模式。 Bluetooth • 第一次使用 無線技術裝置和 Bluetooth •... -
Page 104: Bluetooth Bluetooth
其他接線 檢查 Bluetooth 無線裝置是否偵測到 Bluetooth 傳輸器。 Bluetooth 當 無線技術裝置偵測到 傳輸器時,傳輸器的識別編號 「 Bluetooth 顯示在 無線技術裝置清單中。 從 Bluetooth 無線技術裝置清單中,選取 Bluetooth 傳輸器,然後在步驟 3 輸入所選取 的 PIN 碼。 使用您的系統聆聽 Bluetooth 無線技 術裝置的音樂內容 按 ADAPTER PORT , 然後切換到 BT AUDIO 輸入模式。 將 Bluetooth 無線技術裝置連接至 Bluetooth 傳輸器。 連接... -
Page 105: Kuro Link Kuro Link
KURO LINK 第 12 章 KURO LINK 不適用於 HTZ180/181DVD 機型 HDMI 使用 連接線將本機連接至 相容先鋒平面電視後,您可以使用所連接平面 電視的遙控器控制本機,並且讓所連接的平面 電視自動切換輸入,以回應本機執行的操作。 此外,從連接的平面電視輸入語言資訊時,本 機的圖形使用者介面顯示語言自動切換 (僅在 停止播放或圖形使用者介面的畫面未顯示,只 DVD/CD 能使用 功能時) 。 HDMI 如需有關透過 連接線可執行哪些操作的 詳細資訊,請參閱平面電視的操作手冊。 KURO LINK • 您無法搭配不支援 用此功能。 • 我們不保證本機能搭配先鋒以外所製造的 KURO LINK 相容設備使用。 連接 KURO LINK 您可以同步操作所連接的平面電視。... -
Page 106: 使用同步化之前
KURO LINK 按下 SHIFT+SETUP。 使用 / 以選取 HDMI SET,然後按下 ENTER。 使用 / 以選取 KURO LINK,然後按下 ENTER。 使用 / 以選取設定值,再按下 ENTER 確認。 KURO LINK • LINK ON -啟用 KURO LINK • LINK OFF -已停用 同步化操作。 使用同步化之前 一完成所有連接與設定後,您必須: 讓所有設備進入待機模式。 開啟所有設備的電源 , 最後才開啟平面電視 的電源。... -
Page 107: 其他資訊
其他資訊 第 13 章 其他資訊 碟片/內容格式播放相容性 本機適合播放各種類型(媒體) 及格式的碟片 。 可播放的碟片一般在碟片及/或碟片包裝上會 有下列其中一種標誌。然而請注意有些類型的 碟片,像是可燒錄式 及 不可播放的格式。 碟片相容性參照表 更多資訊,請參閱下列 DVD-Video DVD-R DVD-RW CD-R Fujicolor CD DVD+R/+RW • 本機可播放 是 FUJIFILM Corporation 的商標。 • 是 DVD Format/Logo Licensing • Corporation 的商標。 KODAK Picture CD •... -
Page 108: 關於 Dvd+R/Dvd+Rw 相容性
其他資訊 媒體 相容格式 MPEG-1 Audio Layer 3 (MP3) 音頻壓縮 • Windows Media Audio (WMA) MPEG-4 AAC • 取樣頻率: 48 kHz • 位元率: 任何傳輸率 (建議採用 128 kbps 以上) (可變位元率) • MPEG-4 AAC 無失真編碼: 否 • (數位版權管理)相容性: • 相容(受 法 在本機上播放。) .mp3 •... -
Page 109: 關於 Wmv
其他資訊 Albanian ( ) (sq) 小組 2: 阿爾巴尼亞語 ) (hr) Czech ( 克羅埃西亞語 , 捷克語 Hungarian ( ) (hu) Polish ( 匈牙利語 , Romanian ( ) (ro) Slovak ( 羅馬尼亞語 , (sk) Slovenian ( ) (sl) , 斯洛維尼亞語 Bulgarian ( ) (bg) 小組... -
Page 110: Dvd Video 適用地區
其他資訊 儲放碟片時 避免將碟片留在太冷、太濕或太熱 (包括受到 陽光直射)的環境中。不要將紙張或貼紙黏在 碟片上,或用鉛筆、鋼珠筆或其他尖銳的書寫 用具在上面書寫。這樣會損壞碟片。 碟片應避免事項 碟片係以高速在本機內旋轉。如果碟片發生爆 裂、碎裂、扭曲或其他損壞情形,請勿冒險置 於本機中播放 — 最終您可能會使本機損壞。 本機在設計上為僅可使用傳統、全圓的碟片。 先鋒聲明:對於因使用變形的碟片所引起的所 有責任,概不負責。 DVD Video 適用地區 DVD Video 所有的 碟片上均有印上地區標示, 以指出該碟片於全球適用的地區 。 您的 統亦有一地區標示 (就在背面板上) 。來自不 相容地區的碟片將無法在本機上播放。標示 ALL 的碟片可在任何的播放器上播放。 當您插入一片本播放器無法播放的碟片時,將 會出現以下訊息: Incompatible disc region number (非兼容碟片區域碼) Can't play disc (無法播放碟片)... -
Page 111: 畫面大小及碟片格式
其他資訊 畫面大小及碟片格式 DVD-Video 碟片能收錄各種的畫面比例,範例 從一般為 的電視節目到畫面比例高達 CinemaScope 的 寬螢幕電影 電視機也有各種不同的畫面比例; 「標準」的 16:9 以及寬屏幕 。 寬螢幕電視使用者 如果使用寬螢幕電視,則本播放器的 TV Screen (電視機屏幕)設定應設為 16:9 (Wide) 或 16:9 (Compressed) (第 當您使用 16:9 (Wide) 設定觀賞以 錄製的碟片,您可以使用電視控制功能來選取 影像呈現的方式。您的電視機可能會不同的縮 放及伸展功能;細節部分請參閱您電視機所附 的操作手冊。 請注意,部分電影的畫面比例大於 此即便使用寬螢幕電視觀賞,仍會以 「 」樣式播放該種碟片 (螢幕上下兩側出現 黑色條邊) 。 標準電視使用者... -
Page 112: 頻率間距設置
其他資訊 CHANGE 閃爍時,請按 ENTER。 系統將自動進入待機模式,然後再重新開啟電 源。看到 POWER ON 後,您將在顯示幕上看 到新的電視系統設定。 媒體類型 系統 格式 NTSC DVD/ 超級 VCD/ VCD/DivX 視頻 / — CD/MP3/WMA/ MPEG-4 AAC/ JPEG/ 無碟片 頻率間距設置 不適用於沙烏地阿拉伯、以色列、南非或其他 中東國家與免稅機型 如果您發現您無法成功調選到電台,則表示頻 率間距可能不適用您所在的國家/地區。 按下 SHIFT+SETUP。 使用 / 以選取 AM 9K/10K,然後按下 ENTER。 使用 / 以選取 AM 9K 或 AM 10K,然 後按下... -
Page 113: 故障排除
其他資訊 故障排除 人們經常錯將不正確之操作當成系統故障或異常。如果您認為本機有任何問題,請按照以下各點 進行檢查。有時問題可能是來自其他裝置。請仔細檢查其他使用中的裝置和電器設備。如果在查 證過以下各點後問題還是無法改善,請就近洽詢您的先鋒授權服務中心或經銷商,前來代為維修。 • 如果本系統是因為受到靜電等外來效應致使無法正常操作,請將電源插頭從輸出插座上拔下 再插回去,以回復正常的操作狀態。 一般問題 問題 解決辦法 電源沒有打開,或突然關 • 重開機前請等待一分鐘。 機 (啟動時可能會有一 • 確定主機上的線束無鬆脫的情形。如有鬆脫,可能會造成系統自動關機。 錯誤訊息顯示) 。 • 檢查揚聲器連接是否正確。 • 確定主電源的電壓確實適用於本型機種。 • 嘗試降低音量。 • 如果問題仍然存在,請將本機攜至最近的先鋒授權服務中心或您的經銷商處接受 維修。 選取功能後,沒有聲音輸 • 如果您正使用線路輸入,請確定設備連接是否正確 (請參閱第 出。 頻設備 ) 。 HDMI • 如果 任何聲音。... -
Page 114: Dvd/Cd/Vcd 播放器
其他資訊 DVD/CD/VCD 播放器 問題 解決辦法 碟片在置入後又自動退 • 清潔碟片並將碟片正確對準碟片導槽。 出。 • 如果 參閱第 Incompatible disc region number (非兼容碟片區域碼/無法播放碟片) 。 • 讓播放器內部的水氣有時間蒸發。避免在空調設備附近使用本機。 無法進行播放。 • 如果碟片在置入時放反,請重新將碟片標籤面朝上放入。 影像播放中止,且按鍵無 • 按下 (停止)按鍵,然後按下 (播放)按鍵開始播放。 法使用。 • 先將電源關閉,然後再使用前面板上的 STANDBY/ON 按鍵將電源打開。 設定值全部消除。 • 電源發生中斷時,將會消除設定值。 沒有影像/沒有色彩。 •... -
Page 115: 調諧器
其他資訊 調諧器 問題 解決辦法 收聽電台廣播時有明顯的 • 連接 雜音。 接收條件。您也可以另外接一條內部或外部 線 ) 。 • 完全伸展開 外接一組外部 • 關閉其他可能造成雜訊的設備或將其移走。 • 調諧間距不適用您所在的國家或地區。請參閱第 換調諧間隔。 自動調諧功能無法接收到 • 電台訊號微弱。自動調諧功能僅能偵測到訊號發射良好的無線電台。想要獲得更加 某些電台。 靈敏的調諧條件,可接上一組室外天線。 USB 連接 問題 解決辦法 本系統無法辨識 大 • 確定已將 量儲存裝置。 • 確認記憶體格式為 • 不支援內建有 檔案無法在導覽器/相片 • 檔案必須要有正確的副檔名: 譬如, 瀏覽器中顯示。... -
Page 116: Bluetooth 連線
其他資訊 問題 解決辦法 沒有影像或聲音。 • 如果問題仍然存在,在將您的 器的操作手冊,或洽詢製造商以尋求協助。 HDMI 無 音頻輸出。 • 請參閱第 KURO LINK 不作用。 • 確認是否已牢牢連接 • 確定本機的 • 檢查所連接設備是否支援 手冊。 • 如果同時連接 時連接 您的電視機自動切換輸 • 連接電視機自動切換輸入以回應本機開機播放 入。 (例如碟片導向) 等 。 如果您不要您的電視機以這種方式切換輸入 , 請將本機的 LINK Bluetooth 連線 問題 解決辦法 無法連接或操作... -
Page 117: 重新設置系統
其他資訊 訊息 說明 STEREO • 在 TUNER 、 LINE 或 ADAPTER PORT 輸入模式中按下 SURROUND 或 AUTO/STEREO 時,顯示 STEREO。 KEYLOCK • 按鍵鎖啟用。請參閱第 USB ERR • 如需更多與此相關的資訊,請參閱第 HDMI ERR • 請參閱上述 定 HDMI 連接 EEP ERR • 維修事宜請洽詢您的先鋒授權服務中心或您的經銷商。 EXIT • 輸入禁止的訊號或在顯示選單畫面時接上麥克風即會顯示,然後畫面會返回正常畫 面。 NO MIC •... -
Page 118: 語言代碼清單
其他資訊 語言代碼清單 語言 (語言字母代碼) 、語言代碼 Japanese (ja), Estonian (et), 1001 English (en), Basque (eu), 0514 French (fr), Persian (fa), 0618 German (de), Finnish (fi), 0405 Italian (it), Fiji (fj), 0920 Spanish (es), Faroese (fo), 0519 Dutch (nl), Frisian (fy), 1412 Russian (ru), Irish (ga), 1821... - Page 119 ......1 電源線 安裝指南 操作手冊 (本文件) S-DV180 揚聲器系統 前置揚聲器 • ... . .
- Page 120 其他資訊 ......4 大型防滑墊 ......4 固定托架...
- Page 121 其他資訊 配件 • ..... 5 揚聲器連接線 ..... . . 8 小型防滑墊...
-
Page 122
253 Alexandra Road, #04-01, Singapore 159936 TEL: 65-6472-7555 PIONEER ELECTRONICS AUSTRALIA PTY. LTD. 178-184 Boundary Road, Braeside, Victoria 3195, Australia, TEL: (03) 9586-6300 PIONEER ELECTRONICS DE MEXICO S.A. DE C.V. Blvd.Manuel Avila Camacho 138 10 piso Col.Lomas de Chapultepec, Mexico,D.F. 11000 TEL: 55-9178-4270 K002_B_En Printed in
...