
Related Manuals for Lenovo M7208W

Summary of Contents for Lenovo M7208W
- Page 1 M7208W/M7208 Multifunction Laser Printer 用户手册 User Manual ATTENTION: Read these instructions carefully before using this product to ensure correct operation. Keep this User Manual in a safe place for future reference.
-
Page 2: Disclaimer
Lenovo professional maintenance personnel. Lenovo (Beijing) Limited has taken great care to ensure the accuracy of this User Manual but cannot guarantee it is free from all errors. -
Page 3: Legal Prohibition
Legal Prohibition Please do not copy or print any item prohibited from copying by law. In general, copying or printing the items below are regarded as illegal according to local bylaws: Banknotes Revenue stamps Bonds or other debt certificates ... -
Page 4: Table Of Contents
Table of Contents Disclaimer ...................1 Legal Prohibition .................2 1 Guide to Components..............7 Exterior ................7 Interior .................8 2 Setting up the Printer ...............9 2.1 Unpacking ..............9 2.2 Opening the Paper Feed ..........10 2.3 Loading Paper .............11 2.4 Connecting the Printer to a Power Socket ....13 2.5 Starting the Printer ............13 2.6 Installing Printer Drivers and VOP Software ....14 Quickly Installation .............15... - Page 5 4.1 Print Jobs ..............27 Printing with a Printer Driver ........27 Printing with VOP ............28 4.2 Canceling Print Jobs ...........29 5 Copying .................31 5.1 Placing Originals ............31 About Originals ............31 Placing Originals on the Scanner Glass .....31 5.2 Basic Copying .............32 Copying with Printer Keys ..........32 Making Multiple Copies using Printer Keys ....34 Copying with VOP ............34...
- Page 6 7.3 Drivers Used in Mac ...........60 Basic ................60 8 Print over Wi-Fi ..............65 8.1 Wi-Fi Config and Installation ........65 8.2 Network Installation ............69 8.3 Print over Wi-Fi ............72 9 Keys and Indicators ...............73 9.1 Introduction ..............73 9.2 LED Indicator ...............73 9.3 LED Indicator and Status Description ......74 9.4 LED Indicator Status and Operation Guide ........
- Page 7 12.3 Toner Cartridge ............98 12.4 Specifications of the Machine ........99 12.5 Trademark ...............102 Index ..................104...
-
Page 8: Guide To Components
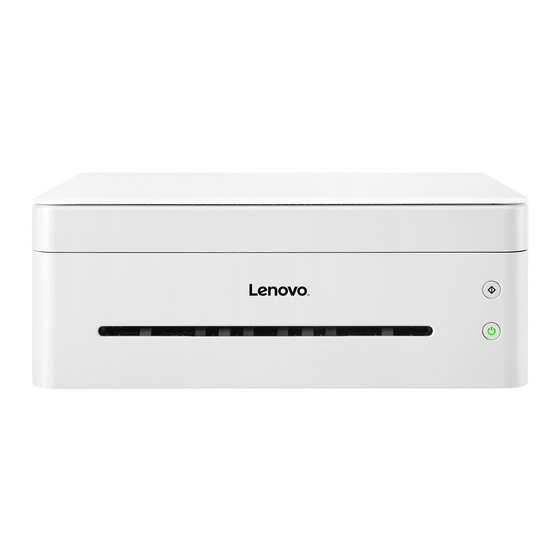
Guide to Components This section introduces the names of the parts in front, at the back and inside the machine. Exterior Scanner cover Start key Paper exit Power key Notes • Please refer to Chapter 9: Keys and Indicators for details of key functions and how indicators display the printer device status. -
Page 9: Interior
Interior Toner cartridge Paper jam release lever... -
Page 10: Setting Up The Printer
Setting up the Printer 2.1 Unpacking Take the printer and all accessories out of the packaging. Check you have all the accessories listed below. Toner cartridge Power cable (1.5 m) Quick Installation Guide USB cable (1.2 m) CD-ROM Safety manual Important • If you find any accessories or parts missing or defective, please notify your reseller immediately. -
Page 11: Opening The Paper Feed
2.2 Opening the Paper Feed Open the feed tray. The raised section here can help you easily open the feed tray. Pull out the Extension Panel 1. Extension Panel 1 Flip open the Extension Panel 2. Extension Panel 2... -
Page 12: Loading Paper
2.3 Loading Paper This section explains how to load paper into the paper feed. Notes • Please refer to Chapter 3: Print Media for details of print media. Before loading the paper, bend the sheets back and forth and fan the stack. Use a flat surface such as a desk to line up the edges of the sheets. - Page 13 Pinch the paper guide clip and slide it to fit the paper size. Important • Please make sure to set the paper size and type when loading paper. When printing, please specify the paper size and type in the printer driver so the settings can be used for printing the loaded paper.
-
Page 14: Connecting The Printer To A Power Socket
2.4 Connecting the Printer to a Power Socket Plug the power cable into the power port at the back of the printer. Plug the other end of the power cable into a properly grounded AC power supply socket. 2.5 Starting the Printer Hold the power key for 0.5 seconds or longer to start the printer. -
Page 15: Installing Printer Drivers And Vop Software
2.6 Installing Printer Drivers and VOP Software Different Models Some functions may not be available on all models or in all countries/regions. Drivers and VOP software are listed below. Drivers and VOP software M7208 M7208w Printer Driver √ √ Scanner Driver √ √... -
Page 16: Quickly Installation
Quickly Installation Installing drivers on Windows The exact steps will depend on which version of the operating system you use. This example uses Windows 7. Start the printer and connect the computer and printer with the USB cable. Insert the CD-ROM supplied with this product into the computer's CD-ROM drive. When the installer window is displayed, select the required language. - Page 17 Click [Quick Install (USB)]. Click [Next]. The program will start installing automatically. When the installation is complete, click [Done]. The printer driver installation is complete. You can start to use your printer.
- Page 18 Installing drivers on Mac OS Start the printer and connect the computer and printer with the USB cable. Insert the CD-ROM supplied with this product into the computer's CD-ROM drive. Double click the CD disk icon on the computer desktop. Double click the [Install] icon.
- Page 19 Please carefully read the software License Agreement, and click [Continue]. If you accept the terms of the license agreement, please click [Accept] to continue installation. Select options as instructed on the interface, and click [Continue]. Click [Install], and the system will perform a default install of the software.
- Page 20 For MAC OS X 10.5 and 10.6, enter the administrator name and password and click [OK]. For MAC OS X 10.7, 10.8 and 10.9, please enter the administrator name and password and click [Install Software]. Click [Continue]. Click [Restart] to complete the installation.
-
Page 21: Wi-Fi Config And Installation
Wi-Fi Config and Installation When the printer is used for the first time,it needs to configured for Wi-Fi.After the printer is configured,you can operate the printer via Wi-Fi. Important • Some functions may not be available on all models or in all countries/regions. Please refer to the models and specific configurations listed: Different Models. -
Page 22: Upgrading Printer Drivers
Upgrading Printer Drivers You can upgrade the installed printer driver by following the steps below. In the [Start] menu, click [Devices and Printers]. Windows XP, Windows Server 2003/2003 R2: In the [Start] menu, select [Printers and Faxes]. Windows Vista, Windows Server 2008: In the [Start] menu, select [Control Panel] and click [Hardware and Sound]-[Printer]. -
Page 23: Uninstalling Printer Drivers
Uninstalling Printer Drivers You can use the uninstall program also can uninstall the printer driver by following the steps below. In the [Start] menu, click [Devices and Printers]. Windows XP, Windows Server 2003/2003 R2: In the [Start] menu, select [Printers and Faxes]. ... -
Page 24: Printing A Test Page
Click [Start], then [Devices and Printers]. Right click your printer and select [Printer Properties] to display the properties dialog box (shown on the right). Click [Print Test Page]. If the test page is successfully printed, the Lenovo M7208/M7208w has been configured correctly. 2.8 Printing a Configuration Page The configuration page shows your printer settings. -
Page 25: Print Media
Print Media 3.1 Supported Paper Paper Sizes Letter "8½" × 11" A5 LEF B6 LEF Executive 7¼" × 10½" (195 × 267 mm) Custom Paper Size Custom Paper Size supports the following sizes: • Width Approx. 76.2-216mm (3-8.5 inches) • Length Approx. 116-356mm (4.5-14 inches) Paper Types Plain Paper (70-90 g/m²) -
Page 26: Non-Recommended Paper Types
Envelopes Notes • Poorly stored paper can cause paper misfeeds,print quality degradation,or malfunctions. • Use of any of the paper types listed above may damage the product. Such damage is not covered by the warranty from Lenovo (Beijing) Limited. -
Page 27: Print Area
3.3 Print Area The picture below shows the area of the paper that the machine can print on. 4.2mm (0.2 inches) 4.2mm (0.2 inches) Print Area 4.2mm (0.2 inches) 4.2mm (0.2 inches) Notes • The print area may vary depending on the paper size and printer driver settings. -
Page 28: Printing
Printing 4.1 Print Jobs This printer offers two options for handling printing: Printing with a Printer Driver Printing with VOP Printing with a Printer Driver This option allows you to print files on the computer using printer drivers. The example below is for Adobe Reader XI on Windows 7. -
Page 29: Printing With Vop
Please make sure your printer is selected. Click [Properties] if displayed. Click [Settings], [Printer] or [Options] if displayed, then [Properties]. Notes • Click the [Properties] button in the print dialog box to display another dialog box with more printer settings. • Any changes made will apply only to the software currently in use. -
Page 30: Canceling Print Jobs
4.2 Canceling Print Jobs The steps for canceling a print job are different for jobs that are not yet printing or currently printing. Canceling a Print Job before Printing has started Double click the printer icon on the taskbar at the bottom right of the computer desktop. - Page 31 Canceling a Print Job during Printing Press and hold the power key for one second or longer. The LED indicator display shown below indicates the current task is being canceled. Start indicator is off Power indicator alternates between <-> red and green every 0.5 seconds. Important • If you cancel a print job that has already been processed,printing may continue for a few pages before being conceled.
-
Page 32: Copying
Copying 5.1 Placing Originals This section describes the types of originals you use set and how to place them. About Originals Recommended size of originals Scanner glass: no wider than 216 mm (8.5 inches) no longer than 297 mm (11.7 inches) ... -
Page 33: Basic Copying
Lower the scanner cover. Notes • Do not place originals until the toner has dried completely. Wet toner may leave marks on the scanner glass and cause smudges on the copies. • For thick, folded or bound documents where the scanner cover will not close, please press and hold the scanner cover while scanning. - Page 34 Notes • The LED indicator display shown below indicates that the printer is in sleep mode. Start indicator is off Power indicator slowly flashes green Press any key to wake the printer. Please refer to Chapter 9: Key Function and Indicator Guide for details.
-
Page 35: Making Multiple Copies Using Printer Keys
Making Multiple Copies using Printer Keys Place the original on the scanner glass. Notes • Please refer to Placing Originals for details. When the printer is in the state of standby, press and hold the start key for 3 seconds or longer to make 5 copies. TThe LED indicator display will change to that shown below. -
Page 36: Copying Both Sides Of An Id Card Onto One Side Of Paper
5.3 Copying Both sides of an ID Card onto one side of Paper You can copy the two sides of an ID card onto one side of a sheet of paper. Place the ID card front side down on the scanner glass.The ID card should be aligned to the rear left corner. - Page 37 When the LED indicator display changes to that shown below, the printer is ready to scan the second side of the ID card. Start indicator flashes green Power indicator flashes green Turn the ID card over and put it in the same position as before. Press the start key to scan the back side.
-
Page 38: Canceling A Copying
5.4 Canceling a Copying Press the power key for one second or longer to cancel all the current jobs. The LED indicator display will change to that shown below. Start indicator is off Power indicator alternates between <-> red and green every 0.5 seconds. Important • If copying is canceled while the machine is sacnning the original,copying is canceled immediately and there is no printout. -
Page 39: Scanning
Scanning This printer offers two options for handling scanning: Scanning with a PC Scanning with VOP 6.1 Scanning with a PC Scanning from a computer (TWAIN scanning and WIA scanning) allows you to operate the machine from your computer and scan originals into your computer directly. Using TWAIN scanner This section describes the preparation and procedure for using TWAIN scanner. - Page 40 Configure the scan settings as required, and click [Scan]. Main page: Preview Scan Function Preview window section Preview window Preview: Click [Preview] to display a preview image of the original to be scanned in the preview window. Scan: Click [Scan] to start scanning the original. Settings: Basic Scanning tab...
- Page 41 CImage Type: Blank & White 8-bit Grayscale 24-bit Full Color, default value. Resolution: 75 dpi/100 dpi/150 dpi/200 dpi/300dpi/600 dpi/ 1200 dpi/2400 dpi/4800dpi/Custom Custom Resolution: When the Custom option is selected, a dialog box will pop up to let you enter your preferred resolution.
- Page 42 Image Quality tab You can adjust the quality of the scanned image in the Image Quality tab. Image Options tab You can configure the image settings for the TWAIN scanner in the Image Options tab.
-
Page 43: Wia Scanning (Windows)
WIA Scanning (Windows) WIA 1.0 (Windows XP/Windows Server 2003) The WIA 1.0 provides default user interface for scan, as fllowing: WIA 2.0 (Windows Vista/Windows Server 2008 or above) The WIA 2.0 provides default user interface for scan, as fllowing:... -
Page 44: Scanning With Mac Ica
Procedure for using WIA scanner: 1 Place the original document on the scanner glass. Notes • Refer to Chapter 5 Loading an Original Document for Copying for details. 1 In the [Start] menu, click [Devices and Printers]. 2 Right click your printer's icon, and click [Start scan]. 3 Configure the scan settings as required, and click [Scan]. -
Page 45: Scanning With Vop
Advanced user interface: Color Kind: Text (1-bit image), Black &White (8-bit Grayscale image),Color (24-bit Color image). Resolution: 75dpi/100 dpi/ 150 dpi/ 200 dpi/ 300 dpi/ 600 dpi/ 1200 dpi/ 2400 dpi/ 4800 dpi. Scan size: A4, B5/JIS B5, US Letter, A5, US Executive. 6.2 Scanning with VOP Refer to the VOP software. -
Page 46: Drivers
Drivers This chapter describes the settings for printer drivers. 7.1 Supported System Environment WindowsXP Home/Professional/Professional x64 (SP2 or later) Windows Vista Home Basic/Home Premium/Business/Enterprise/ Ultimate Windows 7 Home Basic/Home Premium/Professional/Enterprise/ Ultimate Windows Server 2003 Standard/Standard x64/Enterprise/Enterprise x64 (SP1 or later) Windows Server 2003 R2 Standard/Standard x64/Enterprise/Enterprise x64 Windows Server 2008... -
Page 47: Basic Tab
Click [Properties]. Edit the print settings in the Properties dialog box. Basic Tab (1) Displays the current settings Select the options below to change the corresponding settings as required. Paper Size Paper Orientation Copies Paper Type ... -
Page 48: Paper Orientation
Paper Size Select the required paper size from the drop-down list. Supported paper sizes: Letter/A4/A5/A6/B5/B6/Executive/16K/A5(LEF)/B6(LEF)/Custom Paper Size Custom Paper Size supports the following range of paper sizes: • Width Approx. 76.2-216mm (3-8.5 inches) • Length Approx. 116-355.6mm (4.57-14 inches) Notes • Refer to Supported Paper Sizes and Types in Chapter 3 Print Media for details on paper size. -
Page 49: Print Quality
Paper Type This machine supports the following types of printing media. For optimal print quality, select the correct printing media. Plain Paper Recycled Paper Thick Paper Thin Paper Label Print Quality You can select one of the following print quality options: ... - Page 50 Multiple Pages The Multiple Page selection can reduce the image size of a page, allowing multiple pages to be printed on one sheet of paper. You can also enlarge the image size for printing one page on multiple sheets of paper. ...
- Page 51 After the first side is printed, according to the dialog box with the instructions, you will need to manually reload the paper to print the second side. After reloading the paper, press the Power key once, which should be flashing red. The printer will continue to print the second side.
-
Page 52: Advanced Tab
Toner Save Mode Activate the Toner Save mode to reduce toner consumption. In Toner Save mode, the printed document will be fainter, but print density remains the same. This option is disabled by default. Important • The printing speed and memory usage will not be affected in the Toner Save mode. Advanced Tab You can click the options below to change the corresponding settings: ... - Page 53 Scaling You can change the scaling of printed images. Off Fit to Paper Size Custom Resize [25%-400%] Important • When Fit to Paper Size or Custom Resize is selected, Multiple Pages or Booklet Printing options are unavailable. • A warning message will pop up.
-
Page 54: Use Watermark
Use Watermark You can add a logo or text into your documents as a watermark. You can choose to use a preset watermark or a text/image file you created. Check the Watermark check box, and click [Settings]. Watermark Settings Select Watermark Select the required watermark. - Page 55 Enter a proper title in the text box. Text Enter the watermark text in the text box, and select the Font, Style, and Size of the watermark, and select the required Transparent option. Transparent Check this check box to make the watermark transparent, such that the text or images below the watermark remain visible.
- Page 56 Position Define the position of the watermark on the page. Transparent Check this check box to make the watermark transparent, such that the text or images below the watermark remain visible. Leave this check box unchecked to make the watermark completely opaque, such that the text and images underneath it are completely covered.
- Page 57 Position Use the Position settings to define the position of the header/footer on the page. Three options are available in the horizontal direction: Left/Center/Right. Two options are available in the vertical direction: Top/Bottom. Font You can set the text style. Size You can set the text size.
-
Page 58: Density Adjustment
Density Adjustment Use this option to increase or decrease print density. To adjust print density, check the Density Adjustment check box, and click [Settings]. Other print options Skip Blank Page If Skip Blank Page is checked, the printer driver automatically detects blank pages and excludes them from printing. -
Page 59: Print Profile Tab
Print Profile Tab Profiles are editable presets designed to give you quick access to frequently used printing configurations. Function section Preview window • Profile Box (1) • Delete Profile (2) • Add Profile (3) • Current Profile View (4) Select the required profile from the Profile Box. Click [OK] to apply the selected profile. -
Page 60: Support
The selected profile will be deleted. Support Lenovo Support Website The Lenovo website (http://www.lenovo.com/ and http://www.lenovo.com.cn) provides information on Lenovo products, including FAQs, driver updates and tips on using Lenovo products. Visit the Lenovo website for more information and technical support. -
Page 61: Drivers Used In Mac
7.3 Drivers Used in Mac Basic Select the options below to change the corresponding settings as required. • Paper Size • Orientation • Copies • Media Type • Image Quality • Print Settings • Toner Save Mode Check the selected settings displayed in the preview window. Paper Size Select the required paper size from the drop-down list. - Page 62 Manage Custom Sizes(System Build-in Function) Create a Custom Paper Size Open the file to be printed; Follow the steps below: • Go to File>>Page Settings. In the Settings menu, select Page Properties, Then Any Printer. This will allow you to print documents select Format followed by on any printer that supports the paper size you have defined.
-
Page 63: Media Type
Orientation You can select the orientation of your document (Portrait or Landscape). Copies You can define the number of copies to be printed. Collate If the Collate check box is checked, one complete copy of your document will be printed and then repeated for the number of copies you selected. - Page 64 Multiple Page (Built-in Function) With this function, you can print multiple pages on the same sheet. Five options are offered: "1", "2", "4", "6", "9" and "16". Layout Direction (Built-in Function) When the N in 1 option is selected, you can select the layout direction and sposition of the pages on the same sheet.
-
Page 65: Color Balance
3 After the first side is printed, according to the dialog box with the instructions, you will need to manually reload the paper to print the second side. 4 After reloading the paper, press the Power key once, which should be flashing red. -
Page 66: Print Over Wi-Fi
Print over Wi-Fi 8.1 Wi-Fi Config and Installation Before installation: Verify that your printer supports Wi-Fi connection. Not all models support Wi-Fi connections. Notes • Refer to Page 17: Different Printer Models for the program and software configurations for different printer models. Installation steps: Power on the printer, connect the computer to the Wi-Fi which will be connected to the printer. - Page 67 A dialog box will pop up prompting if you would like to configure Wi-Fi. Select [Yes] and click [Next]. A dialog box will appear informing you that the system is searching for available networks. Please wait. The list of available networks will appear. Select the desired network and click [Next].
- Page 68 Enter the passwork and click [Next]. Wait for the network connection to be completed. The Printer Settings window will appear. Select your printer and click [Next].
- Page 69 Wait while the program is installed. Setup is now complete. Select whether to restart your computer now and click "Complete". Wi-Fi configuration and installation is now complete. You can now print over Wi-Fi.
-
Page 70: Network Installation
A window will appear prompting you to select your printer. Click Refresh. • Lenovo M7208w will appear on the list. Click "Next" and proceed to Step 6. • If the printer does not appear in the list, proceed to Step 5. - Page 71 Select your printer from the [Select printer] list, and click "Next". The [Printer Settings] window will appear. Enter the name and share name of your printer. Click "Next". The [Software and Documentation] window will pop up. Select the software and file to be installed, and click "Next".
- Page 72 Wait while the selected items are being installed. Setup is now complete. Select whether to restart your computer now and click "Complete". Network installation is complete. You can now print over Wi-Fi.
-
Page 73: Print Over Wi-Fi
8.3 Print over Wi-Fi Verify that the network driver has been installed. Print To print documents from the computer using the printer drivers, do the following: The example below illustrates printing from Adobe Reader XI on Windows 7. The actual operation may differ depending on the software used. Refer to the instructions from your printing software for the actual procedure. -
Page 74: Keys And Indicators
Keys and Indicators 9.1 Introduction Start key Power key LED indicator has four colors. Start key: Green Power key: Red Blue Green Yellow 9.2 LED Indicator LED indicator Status Flashing (on for one second and off for one second) Slow flash (on for one second and off for three seconds) Rapid flash (on for 0.5 seconds and off for 0.5 seconds) -
Page 75: Led Indicator And Status Description
9.3 LED Indicator and Status Description System Status Description Start indicator is off Power off Power indicator is off Start indicator is off Power on Power indicator is green Start indicator is off Warming up Power indicator flashes green Start indicator is off Initializing/Standby (Non Wi-Fi Models) Power indicator is green... - Page 76 Start indicator is green Starting ID Card Copy Power indicator is green Start indicator flashes green Pending the reverse side of the ID card Power indicator flashes green Start indicator flashes green Pending the next page in the N in1 mode Power indicator flashes green Start indicator is off Wi-Fi enabled...
- Page 77 Start indicator is off Fuser Unit Error The red power indicator flashes rapidly twice and the green indicator flashes once Start indicator is off The red power indicator flashes once Laser Scanning Unit Fault rapidly and the green indicator flashes twice Start indicator is off The red power indicator flashes twice...
-
Page 78: Led Indicator Status And Operation Guide
9.4 LED Indicator Status and Operation Guide Printer Status Operation Key Steps Press and hold power key Power off Power on for one second or longer Open the cover, press and hold the power key for 10 seconds or longer. (Power Power off Factory Reset indicator flashes rapidly for 10... - Page 79 Press start key and power key at the same time for one Enter ID card copy second and then release. Standby mode The indicators of the start key and power key are both green ID card copy mode Start ID card copy Press the start key once Press and hold power key ID card copy mode...
-
Page 80: Machine Maintenance
Machine Maintenance 10.1 Maintaining the Toner Cartridge Storage To extend the life of toner cartridges, note the following: Only remove the cartridge from its packaging just before its installation. Do not refill printer cartridges. The printer's warranty is voided when refilled cartridges are used. ... -
Page 81: Replacing The Toner Cartridge
For good print quality,we recommends that you use genuine toner from the Lenovo. Lenovo(Beijing) Limited shall not be responsible for any damage or expense that might result from the use of parts other than genuine parts from the Lenovo with your office products. 10.2 Replacing the Toner Cartridge Open the printer cover. - Page 82 Take the new toner cartridge out of box, and then take it out of the plastic bag. Gently shake the cartridge five to six times horizontally to distribute the toner evenly within the cartridge. Important • Should your clothes be stained with toner, wipe with a clean cloth and wash with cold water.
-
Page 83: Cleaning The Printer
10.3 Cleaning the Printer To ensure the best print quality, clean the printer as instructed below whenever the toner cartridge is replaced or when you notice a decrease in print quality. Do's and Don'ts Clean the machine periodically to maintain high print quality. ... -
Page 84: Cleaning The Inside Of The Printer
Cleaning the Inside of the Printer During printing, paper scraps, toner and dust particles may fall into and accumulate inside the printer. As time goes by, the debris may result in poor print quality, such as toner spots, stains and paper jams. Cleaning the inside of the printer can eliminate or reduce such issues. -
Page 85: Troubleshooting
Troubleshooting 11.1 FAQs This section provides troubleshooting tips for commonly encountered problems. Problems Possible Causes Solutions 1. Make sure that the power plug is Machine The power cord firmly inserted into the wall outlet cannnot be is not correctly 2. Connect other devices to the same powered on connected socket to verify that it is working... -
Page 86: Paper Feed Problems
11.2 Paper Feed Problems If the machine is operating but paper will not feed or paper jams occur frequently, check the condition of the machine and paper. Problems Solutions • Use only supported paper types. Refer to Chapter 3: Print Media for the supported paper types. -
Page 87: Removing Paper Jams
The printed • Load the paper upside down in the feed tray. paper is • Paper is damp. Use only paper that has been stored properly. curled Images are printed If there are gaps between the paper and the paper guide, adjust the diagonally to paper guide to eliminate the gap. - Page 88 Open the printer cover. Pull the release lever upwards. Pull the jammed paper carefully out of the paper exit. Be careful not to tear the paper.
- Page 89 Push the release lever back into position. Close the cover to resume printing. Paper Jams at the Feed Tray Important • If the paper has already entered the toner cartridge section, carry out the following steps. Pull the jammed paper carefully out of the feed tray. Be careful not to tear the paper.
- Page 90 Resume printing. Important • If the power indicator remains red, it indicates some paper is still stuck in the printer. Check the inside of the printer. Paper Jams Inside the Printer Important • If the paper jam occurs here, it can cause the toner to spill onto the paper. If your clothes is stained with the toner, wash off the stain with cold water.
- Page 91 Gently pull the paper out of the printer. Make sure no paper is left inside the printer. Reinstall the toner cartridge. Close the cover tightly. The printer will resume printing.
- Page 92 Tips to Avoid Paper Jams • The occurrence of paper jams can be significantly reduced by using the recommended types of print media. In the event of paper jams, follow the instructions described in "Removing Paper Jams". • Load paper as instructed in the section on "Loading Paper". Adjust the position of the paper guide properly.
-
Page 93: Print Quality Problems
11.4 Print Quality Problems If there is a problem with the quality of printing, first check the condition of the machine. Problems Solutions Make sure that the machine is on a level surface. The machine is not properly Place the machine where it will not be subject to placed. -
Page 94: Printing Problems
11.5 Printing Problems Problems Solutions If an error occurs during printing, change the computer settings and printer driver settings. • Check whether there are other running applications. Close any other applications An printing error occurs because they may interfere with the printing. If the problem is not resolved, close unneeded processes too. -
Page 95: Print Positions Do Not Match Display Positions
Print Positions Do Not Match Display Positions If the position of items on the printed page differs from the position displayed on the computer screen, the cause may be one of the following. Problems Solutions Page layout settings are not Check that the page layout settings are properly configured properly. -
Page 96: Copying Problems
11.6 Copying Problems Problems Solutions The original was placed with the front and back reversed. Refer to Chapter 5: Copying for Photocopied paper is blank Loading Original. Copied pages are too dark or Adjust the image density. too light Copied pages do not look the Select the correct scanning mode according to the same as the originals type of original. -
Page 97: Scanning Problems
11.7 Scanning Problems Problems Solutions • The scanner glass is dirty,clean the scanner glass. Refer to Chapter 10: Machine Maintenance for Cleaning Scanner Glass. The scanned image is dirty • Make sure the toner is dry before the original is placed on the scanner glass. The original was moved during the scanning The scanned image is process. -
Page 98: Appendix
Appendix 12.1 Precautions about Toner • The normal operation of the machine cannot be guaranteed if non-Lenovo toner products are used. • Depending on printing conditions, there are cases where the printer cannot print the number of sheets indicated in the specifications. -
Page 99: Toner Cartridge
Where to Inquire Contact your sales or service representative for further information about the topics included in this manual or to inquire about other topics not included in this manual. 12.3 Toner Cartridge Retail toner cartridge can print at least 1,500 pages when used for printing documents with 5% text coverage. -
Page 100: Specifications Of The Machine
12.4 Specifications of the Machine This section lists the specifications of the machine. General Function Specifications Configuration Desktop Maximum paper size for scanning using the scanner glass 216 mm × 297 mm (8.5 × 11.7 inches) Maximum paper size for printing 216 mm ×... - Page 101 Memory 128 MB Power requirements 220-240 V, 5 A, 50/60 Hz Power consumption • Maximum 900 W • Power Saving Mode 1 1.2 W or less Dimension (Width×Depth×Height) 350 x 275 x 135 mm Weight (Machine and toner cartridge) Approx. 8.9 kg (19.6 pounds) or less Printing Function Specifications Printing speed 22 pages per minute (A4, SEF)
-
Page 103: Trademark
12.5 Trademark... -
Page 105: Index
Index...