YSI ProDSS User Manual
Hide thumbs
Also See for ProDSS:
- Use, calibration and maintenance manual (25 pages) ,
- Calibration and routine maintenance (16 pages) ,
- Manual (8 pages)
Table of Contents
Quick Links
Table of Contents

Related Manuals for YSI ProDSS


Summary of Contents for YSI ProDSS
- Page 1 USER MANUAL DOCUMENT #626973-01REF ProDSS USER MANUAL...
- Page 2 This page left intentionally blank...
-
Page 3: Table Of Contents
Safety information Precautionary symbols Product components Battery use and battery life Charging the battery pack Battery replacement Connect the handheld to the cable assembly ProDSS sensor installation/removal Operation Keypad and navigation Startup Navigation Main display description System menu Sensor menu... - Page 4 Install the KorDSS software ProDSS driver installation KorDSS startup wizard Accessories Ordering ProDSS handhelds ProDSS cable assemblies (No sensors included) ODO/OBOD sensor and cable assemblies - DO/Temp only ProDSS smart sensors Replacement sensor modules and ODO sensor caps ProDSS accessories Calibration standards...
-
Page 5: Introduction
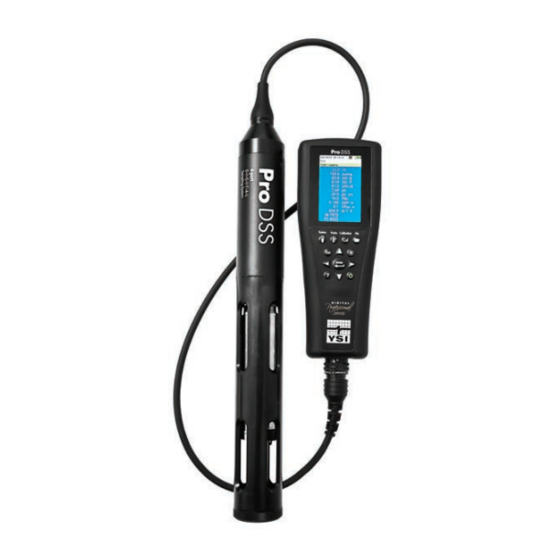
Product components Carefully unpack the instrument and accessories and inspect for damage. If any parts or materials are damaged, contact YSI Customer Service at 800-897-4151 (+1 937 767-7241) or the authorized YSI distributor from whom the instrument was purchased. -
Page 6: Battery Use And Battery Life
Battery life depends on use, enabled parameters, LCD brightness, and GPS use. As with all lithium-ion batteries, battery life will decline over time and use. This decay is typical and should be expected. A new ProDSS battery is expected to last for the following durations (25 °C (77 °F), auto sampling, GPS on, keypad backlight off): •... -
Page 7: Charging The Battery Pack
Charging the battery pack A USB cable is included with the ProDSS to charge the instrument battery pack and connect the instrument to a PC. The instrument battery pack can be charged from the AC power adapter, directly from a computer USB connection or... -
Page 8: Battery Replacement
When replacing the battery pack, use the new battery pack gasket/cradle supplied with the replacement battery pack. 3. Inspect the replacement battery pack and battery pack gasket/cradle for damage. Contact YSI customer service if the new battery pack and/or replacement gasket/cradle is damaged. - Page 9 Introduction Figure 2 Battery replacement 1 Battery pack cover 4 Instrument pin connectors 2 Battery pack 5 Battery pack gasket/cradle* 3 Battery pack connector 6 Battery pack gasket/cradle installed *Color shown for reference...
-
Page 10: Connect The Handheld To The Cable Assembly
Introduction Connect the handheld to the cable assembly The ProDSS cable connectors are keyed for positive mating and to prevent connector damage (Figure 3). The ProDSS instrument retains its IP-67 rating when the cable is disconnected. However, the connectors are not wet-mateable and should be clean and dry before connecting. -
Page 11: Prodss Sensor Installation/Removal
Bulkhead Sensor installation The ports on the ProDSS bulkhead are universal; therefore, you can install any sensor into any port. For highest accuracy, always install a conductivity/temperature sensor to compensate all measurement data for temperature and dissolved oxygen data for conductivity. - Page 12 To protect the bulkhead connectors from damage, install a port plug into any port without an installed sensor. Port plugs and a tube of o-ring lubricant are included in the maintenance kit that ships with all ProDSS cables. Refer to the...
- Page 13 Introduction Sensor guard and weight installation 1. Carefully slide the sensor guard over the bulkhead and attached sensors/port plugs. Push the sensor guard toward the bulkhead until the sensor guard threads align with the bulkhead threads. 2. Carefully finger-tighten the sensor guard clockwise. NOTICE: If any resistance is felt, loosen the sensor guard completely to prevent cross-threading.
- Page 14 Incorrect installation may cause damage to the sensor guard. The bottom of the weight is threaded so that additional weights can be added if needed. See ProDSS accessories on page 76. NOTE: Do not have any weights installed on the sensor guard when calibrating using the calibration cup.
-
Page 15: Operation
Operation Keypad and navigation System Probe Calibration File ENTER Figure 7 Keypad description System: Opens the system menu. Use to adjust 7 ON/OFF: Turn on or turn off the instrument system settings Exit/Escape key: Exits to the Run screen. When in 8 Right arrow key: Navigate right in an alpha/ an alpha/numeric entry screen, returns to previous numeric entry screen. -
Page 16: Startup
Push and hold the key for 1.5 seconds to turn the handheld off. Navigation The ProDSS contains menus to change user-defined options, functions, and parameters. Use the arrow keys ENTER ) to highlight different options within menus and sub-menus, then push the key to select the option. -
Page 17: Main Display Description
Operation Main display description The main display (Run screen) shows the current measurements as defined in the Sensor Display menu (Sensor Display on page 25). If more measurements are selected than can be displayed on the Run screen, a scroll bar will be shown. -
Page 18: System Menu
Operation System menu ENTER Push the System key to view and adjust instrument settings. Highlight a sub-menu then push the key to view the sub-menu options (Figure 10). Pre-defined or user-selected options are noted within brackets ([]). See Alpha/numeric entry on page Use the System menu to: •... - Page 19 For accurate logging and GLP data, correctly set the date and time options (Figure 11). Select any of the following options to set the Date/ Time in the ProDSS. Figure 11 Date/Time Date/Time options: • Set YY/MM/DD, MM/DD/YY, DD/MM/YY or YY/DD/MM date format •...
- Page 20 2. Select Set Password [] and change the default password. 3. Select the Protect Cal check box to password protect the Calibration menu. NOTE: Write down and keep the password in a safe place. Contact YSI Technical Support if you lose the password (Technical support on page 81).
- Page 21 Language → Language The ProDSS is shipped with English enabled. If a different language is desired and selected, the ProDSS will take approximately 10 to 20 Figure 16 Language seconds to enable the new language (during the first installation only).
- Page 22 Enter the desired Sample Period time. NOTE: When both Continuous Logging Mode and Manual Sampling mode are enabled, the ProDSS will power the sensors on and take measurements for 15 seconds before logging a data set.
- Page 23 PC. See the KorDSS help section for more information. Serial # → Serial # (System menu on page Serial # shows the serial number of the ProDSS handheld instrument. Note the serial number when contacting YSI support. Unit ID → Unit ID...
-
Page 24: Sensor Menu
Operation Sensor info → Sensor info (System menu on page Sensor info shows measurement data, and hardware/software information for each component of the system: instrument, sensor, and bulkhead. Use the arrow keys to scroll through the components. Brightness → Brightness The screen brightness can be adjusted to accommodate lighting conditions and to conserve battery power (Figure... -
Page 25
24). If a sensor is installed on the bulkhead and is not listed on the Sensor Setup menu (
displayed), check the sensor and cable connections (ProDSS sensor installation/removal on page Figure 24 Sensor Setup Setup ODO → Setup → ODO Local DO: Enable or disable localized DO% measurements. - Page 26 Operation Setup pH → Setup → pH Select USA auto-buffer recognition (4.01, 7.00, and 10.00) or NIST auto- Figure 27 Setup pH buffer recognition (4.01, 6.86, and 9.18) (Figure 27). Setup Conductivity → Setup → Conductivity Temp Ref (Temperature reference): Reference temperature used to calculate temperature compensated specific conductance.
- Page 27 Operation Setup Depth → Setup → Depth For ProDSS bulkheads with the depth sensor: The ProDSS cable assemblies with a depth sensor in the bulkhead can Figure 29 Setup Depth measure virtual vented depth (Figure 6 on page 11). The virtual vented depth measurement allows for real time compensation for atmospheric pressure using the instrument’s barometer.
- Page 28 Audio Enabled: An audio alert will sound when stability is reached. Continuous Mode: The ProDSS will continuously check sensor values against the stability criteria even after the sample period and sample count have been met.
- Page 29 Figure 33 Salinity the bulkhead. GPS (optional) → GPS GPS turns the ProDSS Global Positioning System On or Off. The symbol is shown when a GPS signal is received (Figure 34). Figure 34 GPS When enabled, the GPS coordinates will be saved with the GLP file and logged data.
-
Page 30: Calibration Menu
Operation Calibration menu ENTER Push the key to access the Calibration menu (Figure 35). Highlight a sub-menu then push the key to view sub-menu options. Pre-defined or user-selected parameters are noted within brackets ([]). See Alpha/numeric entry on page Refer to the Calibration section for sensor specific calibration procedures (Calibration on page 33). -
Page 31: Files Menu
Operation Files menu ENTER Push the key to access the Files menu (Figure 36). Highlight a sub-menu then push the key to view sub- menu options. Use the Files menu to view, delete or backup logged data or the GLP file. Data can be filtered by a specific date and time range and by user-created site and Data ID lists (Logging on page 29). - Page 32 Enter the desired filter criteria, then select Delete Data to permanently delete the data (Figure 40). NOTE: If filter criteria are not selected, all logged data will be permanently deleted. Figure 40 Delete Data Filter Select Delete All Data to permanently delete all logged data from the ProDSS.
- Page 33 Operation Backup Data → Backup Data A USB female to micro USB male adapter is included to directly backup files from the handheld to a standard USB storage device. The data is exported as a CSV file. Enter the desired filter criteria then connect the handheld to the USB storage device using the supplied adapter.
-
Page 34: Taking Measurements
Operation Taking measurements For the highest accuracy, calibrate the instrument before taking measurements (Calibration on page 33). 1. Create site and Data ID lists for logged data (if applicable) (Logging on page 19). 2. Set the logging method (single or interval) (Logging on page 19). -
Page 35: Calibration
Calibration ProDSS sensors (except temperature) require periodic calibration to maintain accurate measurements. Calibration procedures follow the same basic steps with variations for specific parameters. Before calibration • Enter GLP user-defined data if applicable to user requirements (User ID, Probe ID, User Field #1/2) (GLP menu on page 17). - Page 36 Calibration Alternately, pH, ORP, and conductivity calibrations can be completed in a beaker or other container using the same basic procedure described above. Make sure that the temperature sensor and the sensor to be calibrated are completely submerged. When submerging the conductivity sensor, make sure that the calibration solution covers the vent hole on the side of the conductivity sensor and there is at least 25.4 mm (1 in) distance between the sides and bottom of the calibration container and the conductivity probe.
-
Page 37: Conductivity
(nLF) conductivity, TDS, resistivity, and density. Calibration is only available for specific conductance, conductivity, and salinity. Calibrating one of these options automatically calibrates the other conductivity/temperature parameters listed above. For both ease of use and accuracy, YSI recommends calibrating specific conductance. -
Page 38: Barometer
NOTE: If you get calibration error messages, check for proper sensor immersion, verify the calibration solutions is fresh, the correct value has been entered into the ProDSS, and/or try cleaning the sensor. 9. Rinse the bulkhead and sensors in clean water then dry. -
Page 39: Dissolved Oxygen
Calibration Dissolved oxygen ODO calibration requires the current “true” barometric pressure. Make sure that the barometer is reading accurately and recalibrate the barometer as necessary. ODO% and ODO% local - water saturated air calibration NOTE: This method calibrates the instrument’s DO% measurement or DO% Local measurement if DO% local is enabled in the sensor setup menu. - Page 40 Calibration ODO mg/L calibration 1. Place the ODO and conductivity/temperature sensor into a water sample that has been titrated by the Winkler method to determine the dissolved oxygen concentration in mg/L. 2. Push the key, then select ODO. Select DO mg/L. 3.
-
Page 41: Ph/Orp
Calibration pH/ORP pH calibration 1-point NOTE: If performing a 1-point calibration, use buffer 7 (6.86) as your calibration point for highest accuracy. NOTE: Observe the pH mV readings during calibration to understand the condition and response of the pH sensor. In buffer 7, pH mVs should be between -50 and +50. - Page 42 5. Allow the temperature of the standard to stabilize then select Calibration value. 6. Enter the ORP calibration value that corresponds to the measured temperature reading (example: the value of YSI Zobell @ 20 �C is 237.5) 7. Observe the actual measurement readings for stability (white line...
-
Page 43: Depth
Calibration Depth NOTE: This calibration option is available only if your bulkhead is equipped with a depth sensor. The depth sensor is located where the cable connects to the bulkhead (Figure 59 on page 54). For the calibration, make sure that the depth sensor is clean and in air, not immersed in any solution. For highest accuracy, keep the bulkhead still and in one position while calibrating. -
Page 44: Turbidity
Treatment of Water and Wastewater (Section 2130 B). Acceptable standards include: • AMCO-AEPA standards prepared specifically for the ProDSS turbidity sensor manufactured by YSI (YSI turbidity standards) • Formazin prepared according to Standard Methods, especially for calibration points greater than 1010 •... - Page 45 Calibration Turbidity calibration 1-, 2- or 3-point NOTE: The sensor guard must be installed for the turbidity sensor calibration. NOTE: When performing a turbidity calibration, the first point must be zero.Select Calibration Value and enter 0.00. 1. Perform the Calibration setup (pH, ORP, ISE, conductivity, turbidity) on page 33.
-
Page 46: Ises: Ammonium, Nitrate, & Chloride
Calibration ISEs: Ammonium, Nitrate, & Chloride Before performing the calibration, review Calibration setup (pH, ORP, ISE, conductivity, turbidity) on page The ISE sensors can be calibrated to one, two or three points. A 2-point calibration without chilling a third calibration solution is extremely accurate and is the preferred method. - Page 47 Calibration ISE calibration 3-point 1. Perform the Calibration setup (pH, ORP, ISE, conductivity, turbidity) on page 2. Fill the calibration cup to fill line one with standard #1 (approximately 170 mLs). 3. Push the key, then select the applicable ISE sensor. 4.
- Page 48 Calibration Chilled third calibration point The 3-point calibration method assures maximum accuracy when the temperature of the media to be monitored cannot be anticipated. If you must perform a chilled 3-point calibration, the following procedure requires one portion of the high concentration calibration solution and two portions of the low concentration calibration solution. The high concentration solution and one of the low concentration solutions should be at ambient temperature.
- Page 49 The following recipes are provided for preparation of 10 and 1000 mg/L chloride reagents. Nitrate and Ammonium standards can be purchased from YSI or other laboratory supply companies. WARNING: Some of the chemicals required for these solutions could be hazardous under some conditions. It is the responsibility of the user to obtain and study the MSDS for each chemical and to follow the required instructions with regard to handling and disposal of these chemicals.
- Page 50 Calibration Preparing nitrate standards We recommend using YSI calibration solutions whenever possible. However, qualified users can save cost by following these recipes for 1 and 100 mg/L nitrate standards. Other concentrations can be made by altering the amount of potassium nitrate. All other concentrations should remain unchanged.
- Page 51 Calibration Preparing ammonium standards We recommend using YSI calibration solutions whenever possible. However, qualified users can save cost by following these recipes for 1 and 100 mg/L standards. Other concentrations can be made by altering the amount of ammonium chloride. All other ingredient concentrations should remain unchanged.
- Page 52 This page left intentionally blank...
-
Page 53: Maintenance And Storage
Unless otherwise specified, storage terms are defined as follows: Short-term storage (less than 4 weeks): Storage when the ProDSS will be used at regular intervals (daily, weekly, biweekly, etc.) Long-term storage: Storage when the ProDSS will have long periods of inactivity (over winter, end of monitoring season, etc.) -
Page 54: Prodss Handheld Instrument
Maintenance and storage ProDSS handheld instrument Handheld instrument maintenance Wipe the keypad, screen, and case with a cloth dampened with a mild solution of clean water and dish soap (Figure 56). Handheld storage temperature Optimal storage temperature of the handheld instrument: •... -
Page 55: Cable, Bulkhead, And Connectors
Maintenance and storage Cable, bulkhead, and connectors Cable, bulkhead, and connector maintenance Wipe the bulkhead cable with a cloth dampened with a mild solution of clean water and dish soap. NOTICE: Install sensors or port plugs so that the bulkhead ports do not get wet when cleaning. -
Page 56: Depth Sensor Maintenance And Storage
Depth sensor maintenance Periodically clean the depth ports with the syringe included in the ProDSS maintenance kit (626990). Fill the syringe with clean water and gently force water into one of the ports. Flush until clean water flows from the opposite depth port. -
Page 57: Turbidity Sensor
Maintenance and storage Turbidity sensor Turbidity sensor maintenance Clean the sensing window with a non-abrasive, lint-free cloth (Figure 60). NOTICE: Clean the window carefully to prevent scratches. If necessary, use mild soapy water. Figure 60 Turbidity sensor window Turbidity sensor short-term storage (less than 4 weeks) When in regular field use, the turbidity sensor can remain installed on the bulkhead in an environment of water-saturated air (Figure... -
Page 58: Conductivity/Temperature Sensor
Maintenance and storage Conductivity/temperature sensor NOTICE: Use care when handling the conductivity/temperature sensor to prevent any impact on the exposed thermistor. Conductivity/temperature sensor maintenance 1. Dip the sensor’s cleaning brush (included with the maintenance kit) in clean water. 2. Insert the brush at the top of the channels, and sweep the channels 15 to 20 times (Figure 62). -
Page 59: Dissolved Oxygen Sensor
Maintenance and storage Conductivity/temperature sensor long-term storage The Conductivity/Temperature sensor can be stored dry or wet, installed on the bulkhead or detached (Figure 64). Figure 64 Conductivity/Temperature Long-term storage Dissolved oxygen sensor ODO sensor caps are warranted for 1 year but have a typical working life of 18 to 24 months. As the ODO sensor caps ages, large scratches in the paint/dye layer and changes in the dye layer can reduce measurement stability and response time. - Page 60 Maintenance and storage ODO sensor cap replacement (continued) 1. Turn the used sensor cap counterclockwise to remove it from the sensor. NOTE: If possible, do not use a tool to remove the cap from the sensor. If necessary, carefully turn the cap counterclockwise with pliers until it breaks loose.
- Page 61 Updating the ODO sensor cap coefficients After installing a new sensor cap, connect the bulkhead cable assembly to the ProDSS instrument and turn the instrument on. Locate the Calibration Code Label on the ODO sensor cap instruction sheet and note the six numbers which are listed as K1 through K5 and KC.
- Page 62 Maintenance and storage ODO sensor rehydration To prevent sensor drift, always store the ODO sensor in a wet or water-saturated air environment. If the ODO sensor has accidentally been left dry for longer than 8 hours, it must be rehydrated. If rehydration is necessary, soak the ODO sensor cap in warm (room temperature) tap water for approximately 24 hours.
-
Page 63: Ph - Ph/Orp Sensors
2. Rinse the sensor with clean tap water and inspect. 3. If contaminants are removed, attach the sensor to the bulkhead and test the response time (ProDSS sensor installation/removal on page If contaminants remain or response time does not improve, continue to the hydrochloric acid (HCl) soak in step 4. - Page 64 Maintenance and storage pH - pH/ORP sensor storage The pH - pH/ORP sensors are shipped with their tips in a storage bottle containing KCl. Store the pH - pH/ORP sensors in the shipping container when not in use. pH - pH/ORP sensor short-term storage (less than 4 weeks) When in regular field use, the pH-pH/ORP sensors should remain installed on the bulkhead.
-
Page 65: Ise Sensors
Maintenance and storage ISE sensors Do not let the ISE sensor reference electrode junctions dry out. Clean the sensors when deposits, bio-fouling or other contamination appears on the membrane. Ammonium and nitrate sensor maintenance 1. Carefully clean the ammonium or nitrate sensor by using a fine jet of DI water or rinsing in alcohol followed by soaking in the high standard calibration solution (Figure... - Page 66 Maintenance and storage ISE sensor short-term storage (less than 4 weeks) When in regular field use, the ISE sensors should remain installed on the bulkhead in an environment of water-saturated air. Place approximately 0.5 in (1 cm) of any water (deionized, distilled or environmental) in the calibration cup (Figure 75).
- Page 67 ProDSS sensor module replacement ProDSS pH, pH/ORP, ammonium, chloride and nitrate sensors feature replaceable sensor modules. These modules can be replaced by the user as needed. Typical working life of a pH or pH/ORP sensor module is 18 to 24 months. Typical working life of ammonium, chloride and nitrate sensor modules is 4 to 8 months.
- Page 68 This page left intentionally blank...
-
Page 69: Kordss Software Installation
KorDSS software installation YSI recommends that you have administrative privileges on the PC in which KorDSS will be NOTE: installed. Follow these steps to complete the KorDSS installation process: Install the KorDSS software from the USB flash drive included with the instrument. -
Page 70: Install The Kordss Software
5. You may be asked if you want to allow a program from an unknown publisher to make changes on the computer. If so, select Yes. KorDSS is now installed. Before using KorDSS to manage data, you must install the driver for the ProDSS instrument on your PC. -
Page 71: Prodss Driver Installation
Figure 80 Device Manager Windows 7 4. Click Browse my computer for driver software. 5. Click Browse, then navigate to the file location: C:\Program Files (x86)\YSI\KorDSS for 64 bit systems or C:\Program Files\YSI\KorDSS for 32 bit systems. Click Next. 6. A warning will appear indicating that Windows can’t verify the publisher of the driver software. Select Install this driver software anyway. - Page 72 4. Select Search for the best driver in these locations, then Include this location in the search:. Click Browse, then navigate to the file location: C:\Program Files (x86)\YSI\KorDSS for 64 bit systems or C:\Program Files\ YSI\KorDSS for 32 bit systems 81).
- Page 73 7. Connect the ProDSS to the PC with the included USB cable. After connection, turn the instrument on. 8. Open Device Manager by pressing the Windows Key + X to open the Start Menu, then selecting Device Manager.
-
Page 74: Kordss Startup Wizard
85). To upgrade to Premium Mode for free, follow the link, register your ProDSS, then use the code sent to you via email to upgrade to the Premium Mode. You can upgrade to Premium Mode at any time by going to the File tab in KorDSS. -
Page 75: Accessories
+1 937 767 7241 (Globally) Monday through Friday, 8:00 AM to 5:00 ET Fax: +1 937 767 9353 (orders) Email: [email protected] Mail: YSI Incorporated 1725 Brannum Lane Yellow Springs, OH 45387 USA Internet: ysi.com When placing an order please have the following available: 1. -
Page 76: Prodss Handhelds
Accessories ProDSS handhelds YSI Item # Description 626870-1 ProDSS handheld, no GPS 626870-2 ProDSS handheld with GPS ProDSS cable assemblies (No sensors included) YSI Item # Description 626909-1 DSS-1 meter 4 port cable assembly, no depth 626909-4 DSS-4 meter 4 port cable assembly, no depth... -
Page 77: Odo/Obod Sensor And Cable Assemblies - Do/Temp Only
ProDSS chloride sensor with module Replacement sensor modules and ODO sensor caps YSI Item # Description 626890 Replacement ProDSS Optical Dissolved Oxygen sensor cap (for 626900 smart sensor) 626320 Replacement ODO Optical Dissolved Oxygen sensor cap (for 626250 probe/cable assemblies) 626482... -
Page 78: Prodss Accessories
ProDSS battery to about 50%) 626944 Large external Li-Ion rechargeable battery pack (Typical performance: will charge a completely discharged ProDSS battery to full charge, plus have power to charge a second battery to 20%) 626940 AC charger (USA). Includes power supply and USB cable (included with ProDSS... -
Page 79: Calibration Standards
Accessories Calibration standards YSI Item # Description 065270 Conductivity standard, 1000 μmhos/cm (quart, glass); ideal for fresh water 065272 Conductivity standard, 10000 μmhos/cm (quart, glass); ideal for brackish water 065274 Conductivity standard, 100000 μmhos/cm (quart, glass); ideal for supersaturated sea water 060907 Conductivity standard, 1000 μmhos/cm (box of 8 individual pints, plastic);... - Page 80 This page left intentionally blank...
-
Page 81: Safety And Support
• DO NOT place the battery pack in microwave ovens, high-pressure containers or on induction cookware. • DO NOT ship damaged or potentially defective batteries to YSI or any of our authorized service centers unless instructed otherwise. All federal and international shipping laws should be consulted prior to shipping... - Page 82 • DO NOT discharge the battery pack using any device except for the ProDSS handheld. When the battery pack is used in other devices it may damage the performance of the battery or reduce its life expectancy. Use of a non-approved device to discharge the battery pack can cause an abnormal current to flow, resulting in the battery pack to become hot, rupture or ignite and cause serious injury.
-
Page 86: Warranty
Warranty The YSI Professional Digital Sampling System (ProDSS) is warranted for three (3) years from date of purchase by the end user against defects in materials and workmanship. The ProDSS bulkhead, sensors and cable assemblies are warranted for two (2) years from date of purchase by the end user against defects in material and workmanship. -
Page 87: Appendix A - Do% Calibration Values
Appendix A - DO% calibration values Calibration Value Pressure D.O. % in Hg mmHg mbar 101% 30.22 767.6 102.34 1023.38 100% 29.92 760.0 101.33 1013.25 29.62 752.4 100.31 1003.12 29.32 744.8 99.30 992.99 29.02 737.2 98.29 982.85 28.72 729.6 97.27 972.72 28.43 722.0... - Page 88 This page left intentionally blank...
-
Page 89: Appendix B - Oxygen Solubility Table
Appendix B - oxygen solubility table Solubility of oxygen in mg/L in water exposed to water-xaturated air at 760 mm Hg pressure. Salinity = Measure of quantity of dissolved salts in water. Chlorinity = Measure of chloride content, by mass, of water. S(0/00) = 1.80655 x Chlorinity (0/00) Temp °C Chlorinity : 0... - Page 90 Appendix B - oxygen solubility table Temp °C Chlorinity : 0 5.0 ppt 10.0 ppt 15.0 ppt 20.0 ppt 25.0 ppt Salinity: 0 9.0 ppt 18.1 ppt 27.1 ppt 36.1 ppt 45.2 ppt 33.0 7.18 6.84 6.52 6.21 5.91 5.63 34.0 7.07 6.73...