AEG LAVATHERM 76280AC User Manual
Hide thumbs
Also See for LAVATHERM 76280AC:
- User manual (36 pages) ,
- User manual (24 pages) ,
- User manual (28 pages)

Related Manuals for AEG LAVATHERM 76280AC


Summary of Contents for AEG LAVATHERM 76280AC
- Page 1 User Manual LAVATHERM 76280AC Tumble Dryer...
-
Page 2: Table Of Contents
16. WARRANTY ........................ 22 FOR PERFECT RESULTS Thank you for choosing this AEG product. We have created it to give you impeccable performance for many years, with innovative technologies that help make life simpler features you might not find on ordinary appliances. Please spend a few minutes reading to get the very best from it. -
Page 3: Safety Information
ENGLISH SAFETY INFORMATION Before the installation and use of the appliance, carefully read the supplied instructions. The manufacturer is not responsible if an incorrect installation and use causes injuries and damages. Always keep the instructions with the appliance for future reference. - Page 4 If the tumble dryer is put on top of a washing • machine, use the stacking kit. The stacking kit, available from your authorized vendor, can be used only with the appliance specified in the instructions, supplied with the accessory. Read it carefully before installation (Refer to the Installation leaflet).
-
Page 5: Conditions Of Use
ENGLISH Wipe away lint or packaging debris that has • accumulated around the appliance. Do not run the appliance without a filter. Clean the lint • filter before or after each use. Do not dry unwashed items in the tumble dryer. •... -
Page 6: Safety Instructions
3. SAFETY INSTRUCTIONS 3.1 Installation 3.3 Use • Remove all the packaging. WARNING! • Do not install or use a damaged Risk of injury, electrical appliance. shock, fire, burns or damage • Follow the installation instruction to the appliance. -
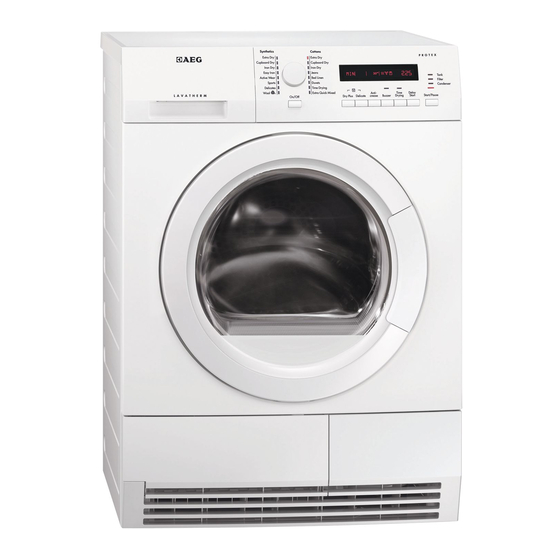
Page 7: Product Description
ENGLISH 3.5 Care and cleaning agent which is free from fluoro-chloro- hydrocarbons. This system must stay WARNING! tight. The damage of the system can Risk of injury or damage to cause a leakage. the appliance. 3.7 Disposal • Do not use water spray and steam to clean the appliance. -
Page 8: Accessories
Locks for condenser cover Rating plate For ease of loading laundry or ease of installation the door is reversible. (see separate leaflet). 5. ACCESSORIES 5.1 Stacking kit Accessory name: DK11. Available from your authorised vendor (can be attached to some types of... -
Page 9: Control Panel
ENGLISH Read carefully the instructions supplied Available from your authorised vendor with the accessory. (can be attached to some types of tumble dryers). Check with the vendor if 5.4 Drying rack the accessory is compatible with your appliance. Use the drying rack when drying: •... -
Page 10: Programme Table
(10min.-2h) delay start selection cooling phase indi- (30min.-20h) - Page 11 ENGLISH Programmes Properties / Fabric mark Load Extra Dry 3,5 kg Drying level: extra dry. 3,5 kg Drying level: cupboard dry. Cupboard Dry Iron Dry 3,5 kg Drying level: suitable for ironing. Easy care fabrics for which a minimum of ironing is necessary.
-
Page 12: Consumption Data
7.1 Programmes and options selection Options Time Dry- Dry Plus Delicate Anti-crease Programmes Cottons; Extra Dry Cottons; Cupboard Dry Cottons; Iron Dry Jeans Bed Linen Duvets Time Drying Extra Quick Mixed Synthetics; Extra Dry Synthetics; Cupboard Dry Synthetics; Iron Dry... -
Page 13: Options
ENGLISH Energy Programme Spun at / residual humidity Drying time consump- tion 1000 rpm / 60% 146 min. 4,80 kWh Iron Dry 1400 rpm / 50% 110 min. 3,49 kWh 1000 rpm / 60% 126 min. 3,98 kWh Synthetics 3,5 kg Cupboard Dry 1200 rpm / 40% 52 min. -
Page 14: Before First Use
9. BEFORE FIRST USE Before you use the appliance for the first • Start a short programme (e.g. 30 time: minutes) with moist laundry. • Clean the tumble dryer drum with a moist cloth. 10. DAILY USE 10.1 Preparing the laundry •... -
Page 15: Starting A Programme
ENGLISH 10.5 Setting a programme You can activate the child lock option: • before you push the Start/Pause button - the appliance cannot start • after you push the Start/Pause button - programmes and option selection is unavailable. Child lock option activation: 1. -
Page 16: Hints And Tips
Buzzer option is activated, the acoustic To remove the laundry: signal sounds intermittently for 1 minute. 1. Push the On/Off button for 2 seconds to turn the appliance off. If you do not turn off the 2. Open the appliance door. - Page 17 ENGLISH The filter collects the fluff. The fluff occurs while the clothes are dried in the tumble dryer. To clean the filter: 1. Open the door. Pull the filter. 5. If necessary remove fluff from the filter socket and gasket. You can use a vacuum cleaner.
-
Page 18: Cleaning The Condenser
3. Push the plastic connection back in and place the water container back 5. Catch the handle and pull the into position. condenser out from the bottom 4. To continue the programme press compartment. Move condenser the Start/Pause button. -
Page 19: Troubleshooting
ENGLISH drum lifters. Dry the cleaned surfaces CAUTION! with a soft cloth. Do not use furniture cleaning agents or cleaning CAUTION! agents which can cause Do not use abrasive corrosion to clean the materials or steel wool to appliance. clean the drum. 12.6 Cleaning the airflow slots 12.5 Cleaning the control panel and housing... - Page 20 Possible cause Remedy Problem The filter not locked in the posi- Put the filter in the correct posi- The loading tion. tion. door does not The laundry is locked between the Put the load correctly in the drum. closed door and the seal.
-
Page 21: Technical Data
ENGLISH 14. TECHNICAL DATA Height x Width x Depth 850 x 600 x 600 mm (maximal 630 mm) Max. depth with the appliance door open 1090 mm Max. width with the appliance door open 950 mm Adjustable height 850 mm (+ 15 mm - feet regulation) Drum volume 118 l Maximum load volume... -
Page 22: Warranty
This document sets out the terms and g) ‘Warranty Period’ means the conditions of the product warranties Appliance is warranted against for AEG Appliances. It is an important manufacturing defects in document. Please keep it with your Australia and New Zealand for 60... - Page 23 Appliance is transported at the use or non use of the Appliance. owner’s cost and risk while in transit 10. For AEG Appliances and services in to and from Electrolux or its ASC. Australia, the Appliances come with a 6. Proof of purchase is required before...
- Page 24 14. You accept that if you make a number of the Appliance warranty claim, Electrolux and its available; ASC may exchange information in c) have the proof of purchase (e.g. relation to you to enable Electrolux an invoice) available;...
- Page 25 ENGLISH your local recycling facility or contact your municipal office.
- Page 26 www.aeg.com...
- Page 27 ENGLISH...
- Page 28 www.aeg.com/au...