
Related Manuals for Haier HR-385WSAA


Summary of Contents for Haier HR-385WSAA
- Page 1 REFRIGERATOR user manual HR-335WSAA HR-385WSAA HR-335SSAA Kühlschrank Gebrauchsanleitung HR-385SSAA HR-335FSAA HR-385FSAA Réfrigérateur Mode d'emploi REFRIGERADOR Manual de usuario FRIGORIFERO Guida per l'utente KOELKAST Gebruikershandleiding LODÓWKA...
- Page 2 This appliance is intended to be used in household and similar working environments; farm houses and by clients in hotels, motels and other residential type environments; Please refer to Haier's Warranty Terms and Conditions for details. Do not use mechanical devices or other means to accelerate the defrosting process,other than those recommended by the manufacturer.
-
Page 3: Intended Use
Intended use The appliance is suitable for cooling food. Haier cannot be held liable for damage resulting from incorrect or improper use or operation. Risk of injury or suffocation! When disposing of the appliance, disconnect the appliance from the main supply. Cut off the power cord and dismantle the door/s and seals to prevent children and pets being trapped inside the appliance. -
Page 4: Table Of Contents
Contents Thanks for purchasing a Haier Product ........5 Legend .................... 5 Standards and directives .............. 5 Unpacking the appliance .............. 6 ............7 Installation ..................9 Door reversibility ..................9 Space requirement ..................9 Aligning the appliance ................10 ..............11 Product description ..............12 Control panel ................ -
Page 5: Thanks For Purchasing A Haier Product
Thanks for purchasing a Haier Product Please read these instructions carefully before using this appliance. The instructions contain important information which will help you get the best out of the appliance and ensure safe and proper installation, use and maintenance. Keep this manual in a convenient place so you can always refer to it for the safe and proper use of the appliance. -
Page 6: Unpacking The Appliance
Unpacking the appliance Please ensure that all packaging materials are removed prior to installation. The appliance must not be connected to the electricity supply during unpacking process. The appliance is packed using a number of different materials to prevent damage during transit. If the appliance is damaged in any way please contact the supplier or retailer. - Page 7 Safety information and advice These instructions are provided for the safety and should be read carefully before installation and commissioning. installation, make sure that the power cord isn’t trapped under the appliance and make sure not to damage it moving the appliance. If the power cord is damaged do not connect it to the power supply. The cable must only be replaced by either the manufacturer or the authorised service agent.
- Page 8 may be pulled away, or the appliance may topple. manufacturer. appliance to remove odors. to avoid personal injury caused by falling or electric shock caused by contact with water. appliance may damage the cooling pipes. Property loss or personal injury may result. Repair of the appliance must be performed by professional personnel.
-
Page 9: Installation
Installation solid surface. and its energy consumption. Door reversibility Before the appliance is permanently installed, check the correct position of the door hinge. If necessary see section the "Door reversibility". Space requirement Required space when door is opened: 90° 125°... -
Page 10: Aligning The Appliance
1. Tilt the refrigerator slightly backwards. 2. Set the feet to the desired level. Aligning the appliance The stability can be checked by alternately bumping on the diagonals. The slightly swaying should be the same in both directions. Otherwise the frame can warp; possible leaking door seals are the result. Possibly the doors are not parallel and the doors may not close fully resulting in ice forming near the door seals. -
Page 11: Energy Saving Tips
Energy Saving Tips Do not keep the door of the appliance open for too long when putting food in or taking food out. consumption and keep your energy bills lower. refrigerators). If necessary, put an insulating plate in between. decrease the temperature in the compartment and save energy. -
Page 12: Product Description
Product description (following diagram changes depending by models) 1 fruit and vegetable box 3 shelf 6 bottle balcony 7 rack... -
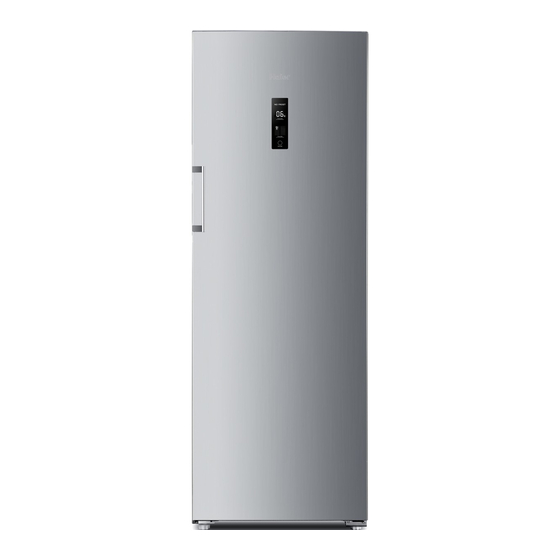
Page 13: Control Panel
Control panel ¡ ¢ £ ¤ ¡ ¥ ¥ ¦ § ¨ © § § a Digital display of temperature d Super Cooling icon e Child lock icon B Touch key for function selection(holiday/super cooling/alarm/child lock) C OK button/Power button Touch keys The display screen turns off automatically 30 seconds after pressing a key. -
Page 14: Start-Up
Start-up putting any food in it. connect it to an earthed socket outlet. the digit display will switch on too, indicating that the product is ON. The icon for the and afterwards key C . When temperature will decrease, the display will show the &... -
Page 15: Product Functions
10 Product functions Refer to Section 9 Control Panel for location of the Keys referred to in the text below. 10.1 Super cooling Switch on the Super cooling function if larger quantity of food should be stored (for example after the purchase) or if you want to cool drinks quickly. The Super cooling function accelerates the cooling of fresh food and protects the goods already stored function pressing once again the key B and the green light d on, then press key C to switch off, otherwise the function will disengage automatically when the temperature in... -
Page 16: Child Lock
10.3 Child Lock icon e blinks , then press key C to switch on. Press again key B, Child Lock icon e blink, press key C to deactivate this function. This function is useful to prevent accidental keys touching or to avoid that children touch keys. -
Page 17: Use Informations
of appliance, but there is no danger for temporary food preservation. In the meantime you must call after sales service as soon as possible. 12 Use informations Adjusting shelf height food, bottles and containers within the compartment. replace it into position, push it until the end of the run and until the rear edge fall down in the special housing on the back side. -
Page 18: Fruit And Vegetable Box
Use of the wire wine holder Pull both parts of the racks downwards the bottom to open bottle holder: pull until the racks lock in position. To close the wine rack push both racks upwards to close bottle holder. max 10kg the bottles may fall and break. - Page 19 Recommended storage for various food Different foods should be placed in different areas according to their properties. 1. Eggs, butter, cheese and etc. 2. Drinks, canned food and etc. 3. Beverages, canned food, cake, etc.
-
Page 20: Storage Of Fresh Food
13 Storage of fresh food from your appliance, don’t let foods decaying inside of it, preventing mold, smell, bacteria. sealed. This will prevent moisture in the food from evaporating and prevent them from spoiling. the front part of the shelves. This can avoid unnecessary delays in door opening as well as expiration of the storage period because you forgot to eat it. -
Page 21: Care And Maintenance
14 Care and maintenance from the mains or disconnect the electrical power supply. 14.1 Cleaning Clean the appliance when only little or no food is stored. The appliance should be cleaned every four weeks for good maintenance and to prevent bad stored food odors. -
Page 22: Non-Use For A Longer Period
14.2 Non-use for a longer period unplug the power cord and clean it with the method described above. Keep the appliance door opened to prevent any food remaining in the compartment from producing bad odors. Turn the appliance off only if strictly necessary. 14.3 Defrosting the appliance The appliance defrosts automatically, no manual defrost is needed. -
Page 23: Troubleshooting
15 Troubleshooting can save both your time and money. The table contains common problems except those caused by defects in workmanship or material of the appliance. PROBLEMS CAUSES SOLUTIONS Appliance operation The compressor does not work... - Page 24 PROBLEMS CAUSES SOLUTIONS appliance’s inner walls Bad odors in the appliance Beeps water If the problem is not resolved, contact the customer service (see warranty card), specifying the the data on the is located inside the refrigeration compartment. must not be removed or altered.
- Page 25 16 Door reversibility...
- Page 26 Move the screw like it is shown 7.1-7.2...
-
Page 27: Technical Data
17 Technical data Trade mark... - Page 28 Additional technical data Model HR-335WSAA HR-385WSAA 220 – 240 220 – 240 Electronic Electronic...
-
Page 29: Connection Description
18 Connection description ① ② ③ ④ ⑤ ⑥ ⑦ ⑧ 1 Place the cooler in parallel to the freezer properly with about 10 mm clearance left between them and keep appropriate working space around two refrigerators. 2 Connect the two refrigerators beginning from the back parts. Knock the rear upper connector ①... - Page 30 3 Install the top cover ③ to the middle position in the upper part of two refrigerators, place the front connector ④ screws ⑦ ④ , and install the front connector box ⑤ to the front connector. ④ ⑦ to ④...