Table of Contents
TABLE OF CONTENTS
1 Specifications ----------------------------------------------------- 2
2 Location of Controls and Components ------------------- 3
3 Troubleshooting Guide ----------------------------------------- 5
4 Disassembly and Assembly Instructions ---------------- 6
4.1. Separate the upper and lower bodies. --------------- 6
4.2. P.C.B. assy removal -------------------------------------- 7
4.3. Motor removal ---------------------------------------------- 9
4.4. Cord reel unit replacement -----------------------------10
4.5. Spring-loaded cord reel pre-winding ----------------- 11
4.6. Installation of some Pakkin----------------------------- 11
4.7. How to disassemble the turbine nozzle ------------12
5 Wiring Connection Diagram ---------------------------------14
6 Exploded View and Replacement Parts List -----------15
6.1. EXPLODED VIEW (ATTACHMENTS)
MC-CL675,MC-CL673,MC-CL671 -------------------15
6.2. PARTS LIST (ATTACHMENTS)
MC-CL675,MC-CL673,MC-CL671 -------------------16
MC-CL675-ZC79
MC-CL675-ZA76
MC-CL673-SC79
MC-CL673-SA76
MC-CL671-RC79
MC-CL671-RA76
Destination
PAGE
6.3. EXPLODED VIEW (BODY UNIT)
MC-CL675 ------------------------------------------------- 17
6.4. PARTS LIST (BODY UNIT)
MC-CL675 ------------------------------------------------- 18
6.5. EXPLODED VIEW (BODY UNIT)
MC-CL673,MC-CL671 ---------------------------------- 19
6.6. PARTS LIST (BODY UNIT)
MC-CL673,MC-CL671 ---------------------------------- 20
6.7. PACKING INSTRUCTIONS
MC-CL675,MC-CL673,MC-CL671------------------- 22
6.8. PACKING LIST
MC-CL675,MC-CL673,MC-CL671------------------- 23
© 2007 Matsushita Electric Industrial Co., Ltd. All
rights reserved. Unauthorized copying and distribu-
tion is a violation of law.
Order No.VCB0705006CE
Vacuum Cleaner
:Europe
PAGE
Table of Contents

Related Manuals for Panasonic MC-CL675-ZC79


Summary of Contents for Panasonic MC-CL675-ZC79
-
Page 1: Table Of Contents
Order No.VCB0705006CE Vacuum Cleaner MC-CL675-ZC79 MC-CL675-ZA76 MC-CL673-SC79 MC-CL673-SA76 MC-CL671-RC79 MC-CL671-RA76 Destination :Europe TABLE OF CONTENTS PAGE PAGE 1 Specifications ----------------------------------------------------- 2 6.3. EXPLODED VIEW (BODY UNIT) 2 Location of Controls and Components ------------------- 3 MC-CL675 ------------------------------------------------- 17 3 Troubleshooting Guide ----------------------------------------- 5 6.4. -
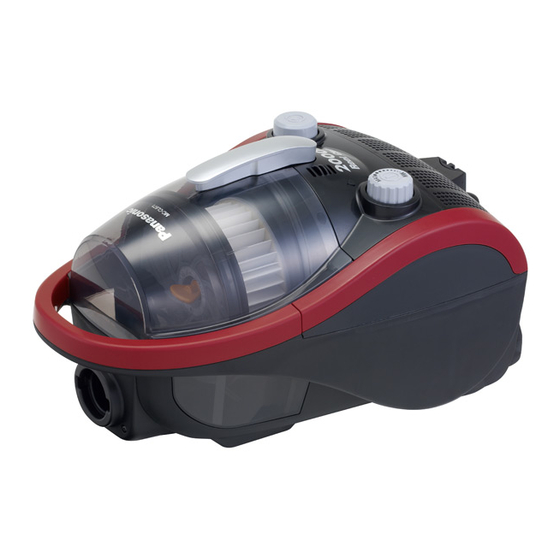
Page 2: Specifications
1 Specifications Model No. MC-CL675 MC-CL673 MC-CL671 Power source 230V~50Hz Input power (MAX) 2300W 2100W 2000W Input power (Nominal) 2000W 1800W 1700W Power control Extension wand Telescopic Floor nozzle Turbin nozzle Dimensions (WxLxH)mm 290x470x280 Net weight 6.4kg 6.0kg Cleaning tools Crevice nozzle / Upholstery nozzle... -
Page 3: Location Of Controls And Components
2 Location of Controls and Components... -
Page 5: Troubleshooting Guide
3 Troubleshooting Guide CONDITION CHECKPOINT METHOD OF INSPECTION CAUSE / REMEDY Motor fails to rotate Power supply cord Check power supply cord continu- If there is no continuity, replace the ity. cord reel patition unit. Fuse of P.C.B. Ass’y Check fuse continuity. If there is no continuity, replace (250V, 13A) P.C.B. -
Page 6: Disassembly And Assembly Instructions
4 Disassembly and Assembly Instructions Important notice: Before replacing any components, make sure to turn OFF the vacuum cleaner. Remove the power plug from the outlet. 4.1. Separate the upper and lower 3. Remove the three screws fixing the upper and lower bod- ies. -
Page 7: Assy Removal
5. Remove the ornamental plate unit from the lower body. 8. Lift the upper body to separate it from the lower body. 6. Remove the screw fixing the caster unit (on the right in 4.2. P.C.B. assy removal the figure below) from the bottom of the lower body to remove the lower caster support plate, caster unit. - Page 8 2. Wiring treatment 3. Remove the right body packing from the lower body. * MC-CL675 4. Remove the P.C.B. assy from the P.C.B. holder. * When removing the P.C.B. assy, unhook it from the tab on the P.C.B. holder by spreading the holder frame.
-
Page 9: Motor Removal
4.3. Motor removal 5. Disconnect the fast-on terminal of the lead wire connect- ing the fan motor unit to the P.C.B. assy. 1. Remove the P.C.B. holder from the lower body. * When connecting or disconnecting the fast-on ter- minal, hold the P.C.B. assy and connecting terminals. 2. -
Page 10: Cord Reel Unit Replacement
4.4. Cord reel unit replacement 3. Remove all components fitted to the fan motor unit. a. Remove the motor support rubber (rear). 1. Lift the body partition assy (fitted with the cord reel unit) b. Remove the motor support. while removing the cord reel shaft from the side of the c. -
Page 11: Spring-Loaded Cord Reel Pre-Winding
4.6. Installation of some Pakkin 2. Remove the screw fixing the body partition assy and the cord reel unit. 3. Remove the cord reel unit from the body partition assy. 1. Remove the two screws fixing the lower and front bodies. 4.5. -
Page 12: How To Disassemble The Turbine Nozzle
4.7.2. Separation of the floor nozzle upper U from the floor nozzle lower U 1. Remove the four screws fixing the floor nozzle lower U. (Fig.27) 4.7. How to disassemble the tur- bine nozzle 4.7.1. Agitator ass'y 2. Remove the floor nozzle lower U. 1. -
Page 13: Mc-Cl675
4.7.4. Removal of the floor nozzle brush CU.DU.EU.FU 1. Turn the floor nozzle lower unit over. Insert the tip of a flat-blade screwdriver into the ditch in the brush installa- tion part, then remove the brush.(Fig.29)