Table of Contents
Quick Links
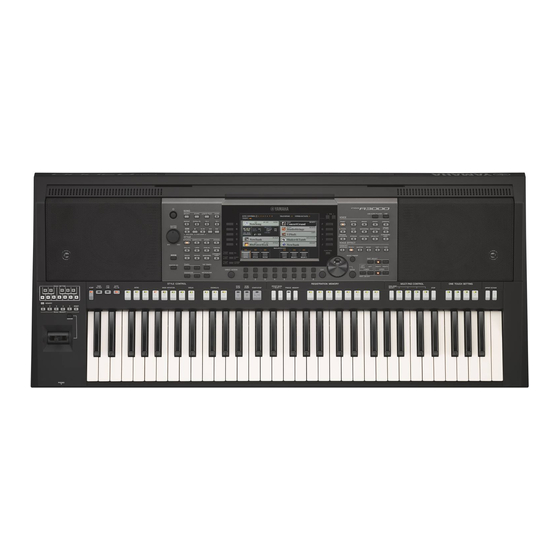
Digital Workstation
Owner's Manual
Thank you for purchasing this Yamaha Digital Workstation!
We recommend that you read this manual carefully so that you can fully take advantage of
the advanced and convenient functions of the instrument. We also recommend that you
keep this manual in a safe and handy place for future reference.
Before using the instrument, be sure to read "PRECAUTIONS" on pages 5 – 6.
EN
Table of Contents

Related Manuals for Yamaha PSR-A3000


Summary of Contents for Yamaha PSR-A3000
- Page 1 Digital Workstation Owner’s Manual Thank you for purchasing this Yamaha Digital Workstation! We recommend that you read this manual carefully so that you can fully take advantage of the advanced and convenient functions of the instrument. We also recommend that you keep this manual in a safe and handy place for future reference.
-
Page 2: Special Message Section
This product should be used only with the components supplied never mix different types of batteries. Batteries MUST be installed or; a cart, rack, or stand that is recommended by Yamaha. If a correctly. Mismatches or incorrect installation may result in over- cart, etc., is used, please observe all safety markings and instruc-... - Page 3 Yamaha Corporation of America or its subsidiaries. devices. Compliance with FCC regulations does not guarantee * This applies only to products distributed by YAMAHA CORPORATION OF AMERICA. (class B) PSR-A3000 Owner’s Manual...
-
Page 4: Important Safety Instructions
(1) this device may not cause harmful interference, and (2) this device must accept any interference received, including interference that may cause undesired operation. (fcc_sengen) CAN ICES-3 (B)/NMB-3(B) • This applies only to products distributed by Yamaha Canada Music Ltd. • Ceci ne s’applique qu’aux produits distribués par Yamaha Canada Musique Ltée. (can_b_01) Explanation of Graphical Symbols... - Page 5 For AC adaptor WARNING CAUTION • This AC adaptor is designed for use with only Yamaha electronic instruments. Do • When setting up, make sure that the AC outlet is easily accessible. If some not use for any other purpose.
-
Page 6: Saving Data
If you experience any hearing loss or ringing in the ears, consult a physician. Yamaha cannot be held responsible for damage caused by improper use or modifications to the instrument, or data that is lost or destroyed. Always turn the power off when the instrument is not in use. -
Page 7: Included Accessories
Connection Manual (only in English, French, German and Spanish) Explains how to connect the instrument to smart devices, such as an iPhone, iPad, etc. To obtain these materials, access the Yamaha Downloads website, then enter the model name for searching the desired files. Yamaha Downloads http://download.yamaha.com/ •... -
Page 8: Formats
* The contents described above include a computer program, Accompaniment Style data, MIDI data, WAVE data, voice recording data, a score, score data, etc. * You are allowed to distribute medium in which your performance or music production using these contents is recorded, and the permission of Yamaha Corporation is not required in such cases. -
Page 9: Main Features
Voices more naturally and with greater expressiveness. Play along with a backing band ..................page 49 The Styles of the PSR-A3000 make it possible to perform in a wide variety of music genres with full instrumental accompaniment, just by playing chords. Voice and Style expandability ....................page 46... -
Page 10: Table Of Contents
11 Other Functions Creating/Editing Styles (Style Creator) .......60 – Making Global Settings and Using Advanced Features – Songs Basic Procedure..............99 – Playing, Practicing and Recording Songs – Playback of Songs ..............62 Displaying Music Notation (Score) ........64 PSR-A3000 Owner’s Manual... - Page 11 Editing FILTER Parameters ..........182 Editing TUNE Parameters ..........183 Editing EFFECT Parameters ..........184 Editing EQ Parameters............187 Editing Master Compressor (CMP) Parameters....189 Block Diagram ..............190 10 Connections Footswitch/Foot Controller Settings........191 MIDI Settings ..............194 Connecting with an iPhone/iPad via Wireless LAN ...200 PSR-A3000 Owner’s Manual...
-
Page 12: Panel Controls And Terminals
& LCD and related controls ......Page 20 9 [METRONOME] button ........Page 38 Turns the metronome on or off. * [BAL.] button .......... Pages 57, 74 Calls up settings for the volume balance among the parts. PSR-A3000 Owner’s Manual... - Page 13 By using the controls on the panel, you can make various settings as Applies various effects to the keyboard performance. described here. These settings of the instrument are together referred to as “panel setup” or “panel settings” in this manual. PSR-A3000 Owner’s Manual...
-
Page 14: Rear Panel
Do not place objects where they might block the air vent, since this may prevent adequate ventilation of the internal components, and possibly result in the instrument overheating. Attaching the Music Rest Insert the music rest into the slots as shown. PSR-A3000 Owner’s Manual... -
Page 15: Using The Headphones
Using the Headphones Connect a pair of headphones to the [PHONES] jack. Standard stereo phone plug CAUTION Do not listen with the headphones at high volume for long periods of time. Doing so may cause hearing loss. PSR-A3000 Owner’s Manual... -
Page 16: Starting Up
After you finish using the instrument, turn off the power by pressing and holding the [ ] (Standby/On) switch for about a NOTE second. Until the Main display appears, no operations can be carried out, includ- ing power-off and keyboard perfor- mance. PSR-A3000 Owner’s Manual... - Page 17 Press the [EXIT] button several times to exit from the display. Disabling Auto Power Off (simple method) Turn the power on while holding down the lowest key on the keyboard. A message appears briefly, then the instrument starts up with the Auto Power Off function disabled. PSR-A3000 Owner’s Manual...
-
Page 18: Adjusting The Master Volume
Call up the operation display. [FUNCTION] TAB [F] MENU 2 [G] SYSTEM TAB [E] OWNER Use the [4 ]/[5 ] buttons to select the desired language. Press the [EXIT] button several times to exit from the display. PSR-A3000 Owner’s Manual... -
Page 19: Playing The Demos
[EXIT] button. Sub menus may be shown on the display. Press one of the [A] – [J] buttons corresponding to the desired sub menu. Press the [EXIT] button several times to exit from the Demo display. PSR-A3000 Owner’s Manual... -
Page 20: Display-Based Controls
[A] – [J] buttons can be used to select the corresponding files. • Example 2 The [A] and [B] buttons are used to The [F] and [H] buttons are used to select move the cursor up or down. the corresponding parameter. PSR-A3000 Owner’s Manual... - Page 21 [1 ] – [8 ] buttons. form, use the [1 ] – [8 ] buttons to adjust the value. To reset the desired parameter value to its default, simultaneously press both the [] and [] buttons below it. PSR-A3000 Owner’s Manual...
- Page 22 (ex., TEMPO [+]), then rotate the Data dial to set the value. 5 [EXIT] button Pressing the [EXIT] button returns to the previously indicated display. Pressing the [EXIT] button several times returns to the default Main display (page 24). PSR-A3000 Owner’s Manual...
-
Page 23: Calling Up The Desired Display Instantly - Direct Access
For example, pressing the [GUIDE] button calls up the display in which the Guide mode can be set. Messages Shown in the Display A message (information or confirmation dialog) sometimes appears on the screen to facilitate operation. When the message appears, simply press the appropriate button. PSR-A3000 Owner’s Manual... -
Page 24: Main Display Configuration
[E] button calls up the Style Selection display (page 49). 8 Voice name Displays the Voice names currently selected for RIGHT 1, RIGHT 2 and LEFT parts (page 36). Use the [F], [G] and [H] buttons to call up the Voice Selection PSR-A3000 Owner’s Manual... -
Page 25: Upper Octave
$ Transpose Displays the amount of transposition in semitone units (page 39). % Upper Octave Displays the amount that the octave value is shifted (page 39). ^ Registration Sequence Appears when the Registration Sequence (page 178) is active. PSR-A3000 Owner’s Manual... -
Page 26: File Selection Display Configuration
MENU 1 and MENU 2 by pressing the [8 ] button. Selecting MENU 1 shows the function names related to the current file (Voice, Style, Song, etc.) while selecting MENU 2 shows the function names of the file/ folder management (page 27). PSR-A3000 Owner’s Manual... -
Page 27: File Management
• Prot. 1: Indicates Preset Songs copied to the USER drive. These only can be copied/moved/deleted in the USER drive. • Prot. 2 Orig: Indicates Yamaha-protection-formatted Songs. These cannot be copied. These can be moved/saved only to the USER drive and USB flash drives with ID. - Page 28 Even if you skip this step, you can rename the file at any time after saving it (page 30). Press the [8 ] (OK) button to actually save the file. The saved file will be automatically located at the appropriate position among the files in alphabetical order. PSR-A3000 Owner’s Manual...
-
Page 29: Creating A New Folder
Enter the name of the new folder (page 32). Expansion Pack (page 46) is installed. The created folder will be automatically located at the appropriate position among the folders in alphabetical order. PSR-A3000 Owner’s Manual... - Page 30 Make sure that MENU 2 is shown at the bottom right corner of copied/moved. • Commercially available song data the display. may be copy protected to prevent If necessary, press the [8 ] button to call up MENU 2. illegal copying. PSR-A3000 Owner’s Manual...
- Page 31 Make sure that MENU 2 is shown at the bottom right corner of the display. If necessary, press the [8 ] button to call up MENU 2. Press the [5 ] (DELETE) button. The window for the Delete operation appears at the bottom of the display. PSR-A3000 Owner’s Manual...
-
Page 32: Entering Characters
For more information on entering characters, refer to “Other character-entry NOTE operations” below. To cancel the character-entering oper- ation, press the [8 ] (CANCEL) but- ton. Press the [8 ] (OK) button to actually enter the new name and return to the previous display. PSR-A3000 Owner’s Manual... -
Page 33: Resetting To The Factory-Programmed Settings
You can also reset specified settings to the factory default value or delete all files and folders in the USER drive. Call up the operation display: [FUNCTION] TAB [F] MENU 2 [G] SYSTEM TAB [F] RESET. For details, refer to the Advanced Features section, Chapter 11 (page 208). PSR-A3000 Owner’s Manual... -
Page 34: Data Backup
Move the Protected Songs When the operation is completed, the instrument will be restarted automatically. (saved to the USER drive) to a USB flash drive before restoring. If the Songs are not moved, the operation deletes the data. PSR-A3000 Owner’s Manual... -
Page 35: Basic Operations
Basic Operations Voices Styles Songs USB Audio Player/Recorder Multi Pads Music Finder Registration Memory Oriental Scales Mixing Console Connections Other Functions PSR-A3000 Owner’s Manual... -
Page 36: Voices
Turn on the PART ON/OFF button corresponding to the part you NOTE want to use. You can save the Voice selection and on/off setting for each part to Registra- The corresponding PART SELECT button is automatically turned on. tion Memory (page 85). PSR-A3000 Owner’s Manual... - Page 37 NOTE Make sure that MENU 1 is shown at the bottom right corner of the display (page 26). If necessary, repeat steps 1 – 4 above to select the Voice for the other part. Play the keyboard. PSR-A3000 Owner’s Manual...
-
Page 38: Using The Metronome
These let you recreate all of the classic organ sounds by adjusting the flute footage result. levels and the percussive sounds, just like on conventional organs. For details, refer to page 45. For information about other Voice types, refer to the Advanced Features section (page 102). PSR-A3000 Owner’s Manual... -
Page 39: Changing The Pitch Of The Keyboard
[FUNCTION] TAB [E] MENU 1 [E] MASTER TUNE/SCALE TUNE. The pitch can be shifted up or down between 414.8Hz and 466.8Hz in approximately 0.2 Hz increments. For details, refer to the Advanced Features section (page 108). PSR-A3000 Owner’s Manual... -
Page 40: Using The Joystick
[FUNCTION] TAB [E] MENU 1 [D] CONTROLLER TAB [F] KEYBOARD/PANEL [A]/[B] 2 MODULATION (+), 3 MODULATION (-). PSR-A3000 Owner’s Manual... - Page 41 Style, etc. Pressing the [F] (RESET) button resets the selected function’s parameter value to the default, while pressing the [G] (ALL RESET) button resets all parame- ter values of the assignable functions. PSR-A3000 Owner’s Manual...
-
Page 42: Applying Voice Effects
[FUNCTION] TAB [E] MENU 1 [B] HARMONY/ARPEGGIO matically set to the default which is memorized as the Voice Set. For details on the Voice Set function, refer Use the [1 ] – [3 ] buttons to select “Harmony” or “Echo.” to page 113. PSR-A3000 Owner’s Manual... - Page 43 (Voices). Both of the keyboard parts [RIGHT 1] and [RIGHT 2] should be turned on when using the Multi Assign effect. The RIGHT 1 and RIGHT 2 Voices are alternately assigned to the notes in the order you play. PSR-A3000 Owner’s Manual...
- Page 44 To turn off the effect, turn the [HARMONY/ARPEGGIO] button off. You can control the Arpeggio volume and the length of each note by using the joystick. For instructions on how to assign the functions to the joystick, refer to page 40. PSR-A3000 Owner’s Manual...
-
Page 45: Creating Your Original Organ Flutes Voices
EFFECT/EQ Page), and the VOICE EFFECT [DSP] button is turned on. [F]/[G] VIBRATO Alternately turns the vibrato effect for the Organ Flutes Voice ON or OFF. VIBRATO Sets the Vibrato depth to one of three levels: DEPTH 1 (low), 2 (mid), or 3 (high). PSR-A3000 Owner’s Manual... -
Page 46: Adding New Contents - Expansion Packs
STYLE category selection buttons, allowing you to expand your music performance and creation possibilities. You can get high quality Expansion Pack data created by Yamaha, or create your own original Expansion Pack data by using the “Yamaha Expansion Manager” software on your computer. This section covers the operations which may be necessary to add new contents to the instrument. - Page 47 Saving the Instrument Info File to the USB Flash Drive If you use the “Yamaha Expansion Manager” software to manage the Pack data, you may need to retrieve the Instrument Info file from the instrument as described below. For information on how to use the software, refer to the accompanying manual.
- Page 48 Voice Selection display [8 ] MENU 1 [5 ] (VOICE Editing Voices (Voice Set): SET) Disabling automatic selection of Voice Sets [FUNCTION] TAB [E] MENU 1 [F] VOICE SET FILTER (effects, etc.): [ORGAN FLUTES] TAB [E][F] VOLUME/ATTACK or Editing Organ Flutes Voices: EFFECT/EQ PSR-A3000 Owner’s Manual...
-
Page 49: Styles
For details, refer to page 59. a basis for fully automatic accompaniment with the selected Style. PSR-A3000 Owner’s Manual... -
Page 50: Style Characteristics
SFF GE format when the file is saved (or pasted) in this instrument. Please keep in mind that the saved file can only be played back on instruments that are compatible with the SFF GE format. PSR-A3000 Owner’s Manual... -
Page 51: Operating Style Playback
You can have the ending gradually slow down (ritardando) by pressing the same ENDING/rit. button once again, while the ending is playing. NOTE If you press the ENDING/rit. [I] button when the Style is playing, a fill-in automatically plays before the END- ING/rit [I]. PSR-A3000 Owner’s Manual... -
Page 52: Adjusting The Tempo
During playback of a Style or Song, you can change the tempo by tapping the [TAP TEMPO] button twice at the desired tempo. When Style and Song are stopped, tapping the [TAP TEMPO] button (four times for a 4/4 time signature) starts Style playback at the tempo you tapped. PSR-A3000 Owner’s Manual... -
Page 53: Changing The Chord Fingering Type
— and still have appropriate accompaniment. You don’t have to worry about specifying the chords. (Depending on the song arrangement, AI Full Keyboard may not always produce appropriate accompaniment.) For other types, refer to the Advanced Features section (page 120). PSR-A3000 Owner’s Manual... -
Page 54: Calling Up Appropriate Panel Settings For The Current Style (One Touch Setting)
You can memorize original settings to One Touch Setting. For instructions, Each Style has four One Touch Setting setups. Press other ONE TOUCH refer to page 124 SETTING [1] – [4] buttons to try out other setups. PSR-A3000 Owner’s Manual... -
Page 55: Finding Suitable Music Pieces For The Current Style (Repertoire)
Depending on the particular selected Style, there may not be any Records The appropriate panel settings for playing the music piece are called up. called up. As soon as you play a chord in the chord section, the selected Style starts. PSR-A3000 Owner’s Manual... -
Page 56: Turning On/Off Each Channel Of The Style
Press the [EXIT] button to close the CHANNEL ON/OFF display. NOTE You can also turn Style channels on/ off for dynamic effect by using the joy- stick. For instructions on how to assign the functions to the joystick, refer to page 40. PSR-A3000 Owner’s Manual... -
Page 57: Adjusting The Volume Balance Between The Parts
“WLAN” appears in the to page 74. BALANCE 2/2 page, and the volume of the audio input via an iPhone/iPad application tool (page 97) can also be Press the [EXIT] button to close the BALANCE display. adjusted. PSR-A3000 Owner’s Manual... -
Page 58: Setting The Split Point
You can also specify the Split Point directly from the keyboard by pressing the LEFT desired key on the keyboard while holding the appropriate button, [G] or [H]. NOTE Split Point (LEFT) cannot be set lower than Split Point (STYLE). PSR-A3000 Owner’s Manual... -
Page 59: Specifying Chords With Your Right Hand While Playing Bass With Your Left Hand
This type is basically same as “FIN- GERED,” except that “1+5,” “1+8” and simultaneously to specify the chord. Pressing two or less notes does not change Chord Cancel are not available. the chord type. • Split Point (STYLE) is unavailable. PSR-A3000 Owner’s Manual... -
Page 60: Creating/Editing Styles (Style Creator)
By using the Drum Setup function of the Style Creator, you can edit the Rhythm part of a Style and save it as an original Style. For details, refer to the Advanced Features section (page 140). PSR-A3000 Owner’s Manual... - Page 61 TAB [E][F] CHANNEL • Editing data for each channel: TAB [E][F] PARAMETER • Making Style File Format settings: • Editing the rhythm part of a Style TAB [E] BASIC [G] DRUM SETUP (Drum Setup) PSR-A3000 Owner’s Manual...
-
Page 62: Songs
Songs – Playing, Practicing and Recording Songs – For the PSR-A3000, “Song” refers to the MIDI songs which include preset songs, commercially available MIDI format files, etc. Not only can you play back a Song and listen to it, but you can also play the keyboard along with Song playback and record your own performance as a Song. - Page 63 (page 65). • Rewind/Fast Forward .......Press the [G] (REW) or [H] (FF) during playback or while the Song is stopped. Pressing either of them once moves back/forward one measure. Holding either of them scrolls backward/forward continuously. PSR-A3000 Owner’s Manual...
-
Page 64: Displaying Music Notation (Score)
You can change the displayed notation style by using the [1 ] – [8 ] buttons. For details, refer to the Advanced Features section (page 143). PSR-A3000 Owner’s Manual... -
Page 65: Displaying Lyrics/Text
Turning Each Channel of the Song On/Off A Song consists of 16 separate channels. You can independently turn each channel of the selected Song playback on or off. Press the [CHANNEL ON/OFF] button several times to call up the CHANNEL ON/OFF (SONG) display. PSR-A3000 Owner’s Manual... -
Page 66: One-Handed Practice With The Guide Function
(Any Key), for Karaoke or for practicing a song at your own pace (Your Tempo). [FUNCTION] TAB [E] MENU 1 [H] SONG SETTING TAB [E] GUIDE/CHANNEL [A]/[B] GUIDE MODE For more information, refer to the Advanced Features section (page 148). PSR-A3000 Owner’s Manual... -
Page 67: Repeat Playback
After you’ve finished practicing, press the [REPEAT] button to turn off Repeat playback. Specifying the repeat range while Songs are stopped 1. Fast-forward the Song to Point A, then press the [REPEAT] button. 2. Fast-forward the Song to Point B, then press the [REPEAT] button again. PSR-A3000 Owner’s Manual... -
Page 68: Recording Your Performance
After you finish your performance, press the SONG [ ] (STOP) button to stop recording. A message may appear prompting you to save the recorded data. Press the [EXIT] button to close the message. PSR-A3000 Owner’s Manual... - Page 69 To cancel the REC status of the channel, press the desired channel button. Use the [C]/[D] buttons to change the part assignment for the NOTE channel to be recorded. To cancel the recording, press the [J] (STOP) button before going on to step PSR-A3000 Owner’s Manual...
- Page 70 • Re-recording a specific section — Punch In/ TAB [E] REC MODE Out: TAB [E][F] CHANNEL • Editing channel events: • Editing chord events, notes, System Exclusive TAB [E][F] CHORD, 1-16, SYS/EX. or LYRICS events and lyrics: PSR-A3000 Owner’s Manual...
-
Page 71: Usb Audio Player/Recorder
While selecting the desired audio file (WAV) in the Audio Link Multi Pad function (step 5 on page 78), the [USB AUDIO PLAYER] button does not func- tion. Press the [H] (FILES) button to call up the Audio File Selection display. PSR-A3000 Owner’s Manual... - Page 72 (page 26). To stop playback, press the [2 ] (STOP) button. NOTICE Do not attempt to disconnect the USB flash drive or turn the power off during playback. Doing so may corrupt the USB flash drive data. PSR-A3000 Owner’s Manual...
- Page 73 The time set as the B point is shown in at “B [--:--]” in the display, and is indicated by the second wedge mark in the playback progress bar. The specified A-B section of the audio file will now play back repeatedly. 3. To cancel Repeat playback, press the [C] button again. PSR-A3000 Owner’s Manual...
-
Page 74: Recording Your Performance As Audio
Make the necessary settings such as Voice/Style selection. Press the [USB AUDIO PLAYER] button to call up the USB NOTE AUDIO PLAYER display. The USB flash drive of “USB1” is selected as the recording destination when multiple USB flash drives are connected. PSR-A3000 Owner’s Manual... - Page 75 [H] (FILES) button. Keep in mind that if you make a mis- take in your performance, you cannot correct it by overwriting an existing file. Delete the recorded file on the File Selection display, then record your performance again. PSR-A3000 Owner’s Manual...
-
Page 76: Multi Pads
You can play up to four Multi Pads at the same time. ers will be played back repeatedly (loop). NOTE Pressing the pad during its playback will stop playing and begin playing from the top again. PSR-A3000 Owner’s Manual... -
Page 77: Using Chord Match
If you put a Multi Pad in standby during Style or Song playback, pressing any note (when [ACMP] is off) or playing a chord in the chord section (when [ACMP] is on) will start Multi Pad playback at the top of the next measure. PSR-A3000 Owner’s Manual... -
Page 78: Creating A Multi Pad With Audio Files (Audio Link Multi Pad)
Press the [EXIT] button to return to the AUDIO LINK MULTI PAD display. To confirm the path of the selected audio file By pressing the [H] (INFO) button in the AUDIO LINK MULTI PAD display, you can confirm the path. Press the [F] (OK) button to close it. PSR-A3000 Owner’s Manual... - Page 79 Refer to the Advanced Features section in this manual, Chapter 5. [FUNCTION] TAB [F] MENU 2 [C] MULTI PAD CRE- Creating Multi Pads (Multi Pad Creator): ATOR Multi Pad Bank Selection display [7 ] (EDIT) Editing Multi Pads: PSR-A3000 Owner’s Manual...
-
Page 80: Music Finder
When sorting the Records by STYLE, you can use the [4 ]/[5 ] button to skip up or down through the Style names alphabetically. Simultaneously press the [] and [] buttons to move the cursor to the first Record. PSR-A3000 Owner’s Manual... -
Page 81: Searching For Records (Panel Settings)
Sets the range of the tempo you want to use for the search. [4 ] TEMPO TO NOTE [5 ]/ GENRE Selects the desired music genre. To cancel searching, press the [8 ] [6 ] (CANCEL) button. PSR-A3000 Owner’s Manual... -
Page 82: Downloading Records (Panel Settings) From The Website
As a factory default, some sample Records are provided in the Music Finder. To use the Music Finder function more conveniently and effectively, we recommend that you download the Records from the Yamaha website, and load them to this instrument. -
Page 83: Registering A Song, Audio Or Style File To A Record
Check that the registered Record is shown in the MUSIC FINDER display. In the STYLE column of the Record, the Song is registered as “(SONG),” the audio file as “(AUDIO)” and the Style is registered according to its Style name. PSR-A3000 Owner’s Manual... - Page 84 [MUSIC FINDER] TAB [E][F] ALL, SEARCH 1 or Creating a set of favorite Records: SEARCH 2 [H] ADD TO FAVORITE [MUSIC FINDER] [8 ] (RECORD EDIT) Editing Records: [MUSIC FINDER] [7 ] (FILES) Saving the Record as a single file: PSR-A3000 Owner’s Manual...
-
Page 85: Registration Memory
Select the desired item by using the [1 ] – [3 ] buttons, then enter or You can also use the Data dial to select items, and the [ENTER] button to enter remove the checkmark by using the [4 ]/[5 ] (MARK ON)/[4 ]/[5 ] or remove checkmarks. (MARK OFF) buttons. PSR-A3000 Owner’s Manual... -
Page 86: Saving The Registration Memory As A Bank File
Press the [6 ] (SAVE) button to save the Bank file. NOTE Make sure that MENU 2 is shown at For instructions on saving, refer to page 28. the bottom right corner of the display (page 26). PSR-A3000 Owner’s Manual... -
Page 87: Recalling A Registered Panel Setup
[FUNCTION] TAB [E] MENU 1 [C] REGIST Disabling recall of specific items (Freeze): SEQUENCE/FREEZE TAB [F] FREEZE Calling up Registration [FUNCTION] TAB [E] MENU 1 [C] REGIST SEQUENCE/FREEZE TAB [E] REGISTRATION Memory numbers in order (Registration SEQUENCE Sequence): PSR-A3000 Owner’s Manual... -
Page 88: Oriental Scales
SCALE MEMORY buttons for instant recall. Set up the scale settings as desired, using the SCALE SETTING buttons or the parameters in the SCALE TUNE display. For instructions on the SCALE TUNE display, refer to the Advanced Features section (page 108). PSR-A3000 Owner’s Manual... -
Page 89: Saving The Scale Memory As A Bank File
The scale settings memorized to the SCALE MEMORY [1] – [5] buttons can be saved as a single Scale Tune Bank file. Bank 04 Bank 03 Bank 02 Bank 01 Press the [DIRECT ACCESS] button, followed by the [EXIT] button to call up the Main display. PSR-A3000 Owner’s Manual... - Page 90 Press the [D] button to call up the Scale Tune Bank Selection display. Press one of the [A] – [J] buttons to select a Bank. Press one of the SCALE MEMORY [1] – [5] buttons to select a specific memory location. PSR-A3000 Owner’s Manual...
-
Page 91: Mixing Console
Rhythm 1, 2, Bass, Chord 1, 2, Pad, Phrase 1, 2 NOTE SONG (CH 1-8 Page 1: Song channels 1 – 8 Page 2: Song channels 9 – 16 You can switch between the pages of or CH 9-16) SONG by pressing the [A] (PART) but- ton. PSR-A3000 Owner’s Manual... - Page 92 3. Use the [8 ] (APPLY) buttons to actually apply the settings. 4. Press the [I] (SAVE) button to call up the Song Selection display, then save it (page 28). Advanced Features Refer to the Advanced Features section in this manual, Chapter 9. PSR-A3000 Owner’s Manual...
-
Page 93: Connections
TAB [E] FOOT PEDAL. Advanced Features Refer to the Advanced Features section in this manual, Chapter 10. [FUNCTION] TAB [E] MENU 1 [D] CONTROLLER Assigning specific functions to each foot pedal: TAB [E] FOOT PEDAL PSR-A3000 Owner’s Manual... -
Page 94: Connecting Audio Devices (Output [L/L+R]/[R] Jacks, [Aux In] Jack)
The input signal from the [AUX IN] jack is affected by the setting of the instrument’s [MASTER VOLUME] dial, and the volume balance with other sounds played on the keyboard can be adjusted from the BALANCE display (page 57). PSR-A3000 Owner’s Manual... -
Page 95: Connecting Usb Devices ([Usb To Device] Terminal)
The instrument does not necessarily support all commer- can save data you’ve created to the connected device, as cially available USB devices. Yamaha cannot guarantee well as read data from the connected device. operation of USB devices that you purchase. Before pur-... - Page 96 By pressing the [USB] button, you can access the files which are saved in the USB flash drive. Select the desired category by using the [A] – [C] and [F] – [H] buttons, then select files by pressing one of the [A] – [J] buttons. PSR-A3000 Owner’s Manual...
-
Page 97: Connecting To An Iphone/Ipad ([Usb To Device], [Usb To Host] And Midi Terminals)
• The instrument will begin trans- mission a short time after the USB connection is made. • For information on setting up your sequence software, refer to the owner’s manual of the relevant soft- ware. USB cable PSR-A3000 Owner’s Manual... -
Page 98: Connecting External Midi Devices (Midi [In]/[Out] Terminals)
“MIDI Basics,” which is downloadable from the website. Advanced Features Refer to the Advanced Features section in this manual, Chapter 10. [FUNCTION] TAB [E] MENU 1 [I] MIDI MIDI settings: PSR-A3000 Owner’s Manual... -
Page 99: Other Functions
For information on what you can do on each page, refer to the Function List on page 209. Use the TAB [E][F] buttons to call up desired page. Change the settings or carry out the operation. Refer to the Function List on page 209 to see where you can find detailed information. PSR-A3000 Owner’s Manual... - Page 100 Memo PSR-A3000 Owner’s Manual...
-
Page 101: Advanced Features
Advanced Features Voices Styles Songs USB Audio Player/Recorder Multi Pads Music Finder Registration Memory Oriental Scales Mixing Console Connections Other Functions PSR-A3000 Owner’s Manual... -
Page 102: Voices
These Voices use sophisticated programming to capture the dynamic textures and subtle nuances of electric instruments. Sweet! These acoustic instrument sounds also benefit from Yamaha’s sophisticated technology—and feature a finely detailed and natural sound. Drums Various drum and percussion sounds are assigned to individual keys, letting you play the sounds from the keyboard. - Page 103 NOTE S.Art! and MegaVoices sound differently depending on keyboard range, velocity, touch, etc. Hence, if you turn on the [HARMONY/ARPEGGIO] button, change the transpose setting or change the Voice Set parameters, unexpected or undesired sounds may result. For a list of preset Voices of this instrument, refer to the “Voice List” in the Data List on the website. PSR-A3000 Owner’s Manual...
-
Page 104: Selecting Gm&Xg Or Other Voices
Press the desired [A]–[J] button to call up the Voice Selection display of GM&XG Voices, GM2 Voices, etc. NOTE You can find the “Legacy” folder in this display. This folder contains previous Yamaha keyboards’ Voices (such as PSR-A2000, etc.) for data compatibility with other models. -
Page 105: Touch Response And Effect-Related Settings
Best for players with a light touch. [4 ] TOUCH OFF Determines the fixed volume level when Touch is set to “OFF.” LEVEL [5 ]– LEFT–RIGHT2 Turns Touch on or off for each keyboard part. [7 ] PSR-A3000 Owner’s Manual... - Page 106 Determines the volume level of the Harmony/Arpeggio notes generated by the Harmony/Arpeggio function. NOTE When you are using certain Voices, such as Organ Voices, in which the TOUCH SENSE DEPTH is set to 0 in the VOICE SET display (page 114), the volume does not change. PSR-A3000 Owner’s Manual...
- Page 107 NOTE The settings for the Arpeggio Quantize function and the Arpeggio Hold function can be made on the display called up via [FUNCTION] TAB [E] MENU 1 [J] UTILITY TAB [E][F] CONFIG 2 (page 204). PSR-A3000 Owner’s Manual...
-
Page 108: Pitch-Related Settings
The main feature of this scale is that each key has its own unique character. The scale was used extensively during the time of Bach and Beethoven, and even now it is often used when performing period music on the harpsichord. PSR-A3000 Owner’s Manual... -
Page 109: Changing The Part Assignment Of The Transpose Buttons
The TRANSPOSE [-]/[+] buttons affect only the pitch of Song playback. MASTER The TRANSPOSE [-]/[+] buttons affect the overall pitch of the instrument, except audio playback. The assignment can be confirmed by the pop-up display called up via the TRANSPOSE [-]/[+] buttons. PSR-A3000 Owner’s Manual... -
Page 110: Editing Parameters Assigned To The Joystick
For information on available functions, see pages 111–112. Press the [EXIT] button to close the PARAMETER ASSIGN window. If necessary, repeat steps 2–5 to change the functions for other numbers. NOTE The settings here are maintained even when you turn off the power. PSR-A3000 Owner’s Manual... - Page 111 Adjusts the resonance of the filter for the Style. Moving the joystick in the + direction makes the sound more pronounced. Style/Filter/Cutoff,Res Adjusts the cutoff frequency of the filter and the resonance for the Style to change the timbre or tone of the sound. PSR-A3000 Owner’s Manual...
-
Page 112
Changes the tempo of the currently selected Style or Song. Setting range is from 50% of the default tempo value to 150%. Returning the joystick to the center position resets the tempo to the default.
No function is assigned. PSR-A3000 Owner’s Manual... -
Page 113: Editing Voices (Voice Set)
Press the [I] (SAVE) button to save your edited Voice. For details on the Save operation, refer to page 28. NOTICE The settings will be lost if you select another Voice or turn off the power to the instrument without carrying out the Save operation. PSR-A3000 Owner’s Manual... -
Page 114: Editable Parameters In The Voice Set Displays
Determines the pitch transition time when the edited Voice is set to MONO TIME above. NOTE Portamento is a function that creates a smooth transition in pitch from the first note played on the key- board to the next. PSR-A3000 Owner’s Manual... - Page 115 “passed” by the range filter. [2 ] HARMO. Determines the emphasis given Volume (Harmonic Con- to the cutoff frequency (reso- tent) nance), set in BRIGHT. above Resonance (see diagram). Higher values result in a more pronounced effect. Frequency (pitch) PSR-A3000 Owner’s Manual...
- Page 116 If you want to re-select the DSP type, you can do so in the “2 DSP” menu explained on page 117. [7 ] PANEL Determines the sustain level applied to the edited Voice when the VOICE SUSTAIN EFFECT [SUSTAIN] button on the panel is turned on. PSR-A3000 Owner’s Manual...
- Page 117 For example, if you want to change the Voice yet keep the same effect, set the EFFECT parameter to OFF (in the display explained below). Call up the operation display. [FUNCTION] TAB [E] MENU 1 [F] VOICE SET FILTER Use the [A]/[B] buttons to select a keyboard part. PSR-A3000 Owner’s Manual...
-
Page 118: Editing Organ Flutes Voices
For instructions on the Save operation, refer to page 28. NOTICE The settings will be lost if you select another Voice or turn off the power to the instrument without carrying out the Save operation. FOOTAGE Page Refer to page 45. PSR-A3000 Owner’s Manual... - Page 119 The longer the graphic bar, the longer the decay. EFFECT/EQ Page Same parameters as in the VOICE SET “EFFECT/EQ” page explained on page 116, except that PANEL SUSTAIN is not available for the Organ Flutes Voices. PSR-A3000 Owner’s Manual...
-
Page 120: Styles
This type is similar to Full Keyboard, with the exception that less than three notes can be played to indicate the chords (based on the previously played chord, etc.). 9th, 11th and 13th chords cannot be played. NOTE “AI” stands for “Artificial Intelligence.” PSR-A3000 Owner’s Manual... - Page 121 Seventh flatted ninth [7( 2+3+(5)+ Seventh add flatted thirteenth [7( 13)] 1+3+5+ Seventh sharp ninth [7( 2+3+(5)+ Suspended fourth [sus4] 1+4+5 Csus4 One plus two plus five [sus2] 1+2+5 Csus2 cancel Cancel * Notes in parentheses can be omitted. PSR-A3000 Owner’s Manual...
-
Page 122: Style Playback Related Settings
OFF: The volume is kept the same regardless of playing strength. NARROW: The volume changes over a narrow range. MEDIUM: The volume changes over a medium range. WIDE: The volume changes over a wide range. PSR-A3000 Owner’s Manual... - Page 123 LOCK: The Channel On/Off status of the previous Style is always main- tained. HOLD: During Style playback, the Channel On/Off status of the previous Style is maintained. When Style playback is stopped, all Style Channels are set to On. RESET: All Style Channels are set to On. PSR-A3000 Owner’s Manual...
-
Page 124: Memorizing Original Settings To One Touch Setting
For instructions on the Save operation, refer to page 28. NOTICE The memorized panel settings (One Touch Settings) will be lost if you change the Style or turn the power off without carrying out the Save operation. PSR-A3000 Owner’s Manual... -
Page 125: Creating/Editing Styles (Style Creator)
Lets you edit the SFF (Style File Format) related parameters of the already recorded channels. • Editing the rhythm part on the BASIC page by using the Drum Setup function (page 140) Lets you edit the rhythm part of the Style, such as changing the sounds of the individual instruments. PSR-A3000 Owner’s Manual... -
Page 126: Realtime Recording
A Rhythm channel can be selected as the recording target no matter whether already recorded data is included or not. If already recorded data is included in the selected channel, you can record notes additionally to the existing data. PSR-A3000 Owner’s Manual... - Page 127 Press the appropriate [1 ] or [2 ] button to disable recording. NOTICE The created Style will be lost if you change to another Style or turn off the power to the instrument without carrying out the Save operation (step 7 on page 126). PSR-A3000 Owner’s Manual...
- Page 128 However, follow the rules below since the Source Root/Chord is set to CM7. • When recording the Intro, make sure that the recorded phrase leads properly into a C scale. • When recording the Ending, make sure that the recorded phrase begins with or properly follows a C scale. PSR-A3000 Owner’s Manual...
- Page 129 Press the appropriate [3 ]–[8 ] button to disable recording. NOTICE The created Style will be lost if you change to another Style or turn off the power to the instrument without carrying out the Save operation (step 7 on page 126). PSR-A3000 Owner’s Manual...
- Page 130 [8 ] (OK) button to actually enter the selection. If you want to select a fill-in section (which has no panel button), press any one of the Section buttons and use the [6 ]/[7 ] buttons to select a fill-in, then press the [8 ] (OK) button. PSR-A3000 Owner’s Manual...
- Page 131 As desired, repeat step 3 for another channel. NOTICE The created Style will be lost if you change to another Style or turn off the power to the instrument without carrying out the Save operation (step 7 on page 126). PSR-A3000 Owner’s Manual...
- Page 132 (for example, the 2nd and 3rd beats, if “3” is selected). In all cases, “A” types produce minimum effect, “B” types produce medium effect, and “C” types produce maximum effect. PSR-A3000 Owner’s Manual...
- Page 133 Groove or Dynamics results. The Undo function only has one level; only the previous operation can be undone. NOTICE The edited Style will be lost if you change to another Style or turn off the power to the instrument without carrying out the Save operation (step 7 on page 126). PSR-A3000 Owner’s Manual...
- Page 134 The Undo function only has one level; only the previous operation can be undone. NOTICE The edited Style will be lost if you change to another Style or turn off the power to the instrument without carrying out the Save operation (step 7 on page 126). PSR-A3000 Owner’s Manual...
- Page 135 Making Style File Format Settings (PARAMETER) The Style File Format (SFF) combines all of Yamaha’s auto accompaniment (Style playback) know-how into a single unified format. Setting the SFF related parameters determines how the original notes are converted to the actual sounded notes based on the chord you specify in the Chord area of the keyboard. The conversion flow is shown below.
- Page 136 NOTE When the parameters for the selected channel are set to NTR: ROOT FIXED, NTT: BYPASS, and NTT BASS: OFF, the parameters here are changed to “PLAY ROOT” instead of “SOURCE ROOT.” In this case, you can hear the resulting sound while you change the Chord Root/Type during playback. NOTE The settings here are not applied when NTR is set to GUITAR. PSR-A3000 Owner’s Manual...
- Page 137 Other notes are not changed. Use this for melody channels of Sections which respond only to major/minor chords, such as Intros and Endings. MELODIC MINOR In addition to the Melodic Minor transposition above, augmented and dimin- ished chords affect the 5th note of the Source Pattern. PSR-A3000 Owner’s Manual...
- Page 138 Suitable for strumming sounds of the guitar. Some notes may sound as if they are muted—this is the normal condition when chords are played on guitar by strumming. ARPEGGIO Suitable for arpeggio-played sound of the guitar, resulting in beautiful four- note arpeggio sounds. PSR-A3000 Owner’s Manual...
- Page 139 The note is retriggered with a new attack at a new pitch corresponding to the next chord. RETRIGGER TO The note is retriggered with a new attack at the root note of the next chord. How- ROOT ever, the octave of the new note remains the same. PSR-A3000 Owner’s Manual...
- Page 140 Use the [3 ]/[4 ] (INSTRUMENT) buttons to call up the window to select the instrument. Use the [2 ]–[7 ] buttons to select the Kit, Category and instrument in order. Press the [EXIT] button to close the window. PSR-A3000 Owner’s Manual...
- Page 141 Determines the cutoff frequency or effective frequency range of the filter. Higher values result in a brighter sound. Filter Resonance Determines the emphasis given to the cutoff frequency (resonance), set in Fil- ter Cutoff above. Higher values result in a more pronounced effect. PSR-A3000 Owner’s Manual...
- Page 142 Press the [EXIT] button to return to close the DRUM SETUP window. NOTICE The edited Style will be lost if you change to another Style or turn off the power to the instrument without carrying out the Save operation (step 7 on page 126). PSR-A3000 Owner’s Manual...
-
Page 143: Songs
[6 ] COLOR ON/OFF When this is set to ON, the notes in the display appear in color (C: red, D: yellow, E: green, F: orange, G: blue, A: purple, and B: gray). PSR-A3000 Owner’s Manual... - Page 144 “D, E, F#, G, A, B, C#” are indicated as “Do, Re, Mi, Fa, Sol, La, Ti” when the language is set to English. Note that the note name indication differs depending on the current language (page 148). PSR-A3000 Owner’s Manual...
-
Page 145: Editing Lyrics/Text Display Settings
[EXIT] button to return back to the Lyrics/Text display. NOTE When the background picture is specified in the Song data, the BACKGROUND setting cannot be changed. NOTE For information on available image files, refer to the MAIN PICTURE parameter on page 206. PSR-A3000 Owner’s Manual... -
Page 146: Using The Auto Accompaniment Features With Song Playback
NOTE When playing back a Song and a Style at the same time, the tempo value set in the Song is automatically used. NOTE The Style Retrigger function (page 112) cannot be used during Song playback. When the Song playback is stopped, Style playback is also stopped at the same time. PSR-A3000 Owner’s Manual... -
Page 147: Song Playback Related Parameters (Guide Function, Channel Settings, Repeat Settings)
AUTO CH SET When set to “ON,” this automatically sets the proper MIDI channels for the [7 ] Right- and Left hand parts pre-programmed in the commercially available Song data. Normally, this should be set to “ON.” PSR-A3000 Owner’s Manual... -
Page 148: Keyboard And Vocal Practice Using The Guide Function
This instrument also features convenient vocal practice tools that let you adjust the timing of Song playback to match your vocal performance. Select the desired Song for practicing the keyboard or singing. Call up the setting display. [FUNCTION] TAB [E] MENU 1 [H] SONG SETTING TAB[E] GUIDE/CHANNEL PSR-A3000 Owner’s Manual... - Page 149 Even though the PSR-A3000 does not have these lamps, you can use the same function by following the indications in the displayed notation with the Song Score function.
-
Page 150: Playing Backing Parts With The Performance Assistant Technology
The actual current chord is shown on the Main display. Press the [ ] (STOP) button to stop playback. After you finish playing, make sure to turn P.A.T. off. NOTE Selecting another Song resets P.A.T. to OFF. PSR-A3000 Owner’s Manual... -
Page 151: Creating/Editing Songs (Song Creator)
• SETUP....For selecting the panel setups to be recorded to the top position of the Song. See page 158. • CHANNEL..For editing Channel events. See page 162. • CHORD....For recording chords and Sections with precise timing (page 155) or editing them (page 165). PSR-A3000 Owner’s Manual... - Page 152 Start Step Recording by using the [A]–[J] buttons and [1 ]–[8 ] buttons, as well as the keyboard. Refer to the example on page 154 for specific instructions. When a note is input, the location (bar: beat: clock), note name, velocity and length listed in succession. PSR-A3000 Owner’s Manual...
- Page 153 Press the [I] (SAVE) button to carry out the Save operation. For details, refer to page 28. NOTICE The recorded Song data will be lost if you select another Song or turn off the power to the instrument without carrying out the Save operation. PSR-A3000 Owner’s Manual...
- Page 154 To enter the rest, use the [4 ]–[8 ] buttons. (Press the button once to select the rest value, and once again to actually enter it.) The BAR:BEAT:CLOCK indication lets you confirm that a rest having the specified note length has been entered. PSR-A3000 Owner’s Manual...
- Page 155 Select the Style you want to use in the Song. Call up the operation display. [FUNCTION] TAB [F] MENU 2 [B] SONG CREATOR TAB [E][F] CHORD Press the [G] (STEP REC) button to call up the STEP RECORD display. PSR-A3000 Owner’s Manual...
- Page 156 * The numbers shown in the illustration correspond to the following operation step numbers. Before executing the instructions below, make sure that [AUTO FILL IN] button is turned off since no Fill in is included in the notation example above. PSR-A3000 Owner’s Manual...
- Page 157 Enter the chords for the Main B section. Press the STYLE CONTROL MAIN VARIATION [B] button. Press the [4 ] button to select the whole-note length. Play the chord C in the chord section of the keyboard. PSR-A3000 Owner’s Manual...
- Page 158 [4 ]/ MARK ON Add or remove a checkmark to the selected item. Checked items are [5 ] recorded to the Song. [4 ]/ MARK OFF [5 ] Press the [8 ] (APPLY) button to record the data. PSR-A3000 Owner’s Manual...
- Page 159 This setting maintains all data after the point at which recording is stopped. You can set the Punch Out measure by pressing the [6 ] buttons. PSR-A3000 Owner’s Manual...
- Page 160 Press the [I] (SAVE) button to carry out the Save operation. For details, refer to page 28. NOTICE The recorded Song data will be lost if you select another Song or turn off the power to the instrument without carrying out the Save operation. PSR-A3000 Owner’s Manual...
- Page 161 Start overwrite recording original data Stop recording *2 PUNCH IN AT=003 PUNCH OUT Play back Start overwrite recording Stop overwrite recording/play original data original data PUNCH IN AT=003 PUNCH OUT AT=006 Previously recorded data Newly recorded data Deleted data PSR-A3000 Owner’s Manual...
- Page 162 Press the [I] (SAVE) button to carry out the Save operation. For details, refer to page 28. NOTICE The edited Song data will be lost if you select another Song or turn off the power to the instrument without carrying out the Save operation. PSR-A3000 Owner’s Manual...
- Page 163 Applying less than 100% quantization lets you preserve some of the “human” feel in the recording. Quarter-note length Original data (assuming 4/4 meter) Quantizing strength =100 Quantizing strength =50 PSR-A3000 Owner’s Manual...
- Page 164 CH 1–8/CH 9–16 Toggles between the two channel displays: Channels 1–8, and Channels 9– ALL CH To simultaneously set all channels to the same value, adjust the Channel Transpose for one of the channels while holding down this button. PSR-A3000 Owner’s Manual...
- Page 165 NOTE After you edit events in the CHORD display, press the [F] (EXPAND) button to convert the data into Song data. NOTE Chord section data recorded with Realtime Recording cannot be indicated and edited on this display. PSR-A3000 Owner’s Manual...
- Page 166 Name Allows you to enter the Song name. Lyrics Allows you to enter lyrics. Code CR: Enters a line break in the lyrics text. LF: Clears the currently displayed lyrics and displays the next set of lyrics. PSR-A3000 Owner’s Manual...
- Page 167 CHORD, 1-16, SYS/EX. or LYRICS page. [6 ]/ MARK OFF [7 ] 3. Press the [EXIT] button to return to the Event List display in which only unfiltered Events are shown. PSR-A3000 Owner’s Manual...
-
Page 168: Usb Audio Player/Recorder
If you want to create a new Multi Pad in the existing Bank, select the desired Multi Pad Bank via the MULTI PAD CONTROL [SELECT] button. If you want to create a new Multi Pad in an empty new Bank, this step is unnecessary. PSR-A3000 Owner’s Manual... - Page 169 Song or Style playback, playback will start and repeat in sync with the beat. If the Repeat parameter is off for the selected pad, playback will end automatically as soon as the end of the phrase is reached. PSR-A3000 Owner’s Manual...
-
Page 170: Editing Multi Pads
NOTE If you select a Preset Multi Pad Bank then edit the Multi Pads, save your edits to “USER” or “USB” (when USB flash drive is connected) as a User Bank. Press the [7 ] (EDIT) button of MENU 1 to call up the MULTI PAD EDIT display. Select a particular Multi Pad to be edited by pressing any of the [A], [B], [F] and [G] buttons. PSR-A3000 Owner’s Manual... - Page 171 Press the [8 ] button to call up the confirmation window, press the [F] (YES) button to call up the USER page, then press the [6 ] (SAVE) button to carry out the Save operation. For details, refer to page 28. PSR-A3000 Owner’s Manual...
-
Page 172: Music Finder
Deleting Records from the FAVORITE Page 1. Select the Record you want to delete from the FAVORITE page. 2. Press the [H] (DELETE FROM FAVORITE) button, then press the [G] (YES) button to actually delete the Record. PSR-A3000 Owner’s Manual... -
Page 173: Editing Records
[4 ] buttons. For SONG or AUDIO Records, this field cannot be edited. [5 ]/ GENRE Selects the desired genre. [6 ] [7 ] GENRE NAME Creates a new genre. To cancel and quit the Edit operation, press the [8 ] (CANCEL) button. PSR-A3000 Owner’s Manual... -
Page 174: Saving The Records As A Single File
The Character Entry window is called up. If necessary, rename the file. For instructions, refer to page 30. Press the [8 ] (OK) button to save the file. All Records are saved together as a single Music Finder file. PSR-A3000 Owner’s Manual... - Page 175 Selecting “REPLACE” automatically deletes all your original Records from internal memory. Make sure that all important data has been archived to another location beforehand. APPEND The Records called up are added to the Records currently in the instrument. CANCEL Cancels the file selection operation. PSR-A3000 Owner’s Manual...
-
Page 176: Registration Memory
Save the current Bank containing the edited Registration Memories. Press the [8 ] (UP) button to call up the Registration Memory Selection display, then press the [6 ] (SAVE) button of MENU 2 to carry out the Save operation. For details, refer to page 28. PSR-A3000 Owner’s Manual... -
Page 177: Disabling Recall Of Specific Items (Freeze)
Press the [FREEZE] button on the panel to turn the Freeze function on. With this operation, you can “freeze” or maintain checkmarked items, even when you select another Registration Memory number. To turn off the Freeze function, press the [FREEZE] button again. PSR-A3000 Owner’s Manual... -
Page 178: Calling Up Registration Memory Numbers In Order (Registration Sequence)
Program the Sequence order, from left to right. Press one of the REGISTRATION MEMORY [1]–[8] buttons on the panel, then press the [6 ] (INSERT) button to input the number. Indicates the Registration Memory numbers, in the order of the current Registration Sequence. PSR-A3000 Owner’s Manual... - Page 179 Registration Sequence, save the current Registration Memory Bank file. Press the REGIST BANK [+] and [-] buttons simultaneously to call up the REGISTRATION BANK Selection display. Press the [6 ] button of MENU 2 to save the Bank file. For details, refer to page 28. PSR-A3000 Owner’s Manual...
- Page 180 To return to the status in which no Registration Memory number is selected, press the TAB [E] and [F] buttons simultaneously while the Main display is called up. NOTE The pedal can be used for Registration Sequence no matter which display is called up (except for the REGIST SEQUENCE display). PSR-A3000 Owner’s Manual...
-
Page 181: Oriental Scales
Save operation. [D]/[I] PANPOT Determines the stereo position of the selected part (channel). [E]/[J] VOLUME Determines the volume of each part or channel, giving you fine control over the balance of all the parts. PSR-A3000 Owner’s Manual... -
Page 182: Editing Filter Parameters
Editing FILTER Parameters [D]/[I] HARMONIC Allows you to adjust the Resonance (page 115) for each part. CONTENT [E]/[J] BRIGHTNESS Determines the brightness of the sound for each part by adjusting the Cutoff Frequency (page 115). PSR-A3000 Owner’s Manual... -
Page 183: Editing Tune Parameters
(MASTER), Song playback (SONG), or the keyboard pitch (KBD), respec- tively. Please note that the “KBD” setting also transposes the pitch of Style playback and the Multi Pads (since these are also affected by keyboard play in the left-hand section). PSR-A3000 Owner’s Manual... -
Page 184: Editing Effect Parameters
This section covers how to change the Effect Type of each Effect Block. The settings here can be saved to a Registration Memory, Song or Style. Call up the desired page from PANEL, STYLE or SONG by pressing the [MIXER/EQ] button, repeatedly, if necessary. PSR-A3000 Owner’s Manual... - Page 185 If you want to edit detailed Parameters of the selected Effect Type, press the [F] (DETAIL) button. For details, refer to the next section. Save the Effect Settings to a Registration Memory, Song or Style. For instructions, refer to page 92. PSR-A3000 Owner’s Manual...
- Page 186 [2 ]–[4 ] buttons, and then use the [5 ]/[6 ] buttons to edit the value. This parameter is effective only when the [DSP VARI.] button lamp lights on the panel. To close this display, press the [EXIT] button. PSR-A3000 Owner’s Manual...
-
Page 187: Editing Eq Parameters
The “EQ” page lets you adjust the EQ for each corresponding part, while the “MEQ” page lets you make overall EQ adjustments for the entire instrument. Editing Part EQ Parameters [D]/[I] EQ HIGH Boosts or attenuates the high EQ band for each part. [E]/[J] EQ LOW Boosts or attenuates the low EQ band for each part. PSR-A3000 Owner’s Manual... - Page 188 In the Character Entry window called up via this operation, enter the name, and then press the [8 ] (OK) button to actually store your settings as a User Master EQ Type, which can be called up via the [A]/[B] buttons. PSR-A3000 Owner’s Manual...
-
Page 189: Editing Master Compressor (Cmp) Parameters
[4 ] THRESHOLD Determines the threshold (minimum level at which compression starts). OFFSET [5 ] RATIO OFFSET Determines the ratio of compression (how much the dynamic range is com- pressed). [7 ] GAIN OFFSET Determines the output level. PSR-A3000 Owner’s Manual... -
Page 190: Block Diagram
Press the [8 ] (OK) button to carry out the Save operation. Press the [EXIT] button to return to the previous display. The saved Master Compressor type is shown in the TYPE selection list. Block Diagram Connection = System Effect Connection = Insertion Effect PSR-A3000 Owner’s Manual... -
Page 191: Connections
Pedal on/off operation may differ depending on the particular pedal you’ve connected to the instrument. For example, pressing down on one pedal may turn the selected function on, while pressing a different make/brand of pedal may turn the function off. If necessary, use this setting to reverse the operation. PSR-A3000 Owner’s Manual... - Page 192 DSP VARIATION Same as the [DSP VARI.] button on the panel. You can turn this pedal function on or off for each keyboard part on this display. PSR-A3000 Owner’s Manual...
- Page 193 Same as the PART ON/OFF [RIGHT 1] button. RIGHT 2 ON/OFF Same as the PART ON/OFF [RIGHT 2] button. LEFT ON/OFF Same as the PART ON/OFF [LEFT] button. OTS +/- Calls up the next/previous One Touch Setting. PSR-A3000 Owner’s Manual...
-
Page 194: Midi Settings
MIDI Settings In this section, you can make MIDI-related settings for the instrument. The PSR-A3000 gives you a set of ten pre- programmed templates that let you instantly and easily reconfigure the instrument to match your particular MIDI application or external device. Also, you can edit the pre-programmed templates and save up to ten of your original templates to USER memory. - Page 195 Style playback with a MIDI pedal unit. MIDI Pedal 2 This template lets you play the bass part for Style playback by using a MIDI pedal unit. MIDI OFF No MIDI signals are sent or received. PSR-A3000 Owner’s Manual...
-
Page 196: Midi System Settings
The “Tx” setting turns MIDI transmission of MIDI chord exclusive data (chord detect. root and type) on or off. The “Rx” setting turns MIDI reception and recognition of MIDI chord exclusive data generated by external equipment on or off. PSR-A3000 Owner’s Manual... -
Page 197: Midi Transmit Settings
NOTE Protected Songs cannot be transmitted even if the proper Song channels 1–16 are set to be transmitted. Use the [4 ]–[8 ] button to determine the types of data to be sent. For information on the MIDI messages which can be set here, see “Note Events” on page 166. PSR-A3000 Owner’s Manual... -
Page 198: Midi Receive Settings
32 channels (16 channels x 2 ports) of the MIDI messages is as follows: MIDI reception MIDI transmission MIDI [IN] terminal [USB TO HOST] terminal MIDI [OUT] terminal [USB TO HOST] terminal Wireless Wireless LAN Port handling USB1 USB2 Merge MIDI/USB1/WLAN USB2 MIDI/USB/WLAN 01–16 01–16 01–16 PSR-A3000 Owner’s Manual... - Page 199 [ACMP] or split point settings. When several channels are simultaneously set to “ON,” the chord type is detected from merged MIDI data received over the channels. The operation procedure is basically the same as that of the BASS display above. PSR-A3000 Owner’s Manual...
-
Page 200: Connecting With An Iphone/Ipad Via Wireless Lan
Connecting with an iPhone/iPad via Wireless LAN By using a USB wireless LAN adaptor (sold separately), you can connect the PSR-A3000 with an iPhone/iPad via a wireless network. For general operating instructions, refer to the “iPhone/iPad Connection Manual” on the website. - Page 201 IP ADDRESS: For setting the IP address and other related parameters. OTHERS: For entering the Host name or showing MAC address, etc. [3 ]/ MODE Switches to the Infrastructure Mode. [4 ] [5 ]/ INITIALIZE Initializes the connection setup to the default factory status. [6 ] PSR-A3000 Owner’s Manual...
-
Page 202: Other Functions
Determines the volume of the metronome sound. [3 ]– SOUND Determines whether a bell accent is sounded or not at the first beat of each [5 ] measure. [6 ]/ TIME SIGNA- Determines the time signature of the metronome sound. [7 ] TURE PSR-A3000 Owner’s Manual... - Page 203 [PHONES] jack. ON: Speaker sound is always on, even if headphones are connected. OFF: Speaker sound is off. You can only hear the instrument sound via the headphones or an external device connected to the AUX OUT jacks. PSR-A3000 Owner’s Manual...
- Page 204 Turns on or off the Arpeggio Hold function. When this is set to ON, turning [6 ] the [HARMONY/ARPEGGIO] button on makes Arpeggio playback con- tinue even after the note has been released. To stop playback, press the [HARMONY/ARPEGGIO] button again. PSR-A3000 Owner’s Manual...
- Page 205 Turns the Song Auto Open function on or off. When this is set to “ON,” [4 ] OPEN simply connecting the USB flash drive (selected in the Device List above) calls up the first Song in the USB flash drive. PSR-A3000 Owner’s Manual...
-
Page 206: System
OWNER EXPORT For exporting identification information of the instrument, which may be INSTRUMENT necessary for using the “Yamaha Expansion Manager” software, to the root INFO directory of the USB flash drive (page 47). OWNER NAME Lets you enter your name as the owner. The Owner name is indicated on the opening display when you turn the power on. - Page 207 If you want to call up the factory default files, select the file in the PRESET tab. When the file is selected, a message is displayed according to the content of the file. Press the desired button. PSR-A3000 Owner’s Manual...
- Page 208 NOTE The same operation can be done by turning the power on while holding the B5 key (rightmost B key). In this case, you can create Registration Memory setups from the default panel settings. Press the [I] (FACTORY RESET EXECUTE) button to carry out the Factory Reset operation for all checkmarked items. PSR-A3000 Owner’s Manual...
-
Page 209: Function List
168 For installing Expansion Packs for adding extra contents downloaded from the website or created PACK INSTALLATION page 46 on your own by using the Yamaha Expansion Manager. OWNER For setting the Owner name, Message language, etc. pages 18, 206 BACKUP/RESTORE For backing up or restoring the settings and data saved in the USER drive of the instrument. -
Page 210: Direct Access Chart
REGIST INFORMATION FOOT PEDAL [1], [2] FUNCTION CONTROLLER FOOT PEDAL 1, 2 SCALE SETTING buttons SCALE TUNE BANK selection display SCALE MEMORY buttons SCALE TUNE BANK selection display SCALE TUNE EDIT Joystick LIVE CONTROL PARAMETER ASSIGN [ASSIGN] PSR-A3000 Owner’s Manual... -
Page 211: Troubleshooting
This may occur if a USB flash drive has been installed to the instru- ment. Installation of some USB flash drives may result in a long interval between turning the power on and appearance of the Main display. To avoid this, turn the power on after disconnecting the device. PSR-A3000 Owner’s Manual... - Page 212 The tempo, beat, measure and music notation is not displayed Some Song data for the instrument has been recorded with special correctly. “free tempo” settings. For such Song data, the tempo, beat, mea- sure and music notation will not be displayed correctly. PSR-A3000 Owner’s Manual...
- Page 213 Style again. Foot Pedal Change the polarity settings: [FUNCTION] TAB [E] MENU 1 The on/off setting of the footswitch connected to the FOOT [D] CONTROLLER [I] (PEDAL POLARITY). PEDAL jack is reversed. PSR-A3000 Owner’s Manual...
-
Page 214: Specifications
Style Creator Styles OTS Information Song Creator Functions Score Display Function Lyrics Display Function Text Display Function Songs Wallpaper Customization Guide Follow Lights, Any Key, Karao-Key, Your Tempo Performance Assistant Technology (P.A.T.) Multi Pads Multi Pad Creator PSR-A3000 Owner’s Manual... - Page 215 * The contents of this manual apply to the latest specifications as of the printing date. To obtain the latest manual, access the Yamaha website then download the manual file. Since specifications, equipment or separately sold accessories may not be the same in every locale, please check with your Yamaha dealer.
-
Page 216: Index
Multi Pad Creator......168 Data dial ..........22 Multi Track Recording ....69 Data List ..........7 Music Finder ......80 Delete ..........31 Harmony ......... 42 Music notation ......64 Demo..........19 Headphones ........15 Music rest ........14 Direct Access......23 PSR-A3000 Owner’s Manual... - Page 217 Record (Music Finder) ....80 Synchro Stop ........51 Recording (Audio)......74 Recording (Song)......68 Registration Memory ....85 Tap Tempo......52 Registration Sequence....178 Tempo..........52 Rename ...........30 Text ......... 65 Repeat......67 Time Stretch ........73 Repertoire........55 Touch Response.....42 Reset ........33 PSR-A3000 Owner’s Manual...
- Page 218 Memo...
- Page 219 Information for Users on Collection and Disposal of Old Equipment This symbol on the products, packaging, and/or accompanying documents means that used electrical and electronic products should not be mixed with general household waste. For proper treatment, recovery and recycling of old products, please take them to applicable collection points, in accordance with your national legislation and the Directives 2002/96/EC.
- Page 221 Yamaha at the address, telephone number or website shown below. Yamaha may request that you send the defective product to a local authorized Yamaha Servicer or authorize return of the defective product to Yamaha for repair. If you are uncertain as to whether a dealer has been authorized by Yamaha, please contact Yamaha’s Service Department at the number shown below, or...
- Page 222 Niederlassung und bei Yamaha Vertragshändlern in den jeweiligen Bestimmungsländern erhältlich. Pour plus de détails sur les produits, veuillez-vous adresser à Yamaha ou au distributeur le plus proche de vous figurant dans la liste suivante. Para detalles sobre productos, contacte su tienda Yamaha más cercana o el distribuidor autorizado que se lista debajo.
- Page 224 Yamaha Global Site http://www.yamaha.com/ Yamaha Downloads http://download.yamaha.com/ Manual Development Department © 2015 Yamaha Corporation Published 07/2015 POZC*.*- 01A0 Printed in Indonesia ZQ09830...