Table of Contents
W - X e
O & @ ) X e
O 2 6 X e
W & @ @ @ ) X g
W 2 @ 6 X g
W . M I / X f
W 2 @ 6 X g
@ @ @ @ @ @ @ @ @ @ @ @
@ @ g @
@ @ @ @ @ @ @ f
@ @ @ @ @ @ @ f
W . M e I / X f
W 2 @ @ 6 X g
W 2 ( M e I ' 6 X
O 2 @ @ @ 6 K e
@ @ @ @ @ @ @ @ 6 K f
@ @ f I ' 6 X e
W 2 @ @ 6 X g
W & @ @ @ @ ) X f
W 2 @ @ 6 X g
W . M e I / X f
W 2 @ @ 6 X g
W . M e I / X f
W 2 ( M g
O 2 @ @ f
W & g
W & @ g
W 2 @ @ 6 X g
W & @ @ @ @ ) X f
@ @ @ @ @ @ @ f
@ @ @ @ @ @ @ f
@ @ @ @ @ h
O 2 @ h
W 2 ( M g
O 2 @ @ f
W & @ g
W & g
W 2 @ @ 6 X g
W & @ @ @ @ ) X f
@ @ @ @ @ @ @ @ @ @ @ @ @ @ @ @ @ @ @ @ @ ) e
J ( Y h g
@ ( Y h f
@ @ ( M h f
@ @ @ @ @ @ @ @ @ @ @ @ @ @ @ @ @ @ @ @ @ ) e
@ @ ( M h e
@ @ H h f
@ 5 h f
@ @ @ @ @ h
O 2 @ h
. M I ' 1 g
@ g
N @ g
@ f @ f
@ L e J 5 f
7 H e N 1 f
@ @ g @
@ @ g @
@ @ h
J ( M h
7 Y h e
@ @ 6 K h
J @ g @ L f
7 @ g @ 1 f
7 H e N 1 f
7 @ H g N @ 1
W & ( Y f V ' ) X
J @ 5 h 3 @
@ @ g @ @ e
@ @ f N @ 1 e
@ @ g @ @ e
7 ( M I ' @ 1 f
@ H e N @ @ f
@ f @ @ f
7 @ g @ 1 f
J @ g @ L f
7 H e N 1 f
7 @ g @ 1 f
J @ g @ L f
7 H e N 1 f
7 @ H h e
W & ( Y h
W & ( Y h
W . Y @ @ g
W & @ @ g
W . Y @ @ g
@ f @ @ f
7 ( M I ' @ 1 f
@ H e N @ @ f
@ @ 6 K h
7 Y h e
J ( M h
@ @ h
@ @ h
@ @ h
W & ( Y h
W & ( Y h
7 @ H h e
W . Y @ @ g
W . Y @ @ g
W & @ @ g
@ H e N @ @ f
7 ( M I ' @ 1 f
@ f @ @ f
@ @ h e @ @ H f
@ @ @ @ @ @ @ @ @ @ @ @ @ @ @ ) f
@ K O & Y f O 2 6 X f
@ @ @ @ @ @ @ @ @ @ @ @ @ @ @ @ @ @ ) e
@ K f @ Y f O 2 6 X e
@ @ e @ @ e @ @ e @ @ H e
@ @ h
@ @ h
@ @ h
@ @ @ @ ) X f
O & U g
J 5 g
S @ @ @ L g
V ' @ @ @ H g
3 ) K O . Y f
@ @ g @
@ @ g @
@ @ @ @ @ @ @ @ @
I ' @ 1 f
@ @ @ @ 6 X g
I 4 @ @ ) X f
@ @ g @ @ f
@ @ g @ @ f
@ @ g @ @ f
@ @ h e @
@ @ h e @
7 @ H h N @
@ @ g @ @ e
@ @ f J @ 5 e
@ @ f O & 0 Y e
W & 5 e @ @ e
W 2 @ @ 6 X e
W & < e @ 1 e
W & < e B ) X e
W & 5 e 3 ) X e
W 2 @ @ 6 X f
3 @ L e J 5 f
@ @ f @ f
@ @ @ @ @ @ @ @ @ @ @ e
W & H e N ) X e
W 2 @ 6 X f
W . M I / X f
O @ 2 @ 6 X f
@ @ H @ @ f
@ @ @ @ ( Y @ 1 f
@ 5 f
@ @ f
J @ H f
@ @ g @ @ f
@ @ g @ @ f
@ @ g @ @ f
@ @ g @ @ f
@ @ g @ @ f
@ @ g @ @ f
J @ @ @ @ 6 K g
7 @ ( M I ' @ g
@ @ h e
W . Y e @ @ g
W . Y e @ @ g
W . Y f @ @ g
J @ H f
@ 5 f
@ @ f
I ' @ 1 f
I 4 @ @ ) X f
@ @ @ @ 6 X g
@ @ h
@ @ h
@ @ h
7 @ ( M I ' @ g
J @ @ @ @ 6 K g
@ @ h e
@ @ f
@ @ f
W . Y f @ @ g
W . Y e @ @ g
W . Y e @ @ g
@ @ f
@ 5 f
J @ H f
@ @ f @ K f @ @ g
@ @ f @ @ @ e @ @ g
@ @ f @ @ H e @ @ g
@ @ e @ @ e @ @ e @ @ f
@ @ e @ @ e @ @ e @ @ f
@ @ e @ @ @ @ @ @ @ @ e @ @ f
@ @ h
@ @ h
@ @ h
I ' @ 1 f
V ' @ f
N @ f
W . Y e I ' ) X f
7 H e V ' 1 f
W . R 4 @ ) X f
@ @ h
@ @ g @
@ @ g @
V ' @ f
N @ f
@ f
@ @ g @ @ f
@ @ g @ @ f
@ @ g @ @ f
@ @ h e @
@ @ h e @
3 @ L h J @
@ @ h e
@ @ h e
@ @ @ @ @ @ 0 M f
@ @ h
@ @ h
7 @ H g
@ @ g @ @ e
@ @ g @ @ e
7 @ H e N @ 1 e
N @ 1 e 7 H f
@ @ e @ g
3 @ L J 5 g
@ @ @ @ @ @ @ @ @ e
@ @ h e
7 @ f @ 1 e
@ @ h
@ @ h
@ @ h
J ( Y g
7 5 g
W . Y g
@ @ g @ @ f
@ @ g @ @ f
@ @ g @ @ f
@ @ g @ @ f
@ @ g @ @ f
@ @ g @ @ f
@ @ f @ 1 f
@ @ f @ @ f
@ @ H e N @ L f
@ @ @ @ @ @ @ @ @ @ @ f
@ @ @ @ @ @ @ @ @ @ @ f
7 Y f @ @ g
W . Y g
J ( Y g
7 5 g
V ' @ f
@ f
N @ f
@ @ h
@ @ h
@ @ h
@ @ f @ @ f
@ @ f @ 1 f
@ @ H e N @ L f
@ @ @ @ @ @ @ @ @ @ @ f
7 Y f @ @ g
@ @ @ @ @ @ @ @ @ @ @ f
W . Y g
J ( Y g
7 5 g
@ @ f @ @ f @ @ g
@ @ f @ @ f @ @ g
@ @ f @ @ f @ @ g
@ @ e @ @ e @ @ e @ @ f
@ @ e @ @ e @ @ e @ @ f
@ @ e @ @ e @ @ e @ @ f
@ @ h
@ @ h
@ @ h
' 6 K O . Y g
W . Y f
@ f
J 5 f
V / K e O . Y f
@ g @ f
@ g N @ f
3 L f J 5 f
@ @ h
@ @ h
@ @ h
@ @ h
' 6 K O . Y g
@ f
J 5 f
W . Y f
V / K e O . Y f
3 @ g @ 5 f
N @ g @ H f
3 L e J 5 f
N @ 1 h 7 @
3 @ L g J @ 5
V ' ) X f W & ( Y
V 4 ) K e O & 0 Y
@ @ h e
@ @ h e
@ @ h e
@ @ h e
3 @ L e @ e
V ' 1 e J 5 e
@ @ h
V ' = O . Y e
V ' 1 e 7 ( Y e
3 @ L e J @ 5 e
V ' = e C ( Y e
@ @ g @ @ e
@ @ h
N @ 1 7 H g
N @ @ H g
3 @ W 5 g
V ' 1 e J 5 e
@ @ h e
3 @ L f @ e
V ' = e O . Y e
@ @ h
@ @ h
@ @ h
@ @ h
W & Y f @ f
W . Y e @ f
W & @ @ @ @ @ @ @ f
W . Y h
V / K e O . Y f
3 L e J 5 f
3 @ g @ 5 f
N @ g @ H f
N @ g @ H f
3 @ g @ 5 f
3 L e J 5 f
V / K e O . Y f
@ @ f @ @ f
3 @ f @ 5 f
@ ) K O & @ g
N @ L e J @ H f
@ @ @ @
@ @ g
@ @ g
@ @ g
@ @ g
@ @ @ @
W & @ @ @ @ @ @ @ f
W & Y f @ f
W . Y e @ f
W . Y h
' 6 K O . Y g
J 5 f
W . Y f
@ f
@ @ h
@ @ h
@ @ h
@ @ h
3 @ f @ 5 f
@ @ f @ @ f
N @ L e J @ H f
@ ) K O & @ g
@ @ g
@ @ g
@ @ g
@ @ g
W & @ @ @ @ @ @ @ f
W . Y h
W & Y f @ f
W . Y e @ f
@ 5 e 7 @ H f ( Y g
@ @ e J @ 5 f @ 5 g
@ @ f @ @ f @ @ g
( Y e J @ 5 / K h e
@ @ e @ @ @ @ @ @ @ @ e @ @ f
@ @ e @ @ e @ @ e @ @ f
@ @ e @ @ e @ @ e @ @ f
@ @ e @ @ e @ @ e @ @ f
@ @ h
@ @ h
@ @ h
@ @ h
V 4 @ @ 0 Y g
V 4 @ @ @ 0 Y f
@ @ @ @ @ @ @ @ @ @ @ @
V 4 @ @ 0 Y g
V 4 @ @ 0 Y g
V 4 @ ) K e
V ' @ @ f
I ' @ @ @ ( M e
@ @ @ @ @ @ h
V 4 @ 0 Y e
V 4 @ @ 0 Y f
@ @ h
V 4 @ @ 0 Y f
@ @ @ @ @ @ g
& @ @ @ @ @ @ @ @ f
V 4 @ @ 0 Y g
V 4 @ @ 0 Y g
I 4 @ 0 M g
@ @ g
& @ @ @ @ @ @ @ @ f
V 4 @ @ 0 Y g
@ @ @ @ @ @ @ @ f
I 4 @ 0 M g
@ @ f
@ @ f
@ @ g
& @ @ @ @ @ @ @ @ f
O 2 0 M g V 4 @ @ 6 X e
W & ( Y V 4 6 K h
O & 0 Y f I ' @ 6 K f
@ @ e @ @ e @ @ e @ @ f
@ @ @ @ @ @ @ @ @ @ @ @ @ @ @ @ @ @ f
@ ( M h f @ 5 f
@ @ @ @ @ @ @ @ f
I 4 @ 6 K I 4 @
@ 0 M
O 2 0 M h e I ' @ , e
V + Y e
( Y
( Y f
Oven
book
Microwave
Cook
Operation Guide
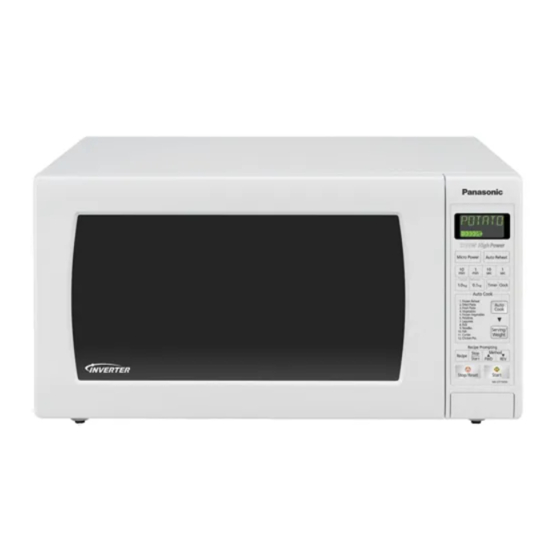
Microwave Oven
Model Numbers:
NN-ST786W / NN-ST756W
Table of Contents

Related Manuals for Panasonic NN-ST756W


Summary of Contents for Panasonic NN-ST756W
- Page 1 I 4 @ 6 K I 4 @ O 2 0 M h e I ' @ , e @ 0 M V + Y e ( Y f Oven Microwave book Cook Operation Guide Microwave Oven Model Numbers: NN-ST786W / NN-ST756W...
-
Page 2: Safety Instructions
4. As with any appliance, close supervision is necessary when used by children. 5. Do not operate this microwave oven if it is not working properly or if it has been damaged or dropped. 6. To reduce the risk of fire in the oven cavity: (a) Do not overcook food. -
Page 3: Installation And General Instructions
3. This oven may be built into a wall cabinet, if desired. This microwave oven is designed and approved for use only with a genuine Panasonic trim kit for Model number listed in the operating instructions (page 21). Installation with any other trim kit may void the warranty. -
Page 4: Microwaves And How They Work
2. TRANSMITTED 3. ABSORBED Cookware and Utensils Guide It is important to use the correct container when cooking in a microwave oven. The following will help you make the right selection. How to Test a Container for Safe Microwave Oven Use... -
Page 5: Cookware And Utensil Guide
The majority of plastic dishes, even those designed for use in the microwave oven, are not suitable for cooking foods with high fat or sugar content, or for lengthy cooking times. Most microwave plastic dishes should not be used for longer than 3 to 5 minutes on P10 power. -
Page 6: Feature Diagram
W - X e @ @ @ @ @ @ @ @ @ @ @ @ @ @ @ @ @ @ @ @ @ ) e O & @ ) X e @ @ @ @ @ @ @ @ @ @ @ @ @ @ @ @ @ @ @ @ @ ) e O 2 6 X e W 2 @ 6 X g W 2 @ 6 X g... -
Page 7: Control Panels
W - X e @ @ @ @ @ @ @ @ @ @ @ @ @ @ @ @ @ @ @ @ @ ) e O & @ ) X e @ @ @ @ @ @ @ @ @ @ @ @ @ @ @ @ @ @ @ @ @ ) e O 2 6 X e W 2 @ 6 X g W 2 @ 6 X g... - Page 8 During cooking: One tap temporarily stops the cooking process. Another tap cancels all your instructions and time of day appears in the Display Window. NN-ST756W Auto Reheat Pad (pg. 16) Timer Pad (pg. 11) Clock Pad (pg. 10) Auto Cook Pad (pg.
-
Page 9: Operation Guide In The Display Window
V + Y e Let’s Start To Use Your Oven! Plug in Plug into a properly earthed electrical outlet. “WELCOME TO PANASONIC MICROWAVE OVEN COOKING” appears in the Display Window. (This will immediately cease when any pad is pressed.) Open Door Open the door and place container with food on Glass Tray in the oven. -
Page 10: Micro Power/Time
To select the correct power level for cooking different foods, refer to the chart below. Press POWER LEVEL WATTAGE Micro Power and Time NN-ST786W NN-ST756W 5 times NN-ST756W Stage 1 Stage 2 P10 for 10 minutes... -
Page 11: To Set Clock
This feature allows you to prevent operation of the oven by a young child; however, the door will open. You can set Child Safety Lock when colon or time of day is displayed. To set: Colon or time of day is displayed To cancel: Display Window NN-ST756W twice once NN-ST756W twice once 3 times... -
Page 12: To Use Timer Pad
( Y f I 4 @ @ 0 M V + Y e To Use Timer Pad To Use as a Kitchen Timer Press. NN-ST786W NN-ST756W To Set Standing Time Press. NN-ST786W Set the desired cooking programme. (see Page 9) NN-ST756W Set the desired cooking programme. - Page 13 When cooking time is longer than 60 minutes, the time will appear in hours and minutes. NOTES: For further information, refer to next page. Defrost by Micro Power and Time Setting NN-ST786W Step 1. NN-ST756W Step 1. Press 8 times to P3. ( Defrost power level,page 9) Enter weight. NN-ST756W Step 2.
-
Page 14: Defrosting Tips And Techniques
W - X e @ @ @ @ @ @ @ @ @ @ @ @ @ @ @ @ @ @ @ @ @ ) e O & @ ) X e @ @ @ @ @ @ @ @ @ @ @ @ @ @ @ @ @ @ @ @ @ ) e O 2 6 X e W 2 @ 6 X g W 2 @ 6 X g... - Page 15 W - X e @ @ @ @ @ @ @ @ @ @ @ @ @ @ @ @ @ @ @ @ @ ) e O & @ ) X e @ @ @ @ @ @ @ @ @ @ @ @ @ @ @ @ @ @ @ @ @ ) e O 2 6 X e W 2 @ 6 X g W 2 @ 6 X g...
-
Page 16: Sensor Reheat
W - X e @ @ @ @ @ @ @ @ @ @ @ @ @ @ @ @ @ @ @ @ @ ) e O & @ ) X e @ @ @ @ @ @ @ @ @ @ @ @ @ @ @ @ @ @ @ @ @ ) e O 2 6 X e W 2 @ 6 X g W 2 @ 6 X g... - Page 17 5. All foods should have a covered stand time of 3 to 5 minutes at the end of reheating. 6. Do not reheat bread or pastry products; raw, uncooked or frozen foods; or beverages. Auto Reheat (for NN-ST756W) RECOMMENDED FOOD WEIGHT...
- Page 18 Cooking time appears in the Display Window and begins to count down. * See Individual recipe chapters for hints and food types suitable for each Auto Cook food category. Auto Cook (for NN-ST756W) Serving / Weight 1 tap 2 taps...
-
Page 19: To Use Recipe Prompting
“ENJOY YOUR MEAL” appears in the Display Window at the end of each recipe. HINTS WHILE USING RECIPE PROMPTING RecipePrompting NN-ST756W One tap: Stops scrolling of the Display Window. Two taps: Restarts scrolling of the Display Window. After you have programmed the recipe with micro power level and cooking time, press Start. -
Page 20: Ingredient Conversion Chart
W - X e @ @ @ @ @ @ @ @ @ @ @ @ @ @ @ @ @ @ @ @ @ ) e O & @ ) X e @ @ @ @ @ @ @ @ @ @ @ @ @ @ @ @ @ @ @ @ @ ) e O 2 6 X e W 2 @ 6 X g W 2 @ 6 X g... -
Page 21: Before Requesting Service
DEMO mode. If it seems there is a problem with the oven, contact an authorised Service Centre. Some radio and TV interference might occur when you cook with the microwave oven. This interference is similar to the interference caused by small appliances such as mixers, vacuums, hair dryers, etc. It does not indicate a problem with your oven. -
Page 22: Care Of Your Oven
Wipe with a soft cloth when steam accumulates inside or around the outside of the oven door. This may occur when the microwave oven is operated under high humidity conditions and in no way indicates a malfunction of the unit or of microwave leakage. - Page 23 Panasonic Technics 1. The product is warranted for 12 months from the date of purchase. Subject to the conditions of this warranty Panasonic or it's Authorised Service Centre will perform necessary service on the product without charge for parts or labour if, in the opinion of Panasonic, the product is found to be faulty within the warranty period.
-
Page 24: Quick Guide To Operation
I 4 @ @ 0 M V + Y e Quick Guide to Operation FOR ALL MODELS Feature NN-ST786W To Set Clock NN-ST756W (☞ page 10) To Set: To Set / Cancel Child Safety Lock To Cancel: (☞ page 10) NN-ST786W... - Page 25 Pads (S) Press until desired food (☞ page 14) category pad appears. To Reheat using “Sensor Reheat” Pads (☞ page 15) FOR NN-ST756W Feature To Cook using “Auto Cook” Å Å Pads Press to select the (☞ page 17) desired food category.
- Page 26 Recipes displaying these symbols may be cooked using these features. • (S) Sensor Cook / for NN-SD786S/NN-ST786W Å Å • Auto Cook / only for NN-ST756W • / for NN-SD786S/NN-ST786W fast and even cooking. Some of these techniques are similar to those used in conventional cooking, but because microwaves produce heat very quickly these following techniques are extremely important.
- Page 27 Standing Time The moisture molecules continue to vibrate in the food when the microwave oven has turned itself off. After all, the molecules were vibrating at 2,450,000,000 times per second during cooking. So cooking continues even after the food is no longer being exposed to the microwaves whether in or outside your microwave oven.
- Page 28 For example, while cooking the roast in the microwave oven, you can be cooking the vegetables and gravy on the range top. This can also be done the other way around. Prepare your meals as follows.
- Page 29 V + Y e One of the most common uses for a microwave oven is to reheat food. Your Panasonic microwave allows you to either reheat by placing food into the oven and you choose the micro power level and...
- Page 30 W - X e @ @ @ @ @ @ @ @ @ @ @ @ @ @ @ @ @ @ @ @ @ ) e O & @ ) X e @ @ @ @ @ @ @ @ @ @ @ @ @ @ @ @ @ @ @ @ @ ) e O 2 6 X e W 2 @ 6 X g W 2 @ 6 X g...
- Page 31 If a foil container is used in the microwave oven it shouldn't be more than 4 cm high and must not touch the interior of the microwave oven. Remove the cover from the tray and replace with paper towel or plastic wrap to prevent splattering.
- Page 32 W - X e @ @ @ @ @ @ @ @ @ @ @ @ @ @ @ @ @ @ @ @ @ ) e O & @ ) X e @ @ @ @ @ @ @ @ @ @ @ @ @ @ @ @ @ @ @ @ @ ) e O 2 6 X e W 2 @ 6 X g W 2 @ 6 X g...
- Page 33 W - X e @ @ @ @ @ @ @ @ @ @ @ @ @ @ @ @ @ @ @ @ @ ) e O & @ ) X e @ @ @ @ @ @ @ @ @ @ @ @ @ @ @ @ @ @ @ @ @ ) e O 2 6 X e W 2 @ 6 X g W 2 @ 6 X g...
- Page 34 W - X e @ @ @ @ @ @ @ @ @ @ @ @ @ @ @ @ @ @ @ @ @ ) e O & @ ) X e @ @ @ @ @ @ @ @ @ @ @ @ @ @ @ @ @ @ @ @ @ ) e O 2 6 X e W 2 @ 6 X g W 2 @ 6 X g...
- Page 35 W - X e @ @ @ @ @ @ @ @ @ @ @ @ @ @ @ @ @ @ @ @ @ ) e O & @ ) X e @ @ @ @ @ @ @ @ @ @ @ @ @ @ @ @ @ @ @ @ @ ) e O 2 6 X e W 2 @ 6 X g W 2 @ 6 X g...
- Page 36 W - X e @ @ @ @ @ @ @ @ @ @ @ @ @ @ @ @ @ @ @ @ @ ) e O & @ ) X e @ @ @ @ @ @ @ @ @ @ @ @ @ @ @ @ @ @ @ @ @ ) e O 2 6 X e W 2 @ 6 X g W 2 @ 6 X g...
- Page 37 W - X e @ @ @ @ @ @ @ @ @ @ @ @ @ @ @ @ @ @ @ @ @ ) e O & @ ) X e @ @ @ @ @ @ @ @ @ @ @ @ @ @ @ @ @ @ @ @ @ ) e O 2 6 X e W 2 @ 6 X g W 2 @ 6 X g...
- Page 38 DO NOT USE A CONVENTIONAL MEAT THERMOMETER IN THE MICROWAVE OVEN. Let stand, covered with foil, 10 to 15 minutes after cooking. Standing time allows the temperature to equalize throughout the food and finishes the cooking process.
- Page 39 W - X e @ @ @ @ @ @ @ @ @ @ @ @ @ @ @ @ @ @ @ @ @ ) e O & @ ) X e @ @ @ @ @ @ @ @ @ @ @ @ @ @ @ @ @ @ @ @ @ ) e O 2 6 X e W 2 @ 6 X g W 2 @ 6 X g...
- Page 40 W - X e @ @ @ @ @ @ @ @ @ @ @ @ @ @ @ @ @ @ @ @ @ ) e O & @ ) X e @ @ @ @ @ @ @ @ @ @ @ @ @ @ @ @ @ @ @ @ @ ) e O 2 6 X e W 2 @ 6 X g W 2 @ 6 X g...
- Page 41 W - X e @ @ @ @ @ @ @ @ @ @ @ @ @ @ @ @ @ @ @ @ @ ) e O & @ ) X e @ @ @ @ @ @ @ @ @ @ @ @ @ @ @ @ @ @ @ @ @ ) e O 2 6 X e W 2 @ 6 X g W 2 @ 6 X g...
- Page 42 W - X e @ @ @ @ @ @ @ @ @ @ @ @ @ @ @ @ @ @ @ @ @ ) e O & @ ) X e @ @ @ @ @ @ @ @ @ @ @ @ @ @ @ @ @ @ @ @ @ ) e O 2 6 X e W 2 @ 6 X g W 2 @ 6 X g...
- Page 43 W - X e @ @ @ @ @ @ @ @ @ @ @ @ @ @ @ @ @ @ @ @ @ ) e O & @ ) X e @ @ @ @ @ @ @ @ @ @ @ @ @ @ @ @ @ @ @ @ @ ) e O 2 6 X e W 2 @ 6 X g W 2 @ 6 X g...
- Page 44 W - X e @ @ @ @ @ @ @ @ @ @ @ @ @ @ @ @ @ @ @ @ @ ) e O & @ ) X e @ @ @ @ @ @ @ @ @ @ @ @ @ @ @ @ @ @ @ @ @ ) e O 2 6 X e W 2 @ 6 X g W 2 @ 6 X g...
- Page 45 W - X e @ @ @ @ @ @ @ @ @ @ @ @ @ @ @ @ @ @ @ @ @ ) e O & @ ) X e @ @ @ @ @ @ @ @ @ @ @ @ @ @ @ @ @ @ @ @ @ ) e O 2 6 X e W 2 @ 6 X g W 2 @ 6 X g...
- Page 46 W - X e @ @ @ @ @ @ @ @ @ @ @ @ @ @ @ @ @ @ @ @ @ ) e O & @ ) X e @ @ @ @ @ @ @ @ @ @ @ @ @ @ @ @ @ @ @ @ @ ) e O 2 6 X e W 2 @ 6 X g W 2 @ 6 X g...
- Page 47 W - X e @ @ @ @ @ @ @ @ @ @ @ @ @ @ @ @ @ @ @ @ @ ) e O & @ ) X e @ @ @ @ @ @ @ @ @ @ @ @ @ @ @ @ @ @ @ @ @ ) e O 2 6 X e W 2 @ 6 X g W 2 @ 6 X g...
- Page 48 W - X e @ @ @ @ @ @ @ @ @ @ @ @ @ @ @ @ @ @ @ @ @ ) e O & @ ) X e @ @ @ @ @ @ @ @ @ @ @ @ @ @ @ @ @ @ @ @ @ ) e O 2 6 X e W 2 @ 6 X g W 2 @ 6 X g...
- Page 49 W - X e @ @ @ @ @ @ @ @ @ @ @ @ @ @ @ @ @ @ @ @ @ ) e O & @ ) X e @ @ @ @ @ @ @ @ @ @ @ @ @ @ @ @ @ @ @ @ @ ) e O 2 6 X e W 2 @ 6 X g W 2 @ 6 X g...
- Page 50 W - X e @ @ @ @ @ @ @ @ @ @ @ @ @ @ @ @ @ @ @ @ @ ) e O & @ ) X e @ @ @ @ @ @ @ @ @ @ @ @ @ @ @ @ @ @ @ @ @ ) e O 2 6 X e W 2 @ 6 X g W 2 @ 6 X g...
- Page 51 W - X e @ @ @ @ @ @ @ @ @ @ @ @ @ @ @ @ @ @ @ @ @ ) e O & @ ) X e @ @ @ @ @ @ @ @ @ @ @ @ @ @ @ @ @ @ @ @ @ ) e O 2 6 X e W 2 @ 6 X g W 2 @ 6 X g...
- Page 52 W - X e @ @ @ @ @ @ @ @ @ @ @ @ @ @ @ @ @ @ @ @ @ ) e O & @ ) X e @ @ @ @ @ @ @ @ @ @ @ @ @ @ @ @ @ @ @ @ @ ) e O 2 6 X e W 2 @ 6 X g W 2 @ 6 X g...
- Page 53 W - X e @ @ @ @ @ @ @ @ @ @ @ @ @ @ @ @ @ @ @ @ @ ) e O & @ ) X e @ @ @ @ @ @ @ @ @ @ @ @ @ @ @ @ @ @ @ @ @ ) e O 2 6 X e W 2 @ 6 X g W 2 @ 6 X g...
- Page 54 W - X e @ @ @ @ @ @ @ @ @ @ @ @ @ @ @ @ @ @ @ @ @ ) e O & @ ) X e @ @ @ @ @ @ @ @ @ @ @ @ @ @ @ @ @ @ @ @ @ ) e O 2 6 X e W 2 @ 6 X g W 2 @ 6 X g...
- Page 55 W - X e @ @ @ @ @ @ @ @ @ @ @ @ @ @ @ @ @ @ @ @ @ ) e O & @ ) X e @ @ @ @ @ @ @ @ @ @ @ @ @ @ @ @ @ @ @ @ @ ) e O 2 6 X e W 2 @ 6 X g W 2 @ 6 X g...
- Page 56 W - X e @ @ @ @ @ @ @ @ @ @ @ @ @ @ @ @ @ @ @ @ @ ) e O & @ ) X e @ @ @ @ @ @ @ @ @ @ @ @ @ @ @ @ @ @ @ @ @ ) e O 2 6 X e W 2 @ 6 X g W 2 @ 6 X g...
- Page 57 W - X e @ @ @ @ @ @ @ @ @ @ @ @ @ @ @ @ @ @ @ @ @ ) e O & @ ) X e @ @ @ @ @ @ @ @ @ @ @ @ @ @ @ @ @ @ @ @ @ ) e O 2 6 X e W 2 @ 6 X g W 2 @ 6 X g...
- Page 58 W - X e @ @ @ @ @ @ @ @ @ @ @ @ @ @ @ @ @ @ @ @ @ ) e O & @ ) X e @ @ @ @ @ @ @ @ @ @ @ @ @ @ @ @ @ @ @ @ @ ) e O 2 6 X e W 2 @ 6 X g W 2 @ 6 X g...
- Page 59 W - X e @ @ @ @ @ @ @ @ @ @ @ @ @ @ @ @ @ @ @ @ @ ) e O & @ ) X e @ @ @ @ @ @ @ @ @ @ @ @ @ @ @ @ @ @ @ @ @ ) e O 2 6 X e W 2 @ 6 X g W 2 @ 6 X g...
- Page 60 W - X e @ @ @ @ @ @ @ @ @ @ @ @ @ @ @ @ @ @ @ @ @ ) e O & @ ) X e @ @ @ @ @ @ @ @ @ @ @ @ @ @ @ @ @ @ @ @ @ ) e O 2 6 X e W 2 @ 6 X g W 2 @ 6 X g...
- Page 61 ⁄ brown sugar Method: Grease a 4 cup microwave oven safe dish. Combine sultanas and rum in a small bowl. Heat on P10 for 1 minute. Set aside. Butter both sides of all bread slices. Remove the crusts and cut into triangles.
- Page 62 ( Y f I 4 @ @ 0 M V + Y e Cakes, Desserts and slices can successfully be cooked in the microwave oven if a few simple rules are followed see individual recipes for instructions. OOKING AKES BY...
- Page 63 W - X e @ @ @ @ @ @ @ @ @ @ @ @ @ @ @ @ @ @ @ @ @ ) e O & @ ) X e @ @ @ @ @ @ @ @ @ @ @ @ @ @ @ @ @ @ @ @ @ ) e O 2 6 X e W 2 @ 6 X g W 2 @ 6 X g...
- Page 64 W - X e @ @ @ @ @ @ @ @ @ @ @ @ @ @ @ @ @ @ @ @ @ ) e O & @ ) X e @ @ @ @ @ @ @ @ @ @ @ @ @ @ @ @ @ @ @ @ @ ) e O 2 6 X e W 2 @ 6 X g W 2 @ 6 X g...
- Page 65 W - X e @ @ @ @ @ @ @ @ @ @ @ @ @ @ @ @ @ @ @ @ @ ) e O & @ ) X e @ @ @ @ @ @ @ @ @ @ @ @ @ @ @ @ @ @ @ @ @ ) e O 2 6 X e W 2 @ 6 X g W 2 @ 6 X g...
- Page 66 W - X e @ @ @ @ @ @ @ @ @ @ @ @ @ @ @ @ @ @ @ @ @ ) e O & @ ) X e @ @ @ @ @ @ @ @ @ @ @ @ @ @ @ @ @ @ @ @ @ ) e O 2 6 X e W 2 @ 6 X g W 2 @ 6 X g...
- Page 67 Do not use your oven for home canning or the heating of any closed jar. Pressure will build up and the jar may explode. In addition, the microwave oven cannot maintain the food at the correct canning temperature. Improperly canned food may spoil and be dangerous to consume.
- Page 68 W - X e @ @ @ @ @ @ @ @ @ @ @ @ @ @ @ @ @ @ @ @ @ ) e O & @ ) X e @ @ @ @ @ @ @ @ @ @ @ @ @ @ @ @ @ @ @ @ @ ) e O 2 6 X e W 2 @ 6 X g W 2 @ 6 X g...
- Page 69 W - X e @ @ @ @ @ @ @ @ @ @ @ @ @ @ @ @ @ @ @ @ @ ) e O & @ ) X e @ @ @ @ @ @ @ @ @ @ @ @ @ @ @ @ @ @ @ @ @ ) e O 2 6 X e W 2 @ 6 X g W 2 @ 6 X g...