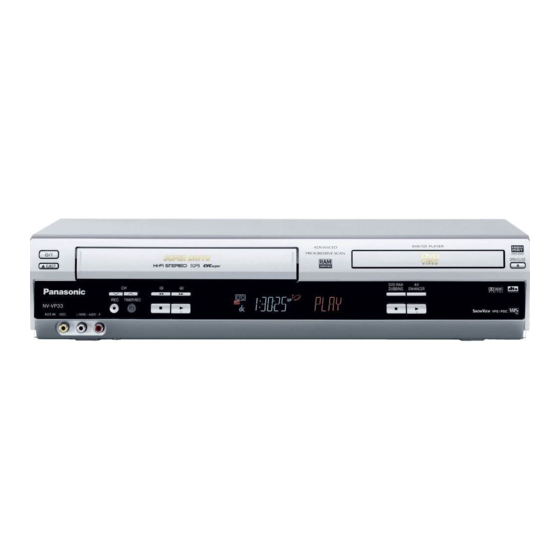
Panasonic NV-VP33 Series Operating Instructions Manual
Nv-vp33 series dvd player/ video cassette recorder
Hide thumbs
Also See for NV-VP33 Series:
- Operating instructions manual (49 pages) ,
- Operating instructions manual (48 pages)

Related Manuals for Panasonic NV-VP33 Series


Summary of Contents for Panasonic NV-VP33 Series
-
Page 1: Operating Instructions
Operating Instructions DVD Player/ Video Cassette Recorder NV-VP33 Series Model No. Before attempting to connect, operate or adjust this product, please read these instructions completely. RQTV0057-1... -
Page 2: Table Of Contents
Contents Before Use Warning and Important Information ... 3 Accessories ... 3 VHS Deck and Cassette Tape Information ... 4 The Remote Control ... 4 Disc Information ... 5 Control Reference Guide ... 6 Main Unit... 6 The Unit’s Display ... 6 Remote Control... -
Page 3: Warning And Important Information
Warning and Important Information Thank you for purchasing this product. For optimum performance and safety, please read these instructions carefully. CAUTION! THIS PRODUCT UTILIZES A LASER. USE OF CONTROLS OR ADJUSTMENTS OR PERFORMANCE OF PROCEDURES OTHER THAN THOSE SPECIFIED HEREIN MAY RESULT IN HAZARDOUS RADIATION EXPOSURE. -
Page 4: Vhs Deck And Cassette Tape Information
VHS Deck and Cassette Tape Information ª Surge Absorber For further protection for this product, these models are equipped with new surge absorbing circuits which prevents damage due to power surges caused by lightning. ≥This function may not be effective for surges by direct lightning. ª... -
Page 5: Disc Information
Disc Information ª Discs that can be played DVD-R/DVD-RW DVD-RAM DVD-Video (DVD-Video) Shown as “DVD-VR” on the display [RAM] [DVD-V] [JPEG] Use discs with the above logos and that conform to specifications. The unit cannot play other discs correctly. Do not use irregularly shaped discs (e.g. -
Page 6: Control Reference Guide
Control Reference Guide Operations in these instructions are described mainly for the remote control, but you can do the operations on the main unit if the controls are the same. Main Unit ª Common section Í Power button ≥Press [Í/I] to switch this unit from on to standby mode or vice versa. -
Page 7: Remote Control
Remote Control VHS/ VHS/DVD VOLUME AUDIO OPERATION SELECT TRACKING/V-LOCK INPUT SELECT CANCEL/RESET REPEAT -/- - SLOW/ INDEX/SKIP SEARCH PLAY SLOW NAVI MENU / DIRECT NAVIGATOR PLAY LIST TOP MENU ENTER FUNCTIONS RETURN (10) AV ENHANCER PLAY MODE PLAY SPEED SET UP (11) PROG/ PROG... -
Page 8: Connections
Connections When the unit is turned on after connecting the aerial cable and the mains lead, Plug in Auto Tuning starts automatically. (NV-VP33GN only) Basic Connections The following connections are required to record the video cassette and play back the video cassette/discs through the TV. -
Page 9: To Enjoy Sound Through Other Audio Equipment
The output terminal common to VHS and DVD, and the one exclusively for DVD COMPONENT VIDEO (PROGRESSIVE/INTERLACE) R-AUDIO-L VIDEO AV1 IN COAXIAL DIGITAL VHS/DVD AUDIO OUT (PCM/BITSTREAM) R-AUDIO-L VIDEO S- VIDEO R-AUDIO-L VIDEO Output common to DVD-only terminal VHS and DVD DVD OUT VHS/DVD OUT To Enjoy Sound through Other Audio Equipment... -
Page 10: Operating The Tv
Notes: ≥If you are using a Panasonic TV, this setting has already been made, you do not need to perform the above procedure. However, this remote control may not work on some Panasonic TVs. -
Page 11: Tuning The Tv To Your Unit
≥Set to “ss” (RF OFF) when you use the audio/video cable for the connection. ≥You can also use the numeric buttons. Example: “28”; [2]l[8] [3] Retune your TV to Panasonic the new RF channel for the END : MENU unit. [4] Press [MENU] to exit the setting mode. -
Page 12: Setting Up For Vhs And Dvd Quick Setup
Setting Up for VHS and DVD Quick Setup Make basic settings for VHS. These settings are retained in memory until they are changed, even if the unit is turned off. ≥Select the unit viewing channel (or the AV input) on the TV. ≥Turn on the unit. -
Page 13: Playback
Playback ≥Select the unit viewing channel (or the AV input) on the TV. ≥Press [ÍVHS] to turn on the unit. ≥Press [VHS]. Insert a recorded video cassette tape. Press [1PLAY]. ≥Play starts automatically if you insert a tape which it’s tab has been removed (Tapes l 4). Select TRACKING/V-LOCK PLA Y... -
Page 14: Adjusting The Playback Picture
Playback Cinema mode Press [CINEMA MODE]. ≥Each time you press the button, the indication changes in the following order: CINEMA OFF CINEMA 1 CINEMA OFF: Normal mode (Initial Setting) CINEMA 1 : Sharper images and enhances detail in dark scenes CINEMA 2 : Clearer images and enhances detail in dark scenes Notes:... -
Page 15: Recording
Recording ≥Select the unit viewing channel (or the AV input) on the TV. ≥Press [VHS]. ≥Check that the clock is set to the correct time. If it has not been set, refer to page 12. Insert a video cassette tape with an intact erasure prevention tab. -
Page 16: One-Touch Recording (Otr)
Recording One-Touch Recording (OTR) You can start recording quickly and set a duration. During recording, press [¥REC/OTR] on the unit repeatedly. Select the desired recording duration. ≥Each time you press the button, the indication on the unit’s display changes as follows: Counter display (normal recording mode)>OFF 30 (min.)>... -
Page 17: Timer Recording
Timer Recording Up to 16 timer programmes, including weekly and daily programmes, can be recorded for up to one month in advance by setting the timer. ≥Select the unit viewing channel (or the AV input) on the TV. ≥Insert a video cassette tape with an intact erasure prevention tab (l 4). ≥Check that the clock is set to the correct time. -
Page 18: To Check And Cancel A Timer Programme
Timer Recording To Check and Cancel a Timer Programme ≥This unit must be turned on, or in timer recording standby mode. [1] Press [PROG/CHECK] twice. ≥The Timer Programme List screen appears. DATE 29SA [2] Press [PROG/ SU- SA CHECK] repeatedly 19 W E 28FR to select the... -
Page 19: Search Functions
Search Functions ≥Select the unit viewing channel (or the AV input) on the TV. ≥Press [VHS]. Jet Navigator This unit can display a list of the recorded programmes on the inserted video cassette on the TV screen. You can then select the desired programme, and this unit will quickly reach its beginning and start playback. -
Page 20: Vhs Index Search System (Viss)
Search Functions Set the category You can find what kind of programmes are recorded with the character and the icon indications. 1) While the Jet Navigator list appears, press [NAVI] and then press [1] (cursor). 2) Press [342 1] to select the desired category. 3) Press [ENTER]. -
Page 21: Settings Using The On-Screen Display
Settings Using the On-Screen Display Change the settings to suit your preferences and to suit the unit to the environment in which it is being used. These settings are retained in memory until they are changed, even if the unit is turned off. -
Page 22: System
Settings Using the On-Screen Display SYSTEM Set the Colour TV System. [1] Select “AUTO” with [34]. ≥The VHS automatically distinguishes between PAL or NTSC signals. If the picture lacks of colour during AV SELECT : external recording, playback or recording from DVD to VHS, set to “PAL”... -
Page 23: Various Indications In On-Screen Display
Various Indications in On-screen Display To see these displays, set the OSD item in the “OPTION” menu to “AUTO” (l 22). Press [VHS STATUS]. The time and operation details appear on the screen for about 5 CH 1 STEREO seconds. Channel display STEREO or BILINGUAL indicator (NV-VP33GL) Indicates when a programme is broadcast in Stereo or... -
Page 24: Playing Discs-Basic Play
Playing Discs-basic Play [DVD-V] [RAM] ]DVD-RW]‹VR›] [VCD] [CD] [MP3] [WMA] [JPEG] ≥Select the unit viewing channel (or the AV input) on the TV. ≥Press [ÍDVD] to turn on the unit. ≥Press [DVD]. Press [- Page 25 Notes: ≥If “ ” appears on the TV, the operation is prohibited by the unit or disc. ≥When the unit is first turned on and there is a disc loaded, it may start playing automatically. ≥When the whole disc has finished playing, the unit automatically stops.
Page 26: Useful Functions
Useful Functions [DVD-V[ [RAM[ ]DVD-RW]‹VR›] [VCD] [CD] [MP3] [WMA] [JPEG] ≥Select the unit viewing channel (or the AV input) on the TV. ≥Press [DVD]. Starting Play from a Selected Item Press the numeric buttons. Example: “10”; [S10]l[1]l[0] [MP3] [WMA] [JPEG] Press the numeric buttons then press [ENTER] or [1PLAY].Page 27: Manual Skip
Manual Skip [DVD-V[ [RAM] ]DVD-RW]‹VR›] (Except iR/iRW) Play starts from approximately 30 seconds later. Convenient when you want to skip commercials etc. During play Press [MANUAL SKIP]. [RAM] ]DVD-RW]‹VR›] ≥It is not possible to skip the program if the start of the next program is within about 30 seconds of the point you skipped from.Page 28: Using Navigation Menus
Using Navigation Menus Playing Data Disc [MP3] [WMA] [JPEG] You can play a MP3, WMA, CD text or JPEG disc by using the menu. ≥Select the unit viewing channel (or the AV input) on the TV. ≥Press [DVD]. ª Using Playback Menu (except JPEG files on DVD-RAM) While the menu screen is displayed 1) Press [34] to select “All”, “Audio”, or “Picture”...Page 29: Playing Highmat Discs
To use the contents screen to find a track (CD text only) While the menu screen is displayed 1) Press [34] to move through the tracks, and press [ENTER]. 2) Press [RETURN] to exit. CD Text Disc Title: All By Artist Disc Artist: Pink Island Track Title:...Page 30: To Enjoy Movies And Music More
To Enjoy Movies and Music More ≥Select the unit viewing channel (or the AV input) on the TV. ≥Press [DVD]. Changing Soundtracks, Subtitles and Angles Some discs have multiple, subtitle languages and camera angles and etc, and you can change them during play. ≥[VCD] (SVCD only) Soundtrack and subtitle numbers may change even if corresponding soundtracks are not recorded.Page 31: Advanced Surround
Advanced Surround [DVD-V[ [RAM[ ]DVD-RW]‹VR›] [VCD] (2-channel or over only) You can enjoy a surround-like effect if you are using 2 front speakers (SP) or headphones (HP). The effect broadens when playing discs with surround effects and sound seems to come from speakers either side of you.Page 32: Variable Zoom Function
Picture Menu Notes: Subtitle Audio Menu Angle Display Menu ≥All Panasonic TVs that have progressive input are compatible. Other Settings Other Menu Consult the manufacturer if you have another brand of TV. Display Menu ≥The VHS video may not be progressive-output.Page 33: Digital Output
Digital Output [DVD-V[ When you have connected equipment through this unit’s COAXIAL DIGITAL AUDIO terminal (l 9), change the settings for “PCM Digital Output”, “Dolby Digital”, “DTS Digital Surround” and “MPEG” (l 37). You can enjoy the powerful movie theater and hall-like sound. [1] Press [SETUP].Page 34: Using On-Screen Menus
Using On-Screen Menus [DVD-V[ [RAM[ ]DVD-RW]‹VR›] [VCD] [CD] [MP3] [WMA] [JPEG] On-Screen Menus are menus that contain information about the disc or unit. These menus allow you to operate the unit by changing this information. ≥Select the unit viewing channel (or the AV input) on the TV. ≥Press [DVD].- Page 35 Picture Menu Picture Mode (l 26) Video Output Mode (l 32) 480i/576i: Interlace video 480p/576p: Progressive video Transfer Mode If you have chosen “480p/576p” (l above), select the method of conversion for progressive output to suit the type of material. Auto 1 (normal):For viewing film material Auto 2: For viewing film material (the same as Auto 1, but...
Page 36: Changing Settings
Changing Settings Change the settings to suit your preferences and to suit the unit to the environment where it is being used. These settings are retained in memory until they are changed, even if the unit is turned off. See the next page for menu and option details.Page 37: Setup Menu
SETUP Menu Menus Items Disc Audio [DVD-V[ Choose the preferred audio language. Subtitle Choose the preferred subtitle language. Menus Choose the preferred language for disc menus. Advanced Disc Review (l 27) Ratings (l 36) Set a ratings level to limit DVD-Video play. ≥The password screen is shown if you choose levels 0 to 7 or if you choose “Ratings”...Page 38: Recording From Dvd To Vhs
DVD-RAM Dubbing You can copy programmes on a DVD-RAM disc to a video cassette with One-touch operation. ≥This function allows DVD-RAM discs recorded by Panasonic DVD recorders to be dubbed. ≥Insert the disc containing the programme to be copied (l 24).Page 39: Before Requesting Service
Before Requesting Service Before requesting service, check the following points once again. General ≥Connect the AC mains lead securely to mains supply. No power. ≥Some operations may be prohibited by the disc. No response when buttons ≥The unit may not be operating properly due to lightning, static electricity or some other pressed.- Page 40 ≥The video heads are dirty: clean them with a head-cleaning cassette. down the screen. ≥The video heads are worn: consult your dealer (for NV-VP33GL only, consult Panasonic ≥The tape is old or damaged. ≥You cannot correctly play tapes recorded with other systems.
Page 41: Error Messages
Disc picture ≥Some distortion is normal during search. Picture distorted. ≥Check the settings in the On-Screen Menu “Picture Menu”. Picture quality is poor. ≥Change the zoom ratio to “k1.00”. Menus not displayed correctly. ≥Set the subtitle position to 0. ≥Go to “Video” in the SETUP menu, and change “TV Aspect” to suit your TV. Editing ≥Move the other equipment away from the TV as it may be picking up interference.Page 42: Glossary
Glossary Audio channel for DVD (ch) Sound is divided into channels based on the sound’s role. Example: 5.1 channel ≥Front speakers— 1 left channel and 1 right channel ≥Center speaker— 1 channel ≥Surround speakers— 1 left channel and 1 right channel ≥Subwoofer—...Page 43: Specifications
Specifications NV-VP33GL NV-VP33GN Power Supply: Power Consumption: ª VHS SECTION Video Recording System: 2 rotary heads, helical scanning system Video Heads: 4 heads Audio Heads: 2 heads (Hi-Fi) Tape Speed: PAL SP; 23.39 mm/s LP;11.7 mm/s EP; 7.8 mm/s NTSC SP; 33.3 mm/s EP; 11.1 mm/s Tape Format: VHS tape Recording/Playback Time:...- Page 44 Matsushita Electric Industrial Co., Ltd. RQTV0057-1 Web Site: http://www.panasonic.co.jp/global/ F0305Ks1045...