Table of Contents
Available languages
Available languages
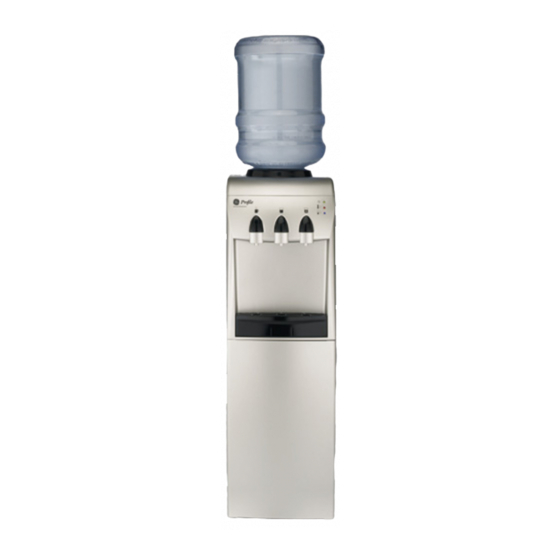
GE Profile
Dispenser with Refreshment Chiller
. . . . . . . . . . . . . . . . . .2, 3
Child Safeguard . . . . . . . . . . . . . . . . . . . . .4
Cold Water and Compartment
Features and Parts List . . . . . . . . . . . . . . . .4
Loading the Dispenser . . . . . . . . . . . . . . . .4
Specifications . . . . . . . . . . . . . . . . . . . . . . .8
. . . . . . . . . . . . . . . . .5-8
. . . . . . . . . . . . . . .8, 9
Consumer Support
Consumer Support . . . . . . . . . . .Back Cover
Warranty . . . . . . . . . . . . . . . . . . .Back Cover
Français
Informations en matière
de sécurité
. . . . . . . . . . . . . . . . . . . . .10, 11
Caractéristiques et liste de pièces . . . . . .12
Caractéristiques techniques . . . . . . . . . . .16
Chargement du distributeur . . . . . . . . . .12
des enfants . . . . . . . . . . . . . . . . . . . . . . . .12
. . . . . . . . . . . . .13-16
Soutien au consommateur
Garantie . . . . . . . . . . . . . . . . . . . . . . . . . .18
Soutien au consommateur . . . . . . . . . . . .18
Español
Cómo cargar el dispensador . . . . . . . . . . .21
Especificaciones . . . . . . . . . . . . . . . . . . . .25
Lista de partes y características . . . . . . . . .21
Seguro contra niños . . . . . . . . . . . . . . . . .22
Cuidado y limpieza . . . . . . . . . . . . . . . .22-25
Solucionar problemas . . . . . . . . . . . . . . .25, 26
Apoyo al consumidor
Garantía . . . . . . . . . . . . . . . . . . . . . . . . . .27
Apoyo al consumidor . . . . . . . . . . . . . . . .27
™
Tri-Temperature Water
. . . . . . . . . . . .16, 17
. . . . . . . . . .19, 20
ge.com
Distributeur d'eau de GE Profile
à trois températures avec
réfrigérant de rafraîchissements
Dispensador de agua de
GE Profile
™
de tres temperaturas
con enfriador de refrescos
La sección en español empieza en la página 19
Owner's Manual
GXCF25FBS
GXCF25HBS*
Manuel d'utilisation
La section française commence à la page 10
Manual del propietario
*E
S
®
qualified product.
NERGY
TAR
As an E
S
®
partner, GE
NERGY
TAR
has determined that this product
meets the E
®
guidelines
S
NERGY
TAR
for energy efficiency.
215C1002P037 49-50216 09-06 JR
™
Table of Contents

Related Manuals for GE GXCF25HBS


Summary of Contents for GE GXCF25HBS
-
Page 1: Table Of Contents
Loading the Dispenser ....4 Specifications ..... . .8 Distributeur d’eau de GE Profile ™... -
Page 2: Safety Instructions
Unplug the water dispenser before cleaning or the disabled and the elderly are at highest risk making repairs. of being scalded. NOTE: GE does not support any servicing of the NOTICE: This product is intended solely for dispenser. We strongly recommend that you do not use in chilling canned and boxed beverages, and attempt to service the dispenser yourself. -
Page 3: Grounding Instructions
GROUNDING INSTRUCTIONS WARNING: Improper use of the grounding plug can result in a risk of electric shock. This appliance must be grounded. In the event of an Do not under any circumstances cut or remove the electrical short circuit, grounding reduces the risk of third (ground) prong from the power cord. -
Page 4: Using The Water Dispenser
Using the water dispenser. Features and Parts List Bottle Support Collar—Black (WS28X10048) Separator (WS28X10013) Cold Water Tank Hot (Red) and Cold (Blue) Power Switch (back of dispenser). The Cold (Blue) power switch also turns on the chiller compartment. Indicator Lights. The green light will be lit when the dispenser is plugged in. - Page 5 Care and cleaning of the dispenser. Cleaning the Outside Cabinet and Storage/Chiller Compartment IMPORTANT: Set both power switches (on the Sweep away or vacuum any dust from the back of the dispenser) in the O (off) position and condenser coils on the back of the unit. For unplug the water dispenser before cleaning.
- Page 6 Care and cleaning of the dispenser. Draining the Dispenser The dispenser should be drained before cleaning the tanks and before leaving for long vacations or absences. Drain outlet cap (rear of dispenser) 1. Set both power switches (on the back of the dispenser) 6.
-
Page 7: Cleaning The Separator
Cleaning the Separator To remove To replace IMPORTANT: Set both power switches 5. Dry the separator thoroughly on (on the back of the dispenser) in the O (off) both sides. position and unplug the water dispenser 6. Using a clean cloth or paper towel, before cleaning. -
Page 8: Specifications
Care and cleaning of the dispenser. Defrosting Defrost whenever frost on the wall of the chiller compartment becomes After defrosting: excessive. Never use a sharp or metallic instrument to remove frost Remove the wet towels and wipe up any remaining water. as it may damage the liner. - Page 9 Problem Possible Causes What To Do Bottle feels warm •Dispense cold water until air is released into the bottle. Water system overfilled. Water is boiling in the hot tank and bubbling up into the bottle. Water dispenser is noisy Water dispenser is uneven. •Make sure the water is installed on a level floor strong enough to support it when fully loaded.
-
Page 10: De Sécurité
âgées courent le plus grand risque d’être ébouillantés. NOTE : GE n’est en faveur d’aucune réparation ou entretien pour le distributeur. Nous vous AVIS : Ce produit ne doit être utilisé que recommandons fortement de ne pas essayer d’assurer... -
Page 11: De Sécurité
INSTRUCTIONS DE MISE À LA TERRE AVERTISSEMENT : Une mauvaise utilisation de la fiche triphasée peut occasionner une secousse électrique. Cet appareil électroménager doit être mis à la terre. Ne coupez ou n’enlevez jamais la troisième broche En cas de court circuit électrique, la mise à la terre (mise à... -
Page 12: Utilisation Du Distributeur D'eau
Utilisation du distributeur d’eau. Caractéristiques et liste de pièces Collier de soutien de bouteille—noir (WS28X10048) Séparateur (WS28X10013) Réservoir d’eau froide Commutateurs de marche eau chaude (rouge) et eau froide (bleu) (arrière du distributeur). Le commutateur de marche Cold (bleu) met aussi en marche le compartiment refroidisseur. -
Page 13: Entretien Et Nettoyage
Entretien et nettoyage du distributeur. Nettoyage de l’extérieur de l’armoire et de rangement du compartiment refroidisseur IMPORTANT : Mettez les deux commutateurs de Enlevez la poussière du serpentin du condensateur marche (à l'arrière du distributeur) en position O (arrêt) à l’arrière de l’appareil à l’aide d’une brosse ou et débranchez le distributeur d’eau avant de le nettoyer. - Page 14 Entretien et nettoyage du distributeur. Vidange du distributeur Vous devez vider le distributeur avant de nettoyer les réservoirs et avant de vous absenter pour de longues vacances ou une longue durée. Capuchon de sortie (arrière du distributeur) 1. Mettez les interrupteurs de marche (à l’arrière du distributeur) 6.
- Page 15 Nettoyage du séparateur Enlèvement Remise en place IMPORTANT : Mettez les deux commutateurs de 5. Faites bien sècher le haut et le bas du marche (à l’arrière du distributeur) en position O séparateur. (arrêt) et débranchez le distributeur d’eau avant 6.
-
Page 16: Caractéristiques Techniques
Entretien et nettoyage du distributeur. Dégivrage Dégivrez chaque fois que le givre sur la paroi du compartiment Après avoir dégivré : refroidisseur devient excessive. N’utilisez jamais d’instrument Enlevez les serviettes mouillées et essuyez complètement aiguisé ou métallique pour enlever le givre, car vous risquez toute eau restante. - Page 17 Problème Cause possible Que faire Le distributeur d’eau coule Il y a un trou d’épingle ou une fente • Remplacez par une nouvelle bouteille d’eau. à l’extérieur dans la bouteille. Le compresseur ne démarre Opération normale—Le démarrage du • Patientez jusqu’à 3 minutes pour permettre au compresseur de pas lorsque le voyant bleu de compresseur est retardé...
-
Page 18: Garantie
Avez vous une question ou besoin d’aide concernant votre appareil électroménager? Essayez le site internet de GE Appliances, 24 heures par jour, 365 jours par an. Pour plus de confort et de rapidité vous pouvez maintenant y extraire les manuels d’utilisation, et même commander des pièces. -
Page 19: Precauciones De Seguridad
Los niños, las personas NOTA: GE no proporciona servicio para el dispensador. con incapacidades físicas y los ancianos tienen un Recomendamos que no intente proporcionar servicio riesgo mayor de sufrir quemaduras. -
Page 20: Información De Seguridad
INFORMACIONES DE SEGURIDAD IMPORTANTES. LEA TODAS LAS INSTRUCCIONES ANTES DE USAR. INSTRUCCIONES PARA CONEXIÓN A TIERRA ADVERTENCIA: El uso inapropiado de un enchufe que no esté conectado a tierra apropiadamente podría resultar en riesgos de descargas eléctricas. Este aparato debe estar conectado a tierra. En el Bajo ninguna circunstancia corte o remueva la caso de que ocurra un corto circuito, la conexión tercer clavija (la de conexión a tierra) del cable... -
Page 21: Cómo Utilizar El Dispensador De Agua
Cómo utilizar el dispensador de agua. Lista de partes y características Collar de apoyo de la botella—negro (WS28X10048) Separador (WS28X10013) Tanque de agua fría Interruptores de potencia Caliente (rojo) y Frío (azul) (en la parte posterior del dispensador). El interruptor de potencia frío (azul) también enciende el compartimiento frío. -
Page 22: Seguro Contra Niños
Cómo utilizar el dispensador de agua. Seguro contra niños El botón CALIENTE del dispensador está El dispensador calienta agua a una equipado con un seguro contra niños que temperatura de aproximadamente 88 °C reduce el riesgo de que un niño suministre (190 °F). - Page 23 Cómo drenar el dispensador El dispensador debería ser drenado antes de limpiar los tanques y antes de salir a una vacaciones largas o ausencias. Tapa de salida de drenaje (parte posterior del dispensador) 1. Coloque ambos interruptores eléctricos (en la parte 6.
- Page 24 Cuidado y limpieza del dispensador. Cómo desinfectar y limpiar los tanques de agua IMPORTANTE: Periódicamente se deben desinfectar los tanques dispensadores de agua para evitar sabores desagradables en el agua y limpiar para retirar los depósitos de minerales que puedan obstaculizar el flujo. Para desinfectar: 1.
-
Page 25: Especificaciones
Preparándose para las vacaciones Para vacaciones extensas o ausencias, coloque los dos 4. Seque el separador completamente tanto en la parte superior como en la parte inferior (ver Cómo limpiar el separador). interruptores eléctricos (en la parte posterior del dispensador) en la posición O (apagado). 5. - Page 26 Solucionar problemas. Problema Posibles causas Qué hacer La botella se siente caliente El sistema se sobrellenó. El agua • Dispense agua fría hasta que el aire sea liberado hacia la botella. está hirviendo en el tanque caliente y haciendo burbujas en la botella. Partículas flotando en •...
-
Page 27: Garantía
Póngase en contacto con nosotros ge.com Si no está satisfecho con el servicio que recibe de GE, póngase en contacto con nosotros en nuestra página Web indicando todos los detalles así como su número de teléfono o escríbanos a: General Manager, Customer Relations... - Page 28 We strongly recommend that you do not attempt to service the dispenser yourself. Contact Us ge.com If you are not satisfied with the service you receive from GE, contact us on our Website with all the details including your phone number, or write to: General Manager, Customer Relations GE Appliances, Appliance Park...