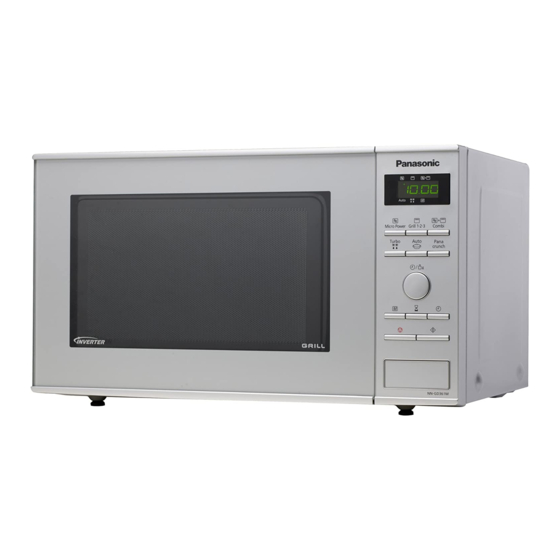
Panasonic NN-GD371S Operating Instructions Manual
Hide thumbs
Also See for NN-GD371S:
- Service manual (32 pages) ,
- Operating instruction and cook book (58 pages)
Table of Contents
Operating Instructions
Bedienungsanleitung
Gebruiksaanwijzing
Mode d'emploi
Manuale di istruzioni
Instrucciones de funcionamiento
Bruksanvisning
Brugsanvisning
Bruksanvisning
Käyttöohjeet
Instrukcja obsługi
Návod k obsluze
Kezelési útmutató
Instrucţiuni de operare
Microwave /Grill Oven
Mikrowellengerät mit Grill
Magnetron/Grill Oven
Four à Micro-ondes-Gril
Forno a Microonde e Grill
Horno Microondas/Grill
Kombinationsugn med Mikrovågor/Grill
Mikrobølgeovn/Grill
Mikrobølge/Grill Ovn
Mikroaaltouuni/Grilli
Kuchenka Mikrofalowa z Grillem
Mikrovlnná / trouba/ Gril
Grillezös/mikrohullámú sütö
Cuptor cu microunde
NN-GD371S / NN-GD361M / NN-GD351W / NN-GD342B
Table of Contents

Related Manuals for Panasonic NN-GD371S


Summary of Contents for Panasonic NN-GD371S
- Page 1 Mikrowellengerät mit Grill Magnetron/Grill Oven Four à Micro-ondes-Gril Forno a Microonde e Grill Horno Microondas/Grill Kombinationsugn med Mikrovågor/Grill Mikrobølgeovn/Grill Mikrobølge/Grill Ovn Mikroaaltouuni/Grilli Kuchenka Mikrofalowa z Grillem Mikrovlnná / trouba/ Gril Grillezös/mikrohullámú sütö Cuptor cu microunde NN-GD371S / NN-GD361M / NN-GD351W / NN-GD342B...
- Page 2 IMPORTANT SAFETY INSTRUCTIONS. Before operating this oven, please read these instruc- tions carefully and keep for future reference. WICHTIGE SICHERHEITSANWEISUNGEN. Vor Gebrauch des Mikrowellengerätes bitte diese Bedienungsanleitung sorgfältig durchlesen und aufbewahren. BELANGRIJKE VEILIGHEIDSINSTRUCTIES. Alvorens u deze microgolfoven gebruikt, raden wij u ten zeerste aan deze gebruiksaanwijzing door te lezen en bij te houden voor eventueel toekom- stig gebruik.
- Page 3 Important safety instructions. Before operating this oven, please read these instructions carefully and keep for future reference. This appliance can be used by children aged from 8 years and above and persons with reduced physical, sensory and mental capabilities or lack of experience and knowledge if they have been given supervision or instruction by a person responsible for their safety concerning the...
- Page 4 agent or a similarly qualified person in order to avoid a hazard. Warning! The appliance should be inspected for damage to the door seals and door seal areas and if these areas are damaged the appliance should not be operated until it has been repaired by a service technician trained by the manufacturer.
- Page 5 instructions have been given so that the child is able to use the oven in a safe way and understands the hazards of improper use. For Countertop use: Allow 15 cm of space on the top of the oven, 10 cm at the back, 5 cm on one side, and the other side open.
- Page 6 The contents of feeding bottles and baby food jars are to be stirred or shaken. The temperature has to be checked before consumption to avoid burns. Do not cook eggs in their shells and whole hard-boiled eggs by MICROWAVE. Pressure may build up and the eggs may explode, even after the microwave heating has ended.
- Page 7 Failure to maintain the oven in a clean condition could lead to deterioration of surfaces that could affect the life of the appliance and possibly result in a hazardous situation. Warning! The accessible parts may become hot in combination use. Young children should be kept away.
- Page 8 Exterior oven surfaces, including air vents on the cabinet and the oven door will get hot during COMBINATION and GRILLING, take care when opening or closing the door and when inserting or removing food and accessories. This appliance is not intended to be ...
-
Page 9: Table Of Contents
Auto weight cook programs ��������������������������������������������������������������������������������������� 25-26 Auto weight Panacrunch programs ���������������������������������������������������������������������������������27 Panacrunch pan ��������������������������������������������������������������������������������������������������������������28 Reheating & cooking charts��������������������������������������������������������������������������������������� 29-31 Recipes����������������������������������������������������������������������������������������������������������������������������32 Questions and answers ���������������������������������������������������������������������������������������������������33 Care of your oven ������������������������������������������������������������������������������������������������������������34 Technical specifications ���������������������������������������������������������������������������������������������������35 Thank you for purchasing a Panasonic Microwave Oven. -
Page 10: Installation And Connection
Installation and connection If your AC outlet is not grounded, it is the Examine your oven personal responsibility of the customer to Unpack the oven, remove all packing have it replaced with a properly grounded material, and examine the oven for any wall socket�... -
Page 11: Important Safety Instructions
Important safety instructions 5� Only allow children to use the oven WARNING! without supervision when adequate Important safety instructions instructions have been given so that the child is able to use the oven in a 1� The door seals and seal areas should safe way and understands the hazards be cleaned with a damp cloth�... - Page 12 Important safety instructions 2� The oven has two heaters situated Use of your oven in the top of the oven cavity� After 1� Do not use the oven for any reason using the COMBINATION and GRILL other than the preparation of food� function these surfaces will be very This oven is specifically designed to hot�...
-
Page 13: Meat Thermometer
Important safety instructions 5� If the food or cooking vessel on the Important! glass tray touches the oven walls and If the recommended cooking times are stops the tray rotating, the tray will automatically rotate in the opposite exceeded the food will be spoiled and in extreme circumstances could catch direction�... - Page 14 Important safety instructions Liquids Utensils/foil When heating liquids, e�g� soup, Do not heat any closed cans or bottles sauces and beverages in your oven, because they might explode� overheating the liquid beyond boiling point can occur without evidence of bubbling� This Metal containers or dishes with could result in a sudden boil over of the hot metallic trim should not be used during...
-
Page 15: Outline Diagram
Outline diagram Door release Control panel Power supply cord Press to open the door� When you open the oven door during cooking, Plug Identification Label the cooking is stopped temporarily without clearing earlier made settings� Glass tray Roller ring The cooking is resumed as soon Grill Elements as the door is closed and Start button pressed�... -
Page 16: Control Panel
Control panel NN-GD371S / NN-GD361M / NN-GD351W / NN-GD342B* Display Window Microwave Power button Grill button Combination button Auto Weight Turbo Defrost button Auto Weight Cook Programs button Auto Weight Panacrunch Programs button Time/Weight dial Memory button Timer button Clock button... -
Page 17: Setting The Clock
Setting the clock When the oven is first plugged in “88:88” appears in display window. Press Clock Turn Time/Weight Dial Press Clock A colon starts to blink� Enter the time by turning the The colon stops blinking� Time/Weight Dial� The time Time of day is now locked appears in the display and into the display�... -
Page 18: Microwave Cooking And Defrosting
Microwave cooking and defrosting The glass tray must always be in position when using the oven. 1 Press 950 Watts 2 Presses Defrost 270 Watts 3 Presses Medium 600 Watts 4 Presses 440 Watts 5 Presses Simmer 300 Watts 6 Presses Warm 100 Watts Set the cooking time... -
Page 19: Defrosting Guidelines
Defrosting guidelines Tips for defrosting Bread Check the defrosting several times, even if Loaves will require a standing time of 5 you use the auto programs� Observe the to 15 minutes to allow the centre to thaw� standing times� Standing time can be shortened if slices are separated and rolls and loaves cut in half�... -
Page 20: Defrosting Chart
Defrosting chart Weight/Quantity Time & mode Food Method 1 pce 60 g Bread rolls MAX 30-40 s Stand 5 min 1 pce 370 g Brioche large 3 min 30 s Combi 2 Stand 5 min 1 pce 280 g 270 W 5 min 30 s Cheese (camembert) Stand 1 hour minimum�... -
Page 21: Grilling
Grilling The glass turntable must always be in position when using the oven. Press Grill to select level Set Time Press Start Select Cooking time by The time counts 1 press Grill 1 1000 W (high) turning the Time/Weight Dial� down in the display�... -
Page 22: Combination Cooking
Combination cooking Select combination level Set Time Press Start Press combination to select level� Select cooking time by The time counts The combination indicator lights, turning Time/Weight Dial� down in the display� and combination level (1, 2 or 3) will Time can be set up to 90 appear in the display�... -
Page 23: Using The Timer
Using the timer Delay start cooking By using the Timer, you are able to program Delay Start cooking. example Press Timer. Set the delay time by Set the desired cooking Press Start turning the Time/ Weight program and cooking time. Dial (up to 9 hours)�... -
Page 24: Multi-Stage Cooking
Multi-stage cooking 2 or 3 stage cooking Example: Press Press Set the cooking Set the cooking Press Start. Microwave Microwave time using the time using the The cooking program Power. Select Power. Select Time/Weight Dial. Time/Weight Dial. will start and the time desired power desired power in the display will... -
Page 25: Using The Memory Function
Using the memory function This feature allows you to pre-program your oven for a regular reheating or cooking task (for instance the manual Preheating of the Panacrunch pan). You are able to pre-program your oven for a specific power level and time that is convenient for you. You can only pre-program one memory task with this oven. -
Page 26: Turbo Defrost
Turbo defrost With this feature you can defrost frozen food according to the weight. Select the desired Turbo Defrost Set the weight of the frozen food Press Start program by using the Time/Weight Dial. Remember to stir or 1 Press Small Pieces Turning the dial slowly will count turn the food during up in 10 g steps�... -
Page 27: Auto Weight Cook Programs
Auto weight cook programs With this feature food can be cooked or reheated according to the weight. The weight has to be entered in grams. Select desired category Set Weight Press Start The auto and cooking function Set the weight of the food by using the indicators light and the program Time/Weight Dial�... - Page 28 Auto weight cook programs Program Weight Accessories Instructions 6. FRESH To cook fresh vegetables. Place prepared vegetables into a suitable VEGETABLES sized container� Sprinkle with 1 tbsp water per 100 vegetables� Cover with pierced cling film or a lid. Press auto cook - 1300 three times�...
-
Page 29: Auto Weight Panacrunch Programs
Auto weight Panacrunch programs Select the desired Press Start to After pre-heating Press Start program and place preheat the beeps sound. Place the Panacrunch Pan Panacrunch Pan. the food in the pan, in the oven directly set weight. on the glass tray. Program Weight Accessories... -
Page 30: Panacrunch Pan
(see page 23 EN)� quiches, pies, breaded products just as a conventional oven� Your Panasonic 2� Always place the pan in the centre of Panacrunch Pan works in three ways:... -
Page 31: Reheating & Cooking Charts
Reheating & cooking charts Food Weight/ Quantity Fresh Frozen Drinks - Coffee - Milk 1 mug 240 ml MAX 1 min 30 s – 2 mugs 470 ml MAX 2 min 30 s – 1 jug 600 ml MAX 4 min 30 s to 5 min –... - Page 32 Reheating & cooking charts Food Weight/ Quantity Fresh Frozen Gratins 400 g Fish bordelaise – 16-18 min Combi 1 340 g 8 min Combi 1 (3) 13 - 14 min Combi 1 Lasagna 9 - 10 min Combi 1 & 13 min MAX &...
- Page 33 Reheating & cooking charts Weight/ Fresh Food Frozen Quantity Convenience foods 1 pce 160 g Quiche onion (P) Auto chilled quiche 3 min 30 s Combi 1 & Stand 2 min 1 pce 400 g Quiche spinach (P) Auto chilled quiche 8 min Combi 1 &...
-
Page 34: Recipes
ingredients Tuna toasts Lightly toast the bread in a toaster (or 2-3 min using Grill 1 on the wire S E RVE S 4 rack)� Drain the tuna and mix together all the other ingredients in a 4 larg e s lic es of b rea d 2 t bsp ca pe r s bowl�... -
Page 35: Questions And Answers
Questions and answers Why won’t my oven turn on? Can I use a conventional oven When the oven does not turn on, thermometer in the oven? check the following: Only when you are using GRILL 1� Is the oven plugged in securely? cooking mode�... -
Page 36: Care Of Your Oven
Care of your oven 1� Turn the oven off before cleaning� The roller ring and oven cavity floor should be cleaned regularly to avoid 2� Clean the inside of the oven, door excessive noise� Simply wipe the seals and door seal areas regularly� bottom surface of the oven with mild When food splatters or spilled liquids detergent and hot water then dry with... -
Page 37: Technical Specifications
Information on Disposal for Users of Waste Electrical Manufactured by: Panasonic Appliances & Electronic Equipment Microwave Oven (Shanghai) Co.,Ltd, 888, 898 Longdong Road, Pudong, (private households) Shanghai, 201203, China. - Page 38 Panasonic Corporation http://panasonic.net © Panasonic Corporation 2013 F0003BB33EP...