Table of Contents
Use & Care Guide
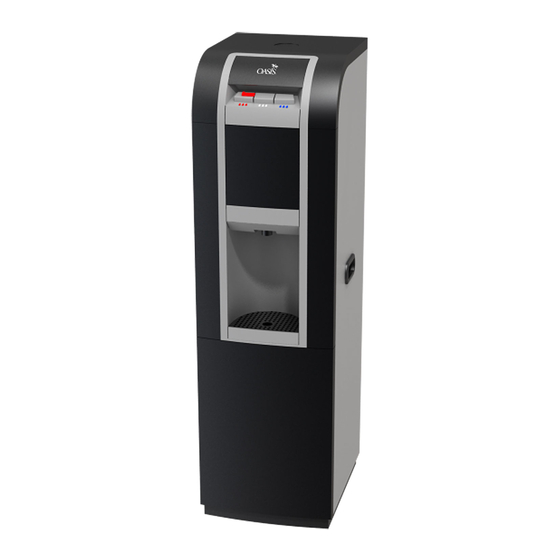
Premium Point-of-Use Water
Cooler
Use & Care Guidelines & Features ........................................................2
Electrical Power Requirements ..............................................................3
Leak controller instructions....................................................................3
Filter Installation ....................................................................................4
First Use set-up procedure/Programming the LCD display....................5
•
•
•
•
•
•
•
Control Panel Quick Reference Guide ...................................................8
Cleaning instructions..............................................................................8
Sanitizing instructions ..........................................................................10
Servicing the cooler..............................................................................11
Troubleshooting the cooler...................................................................13
Troubleshooting the leak controller......................................................14
Warranty...............................................................................................15
The Aquabar 2
Table of Contents
Setting the Clock......................................................................6
Setting hot and cold temperature..............................................6
Setting Energy Saver mode......................................................6
Setting filter life monitor..........................................................7
Setting UV bulb life monitor....................................................7
Hot booster mode .....................................................................8
Locking the display controls ....................................................8
Table of Contents
Troubleshooting

Related Manuals for Oasis Aquabar 2


Summary of Contents for Oasis Aquabar 2
-
Page 1: Table Of Contents
Use & Care Guide Premium Point-of-Use Water Cooler The Aquabar 2 Table of Contents Use & Care Guidelines & Features ............2 Electrical Power Requirements ..............3 Leak controller instructions..............3 Filter Installation ..................4 First Use set-up procedure/Programming the LCD display....5 Setting the Clock..............6 •... -
Page 2: Use & Care Guidelines & Features
This float shuts off the water to the reservoir (Note: A hard impact or jarring of the unit while it is filling may trip the safety float). To restart water flow, press the oval button bearing the OASIS logo on the top of the cooler. -
Page 3: Electrical Power Requirements
Refer to Leak Controller instructions for complete details on setting up and understanding the functions of the leak detector. A troubleshooting guide is on page 13. The leak controller can be added to any of the Aquabar 2 models as an accessory by calling customer service at (614) 861-1350. -
Page 4: Filter Installation
Snap the plastic sensor connector onto the plastic base in the location marked in figure 2. The clip snaps over the rib on the outside of the base so that the terminals in the plastic housing are inside the base. Open the valve again. -
Page 5: First Use Set-Up Procedure/Programming The Lcd Display
To install the carbon filtration system, cut the blue tube which is looped in the filter compartment. Cut it so you have Figure 4 enough tubing to connect your filter inlet and outlet without making the tubes too tight. Connect your filters and turn on water to flush filter(s) per the manufacturer’s instructions. Check for leaks. -
Page 6: Setting The Clock
SET THE CLOCK Press the “CLOCK SET” button once; the hour will flash. Use (+) or (-) button to set hour. Make sure AM or PM setting is correct. Press the “CLOCK SET” button Figure 5 again; the minutes will flash. Use (+) or (-) button to set minutes. -
Page 7: Setting Filter Life Monitor
14. Use the (+) button to move forward from weekdays to Saturday/Sunday and the (-) button to move back to the weekdays. It does not roll over from Saturday/Sunday to Monday through Friday. NOTE: The beginning and ending time for weekdays and weekends must be set individually. This means the procedure must be repeated two times to set the energy saver schedule for weekends and weekdays. -
Page 8: Hot Booster Mode
31. Use the (+) or (-) button to set the total number of months you wish to monitor up to. The maximum number you can enter is 12 months and it does not roll over to 0 after this value. Hold down the (+) or (-) button to roll through the numbers. - Page 9 Use mild soap and water to clean the surfaces. Rinse thoroughly with clean water. Do not use harsh or abrasive cleaners to clean the cooler. Sweep away or vacuum any dust from the condenser coils on the back of the unit. Wash the drip tray in soapy water.
-
Page 10: Sanitizing Instructions
of the taller ear should line up with the hole for the UV bulb. You don’t need to sanitize the cooler unless you wish to. If you have a tri-temp model, you will also need to reconnect the vertical silicone tube to the stainless steel hot tank tube. -
Page 11: Servicing The Cooler
17. Let the reservoir and the hot tank (if applicable) fill. After 5 minutes, check to see that water flows easily from all taps (see hot water safety instructions on page 3). IMPORTANT: You must wait until water has filled the hot tank before plugging in the cooler to avoid overheating. - Page 12 12. To put the center front panel back in, slide the bottom tabs over the lip on the alcove piece. Rotate the top in, snapping the top tabs into the front panel. Due to the close fitting parts, you get a smoother look if you press the top of the center front panel in place before snapping the two sides.
-
Page 13: Troubleshooting The Cooler
TROUBLESHOOTING WATER COOLER Water cooler leaks Unplug water cooler and turn OFF water supply immediately. Wipe up any water on the floor. on the inside Call customer service. LCD MODELS: Set cold control to COLDER or COLDEST. If water is not colder after 2 hours, Water is not cold call customer service. -
Page 14: Troubleshooting The Leak Controller
TROUBLESHOOTING LEAK CONTROLLER * Please note that whenever the valve closes to the red position (except when testing), you must do the following: Change the batteries Check and test the sensor and controller Look for leaks. It is possible that you had a leak and it has dried. Condition Knob Speaker... -
Page 15: Warranty
OWNER’S COPY 3 YEAR WATER COOLER LIMITED WARRANTY GENERAL PROVISIONS AND EXCLUSIONS: FIRST YEAR: This warranty applies only within the Continental Limits of the The Manufacturer promises the original purchaser (user) to United States of America and Canada. repair or, at the Manufacturer’s option, to replace any part of this water cooler which proves to be inoperative due to a defect This warranty does not apply and no agreement, either expressed or in material or workmanship under normal use, for a period of... - Page 16 OASIS INTERNATIONAL 222 E. Campus View Blvd • Columbus, OH 43235 U.S.A. 1-800-64-OASIS (1-800-646-2747) www.OasisCoolers.com Printed in China ©2010 OASIS International 031666-019 rev. B...
- Page 17 UV bulb install in Aquabar 2 Remove 2 screws from back of unit top. Screws for cabinet top Lift off top to expose SS reservoir lid. Silicone plug Lift SS lid up and remove silicone plug (it’s now red). Step The reservoir baffle is shipped in a bag inside the filter compartment.
- Page 18 UV bulb install in Aquabar 2 Screws at Remove two screws at rear of right side rear of unit panel (when facing unit). Screws at front of unit Remove two screws at front of right side panel. Lift side panel up slightly (about 1”) and slide away from unit.
- Page 19 UV bulb install in Aquabar 2 14. Line up top mounting hole with notch on ballast. Insert screw and tighten just until snug. Overtightening will crack ballast housing. 15. Insert insulated male tab into insulated female terminal. Match white wire to white wire and black wire to black wire.
- Page 20 OASIS INTERNATIONAL 222 East Campus View Blvd. • Columbus, OH 43235 U.S.A. 1-800-950-3226 www.oasiscoolers.com OASIS is a registered trademark of LVD Acquisition, LLC dba Oasis International A WBENC – Certified Women’s Business Enterprise © 2014 LVD Acquisition, LLC 030099-472 Rev. A...