Table of Contents
Available languages
Available languages
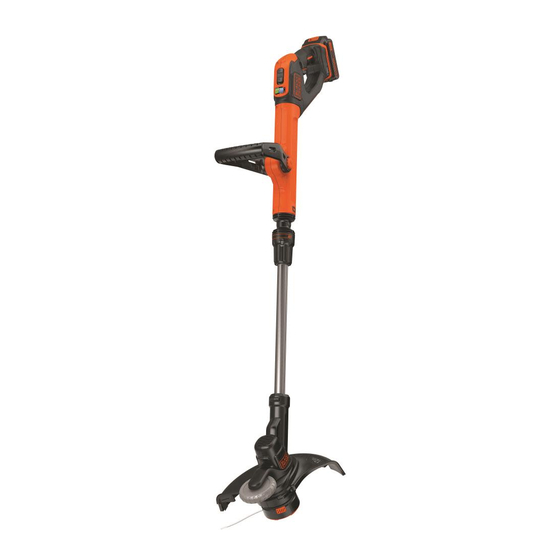
20V MAX* STRING TRIMMER
INSTRUCTION MANUAL
CATALOG NUMBER
LST522
Thank you for choosing BLACK+DECKER!
PLEASE READ BEFORE RETURNING THIS PRODUCT FOR
ANY REASON.
If you have a question or experience a problem with your BLACK+DECKER
purchase, go to http://www.blackanddecker.com/instantanswers
If you can't find the answer or do not have access to the Internet, call
1-800-544-6986 from 8 a.m. to 5 p.m. EST Mon. - Fri. to speak with an agent.
Please have the catalog number available when you call.
SAVE THIS MANUAL FOR FUTURE REFERENCE.
VEA EL ESPANOL EN LA CONTRAPORTADA.
INSTRUCTIVO DE OPERACIÓN, CENTROS DE SERVICIO Y PÓLIZA DE GARANTÍA.
ADVERTENCIA: LÉASE ESTE INSTRUCTIVO ANTES DE USAR EL PRODUCTO.
*Maximum initial battery pack voltage (measured without a workload) is 20 volts. Measured
under a workload, nominal voltage is 18.
KEY INFORMATION YOU SHOULD KNOW:
• The guard must be installed before trimming or edging - if not, the
motor will overheat (page 7).
• When replacing the line, use only .065 inch diameter ROUND line
(B+D Model #AF-100 is recommended) - otherwise the appliance will
not function properly (page 11).
• Do not bump the feed head against the ground - it will disrupt the
feed mechanism.
• For use only with lithium-ion 20v MAX* batteries.
To register your new product, call 1-800-544-6986
or visit www.BlackandDecker.com/NewOwner
Table of Contents

Related Manuals for Black & Decker LST522


Summary of Contents for Black & Decker LST522
- Page 1 20V MAX* STRING TRIMMER INSTRUCTION MANUAL CATALOG NUMBER LST522 Thank you for choosing BLACK+DECKER! PLEASE READ BEFORE RETURNING THIS PRODUCT FOR ANY REASON. If you have a question or experience a problem with your BLACK+DECKER purchase, go to http://www.blackanddecker.com/instantanswers If you can’t find the answer or do not have access to the Internet, call 1-800-544-6986 from 8 a.m.
-
Page 2: Safety Guidelines - Definitions
SAFETY GUIDELINES - DEFINITIONS It is important for you to read and understand this manual. The information it contains relates to protecting YOUR SAFETY and PREVENTING PROBLEMS. The symbols below are used to help you recognize this information. DANGER: Indicates an imminently hazardous situation which, if not avoided, will result in death or serious injury. -
Page 3: Functional Description
n o ....no load speed be properly repaired or replaced by an authorized service center unless otherwise ....Class I Construction (grounded) indicated elsewhere in this manual....earthing terminal • DO NOT immerse appliance in water or ....safety alert symbol squirt it with a hose. DO NOT allow any liquid ....Class II Construction to get inside it. -
Page 4: Important Safety Instructions For Battery Chargers
IMPORTANT SAFETY Minimum Gauge for Cord Sets INSTRUCTIONS FOR Volts Total Length of Cord in Feet 120V 0-25 26-50 51-100 101-150 BATTERY CHARGERS Ampere Rating SAVE THESE INSTRUCTIONS: This manual More Not more American Wire Gauge contains important safety instructions for Than Than battery chargers. -
Page 5: Storage Recommendations
carbonates and lithium salts. • Contents of opened battery cells may cause respiratory irritation. Provide fresh air. If symptoms persist, seek medical attention. WARNING: Burn hazard. Battery liquid may be flammable if exposed to spark or flame. • Charge the battery packs only in BLACK+DECKER chargers. -
Page 6: Assembly And Adjustment
the battery pack in an air temperature below +40°F (+4.5°C), or above +105°F (+40.5°C). This is important and will prevent serious damage to the battery pack. 2. The charger and battery pack may become warm to touch while charging. This is a normal condition, and does not indicate a problem. -
Page 7: Attaching The Auxiliary Handle
• Using a phillips screwdriver, insert the • Push the handle completely onto the guard screw and tighten securely as housing and position it slightly until it shown in Figure E to complete the guard “snaps” into place. assembly. • To adjust the handle up or down, press •... -
Page 8: Operation
RELEASING THE CUTTING LINE In transit, the cutting line is taped to the spool housing. • Remove the tape holding the cutting line to the spool housing. OPERATION WARNING: ALWAYS USE PROPER EYE PROTECTION THAT CONFORMS TO ANSI Z87.1 (CAN/CSA Z94.3) WHILE OPERATING THIS APPLIANCE. -
Page 9: Clearing Jams/Tangled Line
• Position the edging wheel on the edge of • Keep trimmer tilted toward the area being the sidewalk or abrasive surface so the cut; this is the best cutting area. cutting line is over the grass or dirt area to •... -
Page 10: Replacing The Spool
REPLACEMENT ACCESSORIES • Insert the line end through the appropriate hole in the spool housing. Pull slack line CAUTION: Before you begin trimming, through until it pulls out of the holding only use the appropriate type of cutting line. slots as shown in figure O2. Use BLACK+DECKER replacement spool Model No. -
Page 11: Maintenance Warning
• Push the cap onto the housing until it snaps securely into place. REWINDING SPOOL FROM BULK LINE (USE ONLY .065 IN. ROUND DIAMETER LINE) Bulk line is also available for purchase from your local retailer. NOTE: Hand wound spools from bulk line are likely to become tangled more frequently than BLACK+DECKER factory wound spools. -
Page 12: Service Information
TWO-YEAR LIMITED HOME • Reorient or relocate the receiving antenna. USE WARRANTY • Increase the separation between the BLACK+DECKER warrants this product for equipment and receiver. two years against any defects in material or • Connect the equipment into an outlet workmanship. -
Page 13: Troubleshooting
Troubleshooting PROBLEM SOLUTION • Remove battery from trimmer. Trimmer runs slowly. • Check that the spool housing can rotate freely. Carefully clean it if necessary. • Check that the cutting line does not protrude more than approximately 4-13/16 inches (122mm) from the spool. If it does, cut it off so that it just reaches the line trimmingblade. - Page 14 TAILLE-BORDURE / COUPE-BORDURE AVEC PILE AU LITHIUM DE 20 V MAX* MODE D’EMPLOI NUMERO DE CATALOGUE LST522 Merci d’avoir choisi BLACK+DECKER! Consulter le site Web www.BlackandDecker.com/NewOwner pour enregistrer votre nouveau produit. À LIRE AVANT DE RETOURNER CE PRODUIT POUR QUELQUE RAISON QUE CE SOIT : Si des questions ou des problèmes surgissent après l’achat d’un produit...
- Page 15 AVERTISSEMENTS DE SÉCURITÉ pour celui pour lequel il est prévu. ET DIRECTIVES DE PREMIÈRE • NE PAS TROP TENDRE LES BRAS - IMPORTANCE Conserver son équilibre en tout temps. • OUTIL ENDOMMAGÉ - Si vous frappez ou AVERTISSEMENT : Lorsque des devenez enchevêtrer dans un objet, arrêtez outils de jardinage électriques sont utilisés, immédiatement l’outil, débranchez-le puis...
-
Page 16: Directives De Sécurité Importantes Pour Les Chargeurs De Piles
....Utiliser une protection AVERTISSEMENT : Certaines respiratoire adéquate. poussières produites par cet util ...Utiliser une protection oculaire . contiennent des produits chimiques reconnus par l’État de la Californie adéquate. comme pouvant causer le cancer, les ....Utiliser une protection auditive . anomalies congénitales et d’autres adéquate. - Page 17 AVERTISSEMENT : risque de choc Calibre minimal des cordons de rallonge Tension Longueur totale du cordon en pieds électrique. Éviter la pénétration de tout 120V 0-25 26-50 51-100 101-150 liquide dans le chargeur. (0-7,6m) (7,6-15,2m) (15,2-30,4m) (30,4-45,7m) MISE EN GARDE : risque de Intensité...
- Page 18 LIRE TOUTES LES DIRECTIVES. poche, une boîte à outils, une boîte de nécessaire de produit ou un tiroir contenant • Ne pas incinérer le bloc-piles, même s’il des objets tels que des clous, des vis ou des est très endommagé ou complètement clés, car tout contact accidentel entre les usé, car il peut exploser au contact de bornes à...
- Page 19 fait. Il est recommandé de recharger le bloc- b. vérifier si la prise est reliée à un interrupteur mural qui la met hors tension piles après chaque utilisation. lorsque la lumière sont éteinte; c. déplacer le chargeur et le bloc-piles dans FONCTIONS DE DIAGNOSTIC DU un endroit où...
-
Page 20: Montage Et Réglage
fil, située sur le bord du pare-main. CONSERVER CES MESURES MONTAGE ET RÉGLAGE FIXATION DE LA POIGNÉE AUXILIAIRE • Pour fixer la poignée, enfoncer les AVERTISSEMENT : AVANT LE boutons (20) des deux côtés du boîtier MONTAGE, S’ASSURER QUE L’OUTIL supérieur comme le montre la figure F. -
Page 21: Réglage De La Hauteur
MISE EN GARDE : Avant de procéder au taillage, s’assurer d’utiliser uniquement le type de fil de coupe adéquat. MISE EN GARDE : Inspecter la zone qui sera taillée et retirer tout morceau de fil métallique, de corde ou d’objets similaires qui pourraient s’enchevêtrer dans le fil rotatif ou avec la bobine. - Page 22 ou de la saleté à être bordé CONVERTIR AU MODE COUPE- • Pour couper de plus près, incliner BORDURE légèrement l’outil. MISE EN GARDE : Le guide de coupe à roue doit être utilisé uniquement en mode de coupe en bordure. Pour la coupe en bordure, la tête de coupe doit se trouver dans la position indiquée par la figure M.
- Page 23 provocan un mayor desgaste de la cuerda e incluso su rotura. Los muros de piedra y ladrillo, las cunetas y la madera pueden desgastar la cuerda rápidamente. Bobine de • No permita que la tapa del carrete se rechange arrastre sobre el suelo u otras superficies. N°...
-
Page 24: Accessoires De Rechange
AVERTISSEMENT : L’utilisation de tout accessoire non recommandé par BLACK+DECKER, avec cet outil, pourrait s’avérer dangereuse. REMPLACER LA BOBINE • Retirer la pile de l’outil. • Enfoncer les languettes (20) et retirer le couvercle de la bobine (21) du boîtier de la bobine (11) logé... - Page 25 Suivre les étapes ci-dessous pour installer du fil en vrac : • Retirer la pile de l’outil. • Retirer la bobine vide de l’outil comme le décrit la section « REMPLACER LA BOBINE ». • Retirer tout le reste de fil de coupe de la bobine.
- Page 26 sont donc en mesure d’offrir à leur clientèle entraîner un brouillage nuisible des un service efficace et fiable. Que ce soit pour communications radio. Cependant, nous ne un avis technique, une réparation ou des garantissons pas l’absence de brouillage pièces de rechange authentiques installées dans tous les types d’environnement.
-
Page 27: Depannage
DEPANNAGE PROBLÈME SOLUTION L’outil fonctionne lentement. • Appuyer à fond sur la détente à vitesse variable. Le niveau de pression sur la détente influence la vitesse. • Retirer la pile de l’outil. Vérifier que le boîtier de la bobine peut tourner librement. Le nettoyer avec précaution si nécessaire. -
Page 28: Pautas De Seguridad/Definiciones
PODADORA / BORDEADORA MANUAL DE INSTRUCCIONES CATÁLOGO N° LST522 Gracias por elegir BLACK+DECKER! Visite www.BlackandDecker.com/NewOwner para registrar su nuevo producto. LEA EL MANUAL ANTES DE DEVOLVER ESTE PRODUCTO POR CUALQUIER MOTIVO: Si tiene una consulta o algún inconveniente con su producto BLACK+DECKER, visite http://www.blackanddecker.com/instantanswers... - Page 29 ADVERTENCIAS E INSTRUCCIONES correctamente en todo momento. IMPORTANTES SOBRE SEGURIDAD • DANO A LA UNIDAD: si golpea la herramienta o ésta se atasca con un ADVERTENCIA: Al utilizar objeto extraño, deténgala de inmediato, herramientas eléctricas para el jardín, desenchúfela, verifique que no se haya siempre se deben tomar ciertas dañado y repare cualquier daño antes precauciones básicas de seguridad para...
- Page 30 antes del uso mediante el gatillo interruptor es peligrosa y debe repararse.....Use protección adecuada para ADVERTENCIA: las vías respiratorias Parte del polvo generado por este producto contiene ...Use protección adecuada para sustancias químicas reconocidas por el los ojos Estado de California como causantes de ....Use protección adecuada para cáncer, defectos congénitos u otros los oídos...
-
Page 31: Lea Todas Las Instrucciones
ADVERTENCIA: Riesgo de Calibre mínimo para cables de extensión descarga eléctrica. No permita que ningún Volts Longitud total del cable en pies 120V 0-25 26-50 51-100 101-150 líquido entre en el cargador. (0-7,6m) (7,6-15,2m) (15,2-30,4m) (30,4-45,7m) PRECAUCIÓN: Riesgo de quemaduras. Amperaje Para reducir el riesgo de lesiones, cargue Más No más... -
Page 32: Procedimiento De Carga
provocar incendios si los terminales de • No incinere el paquete de baterías, la batería entran en contacto aun si tiene daños importantes o está accidentalmente con materiales completamente desgastado. El paquete conductores como llaves, monedas, de baterías puede explotar en el fuego. herramientas de mano u objetos Cuando se queman paquetes de baterías, similares. - Page 33 o de lo contrario la vida útil de las 3. Si el paquete de baterías no se carga baterías podría acortarse en gran adecuadamente: medida. Para obtener la máxima vida a. Revise el tomacorriente enchufando útil de las baterías, no permita que una lámpara u otro aparato éstas se descarguen completamente.
-
Page 34: Montaje Y Ajuste
• Con un destornillador Phillips, inserte el destornillador del protector, como se muestra en la figura E para completar el ensamblaje del protector. • Una vez instalado el protector, retire la cubierta de la hoja de corte de la cuerda ubicada en el extremo del protector. -
Page 35: Operación
LIBERACIÓN DE LA CUERDA DE CORTE Al despacharse de la fábrica, la cuerda de corte está sujeta con cinta a la cubierta del carrete. • Quite la cinta que sujeta la cuerda de corte a la cubierta del carrete. INSTRUCCIONES DE OPERACIÓN ADVERTENCIA: Utilice siempre... - Page 36 horario hasta su posición original. NOTA: Observará un desgaste de la cuerda de corte más rápido de lo normal si la podadora se coloca directamente sobre la acera o superficie abrasiva. BORDEADO ADVERTENCIA: Cuando se utiliza como un Edger, piedras, trozos de metal y otros objetos que pueden ser lanzados a gran velocidad por la línea.
- Page 37 GOLPEE la unidad al intentar alimentar una mayor cantidad de RPM. NOTA: Cuando la podadora está en el cuerda ni por algún otro motivo. modo de aceleración (n.º 2), el tiempo de funcionamiento se reduce si se compara ELIMINACIÓN DE ATASCOS Y con el modo de tiempo de funcionamiento CUERDAS ENREDADAS extendido (n.º...
-
Page 38: Accesorios De Repuesto
DIÁMETRO. No utilice cuerdas dentadas • Empuje el carrete CON DELICADEZA o de mayor calibre ya que sobrecargarán hacia abajo y gírelo hasta que sienta que el motor y provocarán sobrecalentamiento. encaja en su lugar y luego presiónelo Puede conseguir esta cuerda a través para asegurarlo hasta que se produzca un de su distribuidor local o centro de chasquido. -
Page 39: Mantenimiento
(figura S). ENROLLADO DEL CARRETE CON CUERDA A GRANEL (UTILICE SÓLO • Coloque el carrete en la herramienta como se describe en el “REEMPLAZO CUERDA REDONDA DE 1,65 MM (0,065 PULGADA) DE DIÁMETRO) DEL CARRETE”. También puede comprar cuerda a granel en el comercio minorista local. - Page 40 INFORMACIÓN DE MANTENIMIENTO razonable contra interferencia perjudicial Todos los Centros de servicio de en una instalación residencial. Este equipo BLACK+DECKER cuentan con personal genera, usa y puede irradiar energía en altamente capacitado dispuesto a brindar frecuencia de radio y, si no se instala y a todos los clientes un servicio eficiente y se usa de acuerdo con las instrucciones, confiable en la reparación de herramientas...
- Page 41 PROBLEMA SOLUCIÓN • Appuyer à fond sur la détente à vitesse La herramienta variable. Le niveau de pression sur la détente funciona lentamente. influence la vitesse. • Retirer la pile de l’outil. Vérifier que le boîtier de la bobine peut tourner librement. Le nettoyer avec précaution si nécessaire.
- Page 42 · GARANTÍA BLACK+DECKER · BLACK+DECKER WARRANTY . SOLAMENTE PARA PROPOSITOS DE MEXICO Distributor Name · Sello firma del distribuidor Date of purchase · Fecha de compra Invoice No. · No. de factura PRODUCT INFOMATION · IDENTIFICACIÓN DEL PRODUCTO Cat. No. · Catalogo ó Modelo Serial Number ·...
- Page 43 SOLAMENTE PARA PROPOSITOS DE MEXICO Herramientas y Equipos Profesionales Grupo Realsa en herramientas, S.A. de C.V. Av. Colón 2915 Ote. Col. Francisco I. Madero Súper Manzana 69 MZ.01 Lote 30 Monterrey, Nvo. León (Av. Torcasita) Tel. 01 81 83 54 60 06 Col.
- Page 44 Cat No. LST522 Form #90628790 REV03 October 2015 Copyright © 2015 BLACK+DECKER Printed in China...