
Related Manuals for D-Link DG-102SH


Summary of Contents for D-Link DG-102SH
- Page 1 6DG102SH..01 Printed in Taiwan RECYCLABLE...
- Page 2 Registration Card. If a Registration Card for the product in question has not been returned to a D-Link office, then a proof of purchase (such as a copy of the dated purchase invoice) must be provided when requesting warranty service.
- Page 3 LIGHTNING OR OTHER HAZARD. IN NO EVENT WILL D-LINK BE LIABLE FOR ANY DAMAGES, INCLUDING LOSS OF DATA, LOSS OF PROFITS, COST OF COVER OR OTHER INCIDENTAL, CONSEQUENTIAL OR INDIRECT DAMAGES ARISING OUT THE INSTALLATION, MAINTENANCE, USE, PERFORMANCE, FAILURE OR INTERRUPTION OF A D- LINK PRODUCT, HOWEVER CAUSED AND ON ANY THEORY OF LIABILITY.
- Page 5 ! !
- Page 6 ' -! ( -& ( # ( ( " ) * + * 4 ( - ( ...
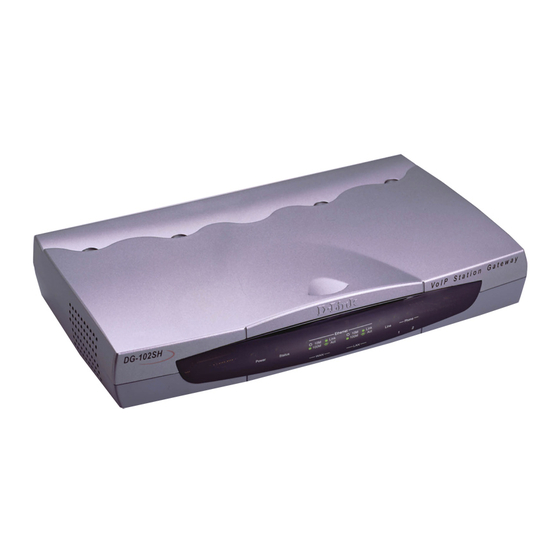
- Page 7 The D-Link DG-102SH VoIP Station Gateway links traditional telephony networks to IP networks with conventional telephony devices such as analog phones or fax machines. The DG-102SH includes two loop start Foreign Exchange Subscriber (FXS) interfaces with normal RJ-11 telephone connectors that provide voice/fax communication over the IP network, and it also provide two 10/100 Mbps dual speed Ethernet ports.
- Page 8 ♦ One DG-102SH VoIP Gateway ♦ A/C Power Adapter If any item is found missing or damaged, please contact your local reseller or D-Link directly at one of the offices listed at the rear of the manual for replacement. !"#$# This section identifies all the major external components of the device.
- Page 9 (not a crossover cable) with RJ-45 connectors at each end. Make the network connection by plugging one end of the cable into the RJ-45 jack of the DG-102SH, and the other end into a port on your WAN router.
- Page 10 DG-102SH VoIP Station Gateway Once the device has been connected to a PC, you will need a separate IP address and a straight cable. To connect the device to either a hub or switch, you must connect the straight cable to the Uplink port.
- Page 11 DG-102SH VoIP Station Gateway Before configuring your VoIP Gateway, take a few minutes to look over this section and familiarize yourself with the front panel LED indicators depicted below. ♦ Power This LED is lit when the device is receiving power; otherwise, it is unlit.
- Page 12 DG-102SH VoIP Station Gateway In order to use the DG-102SH VoIP gateway, you must first configure it. #&)#%*' There are two ways to configure the VoIP gateway, both of which are discussed below. They are: ♦ Using a terminal or PC running terminal emulation software connected to the diagnostic port via an RS-232 cable.
- Page 13 DG-102SH VoIP Station Gateway Once you have set an IP address for your device, you can use a Telnet program (in a VT-100 compatible terminal mode) to access and configure it. Most of the screens are identical, whether accessed from the console port or from a Telnet interface.
-
Page 14
DG-102SH VoIP Station Gateway If the boot up process has proceeded too far and you did not reach the Boot Menu shown above, unplug the device, plug it back in (to restart the boot up process), and press
-
Page 15
DG-102SH VoIP Station Gateway
♦ Gatekeeper Mode Use the
key to choose the Gatekeeper mode once the device is rebooted (restarted). Choices include: Auto Discovery – When Auto Discovery is chosen, the VoIP gateway will auto-search the Gatekeeper from your LAN or WAN. - Page 16 DG-102SH VoIP Station Gateway Your VoIP is now configured for use. In order to use a web browser to configure the VoIP gateway, you must make sure it has a valid Ethernet connection to a PC or LAN via its LAN or WAN ports.
- Page 17 DG-102SH VoIP Station Gateway ! " Click on the Login to the web-based management module button in the middle of the window. The following window will be displayed: Initially, the VoIP gateway does not have a Username or Password. To log in, simply click on the OK button.
- Page 18 DG-102SH VoIP Station Gateway # ! ! To begin configuring the device, click on the Config IP & H.323 folder on the left-hand side of the window (shown below).
- Page 19 DG-102SH VoIP Station Gateway Next, click on Config Device IP Address. The following window will appear:...
- Page 20 DG-102SH VoIP Station Gateway #$ ! ! The items on this window are described below: Restart Settings ♦ Get IP From Choose the method the VoIP gateway will use to obtain its IP settings once it is rebooted (restarted). Choices include: Manual – When Manual is chosen, the VoIP gateway will obtain its IP settings from the fields located just below.
- Page 21 DG-102SH VoIP Station Gateway %&'('! ! The items on this window are described below: Gatekeeper Information...
- Page 22 DG-102SH VoIP Station Gateway ♦ Mode Choose the Gatekeeper mode.(Default is Auto) ♦ Gatekeeper IP Address This IP address is necessary if you chose the Manual mode defined as above. ♦ Gatekeeper Identifier This is used to set the gatekeeper identifier information that is carried in the H.323 RAS messages.
- Page 23 DG-102SH VoIP Station Gateway The DG-102SH VoIP gateway features a Boot Menu, which is described in this chapter. To access the Boot Menu, you must first make sure the console is connected to the Diagnostics port (an RS-232 port with a 9-socket D-shell connector and DCE-type wiring) and the appropriate cabling for the connection is being used.
-
Page 24
DG-102SH VoIP Station Gateway
Each item on the IP Configuration screen is described below: ♦ Gatekeeper Mode Use the
key to choose the Gatekeeper mode once the device is rebooted (restarted). Choices include: Auto Discovery – When Auto Discovery is chosen, the VoIP gateway will auto-search the Gatekeeper from your LAN or WAN. - Page 25 IP Enter the IP address of the trap manager. This screen displays various types of information about the DG-102SH as well as allowing you to enter information pertaining to name, location, and how to reach the person responsible for maintaining the device.
- Page 26 DG-102SH VoIP Station Gateway # "" !+ ♦ Device Type This displays the model name of this device. ♦ MAC Address This displays the MAC address of this device. ♦ Serial Number This displays the serial number of this device. ♦...
- Page 27 DG-102SH VoIP Station Gateway ,! After making your changes in the fields above, press RESET DEVICE TO START UPDATE to initiate the update sequence. "" !+ ♦ Software Update Mode This specifies downloading the image file through a WAN Link. ♦...
- Page 28 DG-102SH VoIP Station Gateway After the settings have been saved to NV-RAM, they will become the default settings for the device, and they will be used every time it is powered on, reset or rebooted. The only exception to this is a factory reset, which will clear all settings and restore them to their initial values, which were present when the device was purchased.
-
Page 29
DG-102SH VoIP Station Gateway -. "
To perform a system reset, use the
keys to highlight the last menu item on the Boot Menu, Restart System, and press . The following Reboot Device screen will be briefly displayed: . - ... - Page 30 ## The DG-102SH VoIP gateway offers an embedded Web-based (hypertext) interface allowing users to manage the device from anywhere on the network through a standard browser such as Netscape Navigator/Communicator, 4.x or later, or Microsoft Internet Explorer, 4.x or later. The Web browser acts as a universal access tool and can communicate directly with the device using HTTP protocol.
- Page 31 DG-102SH VoIP Station Gateway #!! #$ ! ! The items on this window are described below: Restart Settings ♦ Get IP From Choose the method the VoIP gateway will use to obtain its IP settings once it is rebooted (restarted). Choices include: Manual –...
- Page 32 DG-102SH VoIP Station Gateway $%&'& %&'('! ! The items on this window are described below: Gatekeeper Information...
- Page 33 DG-102SH VoIP Station Gateway ♦ Mode Choose the Gatekeeper mode.(Default is Auto) ♦ Gatekeeper IP Address This IP address is necessary if you chose the Manual mode defined as above. ♦ Gatekeeper Identifier This is used to set the gatekeeper identifier information that is carried in the H.323 RAS messages.
- Page 34 DG-102SH VoIP Station Gateway # ! ! The items on this window are described below: ♦ Device Type This displays the model name of this device. ♦ MAC Address This displays the MAC address of this device. ♦ Boot PROM Version This displays the version number of the device’s startup code.
- Page 35 DG-102SH VoIP Station Gateway - / ! ! Enter the desired information on the window above and then click Save. Receive Gain –14~ +14 dB Transmission Gain –14~ +14 dB...
- Page 36 DG-102SH VoIP Station Gateway ! ( "! ! This window allows you to view the Prefer Codec Table settings. Click the number of Tcid column on the window above to access the second Prefer Codec Table window:...
- Page 37 DG-102SH VoIP Station Gateway "! ! The items on this window are described below: ♦ Tcid This displays the port number of this device. (0: port1, 1: port2, 2: port3, 3: port4) ♦ Prefer Codec Type This is a user-defined prefer codec type for the port shown as above.
- Page 38 DG-102SH VoIP Station Gateway # ) ! " * + First Analog Port Telephone No. Table window This window allows you to view the Analog Port Telephone No. Table settings. Click the number of Tcid column on the window above to access the second Analog Port Telephone No. Table...
- Page 39 DG-102SH VoIP Station Gateway $ * &"! ! The items on this window are described below: ♦ Tcid This displays the port number of this device. (0: port1, 1: port2, 2: port3, 3: port4) ♦ Telephone No. This is a user-defined Caller ID number for the port shown as above.
- Page 40 DG-102SH VoIP Station Gateway ), ! " + # * &"! ! This window allows you to view the Data Port Telephone No. Table settings Click the Add icon on the window above to access the First Data Port Telephone No. Table window:...
- Page 41 DG-102SH VoIP Station Gateway # * &"! ! The items on this window are described below: ♦ Prefix Strip Dial No. This is a user-defined prefix strip dial number for outgoing call to another device. ♦ Destination IP Address Enter the IP address of the destination you would like to call. One prefix telephone number will map to one destination IP address.
- Page 42 DG-102SH VoIP Station Gateway #)#!! ! !+-. ! $ ! ! The items on this window are described below: ♦ Analog This Mode allow user to setup advanced ingress calls and dialing rule settings for the gateway’s voice ports. ♦ Data This Mode allow user to setup advanced egress calls and dialing rule settings via the gateway’s data ports Choose the Analog or Data Mode then click Next.
- Page 43 DG-102SH VoIP Station Gateway # ! $# "! ! The items on this window are described below: ♦ Destination ID. This is a user-defined destination ID for the port shown as below. The ID is only and cannot duplicate. ♦ Tcid This is a user-defined port number of this device. (0: port1, 1: port2, 2: port3, 3: port4)
- Page 44 DG-102SH VoIP Station Gateway $%/ "! ! The items on this window are described below: ♦ Hunt Group. This is a user-defined hunt group number for the destination ID shown as below. ♦ Destination ID. This displays the destination ID we set last page.
- Page 45 DG-102SH VoIP Station Gateway $$ "! ! The items on this window are described below: ♦ Dial No. This is a user-defined prefix dial number when user make the call. ♦ HG ID This displays the Hunt Group ID we set last page.
- Page 46 DG-102SH VoIP Station Gateway ! $# "! ! The items on this window are described below: ♦ Destination ID. This is a user-defined destination ID for the port shown as below. The ID is only and cannot duplicate. ♦ IP Address Enter the destination IP address of outgoing calls.
- Page 47 DG-102SH VoIP Station Gateway $%/ "! ! The items on this window are described below: ♦ Hunt Group. This is a user-defined hunt group number for the destination ID shown as below. ♦ Destination ID. This displays the destination ID we set last page.
- Page 48 DG-102SH VoIP Station Gateway $$ "! ! The items on this window are described below: ♦ Dial No. This is a user-defined prefix dial number when user make the call. ♦ HG ID This displays the Hunt Group ID we set last page.
- Page 49 DG-102SH VoIP Station Gateway ##!! ( $$ "! ! This window allows you to view the ATPM Address Table settings Click the Add or Delete icon on the window above to access the Second ATPM Address Table window:...
- Page 50 DG-102SH VoIP Station Gateway $$ "! ! Enter the desired information on the window above and then click Save.
- Page 51 DG-102SH VoIP Station Gateway #$ ( $%/ "! ! This window allows you to view the ATPM Hunt Group Table settings Click the Add or Delete icon on the window above to access the Second ATPM Hunt Group Table window:...
- Page 52 DG-102SH VoIP Station Gateway $%/ "! ! Enter the desired information on the window above and then click Save.
- Page 53 DG-102SH VoIP Station Gateway # ( $# "! ! This window allows you to view the ATPM Destination Table settings Click the Add or Delete icon on the window above to access the Second ATPM Destination Table window:...
- Page 54 DG-102SH VoIP Station Gateway $# "! ! Enter the desired information on the window above and then click Save.
- Page 55 DG-102SH VoIP Station Gateway # #-$ ! ! Enter the desired information on the window above and then click Save.
- Page 56 DG-102SH VoIP Station Gateway # $ ! ! 0 ! !" ! !+...
- Page 57 DG-102SH VoIP Station Gateway $ ! ! Enter the desired information on the window above and then click Save.
- Page 58 DG-102SH VoIP Station Gateway # *$ ! ! After entering the desired information on the window above, enable or disable the NAT Function and then click Save.
- Page 59 DG-102SH VoIP Station Gateway / 1 ! ! ! ! ! - ! & 0 ! !" ! !+...
- Page 60 DG-102SH VoIP Station Gateway 1 ! ! After completing the local server configuration settings on the window above, select enabled or disabled in the drop-down menu under State and then click Save.
- Page 61 DG-102SH VoIP Station Gateway * ! ! The items on this window are described below: ♦ Trap Manager IP Address The IP address of the trap receiving station. ♦ Community Name A user-defined SNMP community name. ♦ SNMP AuthTrap Enable or disable the SNMP trap.
- Page 62 DG-102SH VoIP Station Gateway #! $ ! ! To add or change a User Account, fill in the appropriate information in the User Name, Old Password (if applicable), New Password, and Confirm New Password fields. Click on the Save button to keep the settings.
- Page 63 DG-102SH VoIP Station Gateway , ! ! Items in the window are described as follows: ♦ Rx Packets The total number of packets received by the device. ♦ Rx Bytes The total number of bytes contained in packets received by the device.
- Page 64 DG-102SH VoIP Station Gateway ♦ Tx Late Collision The number of late collisions. ♦ Tx Retransmission Limit The number of times the device had to retransmit packets. ♦ Tx Underrun Packets This counter shows the number of runt packets transmitted by the device that are less than the allowed 64-octet minimum length.
- Page 65 DG-102SH VoIP Station Gateway ! ! ! This read-only window displays a variety of Tcid configuration settings.
- Page 66 DG-102SH VoIP Station Gateway ! ! ! This read-only window displays various Coding Profile settings.
- Page 67 DG-102SH VoIP Station Gateway ! ! ,! ! ! The items on this window are described below: ♦ Software Update Mode This specifies downloading the image file through a WAN Link or LAN Link. ♦ TFTP Server Address The IP address of the TFTP server where the runtime or configuration file is located.
- Page 68 DG-102SH VoIP Station Gateway ! ! After the settings have been saved to NV-RAM, they will become the default settings for the device, and they will be used every time it is powered on, reset or rebooted. The only exception to this is a factory reset, which will clear all settings and restore them to their initial values, which were present when the device was purchased.
- Page 69 DG-102SH VoIP Station Gateway " -. # 2! ! Before performing a Factory Reset, be absolutely certain that this is what you want to do. Once the reset is done, all of the device’s settings stored in NV-RAM will be erased and restored to values present when the device was purchased.
- Page 70 DG-102SH VoIP Station Gateway " . - ! ! To perform a reboot of the device, which resets the system, click the Restart button.
- Page 71 DG-102SH VoIP Station Gateway The DG-102SH VoIP gateway offers a line-at-a-time prompt and response scheme to execute various configuration instructions. The interface displays a single prompt character ggdbg> when it is ready to accept a command (ex. ggdbg>set or ggdbg>show).
- Page 72 DG-102SH VoIP Station Gateway nwdbg dtmf_relay <0|1> Definition: This command turns the Dual Tone Multiple Frequency (DTMF) relay function on or off, or shows the DTMF relay state if only nwdbg dtmf_relay is typed. Parameter(s): <0 : off, 1 : on>...
-
Page 73
DG-102SH VoIP Station Gateway If only nwdbg dns is typed, this command shows the DNS IP/STATE. Parameter(s):
Example: nwdbg dns 10.1.1.5 nwdbg dns -
Page 74
DG-102SH VoIP Station Gateway Definition: Gets the image from the TFTP server. The
is the name of the image on the TFTP server. If any error happened during downloading image, the message ERROR will be displayed. When the user enters tftp get, the file name in EEPROM will be employed. - Page 75 DG-104SH VoIP Station Gateway !" #$ %&#!'( ! )')*&+' ,#! -#./ # !0*'01 2 332 4'445 - $-.$ &%666 332 4'445 - $-.$ &%6 6---1445 --.#+! # 6---14445 - $-.#+! )!#$7!#!$!!!87. ""!# ))))& !'%+ ! ,9 :#$1 ;! /:'6:<%: 9:6/&::3&:: %/:% +!#$/"!( !:#$7 #! 3 3= $$ $ ! :::7-./! ! 3&:+ (+ (> $&6566 7!$!!( & ("#!$.(. !!!7>> $( .!# $!" # # + (+#$ :.>!?!!7! ! $":#7!$"!+ ( ...
- Page 76 DG-102SH VoIP Station Gateway +!!$ !7 $$.(./$2> 3&: "# $ : $ 2 34'44&!=' # 34'44&!=' # " ='9!(!( %& ='9!(!( # 2, %,* ++ ' ;4'445 - $-. 2 3 ;4'445 - $-. 3 $ 9@$ ;:3:;9@"!"! ;9/%5/$ /%/ 7! %/6)%/' ( ) 4*4A/ ) 4**A/ *+ *B*B#$!( / 6 ! / *4<*4-304*46-/*4 ,!-. /// $$5 )//6/ $$5 5&6/ $$5...
- Page 77 TEL: 39-02-2900-0676 FAX: 39-02-2900-1723 URL: www.dlink.it E-MAIL: [email protected] JAPAN D-LINK TOKYO 10F, 8-8-15 Nishi-Gotanda, Shinagawa-ku, Tokyo 141 Japan TEL: 81-3-5434-9678 FAX: 81-3-5434-9868 URL: www.d-link.co.jp E-MAIL: [email protected] SINGAPORE D-LINK INTERNATIONAL/D-LINK SINGAPORE 1 International Business Park, #03-12 The Synergy, Singapore 609917 TEL : 65-774-6233 FAX: 65-774-6322 E-MAIL: [email protected] URL: www.dlink-intl.com...
- Page 78 # ! " # Product Product Serial * Product installed in type of * Product installed Computer serial Model computer (e.g., Compaq 486) $ $ !! ! !!! !!!!!!! ! " ! !"! !"!#$%!%&''''''''''''''''''''''''''''' # ! ! " ...