Chapters
Table of Contents

Related Manuals for Haier HD80-26A


Summary of Contents for Haier HD80-26A
- Page 1 User Manual HD80-26A HD80-26A-F HD80-26A-DF Heat Pump Dryer...
-
Page 2: Table Of Contents
TABLE OF CONTENTS Dear customer ....................3 Scope of delivery .................... 3 Intended use ....................3 Safety instructions ..................4 Unpacking ....................... 6 Installation ...................... 6 Using the dryer rack ..................7 Front view ....................... 8 Rear view ......................9 Control panel ....................10 Program modes .................... -
Page 3: Dear Customer
DEAR CUSTOMER Thank you for your purchase of a Haier Read the instructions. product. Please read the manual and safety instructions carefully and keep Instructions showing this icon them for future reference and pass need special attention for safe them on to any future owner. -
Page 4: Safety Instructions
The tumble dryer must not be used in a non-stationary location (e.g. a ship). Do not make any alterations to the tumble dryer, unless authorised to do so by Haier. In areas which may be subject to infestation by cockroaches or other vermin, pay particular attention to keeping the tumble dryer and its surroundings in a clean condition at all times. - Page 5 Items which contain a large proportion of rubber, foam rubber (latex foam) or rubber like materials such as shower caps, waterproof textiles, rubberised articles and items of clothing and pillow dried in the tumble dryer. Items which have been cleaned using chemicals such as professional drycleaning agents, should not be dried in the tumble dryer.
-
Page 6: Unpacking
UNPACKING Remove all packaging material including the polystyrene base. All packaging material should be recycled. 1 Cut the strips. 2 Lift the cover upwards. 3 Remove the protective parts. 4 Remove the base. Ensure that any plastic wrappings, bags, etc are kept out of the reach of babies and young children. -
Page 7: Using The Dryer Rack
For further technical information, please check the type plate on the appliance. Do not dispose of electrical appliances as unsorted municipal waste, use separate collection facilities.Contact your local government for information regarding the collection systems available. If electrical appliances are disposed of in landfills or dumps, hazardous substances can leak into the groundwater and get into the food chain, damaging your health and well-being. -
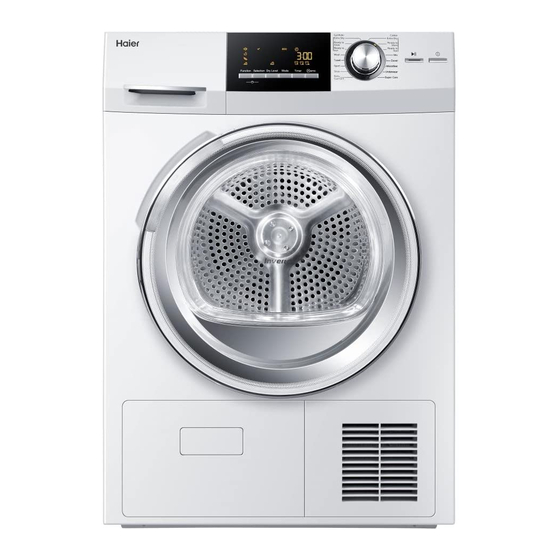
Page 8: Front View
FRONT VIEW The pictures may differ from the appliance you have purchased due to technical improvements. Synthetic Cotton Extra Dry Extra Dry Ready to Ready to Store Store Ready to Ready to E CO Iron Iron Wool Towel Duvet b i f Shoe Underwear Function... -
Page 9: Rear View
REAR VIEW 5 Power supply cord 7 Drainage outlet 6 Back plate 8 Adjustable feet English | 9... -
Page 10: Control Panel
CONTROL PANEL Synthetic Cotton Extra Dry Extra Dry Ready to Ready to Store Store Ready to Ready to Iron Iron Wool Towel Duvet Sport Microfiber Shoe Underwear Function Selection Dry Level Mode Timer Baby Ultra Care Garment 12 13 Child-lock indicator To activate the Child-lock function at any time when the dryer is powered on, press the function &... - Page 11 Note: The remaining time is a default value, this time will be re-calculated depending on additional program settings and the moisture content of the laundry. 6 Program knob Select one of the 16 programs using the knob. The indictor of the respective program lights up. See Program Modes section of the manual for further information.
- Page 12 Anti-Crease function to lengthen the automatic anticrease phase at the end of each program by 60 minutes. Note: The laundry can be removed at any time during the anti-crease phase. Press the button to set the final moisture content 11 Dry level button of the laundry at the end of cycle.
-
Page 13: Program Modes
PROGRAM MODES DRYING RECOMMENDED MAX. LOAD PROGRAM DEGREE LAUNDRY Extra Dry Extra dry Heavy cotton 8 kg Ready to Ready to wear Cotton, coats 8 kg Store *) Ready to Iron Damp Ordinary cotton 8 kg Extra Dry Extra dry Heavy synthetic 4 kg Ready to Store... -
Page 14: Preparing The Dryer
PREPARING THE DRYER 1 Connect the tumble dryer to a power socket. 2 Make sure the water tank is empty and properly installed. and properly installed. clean and properly installed. PREPARING THE LAUNDRY 1 Sort clothes according to fabric (cotton, synthetics, wool etc.). -
Page 15: Loading The Dryer
LOADING THE DRYER 1 Place the laundry evenly in the drum making sure not to overload the dryer. 2 Switch on the tumble dryer by pressing the Power button. Fabric softeners or similar products should be used as specified in the manufacturer’s instructions. -
Page 16: Load Reference
LOAD REFERENCE Bed sheet (single) Cotton Approx. 800 g Blended fabric clothes Approx. 800 g Jackets Cotton Approx. 800 g Jeans Approx. 800 g Overalls Cotton Approx. 950 g Pyjamas Approx. 200 g Shirts Approx. 300 g Socks Blended fabrics Approx. -
Page 17: End Of Dry Cycle
END OF DRY CYCLE The tumble dryer stops operation automatically when a dry cycle is complete. The display shows END. Open the tumble dryer door and remove the laundry. If the laundry is not removed the anti-crease program starts automatically. 1 Switch off the tumble dryer by pressing the Power button. - Page 18 LINT FILTER CLEANING Clean the lint filter after each dry cycle. Note: if the lint filter is very dirty, it can be cleaned under running water. Let it dry thoroughly before use. CONDENSER FILTER CLEANING Clean the condenser filter after each dry cycle.
-
Page 19: Heat Pump Technology
HEAT PUMP TECHNOLOGY The condensation dryer with heat exchanger is outstanding in terms of efficient energy consumption. These are guide values determined under standard conditions. The values may differ from those given, depending on overvoltage and undervoltage, the type of fabric, composition of the laundry to be dried, the residual moisture in the fabric and the size of the load. -
Page 20: Cleaning & Care
CLEANING & CARE TUMBLE DRYER Wipe the outside of the tumble dryer and the control panel with a damp cloth. Do not use any organic solvent or corrosive agent to avoid damage to the device. DRUM After some operation time, fabric care agents or calcium contained in the water some detergent to remove it. -
Page 21: Troubleshooting
TROUBLESHOOTING Before contacting the customer service, please check the following circumstances: PROBLEM CAUSES SOLUTION Tumble dryer – Poor connection to the Check connection to the power fails to operate. power supply. supply. – Power failure. Check the power supply. – No drying program is set. Set a drying program. -
Page 22: Electric Circuit Diagram
ELECTRIC CIRCUIT DIAGRAM NTC2 NTC3 Door switch Capacitor 10uf Water level switch Heat pump Humidity sensor Drainage pump NTC2 Lamp NTC3 Temperature sensor Fan motor Capacitor 17uf Motor 22 | English... -
Page 23: Product Fiche
PRODUCT FICHE http://www.haier.com/uk Product fiche (according EU 392/2012) Trade mark Haier HD80-26A/HD80-26A-F Mode No. HD80-26A-DF Rated capacity (kg) Type Condensing Energy efficiency class A+++ Energy consumption per year (kWh annum) Automatic or non-automatic Automatic ... -
Page 24: Customer Service
SERIAL NUMBER Warranty Card COUNTRY PHONE NUMBER COSTS Haier Italy (IT) 199-100 912 Haier Spain (ES & PT) 902 509 123 Haier Germany (DE) 0180 5 39 39 99* max. 42 Ct/Min Mobile Haier Austria (AT) 0820 001 205* Haier United Kingdom (UK) - Page 25 Mode d'emploi HD80-26A HD80-26A-F HD80-26A-DF Sèche-linge avec pompe à chaleur...
- Page 26 TABLE DES MATIÈRES Cher client ....................... 3 Contenu de la livraison .................. 3 Utilisation prévue ................... 3 Consignes de sécurité ................... 4 Déballage ......................6 Installation ...................... 6 Utilisation de l'étagère de séchage ............... 7 Vue avant ......................8 Vue arrière ....................... 9 Panneau de commande ................
-
Page 27: Cher Client
1 Mode d'emploi 2 Panier Tuyau d'évacuation UTILISATION PRÉVUE Ce sèche-linge avec pompe à chaleur Haier ne peut être tenu responsable est conçu pour un usage domestique de dommages résultant d'un uniquement. Il doit être utilisé pour fonctionnement incorrect ou sécher des articles qui ont été... -
Page 28: Consignes De Sécurité
Le sèche-linge doit être utilisé sur un endroit stable (par exemple un bateau). Ne procéder à des modifications sur le sèche-linge, qu'après autorisations de Haier. Dans des zones susceptibles d'être infestées par des cafards ou d'autres animaux nuisibles, veillez à la propreté du sèche-linge et de son environnement à... - Page 29 Ne pas sécher des articles non lavés dans le sèche-linge. Ne pas dépasser la charge nominale. de cuisine, l'acétone, l'alcool, l'essence, le diesel, le kérosène, les détachants, la térébenthine, les cires, les détachants pour la cire ou tout autre produit chimique ne doit pas être séché...
-
Page 30: Déballage
DÉBALLAGE Retirez tous les éléments d'emballage, y compris la base en polystyrène. Tout le matériel d'emballage est à recycler. 1 Découpez les lanières. 2 Soulevez l'emballage. 3 Retirez les éléments protecteurs. 4 Retirez la base. Ne pas laisser les emballages plastiques, les sachets, etc. - Page 31 Pour plus d'informations techniques, veuillez consulter la plaquette signalétique figurant sur l'appareil. Ne pas éliminer les appareils électriques avec les déchets ménagers non triés, utiliser des centres de collecte séparés. Contacter votre commune pour en savoir plus sur les systèmes de collecte disponibles. Si les appareils électriques sont éliminés dans des décharges ou dépotoirs, des substances dangereuses peuvent s'échapper dans la nappe phréatique et s'introduire dans la chaîne alimentaire, portant...
-
Page 32: Vue Avant
VUE AVANT L'image peut être différente de l'appareil que vous avez acheté en raison des Synthétique Coton Extra sec Extra sec Prêt à Prêt à ranger ranger t ê r à ê r à t E CO Laine Mixte Serviette Couette Sport Microfibres... -
Page 33: Vue Arrière
VUE ARRIÈRE 5 Cordon électrique 6 Plaque arrière 8 Pieds réglables Français | 9... -
Page 34: Panneau De Commande
PANNEAU DE COMMANDE Synthétique Coton Extra sec Extra sec Prêt à Prêt à ranger ranger Prêt à Prêt à repasser repasser Laine Mixte Serviette Couette Sport Microfibres Sous Chaussures Fonction Sélection Séchage Minuteur émo Mode Function Selection Dry Level Temp. Timer Timer vêtements... - Page 35 le départ différé. le déroulement du cycle de séchage (séchage, rafraîchissement, fin du cycle). Remarque d'interruption de l'alimentation électrique, la fonction est annulée automatiquement. Bouton programme Sélectionnez l'un des 16 programmes en utilisant ce bouton. Le voyant lumineux du programme correspondant s'allume.
- Page 36 Utilisez cette fonction pour les textiles délicats. La température est réduite et le cycle de séchage est prolongé pour mieux prendre soin du linge. Utilisez cette fonction pour prolonger de 60 minutes la phase Anti-froissage automatique Remarque: : lors de la phase Anti-froissage, il est possible de retirer le linge à...
-
Page 37: Modes De Programmes
MODES DE PROGRAMMES NIVEAU LINGE MAX. CHARGE PROGRAMME SECHAGE RECOMMANDE Très sec Extra sec Coton lourd 8 kg Prêt à Prêt à porter Coton, manteaux 8 kg ranger *) Prêt à repasser Vapeur Coton ordinaire 8 kg Très sec Extra sec Matières synthétiques 4 kg lourdes... -
Page 38: Préparation Du Sèche-Linge
PRÉPARATION DU SÈCHE-LINGE 1 Branchez le sèche-linge à une prise électrique. 2 Le bac d'eau doit être vide et correctement installé. soit propre et correctement installé. condenseur soit propre et correctement installé. PRÉPARATION DU LINGE 1 Triez les vêtements en fonction de leur matière (coton, matières synthétiques, laine etc.). -
Page 39: Chargement Du Sèche-Linge
CHARGEMENT DU SÈCHE-LINGE 1 Placez le linge uniformément dans le tambour en évitant de le surcharger. 2 Mettez le sèche-linge en marche en appuyant sur la touche Power (marche). Les assouplissants ou produits identiques sont à utiliser conformément aux consignes du fabricant. -
Page 40: Indications De Charge
INDICATIONS DES CHARGES Drap (simple) Coton Env. 800 g Vêtements de textiles Env. 800 g mélangés Vestes Coton Env. 800 g Jeans Env. 800 g Combinaisons de travail Coton Env. 950 g Pyjamas Env. 200 g T-shirts Env. 300 g Socquettes Tissus mélangés Env. -
Page 41: Fin Du Cycle De Séchage
FIN DU CYCLE DE SÉCHAGE Le sèche-linge s'arrête de fonctionner automatiquement lorsqu'un cycle de FIN. Ouvrez la porte du sèche-linge et retirez le linge. Si le linge n'est pas retiré, le programme Anti-froissage démarre automatiquement. 1 Eteignez le sèche-linge en appuyant sur la touche Power. - Page 42 NETTOYAGE DU FILTRE À PELUCHES de séchage. 1 Retirez le ltre à peluches du tambour. résidu. Remarque il peut être nettoyé sous le robinet. Laissez-le sécher soigneusement avant utilisation. NETTOYAGE DU FILTRE DU CONDENSEUR Veillez à nettoyer le filtre du condenseur après chaque cycle de séchage.
-
Page 43: Technologie De Pompe À Chaleur
TECHNOLOGIE DE POMPE À CHALEUR Le sèche-linge par condensation avec échangeur de chaleur présente d'excellentes performances en termes de consommation énergétique. Ces valeurs de référence sont déterminées dans des conditions standard. Ces valeurs sont différentes de celles transmises; elles varient en fonction de la surtension et de la sous-tension, du type de tissu, de la composition du linge à... -
Page 44: Nettoyage Et Entretien
NETTOYAGE ET ENTRETIEN SECHE-LINGE Essuyez l'extérieur du sèche-linge et le panneau de commande avec un chiffon mouillé. Ne pas utiliser de solvants organiques ou d'agents corrosifs pour éviter tout dommage à l'appareil. TAMBOUR A vec le temps, les lessives ou le calcaire contenu dans l'eau peuvent former un film quasiment invisible sur l'intérieur du tambour. -
Page 45: Dépannage
DÉPANNAGE Avant de contacter le service client, veuillez contrôler les points suivants : PROBLEME CAUSES SOLUTION Le sèche-linge – Mauvais branchement ne fonctionne électrique. électrique. pas. – Pas d'électricité. électrique. – Aucun programme de Sélectionnez un programme de séchage n'est sélectionné. séchage. -
Page 46: Diagramme Du Circuit Électrique
DIAGRAMME DU CIRCUIT ÉLECTRIQUE NTC2 NTC3 Interrupteur de la porte Capacité 10uf Interrupteur du niveau d'eau Pompe à chaleur Capteur d'humidité Pompe de vidange NTC2 Capteur de température Lampe NTC3 Capteur de température Moteur de ventilation Capacité 17uf Moteur 22 | Français... -
Page 47: Fiche De Produit
Fiche de produit http://www.haier.com/fr Fiche de produit (selon EU 392/2012) Haier la marque commerciale HD80-26A/HD80-26A-F la référence du modèle HD80-26A-DF la capacité nominale en (kg) Type Condenseur la classe d’efficacité énergétique A+++ la consommation d’énergie annuelle pondérée (kWh/annum) ... -
Page 48: Service Client
PAYS NUMERO DE FRAIS TELEPHONE Haier Italie (IT) 199-100 912 Haier Espagne (ES et PT) 902 509 123 Haier Allemagne (DE) 0180 5 39 39 99* : 14 c/min max. mobile : 42 c/min max. Haier Autriche (AT) 0820 001 205* : 14,53 c/min max.