Table of Contents
- 1 Table of Contents
- 2 Speed Controls
- 3 Controles de Velocidad
- 4 Réglage de la Vitesse
- 5 Ensamblaje
- 6 Assemblage
- 7 Using the Dicing Disk
- 8 Uso del Disco para Cortar Cubitos
- 9 Utilisation du Disque de Découpage en Dés
- 10 Using the Slicing Disk
- 11 Uso del Disco para Rebanar
- 12 Utilisation du Disque Éminceur
See also:
User Manual
Table of Contents

Related Manuals for Black & Decker FP6010


Summary of Contents for Black & Decker FP6010
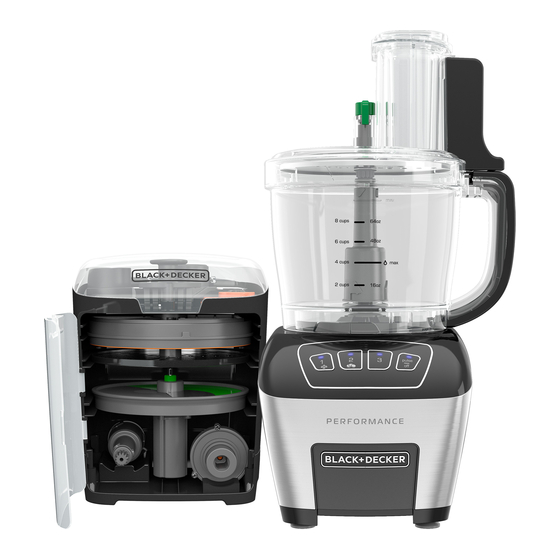
- Page 1 GETTING STARTED WITH YOUR PERFORMANCE DICING FOOD PROCESSOR PROCESADOR PREPÁRESE A USAR SU DE ALIMENTOS PARA CORTAR EN CUBITOS POUR COMMENCER AVEC VOTRE ROBOT CULINAIRE À DÉCOUPAGE EN DÉS FP6010...
- Page 2 Recipe Book Included! When you need easy, consistent and delicious results, reach for your PERFORMANCE DICING FOOD PROCESSOR! Make perfect dices and thin to thick slices effortlessly following the included recipes or your own distinct creations. Enjoy! ¡Libro de Recetas Incluido! Cuando necesite resultados fáciles, consistentes y deliciosos, ¡acuda a su PROCESADOR DE ALIMENTOS PARA CORTAR EN CUBITOS...
-
Page 3: Table Of Contents
TA BLE OF CONTE NTS TA BLA DE CO NT ENIDO MAT I ÈRE S Speed Controls Controles de Velocidad Réglage De La Vitesse Assembling The Food Processor Ensamblaje Assemblage Using The Dicing Disk Uso Del Disco Para Cortar Cubitos Utilisation Du Disque De Découpage En Dés Using The Slicing Disk Uso Del Disco Para Rebanar... -
Page 4: Speed Controls
SP EED CONT ROL S CON T ROLE S DE V ELOCIDAD RÉGLAGE DE LA VIT ESS E SPEED 1 SPEED 2 SPEED 3 WARNING: Blades/ disks are sharp. Dicing Disk Handle carefully Dough Blade Slicing Disk S Blade and refer to the S Blade Shredding Disk User Manual for full... -
Page 5: Ensamblaje
ASSE MBLI NG EN SA MBLAJE ASSEMBLAGE Place workbowl on base. Turn Install disk or blade. Place Insert food pusher into wide counterclockwise to lock. lid on workbowl, turn mouth feed chute. counterclockwise to lock. Coloque el recipiente en la Instale el disco o la cuchilla. -
Page 6: Using The Dicing Disk
USI NG T HE DI C I NG DIS K USO DEL DI SCO PA RA CORTAR C UBI TOS UTILISATION DU DISQUE DE DÉCOUPAGE EN DÉS Install dicing shaft into bottom Place dicing disk in workbowl Install the blade: grasp center of dicing disk. - Page 7 USIN G T HE DI CI NG DIS K USO DE L DI SCO PA RA CORTAR CUBI TOS UTILISATION DU DISQUE DE DÉCOUPAGE EN DÉS Place the curved edge of blade Lower center of blade over Lock lid on bowl. Add food below the lip on the edge of the center shaft.
- Page 8 USI NG T HE DI C I NG DIS K USO DEL DI SCO PA RA CORTAR C UBI TOS UTILISATION DU DISQUE DE DÉCOUPAGE EN DÉS Grab center of blade and lift When finished, press PULSE | OFF. Pull curved edge away up and off center of disk first.
- Page 9 USIN G T HE DI CI NG DIS K USO DE L DI SCO PA RA CORTAR CUBI TOS UTILISATION DU DISQUE DE DÉCOUPAGE EN DÉS Use finger holes to remove Place grid cleanout tool into Remove dicing shaft from dicing disk from workbowl.
-
Page 10: Using The Slicing Disk
USI N G T HE SLI C I NG DISK USO D EL D I SCO PARA RE BANAR UT I LI SATI ON DU DI SQUE ÉMI NCE UR Lock lid onto workbowl and Place slicing disk onto center Press speed button 1 or 2, add food to feed chute. - Page 11 USI NG THE SLICI NG DIS K USO DEL DI SCO PARA RE BANAR UT IL ISAT I ON D U DI SQUE ÉM INCE UR Press PULSE|OFF to stop Adjust slicing thickness by turning the slicing. external lever counterclockwise for thick slices and clockwise for thin slices.
- Page 12 BLACK+DECKER et le logo BLACK+DECKER sont des marques de commerce de The Black & Decker Corporation, et sont utilisés sous licence. Tous droits réservés. Made in People’s Republic of China Fabricado en la República Popular de China Fabriqué en République populaire de Chine FP6010 T22-5001514 © 2014 The Black & Decker Corporation and Spectrum Brands, Inc. Middleton, WI 53562...