Yamaha YWA-10 - Wireless Network Adapter Manual
- Owner's manual (6 pages) ,
- Quick setup manual (1 page) ,
- Configuration manual (1 page)
- 1 Package contents
- 2 Features
- 3 Setup procedure
- 4 Part names
- 5 Things to check before setup
- 6 Step 1. Checking the base unit
- 7 Step 2-A. Connecting to the base unit (using WPS)
- 8 Step 2-B. Connecting to the base unit (manual configuration)
- 9 1. Check the network that you are attempting to connect to
- 10 Step 3. Connecting to an AV product
- 11 Troubleshooting
- 12 Resetting this unit
- 13 Changing the IP address
- 14 Factory default settings
- 15 Specifications
- 16 Documents / Resources
Package contents
To assure the finest performance, please read this manual carefully.
Keep it in a safe place for future reference.
Check that the following accessories are supplied with the product.

Features
Allows Yamaha AV products equipped with a NETWORK port and a DC OUT jack to be connected with a wireless LAN.
Compatible devices can connect to the YWA-10 through a USB connector instead of a DC OUT jack. Refer to the website below for a list of compatible devices.
http://yamaha.com/

The firmware of this unit may be updated at times for improvement. Please refer to the following website for information on firmware updates.
http://yamaha.com/
Setup procedure
- Checking the base unit
- Connecting to the base unit
- When the Wireless LAN router (base unit) has aWPS button
→ Carry out the procedures in "Step 2-A Connecting to the base unit (using WPS)" to connect to the base unit. - When the Wireless LAN router (base unit) doesnot have a WPS button
→ Carry out the procedures in "Step 2-B Connecting to the base unit (manual configuration)" to connect to the base unit.
✻ If connecting using "(using WPS)" does not succeed, refer to "(manual configuration)" and configure the connection.
- When the Wireless LAN router (base unit) has aWPS button
- Connecting to an AV product
The Wi-Fi CERTIFIED Logo is a certification mark of the Wi-Fi Alliance.

The Wi-Fi Protected Setup Mark is a mark of the Wi-Fi Alliance.

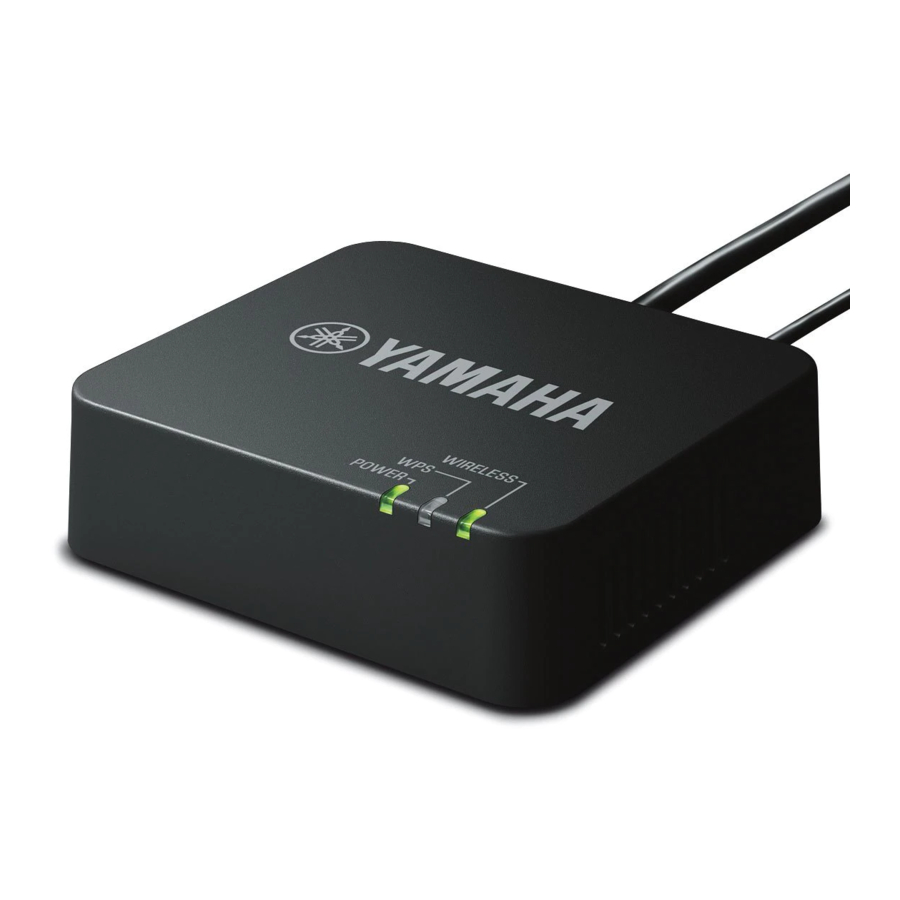
Part names

Things to check before setup
- If you do not already have an Internet connection, please apply for onebefore setting up this unit.
- Do not connect the USB power cable to a USB hub.
Step 1. Checking the base unit
- Check that the wireless LAN router (base unit) can connect to the Internet without difficulty.

Notes
- If you do not currently have an Internet subscription, please obtain one.
- A wireless LAN router is required to set up a connection using thisprocedure. Please obtain a wireless LAN router if you do not have one available.
- Check whether the wireless LAN router (base unit) is WPS compatible. Check the owner's manual and other documentation supplied with the wireless LAN router.
Note
WPS (Wi-Fi Protected Setup) is a function that uses a button to configure connections and security on wireless LAN devices.
*Some Wi-Fi devices have "WPS" written on them.
- When the wireless LAN router (base unit) has a WPS button
Carry out "Step 2-A Connecting to the base unit (using WPS)", and then "Step 3 Connecting to an AV product", in that order. - When the wireless LAN router (base unit) does not have a WPS button
Carry out "Step 2-B Connecting to the base unit (manual configuration)", and then "Step 3 Connecting to an AV product", in that order.
Step 2-A. Connecting to the base unit (using WPS)
Notes
- This explanation details the procedure for connecting using the WPSfunction. When using a base unit that is not equipped with a WPS function, refer to "Step 2-B Connecting to the base unit (manual configuration)" at right.
- You will need to change the IP address of this unit if you are using morethan one YWA-10 at the same time.
Refer to "Troubleshooting" on the reverse page for more details.
1. Supply power to the YWA-10
- Turn on the power of the AV product that you wish to connect this unit to.
- Use the supplied USB power cable to connect the power connector on this unit to the DC OUT jack on the AV product.
The indicator on the front panel of this unit lights. Wait for approximately one minute after the indicator lights and then carry out the following procedure.
Note
If the AV product is not equipped with a DC OUT jack, connect to the USB connector on the front panel.


2. Connect the base unit
- Press the WPS button on the wireless LAN router (base unit).
Refer to the owner's manual of the wireless LAN router (base unit) for information on how to use the WPS button. - Press and hold the WPS button on the rear of this unit for more than 5 seconds and release it.
The WPS indicator on the front panel lights.

- Wait until the WPS indicator turns off (this will take two minutes at most).

Note
If the WPS indicator blinks, carry out procedure 2 again, starting at number 1.
This completes connection with the base unit. Proceed to "Step 3 Connecting to an AV product".


Step 2-B. Connecting to the base unit (manual configuration)
Notes
- When making a manual connection to the base unit, or when you areunable to connect using the procedure described in "Step 2-A Connecting to the base unit (using WPS)" at left, refer to the explanation below.
- If the PC you are using to configure this unit is connected to the wirelessLAN, turn the PC's wireless LAN function off.
- You will need to change the IP address of this unit if you are using morethan one YWA-10 at the same time.
Refer to "Troubleshooting" on the reverse page for more details.
1. Check the network that you are attempting to connect to
You will need the setting information from the wireless LAN router (base unit) when connecting or setting up this unit. Have the following table ready for use.
* Refer to the owner's manual of the wireless LAN router (base unit) for information on how to check its wireless LAN settings.
- When using WEP security settings
| Name | Wireless LAN setting | |
| (1) | SSID | |
| (2) | Security mode | ❑ Open ❑ Shared |
| (3) | Security key type | ❑ Hexadecimal*1 ❑ ASCII*2 |
| (4) | Default key | ❑ Key 1 ❑ Key 2 ❑ Key 3 ❑ Key 4 |
| (5) | Password |
*1: 16-digit number (0–9, A–F), *2: ASCII (0–9, A–Z, a–z)
- When using WPA/WPA2 security settings
| Name | Wireless LAN setting | |
| (1) | SSID | |
| (2) | Security mode | ❑ WPA-PSK ❑WPA2-PSK |
| (3) | Encryption type | ❑ TKIP ❑ AES |
| (4) | Password |
Note
Use only alpha-numeric characters (0–9, A–Z, a–z) for an SSID or password. Otherwise, Yamaha cannot guarantee normal operation.
Refer to the owner's manual of the wireless LAN router (base unit) for information on how to change the SSID or password.
2. Connect this unit to a PC
- Turn the PC power on.
- Use the supplied LAN cable to connect the LAN1 port (or the LAN2 port) on this unit to the LAN port on the PC. Then, use the supplied USB power cable to connect the power connector on this unit to the USB connector on the PC.
The indicator on the front panel of this unit lights. Wait for approximately one minute after the indicator lights and then carry out the following procedure.

3. Setting up this unit
- Start the web browser on the PC.
- Enter "ywa.setup" in the address field in the Web browser, and press the Enter key
.
Note
If the login screen does not appear even after you enter "ywa.setup", enter "192.168.1.249" and press the Enter key. If the login screen still does not appear, refer to "Troubleshooting". - On the login screen, enter "admin" in the user name field, and "password" in the password field, and then click the OK button.

Note
If you cannot login to the setup screen, check that you have entered the correct letters. - Where necessary, select the display language from the drop-down list.
The screen display language changes.
Note
The display examples in this manual use English as the display language. - Click [Setup Wizard] and then [Next], in that order.
The "Wireless Site Survey" screen appears. - On the "Wireless Site Survey" screen, choose the same SSID as in (1) on the table in "1 Check the network that you are attempting to connect to." and then click [Next].

Notes


- When the SSID does not appear, click [Refresh] and then search again.
- If the SSID (the name of the device you are connecting to) does notdisplay even when the above operation is performed, the wireless LAN router (base unit) power is turned off, or the SSID name notification is turned off (SSID Broadcast refusal).
In such cases, enter the same SSID as the wireless LAN router (base unit) directly. - It is recommended that you connect to an SSID with an RSSI (ReceivedSignal Strength Indication) of 50 or above.
- Follow the procedure in "1 Check the network that you are attempting to connect to." to set up this unit.
When (2) in the table is "Open / Shared"
Refer to  When using WEP security settings" in the table on the reverse page to set up this unit.
- When (2) in the table is "Open"
→ Select "Open" under "Encryption".
When (2) in the table is "Shared"
→Select "SHARED" under "Encryption". - When (5) in the table is set to use a 10 or 5 letter password
→ Select "64Bit" under "Key Length".
When (5) in the table is set to use a 26 or 13 letter password
→Select "128Bit" under "Key Length". - When (3) in the table is "Hexadecimal"
→Select "Hex" under "Key Format".
When (3) in the table is "ASCII"
→Select "ASCII" under "Key Format". - Enter the same encryption key as in (5) on the table in the same Encryption key field as in (4) in the table.
For example, when (4) in the table is "Key 1", enter the same password as "Encryption Key 1" from (5) in the table.


When (2) in the table is "WPA-PSK"/"WPA2-PSK"
Refer to When using WPA/WPA2 security settings" in the table on the reverse page to set up this unit.
- Enter the profile name of your choice in "profile name".


Note
To register multiple base units repeat procedures 5 through 7.
- The "LAN Setup" screen appears. Change the IP address if it is already being used by another device.
Check the settings and click [APPLY].

- The seconds before this unit restarts are counted down (30 seconds). When the count reaches "0", this unit will restart. Click "OK" and check that this unit can connect to the access point.
- Close the browser.
- Remove the connected LAN cable and USB power cable.

This completes connection with the base unit. Proceed to "Step 3 Connecting to an AV product".
Step 3. Connecting to an AV product
- Use the supplied LAN cable to connect the LAN1 port (or the LAN2 port) on this unit to the NETWORK port on the AV product. Then, use the supplied USB power cable to connect the power connector on this unit to the DC OUT jack on the AV product.
The indicator on the front panel of this unit lights. Wait for approximately one minute and then carry out the following procedure.
Note
If the AV product is not equipped with a DC OUT jack, connect to the USB connector on the front panel.

- Turn on the power of the AV product that you wish to connect this unit to.
- Check that the network functions of the connected AV products function correctly.
Refer to the owner's manual of the AV product for information on these network functions.

This completes the setup procedure.
Troubleshooting
- The power does not turn on
- Check that the USB power cable is firmly connected to this unit and the AVproduct.
- Check that the AV Receiver Network Standby is set to ON. (If NetworkStandby is OFF, power supply to the DC OUT jack will turn OFF when the AV Receiver is set to Standby.)
- Cannot connect using WPS
- Only some devices are WPS compatible. If you are unable to connect usingWPS, configure the settings manually.
- An error occurs when "ywa.setup" or "192.168.1.249" is input in the address field of the web browser, or the login screen does not appear.
- Cannot log in from the login screen
- Unable to find the base unit in "Wireless Site Survey" on the setup screen
- Unable to configure settings in "Wireless Site Survey" on the setup screen
- Not connected to the Internet, or connected to the Internet, but experiencing sound skipping.
Resetting this unit
Note
Resetting this unit will erase all of its settings. Be sure to note down the necessary information before resetting.
- Check that this unit's power is on.
- Release the Reset button when all the indicators are blinking.
When this unit restarts after approximately 2 minutes, resetting is complete.
When resetting is complete, set up this unit again, starting from "Step 2-A Connecting to the base unit (using WPS)" or "Step 2-B Connecting to the base unit (manual configuration)".
Changing the IP address
- Reset this unit.
Refer to "Resetting this unit". - Connect this unit to a PC.
Refer to "2 Connect this unit to a PC" in "Step 2-B Connecting to the base unit (manual configuration)". - Open the setting screen of this unit.
Refer to "3 Setting up this unit" in "Step 2-B Connecting to the base unit (manual configuration)", and carry out procedures 1-3. - Set up this unit again.
Carry out "Step 2-A Connecting to the base unit (using WPS)," or "Step 2-B Connecting to the base unit (manual configuration)".
Factory default settings
- User name (Login ID): admin
- IP address: 192.168.1.249
- Password: password
Specifications
| Wireless section | |
| Wireless type | IEEE802.11n, IEEE802.11g, IEEE802.11b |
| Frequency of operation | US: 1—11 ch, EU: 1—13 ch |
| Frequency band | 2.4 GHz (2,400—2,483.5 MHz) |
| Type of modulation | IEEE802.11n: OFDM, IEEE802.11g: OFDM, IEEE802.11b: DSSS |
| Antenna gain | 2 dBi |
| Antenna | Internal antenna x 2 (2T2R) |
| Access mode | Infrastracture mode |
| Bandwidth | 20 MHz and 40 MHz |
| Security | WPA2-PSK (TKIP), WPA2-PSK (AES), WPA-PSK (TKIP), WPA-PSK (AES), SHARED, OPEN (WEP: 64bit/128bit, Key format: ASCII/Hexadecimal), Disabled (No encryption) |
| Wired section | |
| Ethernet type | IEEE802.3u (100Base-Tx), IEEE802.3i (10Base-T) |
| Interface | RJ-45 port x 2 (LAN x 2) |
| Ethernet cable | Category 5 or more |
| Configuration window requirement | |
| OS | Windows 7(32bit/64bit)/Vista(32bit/64bit)/XP, Mac OS X 10.4/10.5/10.6, CPU: Intel/PowerPC support) |
| Browser | Internet Explorer 6 or above, Firefox 5.0 or above |
| General | |
| Dissipation power | Maximum of approximately 2.3 W |
| Power supply | DC +5V 0.5 A |
| External dimensions | 78 x 70 x 22 (mm) *Excluding protrusions |
| Weight | 62 g |
| Operating temperature range | Temperature: 0—40°C Humidity: 10—90% (No condensation) |
| Strage temperature range | Temperature: –20—60°C Humidity: 10—90% (No condensation) |
* Specifications are subject to change without notice.
© 2012 Yamaha Corporation

Documents / Resources
References
Download manual
Here you can download full pdf version of manual, it may contain additional safety instructions, warranty information, FCC rules, etc.
Thank you! Your question has been received!


Need Assistance?
Do you have a question about the YWA-10 that isn't answered in the manual? Leave your question here.