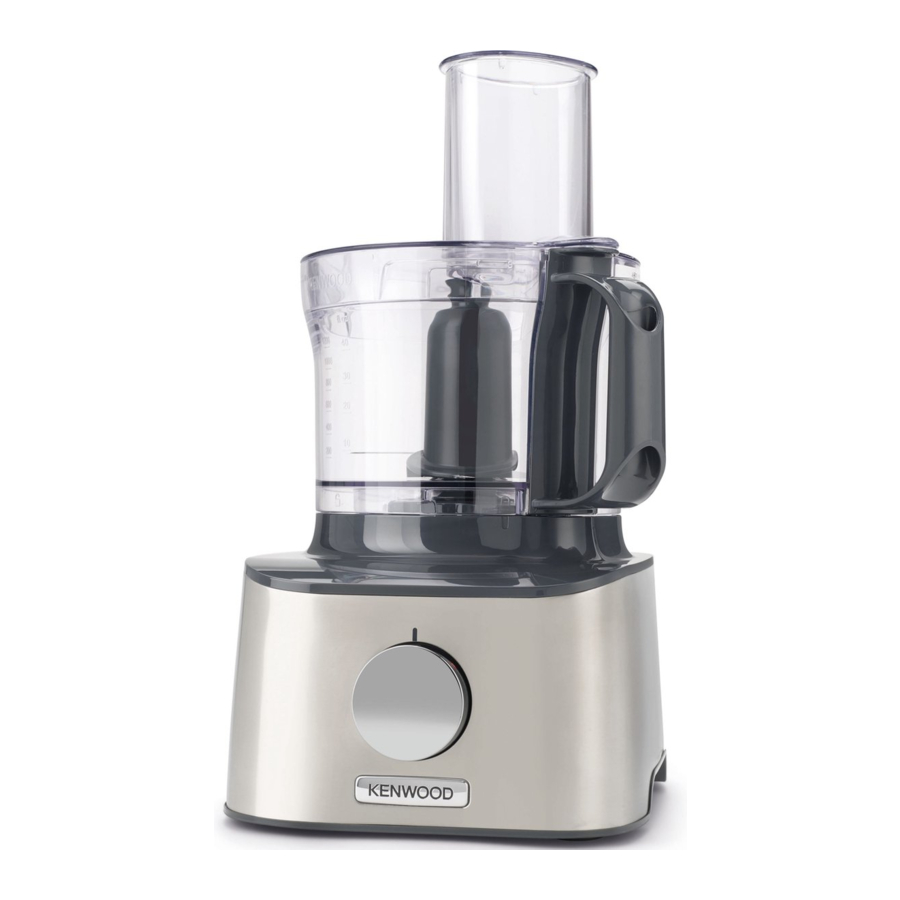
Kenwood FDM30 - MultiPro Compact Food Processor Manual
- Instructions manual (203 pages) ,
- Instructions manual (27 pages) ,
- Instructions manual (32 pages)
- 1 Safety
- 2 Key
- 3 To Use Your Food Processor
- 4 Using The Attachments
- 5 To Use Your Blender
- 6 Knife Blade
- 7 Dough Tool
- 8 Dual Whisk
- 9 Discs
- 10 Citrus Juicer
- 11 Mini Chopper/Mill
- 12 Grinding Mill
- 13 Juice Extractor
- 14 Express Dice
- 15 Express Serve
- 16 Care and Cleaning
- 17 Service and Customer Care
- 18 Recommended Usage Chart
- 19 Troubleshooting Guide
- 20 Documents / Resources
Safety
- DO NOT touch the sharp blades. The blades and discs are very sharp, handle with care. Always hold by the finger grip at the top, away from the cutting edge, when handling the sharp cutting blades, emptying the bowl and during cleaning.
- DO NOT process hot ingredients.
- Be careful if hot liquid is poured into the food processor or blender as it can be ejected out of the appliance due to sudden steaming.
- Do not operate your appliance for longer than the times specified below without a rest period. Processing continuously for longer periods can damage your appliance.
| Function/Attachment | Maximum Operation Time | Rest Period Between Operations |
| Blender | 60 secs | Unplug the appliance and allow to cool down for 15 minutes |
| Heavy mixtures in the bowl (e.g. Dough) | 60 secs | |
| Mini Chopper/Mill | 30 secs | |
| Grinding Mill | 60 secs |
- Never fit the blade assembly to the power unit without the goblet or mill jar/lid fitted.
![]()
Before removing the lid from the bowl, blender or mill from the power unit:

- This appliance will be damaged and may cause injury if the interlock mechanism is subjected to excessive force.
- Never use a damaged appliance. Get it checked or repaired:
see 'Service and customer care'. - Only use the appliance for its intended domestic use.
Kenwood will not accept any liability if the appliance is subject to improper use, or failure to comply with these instructions.
Blender
![]() DO NOT process hot ingredients.
DO NOT process hot ingredients.![burn hazard]() SCALD RISK: Hot ingredients must be allowed to cool to room temperature before placing in the goblet or before blending.
SCALD RISK: Hot ingredients must be allowed to cool to room temperature before placing in the goblet or before blending.
 SCALD RISK: Hot ingredients must be allowed to cool to room temperature before placing in the goblet or before blending.
Mill Attachments
Mini Chopper/Mill
Grinding Mill
Juice extractor
Express Dice/Express Serve Attachment and Discs
- The cutting grid and discs are very sharp; handle with care when fitting, removing and cleaning. Always hold by the finger grip away from the cutting edge when handling the sharp cutting blades, emptying the bowl and during cleaning.
Express Serve
- Do not operate when using the Dicer or Discs without the slinger plate fitted. If the slinger plate is not fitted food will clog under the plate and not exit the food outlet, resulting in damage to your attachment.
Cleaning
- Wipe the power unit and whisk drive head with a damp cloth, then dry. Ensure that the interlock area
![]() is clear of food debris.
is clear of food debris.
 is clear of food debris.
Before plugging in

Plug and Fuse Information
- The wires in the cord are coloured as follows:
Blue = Neutral
Brown = Live
Note:
Before using for the first time
- Remove the plastic blade covers from the knife blade. Take care the blades are very sharp. These covers should be discarded as they are to protect the blade during manufacture and transit only.
Key
Processor

- Pusher
- Feed tube
- Lid
- Bowl
- Detachable drive shaft
- Power unit
- Speed/pulse control
- Safety interlocks
- Cord storage (at back)
Plastic Blender (if supplied)

- Blade assembly
- Sealing ring
- Goblet
- Filler cap
- Lid
Glass Blender (if supplied)

- Blade assembly
- Sealing ring
- Goblet
- Lid
- Filler cap
Standard Attachments

- Knife blade
- Dough tool
- Dual whisk
- 4mm slicing/grating disc
- 2mm slicing/grating disc
- Extra fine grating disc
Attachments
Not all of the attachments listed below may be included with your food processor. Attachments are dependent upon the model variant. Visit www.kenwoodworld.com for information on how to buy an attachment not included in pack.
Optional Attachments

- Citrus juicer (if supplied)
- Glass mini chopper/mill (if supplied)
- Plastic mini chopper/mill (if supplied)
- Grinding mill (if supplied)
- Juice extractor (if supplied)
- Express Dice (if supplied)
- Express Serve (if supplied)
To Use Your Food Processor
Illustrations –
- Then fit the bowl by aligning the
![]() on the bowl with the
on the bowl with the ![]() on the power unit, turn clockwise until it locks
on the power unit, turn clockwise until it locks ![]() .
.
- Do not use the lid to operate the processor, always use the on/off speed control.
- The processor will not operate if the bowl or lid are not fitted correctly into the interlock. Check that the feed tube and bowl handle are situated to the right front hand corner.
- Use the pulse (P) for short bursts. The pulse will operate for as long as the control is held in position.
- Always switch off and unplug before removing the lid.
Using The Attachments
Refer to recommended usage chart for each attachment.
To Use Your Blender
 Plastic Blender (if supplied)
Illustrations – 
- Leaking will occur if the seal is damaged or incorrectly fitted.
- Hold the underside of the blade assembly and insert the blades into the goblet - turn anti-clockwise until it is secure. Refer to the graphics on the underside of the blade assembly as follows:
![]() Unlocked position
Unlocked position
![]() Locked position
Locked position - Place the blender onto the power unit, align the
![]() on the blender with the
on the blender with the ![]() on the power unit and turn clockwise to lock
on the power unit and turn clockwise to lock ![]() .
.
 Unlocked position
  Locked position
- The appliance will not operate if the blender is incorrectly fitted to the interlock.
 Glass Blender (if supplied)
Illustrations – 
- Leaking will occur if the seal is damaged or incorrectly fitted.
- Screw the goblet onto the blade assembly. Refer to the graphics on the underside of the blade unit as follows:
![]() Unlocked position
Unlocked position
![]() Locked position
Locked position - Place the blender onto the power unit, align the
![]() on the blender with the
on the blender with the ![]() on the power unit and turn clockwise to lock.
on the power unit and turn clockwise to lock.
 on the blender with the
 - The appliance will not operate if the blender is incorrectly fitted to the interlock.
 Hints and Tips
Knife Blade

Follow the instructions under 'to use your food processor'.
Hints and Tips
Dough Tool
 Use for yeasted dough mixes.
Follow the instructions under 'to use your food processor'.
Hints and Tips
Dual Whisk
Using The Whisk

Hints and Tips
 Use for light mixes only such as eggwhites and cream.
 The whisk is not suitable for making allin one cake mixes as these mixes are too heavy and will damage it. Always use the knife blade.
 Discs
To Use The Cutting Discs

- Switch on and push down evenly with the pusher
![]() - never put your fingers in the feed tube.
- never put your fingers in the feed tube.
 - never put your fingers in the feed tube.
 Hints and Tips
Citrus Juicer
(if supplied)

- Cone
- Sieve
To use the citrus juicer
- The citrus juicer will not operate if the sieve is not locked correctly.
Hints and Tips
Mini Chopper/Mill
 (if supplied)


- Jar
- Sealing ring
- Blade assembly
- Screw the blade assembly onto the jar until finger tight. Refer to the graphics on the underside of the blade assembly as follows:
![]() Unlocked position
Unlocked position
![]() Locked position
Locked position - Place the mill onto the power unit, align the
![]() on the mill with the
on the mill with the ![]() on the power unit and turn clockwise to lock.
on the power unit and turn clockwise to lock.
 on the mill with the
  on the power unit and turn clockwise to lock.
 Hints and Tips
Grinding Mill
(if supplied)

- Mill lid
- Grinding mill blade assembly
Hints and Tips
Juice Extractor
(if supplied)

- Pusher
- Juicer lid
- Pulp remover
- Filter drum
- Bowl
- Juicing spout
To use the juice extractor
- Fit the attachment lid - turn clockwise until it locks. Your juicer will not operate if the bowl or lid are not fitted correctly into the interlock.
Hints and Tips
Express Dice
(if supplied)

- Dicing disc
- Dicing grid
- Dicing pusher
To use the Express Dice
Hints and Tips
- To prevent the food from jamming do not pack the food tightly in the feed tube – ideally the food should be cut no larger than:
![]()

Note:
Cleaning the grid
Use the end of the pusher to dislodge any food which may become trapped in the dicing grid.

The Express Dice can also be used to produce French fries, crudités and batons.
Express Serve
(if supplied)

- Express serve drive shaft
- Extension chute
- Base
- Slinger plate
- Fit the small drive shaft to the main shaft – the Express serve will not operate unless fitted.
Use in conjunction with the following:

Dicer and Discs
Care and Cleaning
- Handle the blade and cutting discs with care - they are extremely sharp.
Power Unit
- Wipe with a damp cloth, then dry. Ensure that the interlock area
![]() is clear of food debris.
is clear of food debris. - Store excess cord in the storage area at the back of the power unit
![]() .
.
 is clear of food debris.
 .
.Cleaning Instructions
Refer to the relevant illustration  .
.

Service and Customer Care
- If you experience any problems with the operation of the processor, before calling for assistance refer to the Troubleshooting Guide or visit www.kenwoodworld.com.
UK
If you need help with:
- using your appliance or
- servicing, spare parts or repairs (in or out of guarantee)
![]() call Kenwood customer care on
call Kenwood customer care on
0345 222 0458. Have your model number (e.g. TYPE: FDM30) and date code (5 digit code e.g. 21T04) ready.
They are on the underside of the power unit. - spares and attachments
![]() call 0844 557 3653.
call 0844 557 3653.

Other countries
- If you experience any problems with the operation of your appliance, before requesting assistance refer to the 'Troubleshooting Guide' section in the manual or visit www.kenwoodworld.com.
- Please note that your product is covered by a warranty, which complies with all legal provisions concerning any existing warranty and consumer rights in the country where the product was purchased.
- If your Kenwood product malfunctions or you find any defects, please send it or bring it to an authorised KENWOOD Service Centre. To find up to date details of your nearest authorised KENWOOD Service centre visit www.kenwoodworld.com or the website specific to your Country.
- Designed and engineered by Kenwood in the UK.
- Made in China.

IMPORTANT INFORMATION FOR CORRECT DISPOSAL OF THE PRODUCT IN ACCORDANCE WITH THE EUROPEAN DIRECTIVE ON WASTE ELECTRICAL AND ELECTRONIC EQUIPMENT (WEEE)
At the end of its working life, the product must not be disposed of as urban waste. It must be taken to a special local authority differentiated waste collection centre or to a dealer providing this service.
Guarantee UK only
|
Recommended Usage Chart
Do not operate your appliance for longer than the times specified below without a rest period.
Do not exceed the maximum capacities stated in the chart below.
Processing continuously for longer periods can damage your appliance.
Processing information supplied is for guidance only and will vary depending on the exact recipe and ingredients being processed. Do not process hot ingredients
| Tool/ Attachment | Function |  |  (Secs) |  |
 | All in one cake mixes | 2 | 10 | 1.2kg total weight |
| Pastry - rubbing fat into flour Adding water to combine pastry ingredients | 2 1 – 2 | 10 10 – 20 | 300g flour weight | |
| Chopping fish and lean meat Pâtés and terrines | 2 | 10 – 30 | 400g max lean beef | |
| Chopping vegetables | Pulse | 5 – 10 | 100 – 250g | |
| Chopping nuts | 2 | 30 – 60 | 100g – 200g | |
| Herbs | 2 | 20 – 30 | 30 – 50g | |
| Mayonnaise | 2 | 60 – 80 | 4 egg yolks | |
| Pureeing soft fruit, cooked fruit and vegetables | 2 | 10 – 30 | 500g | |
 | Egg whites | 2 | 60 – 120 | 2 – 6 (200g) |
| Whipping cream (Processing times may vary, depending on fat content of cream) | 2 | 60 – 120 | 250 – 500ml | |
 | Yeasted mixes | 2 | 60 | 340g flour weight 550g total weight |
 | Grating and slicing firm food items - cheese, carrots, potatoes and foods of a similar texture | 2 | – | Do not fill above the maximum 1.2L marked on the bowl |
| Slicing softer food items - cucumbers and tomatoes | 1 | – | ||
 | Grates Parmesan cheese | 2 | – | |
 | Use to squeeze the juice from citrus fruits e.g.oranges, lemons, limes and grapefruits. | 1 | – | – |
 | Cold liquids and drinks (Add ice/frozen ingredients to goblet last) | 2 | 30 – 60 | 1.2 litre |
| Milkshake/Cold milk based mixtures | 2 | 15 – 30 | 1 litre | |
| Ice crushing | Pulse | 30 – 40 | 6 ice cubes (125g) | |
| Batter mix (Add liquid ingredients first) | 1  2 | 10 50 | 1 litre | |
 | Nuts | 2 | 10 – 30 | 50g |
| Coffee beans | 2 | 30 | 50g | |
| Uncooked meat (beef steak) cut into 2cm cubes | P | 5 | 70g | |
 | Processing spices Black peppercorns, cardamom seeds, cumin seeds, coriander seeds and fennel seeds | 2 | 30 – 60 | 50g |
| Grinding coffee beans | 2 | 50g | ||
| Chopping nuts | Pulse | – | 50g | |
| Processing garlic cloves, fresh chillies and root ginger | Pulse | – | 30g | |
| Fresh coconut | 2/Pulse | 30 – 60 | 40g | |
 | Fruit and vegetables | 2 | 60 – 120 | 600g |
 | Use to cut a variety of foods such as carrot, courgette, cucumber, beetroot and apples into cubes. | 2 | – | Do not fill above the maximum capacity marked on the bowl |
 | Use to cut a variety of foods such as potato, carrot, courgette and cucumber into French Fries and crudités. | Manual |
Troubleshooting Guide
| Problem | Cause | Solution |
| The processor will not operate. | No Power. Bowl not fitted to power unit correctly. Bowl lid not locked on correctly. | Check processor is plugged in. Check bowl is located correctly and the handle is situated towards the right front hand corner. Check that the lid interlock is located correctly into the handle area. The processor will not work if the bowl and lid are fitted incorrectly. If none of the above check the fuse/circuit breaker in your home. |
Detachable drive shaft  not fitted to power unit. not fitted to power unit. | Fit the detachable drive shaft onto the power unit before fitting the bowl. The bowl tools and attachments will not operate unless the drive shaft is fitted. | |
| Blender or mill will not operate | Blender or mill not locked on correctly. Blender or mill not assembled correctly. | Blender or mill will not operate if fitted incorrectly to the interlock. Check blade assembly is fully tightened into the goblet/jar |
| Processor stops during processing | Processor overloaded/ maximum capacities exceeded. Lid unlocked. | Check maximum capacities stated in the recommended usage chart. Check lid is locked correctly. |
| Blender or multi mill leaking from blade assembly base. | Seal missing Seal incorrectly fitted Seal damaged. | Check seal is fitted correctly and not damaged. To obtain a replacement seal see 'Service and customer care'. |
| Unit unstable/heavy vibrations and movement. | Sticky fruit/ingredients such as dates being processed. Speed selected too low. | For best results use 'Pulse' first to break down the ingredients and then continue processing on maximum speed. |
| Poor performance of tools/attachments | Refer to hints in relevant 'using the attachment' section. Check attachments are assembled correctly. | |

Documents / Resources
References
Download manual
Here you can download full pdf version of manual, it may contain additional safety instructions, warranty information, FCC rules, etc.
Thank you! Your question has been received!


Need Assistance?
Do you have a question about the FDM30 that isn't answered in the manual? Leave your question here.