Miele CVA6805 Operating And Installation Instructions
Built-in coffee system
Hide thumbs
Also See for CVA6805:
- Operating and installation instructions (108 pages) ,
- Installation instructions manual (19 pages) ,
- Quick start manual (2 pages)

Related Manuals for Miele CVA6805


Summary of Contents for Miele CVA6805
- Page 1 Operating and Installation Instructions Built-in Coffee System To prevent accidents and machine damage, you absolutely must read these instructions before installation or use. en – US, CA M.-Nr. 10 215 120...
-
Page 2: Table Of Contents
Contents IMPORTANT SAFETY INSTRUCTIONS..............5 Preparing your appliance for an extended vacation ..........15 SAVE THESE INSTRUCTIONS................15 Guide to the appliance ..................16 Front view....................... 16 Accessories ......................18 Operation ......................19 Touch display ......................19 Operating actions....................20 Symbols in the display ................... - Page 3 Contents Portion size ......................41 Resetting drinks ....................42 User profiles ......................43 Accessing a user profile..................43 Creating a profile....................43 Selecting a user profile ..................43 Changing the name....................43 Deleting a user profile .................... 43 Changing a user profile ..................44 User profiles: Creating and editing your own drinks ........
- Page 4 Contents Drip tray cover......................61 Water tank......................61 Waste unit ......................62 Main dispenser....................... 62 Sensor cover ......................65 Maintenance of the milk valve ................65 Milk flask with lid....................66 Bean container....................... 67 Interior and machine front..................68 Main dispenser connector ..................68 Brew unit ........................
-
Page 5: Important Safety Instructions
To avoid the risk of personal injury or damage to the coffee system, it is important that you carefully read the instructions. Miele cannot be held liable for damage caused by non-compliance with these IMPORTANT SAFETY INSTRUCTIONS. -
Page 6: Intended Use
IMPORTANT SAFETY INSTRUCTIONS Intended use Use this coffee system only in standard household environments for making coffee beverages such as espresso, cappuccino, latte macchiato, etc. Any other type of use is not permitted. The coffee system is not suitable for outdoor use. ... - Page 7 IMPORTANT SAFETY INSTRUCTIONS Safety with children Caution! Danger of burning and scalding on the dispensing dispensers. Children's skin is far more sensitive to high temperatures than that of adults. Ensure children do not touch hot surfaces of the coffee system or place parts of their body under the dispensing dispensers.
-
Page 8: Technical Safety
IMPORTANT SAFETY INSTRUCTIONS Technical safety Installation and repairs may only be carried out by a Miele-author‐ ized service technician. Installation, repairs and other work by un‐ qualified persons can cause considerable danger to users. A damaged coffee system could be dangerous. Before building in the machine, check it for any externally visible damage. - Page 9 Do not close the cabinet door while the coffee system is in use. Ensure the coffee system has cooled down completely before closing the door. Repair work should only be performed by a Miele-authorized service technician. Repairs by unqualified persons can cause con‐ siderable danger to users. ...
- Page 10 Use only genuine original Miele parts. If parts or accessories from other manufacturers are used, the warranty may become void.
- Page 11 IMPORTANT SAFETY INSTRUCTIONS Plumbing Do not connect the coffee system to a hot water supply. The non-return valve must be easily accessible when the coffee system is built in. The protective sleeve of the water intake hose must not be dam‐ aged or become kinked.
-
Page 12: Proper Use
IMPORTANT SAFETY INSTRUCTIONS Proper use Danger of burning and scalding from the dispensers. The liquids and steam dispensed are very hot. Please note: – Keep away from the area underneath the dispensers when hot liquids and steam are being dispensed. –... - Page 13 IMPORTANT SAFETY INSTRUCTIONS Do not use green (unroasted) coffee beans or mixtures of coffee beans which contain green coffee beans. Green coffee beans are very hard and still contain a certain amount of residual moisture. These can damage the coffee system grinder as soon as grinding begins.
- Page 14 Descale the coffee system regularly depending on the water hard‐ ness level in your area. Descale the machine more frequently in areas with very hard water. Miele cannot be held liable for damage arising from insufficient descaling, the use of incorrect descaling agent or the use of descaling agent that is not of the appropriate concentration.
-
Page 15: Preparing Your Appliance For An Extended Vacation
IMPORTANT SAFETY INSTRUCTIONS For machines with stainless steel surfaces: Do not use sticky notes, transparent adhesive tape, masking tape or other types of adhesive on stainless steel surfaces. These dam‐ age the surface, causing it to lose its dirt repellent protective coat‐ ing. -
Page 16: Guide To The Appliance
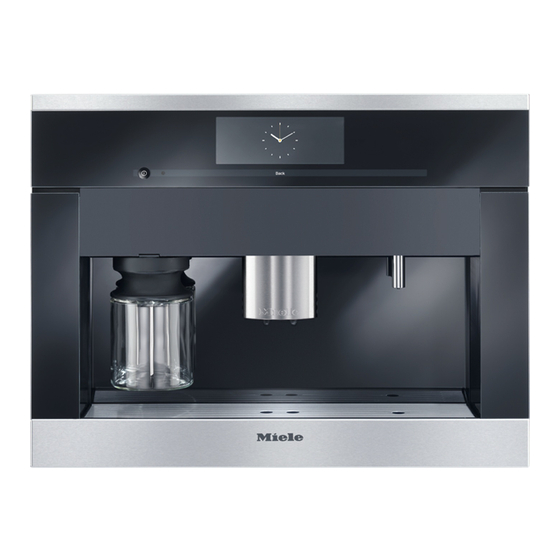
Guide to the appliance Front view a On / Off button b Touch display c Back sensor button d Door handle e Hot water dispenser f Drip tray cover g Main dispenser, with automatic height-adjustment and lighting h Milk flask with lid... -
Page 17: Interior View
Guide to the appliance Interior view i Ground coffee chute cover j Brew unit k Ground coffee chute l Grind control lever m Coffee bean container n Water tank with intake device o Drip tray with no-spill grid p Waste unit q Drip catcher r Main dispenser connector s Service cover... -
Page 18: Accessories
Miele website or from Miele Service or your Miele dealer. Optional accessories Included accessories Miele also offers a range of optional ac‐ cessories, as well as cleaning and con‐ – Measuring scoop ditioning products for your coffee sys‐... -
Page 19: Operation
Operation Touch display The touch display can be scratched by pointed or sharp objects, e.g. pens and pencils. Only touch the touch display with your fingers. Touching the display with your finger emits a small electrical charge which in turn triggers an electrical pulse that is detected by the surface of the touch display. -
Page 20: Operating Actions
Operation Operating actions Each time you tap a possible option, the relevant field will light up orange. To select or open a menu Tap the desired field to select it. Scrolling You can scroll to the right or the left. Some menu options allow you to scroll up and down too. - Page 21 Operation The numerical keypad will appear. Tap the desired numbers. Once you have entered an accepted value, will light up green. Tap Entering letters Profile names or the names for your own drinks are entered using a keyboard. It is best to select short names.
- Page 22 Operation Help When maintenance programs are selected, a context help appears in the bottom line Help To display the information with images and text, tap Help To return to the maintenance program, tap Close...
-
Page 23: Symbols In The Display
Operation Symbols in the display The following symbols can appear in addition to the text and the drinks symbols: Symbol Description Settings, e.g., the brightness of the display or the volume of the buzzer and keypad tones, are selected via a bar chart. This indicates information and instructions about operating ... -
Page 24: Before Using For The First Time
5:00 am to 11:00 pm. Tap the On / Off button . Tap the desired time display and appears briefly in the Miele - Willkommen then display. The coffee system will use more ener‐ gy depending on the option you choose for the display. - Page 25 Before using for the first time Select the water supply (Main Water) The coffee system is intended for oper‐ ation with a water connection. You can select the water supply from the follow‐ ing possibilities: – : The water tank is automatically filed with water through the water connection.
-
Page 26: Water Hardness
Before using for the first time Water hardness Determining the water hardness You can measure the water hardness The water hardness level indicates how yourself using the enclosed test strip. much calcium is dissolved in the water. Alternatively, your local water authority The higher the calcium content, the will be able to tell you the hardness of harder the water, and the harder the... -
Page 27: Filling The Water Tank
Filling the water tank Change the water every day to prevent a build-up of bacteria. If the coffee system is plumbed into the water supply, the water tank will fill au‐ tomatically as soon as the machine is switched on. The intake device in the lid ensures that the water is taken in slowly. -
Page 28: Filling The Coffee Bean Container
Filling the coffee bean container Fill the coffee bean container with whole roasted espresso or coffee beans if you want to use freshly ground coffee beans for each cup of espresso or coffee. Alternatively, you can make coffee or espresso with ground coffee (see "Mak‐ ing coffee drinks from ground coffee"). -
Page 29: Turning The Machine On And Off
Turning the machine On and Off Turning on Turning off When the coffee system is switched on, Tap the On / Off button . it heats up and rinses the pipework. After a coffee has been dispensed, the This not only cleans the pipework, but machine pipework is rinsed before the also warms it before coffee is prepared. -
Page 30: Dispenser Adjustment
Dispenser adjustment Turning the dispenser adjust‐ The height of the main dispenser can‐ ment on and off not be manually adjusted. menu is displayed. Drinks The coffee system automatically de‐ tects the height of the cup or glass un‐ Tap or Back. -
Page 31: Preparing Beverages
Preparing beverages Making a coffee drink Danger of burning and scalding from the dispensers. The liquids and steam dispensed are very hot. Keep away from the area underneath the dispensers when hot liquids and steam are being dispensed. Do not touch hot components. You can choose from a variety of spe‐... -
Page 32: Double Portion
Preparing beverages Double portion Coffee pot: Preparing several cups of coffee one after the You can request two portions of es‐ other presso or coffee at once in one cup or in two separate cups simultaneously. You can automatically prepare several cups of coffee one after the other (max. -
Page 33: Making Coffee Drinks From Ground Coffee
Preparing beverages Making coffee drinks from Open the appliance door. ground coffee To make espresso or coffee using ground coffee, add a portion of ground coffee to the ground coffee chute. This gives you the option of preparing a cup of decaffeinated coffee, for exam‐... -
Page 34: Drinks With Milk
Preparing beverages Making coffee drinks from ground Drinks with milk coffee Danger of burning and scalding If you want to make a drink with ground from hot steam coming out of the coffee: main dispenser! Tap The liquids and steam dispensed are very hot. - Page 35 Preparing beverages Notes on the milk flask Milk is not cooled in the milk flask. Therefore, place the milk flask in the refrigerator if you are not going to use milk for a while. Good milk froth can only be achieved when cold milk (be‐ low 50°F / 10°C) is used.
-
Page 36: Preparing Hot Water
Preparing beverages Preparing hot water Preparing user profile drinks If you have already created a user pro‐ Caution! Danger of burning and file (see "User profiles"), you can select scalding. The water dispensed is it before preparing a drink. very hot. ... -
Page 37: After A Drink Has Been Prepared
Preparing beverages After a drink has been pre‐ pared appears in the display a Start rinse cycle few minutes after a drink with milk has been prepared. Tap The milk pipework will now be rinsed. Even if you do not confirm the mes‐ sage with OK, the milk pipework will automatically be rinsed after some time. -
Page 38: Coffee The Way You Like It
Coffee the way you like it In order to customize the coffee system To avoid damaging the grinder, to the type of coffee being used, you please note the following: Only adjust the grinder one setting at a time. – Change the grinder setting Grind the coffee beans again if you –... -
Page 39: Changing The Parameters Of A Drink
Coffee the way you like it Changing the parameters of a Amount of coffee drink The coffee system can grind and brew 6-14 g of coffee beans per cup. The You can change the amount of coffee, greater the quantity, the stronger the pre-brewing and the brewing tempera‐... -
Page 40: Brewing Temperature
Coffee the way you like it Brewing temperature Pre-brewing ground coffee The ideal brewing temperature will de‐ When the pre-brewing function is pend on: turned on, the freshly ground coffee is first moistened with a little hot water. – the type of coffee, Then the remaining water is forced –... -
Page 41: Portion Size
Portion size The flavor of the coffee produced de‐ menu is displayed. Drinks pends not just on the type of coffee Place the desired cup under the main used, but also on the amount of water dispenser. used. You can program the amount of water ... -
Page 42: Resetting Drinks
Resetting drinks You can reset drink portions and pa‐ rameters for all drinks to the factory de‐ fault. menu is displayed. Drinks Tap and then Edit Reset drinks appears on the Reset all drinks to default? display. Tap... -
Page 43: User Profiles
Tap Create Profile ces, you can create individual user pro‐ files in addition to the Miele profile. The editor will open in the display. In each user profile, you can make set‐ Select the name you want using the... -
Page 44: Changing A User Profile
User profiles Changing a user profile You can set up the coffee system so that after each use it automatically re‐ verts back to the Miele standard user profile, or it retains the last selected user profile. Select and then... -
Page 45: User Profiles: Creating And Editing Your Own Drinks
User profiles: Creating and editing your own drinks You can create your own drinks for The new drink will appear in the current each user profile and, for each drink, user profile. you can adjust the portion size and oth‐ Changing drinks: Changing er parameters, e.g., amount of coffee, portion sizes, parameters and... -
Page 46: Mymiele
MyMiele You can display drinks you make fre‐ Deleting entries quently, drinks from profiles, and pre‐ Tap Edit ferred maintenance programs in the MyMiele screen. Select Delete entry The MyMiele screen can be set to ap‐ Select the entry and then tap pear as the start screen (see "Settings - The entry will be deleted. -
Page 47: Settings
Settings You can use the "Settings" menu to Changing and saving settings customize the coffee system to suit Tap or Back. Main Menu your individual requirements. Select Settings Accessing the "Settings" menu Select the option you want to menu is displayed. -
Page 48: Setting Options
Settings Setting options The factory default for each option is indicated by *. Menu item Available settings and other languages Select language deutsch Country Time Display – Night Dimming Clock Type – Analog Digital Clock Format – 12 h (am/pm) 24 h Date Timer... - Page 49 Settings Menu item Available settings Start Screen Main Menu Drinks Profiles MyMiele Info Number of drinks – Total coffee drinks Espresso Coffee Lungo Coffee Cappuccino Latte Macchiato Caffè Latte Milk Froth Hot Milk Hot Water No. of uses until Descale Appliance / Degrease the brew unit System Lock ...
-
Page 50: Language
Settings Language Clock type You can display the time of day in an You can select the language (and coun‐ try variant of that language) for all dis‐ play text. Tip: If you select the wrong language by mistake, you can find the "Lan‐ guage"... -
Page 51: Timer
Settings Timer Turn on at: There are two timers with the following The coffee system will not turn on at functions: the required time if you have activated the system lock. The coffee system: The timer settings are deactivated. – switches on at a particular time, e.g. If the coffee system has turned itself on in the morning for breakfast ( Turn on... - Page 52 Settings Turn off after Activating and deactivating the timer For the time display, you have selected timer function is only Turn off after Night Dimming available in Timer 1. If the timer for has been acti‐ Turn on at vated, the symbol and the desired If none of the keys have been pressed switch-on time appear in the display or no drink has been prepared, the cof‐...
-
Page 53: Eco Mode
Settings Eco mode Lighting Eco mode is an energy-saving mode. You have the following options: The steam system does not heat up un‐ – You can set the brightness when the til a coffee drink or steam for hot milk / machine is switched on. -
Page 54: Start Screen
Settings Start screen Locking the coffee system (System lock ) You can choose which screen appears when the coffee system is switched on. You can lock the coffee system to pre‐ vent it being used without your knowl‐ – Main Menu edge, by children, for example. -
Page 55: Water Hardness
– Drink portions and parameters of the Miele user profile (standard): see "Resetting drinks." Showroom program (Demo mode) Do not activate this setting for domes‐ tic use. The coffee system can be presented in Miele Showrooms of retail stores with function. The Showroom Program... - Page 56 Settings lighting will come on, but drinks cannot be dispensed and other actions cannot be carried out. If you activate the Demo mode, you cannot turn the appliance off with the On / Off button .
-
Page 57: Cleaning And Care
Front of the machine (especially immediately after desca‐ ling) Once a month Lubricate the cap on the main dispenser connector Coffee bean container When prompted Milk pipework (with the original Miele cleaning agent for milk pipework) Brew unit (degrease with the cleaning tablets) Descaling the machine... -
Page 58: Clean By Hand Or In Dishwasher
Cleaning and care Clean by hand or in dishwash‐ Danger of burning and scalding on hot components or by hot liquids. Always allow the coffee system to The following must be cleaned by hand cool down before cleaning it. only: Caution: Water in the drip tray can –... - Page 59 Cleaning and care All external surfaces are susceptible to scratching. Scratches on glass surfaces could even cause a break‐ age. Contact with unsuitable clean‐ ing agents can discolor the external surfaces. Wipe up any spillages or splashes of descaling agent immedi‐ ately.
-
Page 60: Drip Tray
Cleaning and care Drip tray Burn hazard! If the rinsing process has just finish‐ ed, wait a few minutes before remov‐ ing the drip tray as the water used for rinsing will run out of the coffee dispensers. Clean the drip tray every day to pre‐ vent unpleasant odors and mildew. -
Page 61: Drip Tray Cover
Cleaning and care Drip tray cover Water tank Remove the drip tray cover. Change the water every day to prevent a build-up of bacteria. The drip tray cover can be cleaned in the dishwasher or by hand using Make sure that the valve, the under‐... -
Page 62: Waste Unit
Cleaning and care Waste unit Main dispenser After a certain period of time a reminder Clean all parts of the main dispenser to empty the waste unit will appear in except for the stainless steel cover in the display. The waste unit must be the dishwasher at least once a week. - Page 63 Cleaning and care Press the catch upwards , grasp Turn upper connecting piece and the dispensing unit by the handle, pull it upwards to remove it. Remove and pull it forwards and off . lower connecting piece in the same way.
- Page 64 Cleaning and care Reassemble the dispensing unit in the reverse order. Make sure that up‐ per adapter clicks into position. Tip: Place the dispenser upright in the Press the dispenser nozzles firmly top basket of the dishwasher. Lay the onto the dispensing unit.
-
Page 65: Sensor Cover
Cleaning and care Sensor cover Maintenance of the milk valve The sensor cover for the cup protection The milk valve should be cleaned once cut-out is located under the main dis‐ a week to ensure good quality milk froth penser. If the automatic dispenser ad‐ without spraying. -
Page 66: Milk Flask With Lid
Cleaning and care Milk flask with lid Taking apart the milk flask lid and cleaning it with the cleaning brush Soiling can lead to machine malfunc‐ Milk fat can deposit in the milk flask lid. tions. When this happens, milk will spray It is important to keep the neck and when milk froth is made. -
Page 67: Bean Container
Cleaning and care Bean container Pull the bean container out of the ap‐ pliance and pull the lid toward the back and off. Clean the bean container and its lid by hand using warm water and liquid dish soap. Dry both components. ... -
Page 68: Interior And Machine Front
Cleaning and care Interior and machine front Main dispenser connector First take out all removable parts and The part which connects the brew unit then clean the interior and the ma‐ and the main dispenser is located on chine front with a mild solution of hot the inside of the machine front. -
Page 69: Brew Unit
Cleaning and care Brew unit If you cannot remove the brew unit or can only do so with difficulty, the brew Remove the brew unit and wash by unit is not in the correct position (See hand "Frequently asked questions"). Clean the brew unit by hand only us‐... -
Page 70: Care Programs
Cleaning and care Care programs The following maintenance programs are available: – Rinsing the coffee system – Rinsing the milk pipework – Cleaning the milk pipework – Degreasing the brew unit – Descaling the machine Press the button on the end of the Perform the respective maintenance handle of the brew unit ... -
Page 71: Rinsing The Coffee System
Cleaning and care Rinsing the coffee system Rinsing the milk pipework After a coffee has been dispensed, the Milk residue can clog up the milk pipe‐ machine pipework is rinsed before it work. If you have made a drink with turns off. -
Page 72: Cleaning The Milk Pipework
Clean the milk pipework pear in the display. You cannot make Making a cleaning solution drinks with milk until cleaning has been We recommend using the Miele milk pi‐ carried out. pework cleaning agent for cleaning the You can now only dispense espresso, milk pipework. -
Page 73: Degreasing The Brew Unit
Miele cleaning tablets can be ordered Please adhere to the mixing ratio. It from a Miele dealer or from the Miele is important that you do not fill the website. water tank with too little water, other‐... - Page 74 Cleaning and care When Place a cleaning tablet in the ground appears coffee chute and close the chute in the display: Remove the coffee chute cover and open the lid of the coffee chute. Drop a cleaning tablet into the ground coffee chute.
-
Page 75: Descaling The Machine
Descaling the machine The coffee system prompts you when it Important! When descaling the ma‐ needs to be descaled. "No. of portions chine, cover delicate surfaces and until appliance needs descaling: No. of natural flooring to prevent damage uses until appliance needs descaling: 50 from splashes of descaling solution. - Page 76 Only use the Miele descaling tablets. Other types of descaling agents can damage the machine and affect the taste. Miele descaling tablets are available to order from a Miele dealer or Miele's on‐ line store. You will need two descaling tablets.
- Page 77 Descaling the machine Performing a descale Descaling when not prompted by a message Replace the water tank in the coffee system and close the front. Tap or Back. Main Menu Follow the instructions given in the Select .
-
Page 78: Frequently Asked Questions
Fault messages must be confirmed with OK, otherwise the message can reap‐ pear in the display even though the problem has been remedied. To address the fault, follow the instructions on the display. If the fault message appears in the display again, contact Miele. Problem Possible cause and solution F1, F2, F3, F4, There is an internal fault. - Page 79 Frequently Asked Questions Problem Possible cause and solution F73 or The brew unit cannot be positioned correctly, or it is dirty and the coffee cannot be processed. Check the brew unit Check whether you can remove the brew unit (see "Cleaning and care - Brew unit").
- Page 80 Frequently Asked Questions Problem Possible cause and solution F234 Cup protection switch-off has been activated three times since switching on the coffee system. The cups or glasses being used are not recognized by the auto‐ matic dispenser adjustment. Use only cups or glasses that can be recognized by the automatic dispenser adjustment.
-
Page 81: Unusual Performance Of The Coffee System
Insert the plug into the electrical outlet. The fuse has tripped because the coffee system, volt‐ age or another appliance is defective. Reinsert the plug.. Contact a qualified electrician or Miele Service for assistance. The lighting remains off The lighting has been turned off. - Page 82 Frequently Asked Questions Problem Possible cause and solution The coffee system does The system lock feature has been activated. not switch itself on, al‐ You need to deactivate the system lock (see "Set‐ though the timer setting tings - System lock"). has been acti‐...
- Page 83 Frequently Asked Questions Problem Possible cause and solution ap‐ The drip tray is not positioned correctly in the ma‐ Empty the drip tray pears in the display, chine. even though the drip Push the drip tray in as far as it will go. tray is empty.
- Page 84 Frequently Asked Questions Problem Possible cause and solution The door is difficult to The cap of the main dispenser connector is not suffi‐ open and close. ciently greased. The silicone cap gets jammed in the brew unit. Check the silicone cap for damage. Repalce the cap with the provided spare part if necessary.
- Page 85 Frequently Asked Questions Problem Possible cause and solution Drink preparation has There is a problem with the water intake. been cancelled. Check whether the intake hose is kinked or the tap is not turned on completely. The water tank has emptied during drink preparation, is selected and the coffee system Main water - On is not connected to the water supply.
- Page 86 If cup protection switch-off is activated again or vated. the main dispenser lowers until it touches the top of the cup or glass again, please contact Miele. Cup protection switch- If the cleaning container is sitting too close to the off does not work.
-
Page 87: Unsatisfactory Results
Fill the coffee bean container with fresh beans. There may be stones in among the coffee beans. Turn the coffee system off immediately. Contact Miele. The coffee flows too The grind level is too coarse. quickly into the cup. - Page 88 Frequently Asked Questions Problem Possible cause and solution The coffee trickles too The grind level is too fine. slowly into the cup. Set the grinder to a coarser setting (see "Setting the coffee grinder"). The crema on the cof‐ The grinder setting is not correct.
-
Page 89: Problems When Preparing Milk
Frequently Asked Questions Problems when preparing milk Problem Possible cause and solution The milk sprays during The milk temperature is too high. Good milk froth can dispensing and hissing only be achieved when cold milk (below 50°F/10°C) is noises can be heard. used. -
Page 90: Exchanging The Elbow Connector
Frequently Asked Questions Exchanging the elbow connec‐ If you can prepare only hot milk instead of milk froth, check the following first: – Is the milk in the milk flask cold (< 50°F / 10°C)? – Have the main dispenser and milk flask lid been cleaned carefully? –... - Page 91 Frequently Asked Questions Push the tubes back into the elbow connector and replace this in the ma‐ chine. Make sure that the land on the elbow connector is pointing down‐ wards. Re-insert the air intake tube into the opening .
-
Page 92: Technical Service
Miele’s Service department, Ex‐ tended Service Contracts offered by other providers for Miele products will not be recognized by Miele. Our goal is to prevent unauthorized (and untrained) service personnel from working on your Miele products, possibly doing further damage to them, you and/or your home. -
Page 93: Saving Energy
Saving energy If the settings of the following functions are altered from the factory default, en‐ ergy consumption will increase: – Eco mode – Lighting – Time display – Timer... -
Page 94: Packaging Material / Disposal Of Old Machine
Packaging material / Disposal of old machine Disposal of packaging material Disposal of your old appliance The cardboard box and packing materi‐ Old electrical and electronic appliances als protect the appliance during ship‐ often still contain valuable materials. ping. They have been designed to be However, they also contain harmful biodegradable and recyclable. -
Page 95: Plumbing
Plumbing Notes on connecting to the The appliance must be connected to a cold water line that: water supply – is directly connected to the fresh wa‐ The appliance must be connected to ter supply in order to ensure a circu‐ the water supply by a qualified pro‐... - Page 96 Plumbing Parts must only be replaced with original Miele spare parts, available from Miele. Fitting the stainless steel hose to the appliance Make sure that the stainless steel hose is not kinked or damaged. The Screw the supplied brass compres‐...
- Page 97 Plumbing This product is tested and certified by the WQA against ORD0902 for California "lead free" compliance. Miele & Cie KG Carl-Miele-Straße 29 D-33332 Gütersloh...
-
Page 98: Electrical Connection
All to your power supply, please consult a electrical work should be performed by licensed electrician or contact Miele’s a qualified electrician in strict accord‐ Technical Service Department. See ance with national and local safety reg‐... -
Page 99: Installation
Installation Installation and combination options The appliance is designed to be built into a tall unit. - Page 100 Installation It can also be combined with other Miele built-in appliances. If the coffee system is to be built in above another appliance, there must be a full-width, closed shelf between them.
-
Page 101: Ventilation
Installation Ventilation – A ventilation gap of at least 1 5/8" (40 mm) depth must be provided be‐ Condensation water can damage the hind the appliance for air to circulate. coffee system or surrounding cabi‐ – The ventilation cross-sections in the nets. -
Page 102: Installing The Coffee System
Ensure the electrical and water con‐ If there is not a seal at the front of the nection does not get damaged when building-in niche, adhere the Miele pushing the appliance into the niche. sealing strips from the back (see pic‐... -
Page 103: Adjusting The Door Hinges
Installation Adjusting the door hinges If the machine door becomes difficult to open or close after installation, you can adjust the hinges to realign it (TX 20): Open the appliance door, and partial‐ ly tighten the side socket screws. ... -
Page 104: Copyright And Licenses
You will need to enter the specific product name. Miele will provide the source code for all components of software licensed under the GNU General Public License and comparable Open Source licenses. For source code requests, please e-mail [email protected]. - Page 107 Technical Service. U.S.A. Canada Miele, Inc. Importer Miele Limited National Headquarters 9 Independence Way Headquarters and Miele Centre Princeton, NJ 08540 161 Four Valley Drive Phone: 800-843-7231 Vaughan, ON L4K 4V8 609-419-9898 www.miele.ca 609-419-4298...
- Page 108 CVA 6805 en – US, CA M.-Nr. 10 215 120 / 01...