Table of Contents
Table of Contents

Related Manuals for Epson PP-1002


Summary of Contents for Epson PP-1002
- Page 1 User’s Guide for Mac M00050803...
-
Page 2: Trademarks
Neither Seiko Epson Corporation nor its affiliates shall be liable to the purchaser of this product or third parties for damages, losses, costs, or expenses incurred by purchaser or third parties as a result of: accident, misuse, or abuse of this product or unauthorized modifications, repairs, or alterations to this product, or (excluding the U.S.) failure to... -
Page 3: Organization Of This Manual
It is included on the Discproducer Utility & Documents Disc For Apple Mac OS. You can access it by clicking Launchpad, EPSON Software, and then EPSON Total Disc Maker after installing the software. -
Page 4: Table Of Contents
Using Software......35 Cautions for Using ............9 WARNING ..............10 FCC Compliance Statement for American Users . 10 ■ EPSON Total Disc Maker ........ 35 For Canadian Users........... 11 What is EPSON Total Disc Maker? ......35 DECLARATION of CONFORMITY (For PP-100/ Starting EPSON Total Disc Maker......35... - Page 5 Checking the Ink Levels ........... 81 Other Error ...............121 How to Replace the Ink Cartridges ......82 ■ Checking with EPSON Total Disc Utility..122 ■ Checking the Print Head Nozzles ....85 ■ When Discs Cannot be Published ....123 How to Perform a Nozzle Check ......85 ■...
-
Page 6: Before Using This Product
Before Using this Product For Safe Use • To use this product safely, be sure to read this guide as well as the other instruction guides included with this product before using it. • Keep this guide at hand so that you can resolve any questions you have about this product. To prevent harm to customers and other people or damage to property, this guide contains the following symbols and warning displays for operations and use that may be dangerous. - Page 7 Before Using this Product Install this product in the following type of place. Place with the following temperature and Place that is flat and stable humidity range Flat • When using this product in a place where static electricity is easily generated, use an antistatic mat or other product to prevent static electricity.
-
Page 8: Cautions For The Power Source
Cautions for the Power Source Do not connect or disconnect the power plug with wet hands. This may result in electric shock. WARNING Use only the type of power source indicated on the product’s label. Use of the wrong type of power source may result in electric shock or fire. Do not plug the power cord into an outlet with many other cords connected to This may result in heat build-up and fire. -
Page 9: Cautions For Using
WARNING Immediately turn off the power, disconnect the power plug from the outlet, and contact your dealer or the Epson Repair Center about repairs. Servicing the product yourself is dangerous, so never attempt it. If a foreign object, water or other liquid enters the product, do not continue to use it. -
Page 10: Warning
The connection of a non-shielded interface cable to this product will invalidate the EMC standards of this device. You are cautioned that changes or modifications not expressly approved by Seiko Epson Corporation could void your authority to operate the equipment. -
Page 11: For Canadian Users
DECLARATION of CONFORMITY (For PP-100/PP-100AP) According to 47CFR, Part 2 and 15 for Class B Personal Computers and Peripherals; and/or CPU Boards and Power Supplies used with Class B Personal Computers: EPSON AMERICA, INC. Located at: MS 3-13 3840 Kilroy Airport Way... -
Page 12: Cautions For Cd/Dvd Discs
• During a malfunction or repair • When there is damage due to a natural disaster Even if the product is still under warranty, Epson accepts no responsibility for data that is lost or damaged due to causes not limited to those listed above. -
Page 13: Basic Operations
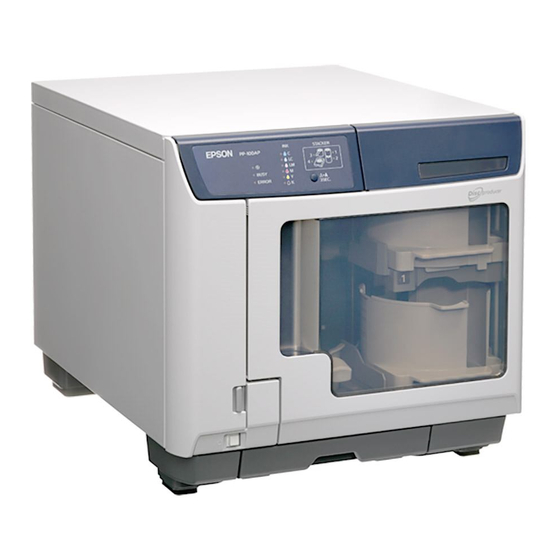
Basic Operations Basic Operations Parts Names Front Control panel Use to control the product. It also shows the status of the product. “Control panel” on page 17 for details. Ink cartridge cover Open to insert and replace ink cartridges. Power button Use to turn the product on and off. - Page 14 Back USB interface connector PP-100II Plug the USB cable into this connector. Interface cable holder Use to fix the USB cable. AC inlet Plug the power cord into this connector. Rear printer cover Open this cover only when a disc is stuck in the printer tray.
- Page 15 Basic Operations Inside PP-100II/PP-100/PP-100AP Drive 1 (Only for PP-100II/PP-100) Writes data on the recording surface of the discs. Drive 2 (Only for PP-100II/PP-100) Writes data on the recording surface of the discs. Drive release lever 1 (Only for PP-100II) Releases Drive 1 when you replace it. Drive release lever 2 (Only for PP-100II) Releases Drive 2 when you replace it.
- Page 16 PP-50 Drive Writes data on the recording surface of the discs. Printer Prints on the label surface of the discs. Stacker 3 Use as the disc output stacker. Holds up to about 20 discs. Transports discs. Stacker 1 Use Stacker 1 as a disc input stacker. Holds up to about 50 discs. Stacker 2 Use Stacker 2 as a disc input or output stacker.
- Page 17 Basic Operations Control panel PP-100II/PP-100/PP-100AP PP-50 Power light Flashes or turns on when the power is turned on. BUSY light Flashes when a job is being processed. ERROR light Flashes or turns on when an error occurs. INK light PP-100II/PP-100AP: Flashes or turns on depending on the ink/maintenance box status. PP-100/PP-50: Flashes or turns on depending on the ink status.
-
Page 18: Lights For The Status Of The Product
Lights for the Status of the Product This section describes the status of the product using the lights displayed on the control panel. The status of the product is also indicated by the combination of lights flashing/turning on. See “Checking Lights for Errors”... - Page 19 Basic Operations Indicator light Flashing/On Status The stacker is overloaded or full. STACKER STACKER light 1/2/3/4* Flashing The stacker is empty or not correctly inserted. * PP-50 does not have the STACKER 4 light. The STACKER light flashes when the input stacker is empty; however. the beginning of the Notes light flashing may not match the exact time that the stacker becomes empty.
-
Page 20: Turning Power On/Off
Turning Power On/Off This section describes how to turn the power on and off. Turning On the Power Connect the power cord. Press the power button. The Power light flashes green, then stays on. Turning Off the Power Press the power button until the Power light flashes. The Power light flashes in green then goes off;... -
Page 21: Opening/Closing The Disc Cover
Basic Operations Opening/Closing the Disc Cover When you load discs into the input stackers or take out discs from the output stackers, open and close the disc cover as described below. Opening the Disc Cover Hold the handle, and open the disc cover in the direction indicated by the arrow in the illustration below. -
Page 22: Closing The Disc Cover
Closing the Disc Cover Hold the handle, and close the disc cover in the direction indicated by the arrow in the illustration below. For PP-50 Before closing the disc cover, make sure that there are no discs left near Stacker 3 and that discs in Stacker 3 are not slanted. -
Page 23: Handling Stackers
Basic Operations Handling Stackers Handle the stackers as shown below. Stacker 1/Stacker 2 Stacker 1 and Stacker 2 are the same. Handle them in the same way. Stacker 1 Stacker 2 Attach Line up the indentations and attach. Remove Gently lift and pull towards you to take out. -
Page 24: Stacker 3
Stacker 3 For PP-50 Stacker 3 is fixed. Its shape differs from that of stacker 3 for the PP-100II, PP-100 and PP-100AP . Attach (Only for PP-100II/PP-100/PP-100AP) • When you insert Stacker 3, first check that there are no discs in Stacker 4, and then attach it. -
Page 25: Stacker 4 (Only For Pp-100Ii/Pp-100/Pp-100Ap)
Basic Operations Stacker 4 (Only for PP-100II/PP-100/PP-100AP) • Do not apply strong force to Stacker 4 when handling it. • When the BUSY light and the STACKER 4 light are flashing rapidly, a disc is being ejected, so do not pull out Stacker 4. Discs may be damaged. •... -
Page 26: Software Settings
* Editing write data is not available with the PP-100AP. • Important Note You may use the software to operate the EPSON products. You may use the EPSON products to copy materials onto media, including but not limited to CDs and DVDs. -
Page 27: System Requirements
Software Settings System Requirements The minimum hardware and system requirements for using the supplied software are shown below. • Mac OS X v10.10 Yosemite • Mac OS X v10.9 Mavericks • Mac OS X v10.8 Mountain Lion OS (Operating system) •... -
Page 28: Properties Setting
After installing the software and adding the printer (For these procedures, see Setup Guide for Mac.), follow the steps below to set Stacker Settings, Drive Settings, and Printer Settings with EPSON Total Disc Utility. Make sure that the product is connected to the PC via the USB cable and that the product is turned on. - Page 29 Set Stacker Settings, Drive Settings (only for PP-100II/PP-100/PP-50), and Printer Settings (only for PP-100II/PP-100/PP-50). See EPSON Total Disc Utility Help for details. • Setting the most suitable publish mode for the usage or number of discs to be published enables efficient disc publishing. (See “Selecting Publish Mode”...
-
Page 30: Common Settings For Publishing
Follow the steps below to create a Working Folder on the hard disk for the disc publishing operation. Start up EPSON Total Disc Utility. “Starting EPSON Total Disc Utility” on page Select Common Settings for Publishing from the Tools menu. -
Page 31: Notification Settings (Only For Pp-100Ap)
Click Notification Settings. The Notification Settings screen appears. Set Notification Method and Notification When Job is Finished. See EPSON Total Disc Utility Help for details. For EPSON Total Disc Utility Help, see “EPSON Total Disc Utility Help” on page Notes... -
Page 32: Write Settings (Only For Pp-100Ii/Pp-100/Pp-50)
Write Settings (Only for PP-100II/PP-100/PP-50) Follow the steps below to set Write Speed and Write Verification with the PP-100II/PP-100/PP-50. If you publish with EPSON Total Disc Maker, changing the settings is possible also in Publish Notes view. Start up EPSON Total Disc Utility. -
Page 33: Uninstalling The Software
[System Preferences] in the Dock. Click [Print & Scan] ([Print & Fax] in Mac OS X v10.6) in Hardware. Select the printer to be deleted, and click [-]. When the confirmation message appears, click Delete Printer. Click [Applications]. Click EPSON Software. Click [Uninstaller]. - Page 34 Select EPSON Total Disc Maker, and click Uninstall. When the uninstall complete screen appears, click Quit.
-
Page 35: Using Software
EPSON Total Disc Maker What is EPSON Total Disc Maker? EPSON Total Disc Maker is software for registering the write data* and the print data for the label surface, and publishing to this product (PP-100II/PP-100/PP-100AP/PP-50). In EPSON Total Disc Maker, the execution of writing data* and printing labels is referred to as “publishing.”... -
Page 36: Screen Configuration Of Epson Total Disc Maker
See EPSON Total Disc Maker Help for details on use. Disc view Starting EPSON Total Disc Maker or clicking Disc in Label view displays Disc view. In Disc view, you can register the data to write to the disc. Disc view is not used with the PP-100AP. - Page 37 Using Software Label view Clicking Label in Disc view displays Label view. In Label view, you can edit the data for printing on the label surface of the disc.
- Page 38 Publish view Clicking [Publish] in Disc view or Label view displays Publish view. In Publish view, you can publish the writing data and label to this product.
-
Page 39: Epson Total Disc Utility
The EPSON Total Disc Utility starts. • If you drag and drop the EPSON Total Disc Utility icon to the Dock, the EPSON Total Disc Utility icon will be added in the Dock. After that, clicking the icon starts up EPSON Total Notes Disc Utility. -
Page 40: Screen Configuration Of Epson Total Disc Utility
Screen Configuration of EPSON Total Disc Utility This section describes the screen configuration of EPSON Total Disc Utility. See EPSON Total Disc Utility Help for details on use. Main screen Click the Unfinished Job tab and Finished Job tab to display each screen. - Page 41 On the Main screen, double-click a model name for Device Name or click [Properties] to display the device’s Properties screen. You can also display the Properties screen by clicking in Publish view of EPSON Total Notes Disc Maker. Click the General tab, Maintenance Info tab, and About tab to display each screen.
- Page 42 Maintenance Info screen In the Maintenance Info screen, you can check maintenance information for your product. “Checking Maintenance Information” on page 100 for details. Notes...
- Page 43 Using Software About screen In the About screen, you can check the serial number and versions for your product.
- Page 44 Printer Utility screen In the Utility screen, you can run various maintenance functions to maintain the print quality. • For details on Nozzle Check, see “Checking the Print Head Nozzles” on page • For details on Head Cleaning, see “Cleaning the Print Head” on page •...
-
Page 45: Printer Driver
What is Printer Driver? The printer driver is software for the necessary settings to publish discs from commercially available applications other than EPSON Total Disc Maker. Displaying Printer Driver Screen Select Print... from the File menu of your application to display the setting screen of the... -
Page 46: Screen Configuration Of Printer Driver
Screen Configuration of Printer Driver This section describes the screen configuration of the printer driver. After setting, you can store the current setting as a preset. However, some items of the preset setting may not be reflected if the current publish mode is different from the publish Notes mode when the preset was stored. - Page 47 PP-50) • If you print on the matte label type of EPSON specified CDs, set Label Type to CD/DVD Label. • If you print on the matte label type of EPSON specified DVDs, set Label Type to CD/DVD Premium Label.
- Page 48 Color Options area In Color Options area, you can adjust print colors. Display the printer driver screen, and select Color Options to display the Color Options area. • If you wish, you can make color adjustments at the time of printing without making color adjustments to the actual data.
-
Page 49: Publishing Discs
• Even if the same data is printed on identical discs, the same print results may not be able to be achieved because of the individual differences (variations) of each disc. Disc quality may affect print quality. We recommend using EPSON specified CDs/DVDs. Notes... -
Page 50: Writable Disc Types
If this happens, write at a slower speed. In particular, we recommend writing to DVD±R DL at a slow speed. • Disc quality may affect write quality. We recommend using EPSON specified CDs/DVDs. Epson offers the specified CD-R and DVD-R discs for all your printing needs. -
Page 51: Handling Discs
Publishing Discs Handling Discs Notes on Usage • Do not touch the recording surface when holding a disc. • Handle discs carefully to ensure fingerprints, dirt, dust, moisture, scratches, etc., do not get on the label surface and recording surface. Gently wipe off any dust, dirt, and the like with a soft dry cloth or a commercially available CD cleaner. -
Page 52: Notes On Storage
Notes on storage • Do not place discs in a location where they will be subject to high temperature and humidity such as locations under direct sunlight, near heating equipment. • Do not place discs in locations where temperatures vary greatly. Doing so may result in condensation. -
Page 53: Printable Area
Publishing Discs Printable Area The printable area is the area of the label surface on which printing is possible. The printable area and recommended print area are shown in the table below. Printing will be done in the gray area in the figure below. -
Page 54: Setting The Print Area
∗ Paper size: 124 x 124 mm ∗ Margins on all sides: 2 mm The setting procedure of the print area differs, depending on whether you publish with EPSON Total Disc Maker or with the other applications. When publishing with EPSON Total Disc Maker... -
Page 55: Flow For Publishing Discs
Flow for Publishing Discs This section describes how to publish discs using the product. The publishing procedure differs, depending on whether you publish with EPSON Total Disc Maker or with other applications. • If you publish a large number of discs, first publish one disc and check the write result and print result. - Page 56 When publishing with the other applications Selecting Publish Mode Select publish mode. (See page 57.) Loading Discs Load discs into the product. (See page 61.) Application Creating Label Create a label design. Printer driver Print Settings and Registering Write Data* (See page 68.)
-
Page 57: Selecting Publish Mode
Select the publish mode, referring to the following descriptions, and change the setting in the properties setting if necessary. For properties setting procedure, see “Properties Setting” on page If you publish with EPSON Total Disc Maker, you can change the publish mode setting in Notes Publish view. -
Page 58: External Output Mode
External Output mode: When you want to publish two type of discs without having to change discs This mode uses Stacker 1 and Stacker 2 as the input stackers for discs. You can select Stacker 3 or Stacker 4 as the output stacker. - Page 59 Publishing Discs Batch mode: When you want to publish a large number of discs with least labor This mode uses Stacker 1 and Stacker 2 as the input stackers for discs, and Stacker 2 and Stacker 3 as the output stackers.
- Page 60 For PP-50 Standard mode: When you want to publish up to 50 identical discs at once This mode uses Stacker 1 as the input stacker for discs. You can select Stacker 2 or Stacker 3 as the output stacker. If you select Stacker 2 as the output stacker, you can publish up to 50 discs without having to replenish the discs or take out published discs.
-
Page 61: Loading Discs
Publishing Discs Loading Discs This section describes how to load discs into the input stacker, and insert it. Load the discs into a stacker. Do not load discs in the drives or printer. Furthermore, with the PP-100II or PP-100, do not load discs between Drive 1 and Drive 2. They may become unable to be removed. - Page 62 For PP-50 Publish Mode Input Stacker Number of Discs Standard Mode Stacker 1 Up to approximately 50 discs Low-volume Mode Stacker 1 Up to approximately 50 discs (Different types of discs can be loaded into Stacker 1 Stacker 2 Up to approximately 50 discs and Stacker 2.) Insert the stacker, and close the disc cover.
-
Page 63: Registering Write Data (Only For Pp-100Ii/Pp-100/Pp-50)
Registering Write Data (Only for PP-100II/PP-100/PP-50) This section describes how to register data to be written in Disc view of EPSON Total Disc Maker. • There is no need to register write data if you only want to print disc labels. - Page 64 The data that you drag and drop appears in the data list. • When the registered data does not comply with the restrictions of the selected file system, the file system restriction dialog box appears. See EPSON Total Disc Maker Help for details on file system restrictions.
-
Page 65: Creating Labels
• For details on EPSON Total Disc Maker, see EPSON Total Disc Maker Help. • When printing barcodes and 2D codes, be sure to use Epson brand ink cartridges. • When printing barcodes and 2D codes on discs that are not EPSON specified CD/DVDs, check whether the printed barcodes or 2D codes can be read correctly by a scanner. -
Page 66: Publishing Discs
Publishing Discs This section describes how to publish a job for publishing discs to the product in Publish view of EPSON Total Disc Maker. Click [Publish] in Disc view or Label view to display Publish view. Configure each setting. See EPSON Total Disc Maker Help for details. - Page 67 Make sure that discs are loaded in the input stacker correctly. “Loading Discs” on page Click Publish. EPSON Total Disc Utility starts, and the disc publishing process begins. • With the PP-100II, PP-100, or PP-100AP , you can take out the published discs output to Stacker 4 without pausing the job.
-
Page 68: Setting Printer Driver And Publishing Discs
In this example, we explain the procedure using Mac Preview. Start up Preview. Open the data to be printed on the disc label. When you print using application other than EPSON Total Disc Maker, create the print data using the following settings. Notes •... - Page 69 Publishing Discs Select Print Settings. The Print Setting area appears.
- Page 70 Click Print. EPSON Total Disc Utility starts, and the disc publishing process begins. • With the PP-100II, PP-100, or PP-100AP , you can take out the published discs output to Stacker 4 without pausing the job. However, when the BUSY light is flashing rapidly, do not pull out Stacker 4 because discs are being output to Stacker 4.
-
Page 71: Taking Out Discs
• After printing on the label surface, allow EPSON specified CDs/DVDs to dry for at least one hour, and other types of discs for at least 24 hours. Do not insert discs into a drive or other device until they are completely dry. -
Page 72
• After printing on the label surface, allow EPSON specified CDs/DVDs to dry for at least one hour, and other types of discs for at least 24 hours. Do not insert discs into a drive or other device until they are completely dry. -
Page 73: Job Operations
Job Operations Processing performed by this product, such as writing and printing data, is called a “job.” After publishing a job with EPSON Total Disc Maker or the printer driver, you can pause/cancel it or change the processing order of jobs. -
Page 74: Priority Publishing
If you need to process a job before the others when more than one job is being published, follow the steps below. Start up EPSON Total Disc Utility. “Starting EPSON Total Disc Utility” on page Select the job you want to give priority to, and click [Priority Publishing]. -
Page 75: Convenient Features
Area” on page 53 for details on the recommended print area. The setting procedure of the user defined label size differs, depending on whether you publish with EPSON Total Disc Maker or with the other applications. When publishing with EPSON Total Disc Maker... -
Page 76: Creating Disc Copies (Only For Pp-100Ii/Pp-100/Pp-50)
Creating Disc Copies (Only for PP-100II/PP-100/PP-50) With EPSON Total Disc Maker, you can create CD/DVD copies using an original disc or a disc image file. • This section describes only the procedure to register write data to create disc copies. - Page 77 Convenient Features Configure each setting. See EPSON Total Disc Maker Help for details. The registration of write data is now finished.
-
Page 78: Creating Copies From Disc Image Files
63.), you can create a disc image file. Start EPSON Total Disc Maker. “Starting EPSON Total Disc Maker” on page Set Type to Copy. Configure each setting. See EPSON Total Disc Maker Help for details. The registration of write data is now finished. -
Page 79: Adjusting Print Colors
Mode EPSON Standard Performs color processing to obtain the standard colors of Epson. Performs color processing with Adobe RGB for wider color space. Adobe RGB Select this option when, for example, printing print data that includes Adobe RGB color space information. - Page 80 When publishing with EPSON Total Disc Maker Set in the dialogue that is displayed when you click Color Settings... in Publish view of EPSON Total Disc Maker. Click Color Correction to configure each setting. • If you set Print Mode Setting to Black in Publish view of EPSON Total Disc Maker, you can adjust only Gamma, Brightness, and Contrast.
-
Page 81: Maintenance
• When the ink cartridges are installed for the first time (during setup), ink is consumed for filling, and so the time to replace the cartridges is earlier than normal. • Even when Print Mode Setting is set to Black in Publish view of EPSON Total Disc Maker or Notes when Color is set to Black in the Print Settings area of the printer driver, all the ink colors are used in an operation designed to maintain the printing and print head quality. -
Page 82: How To Replace The Ink Cartridges
• Epson cannot guarantee the quality and reliability of non-Epson brand products. Repairs for any damage or breakdown of this product due to the use of non-Epson brand products will not be free of charge even if the warranty period is still valid. - Page 83 Maintenance Take the ink cartridge out of its package. • For optimum printing quality, open the clear plastic package only immediately before installing. After opening the cartridge, try to use it up within six months. If you use an ink cartridge that has been left open for a long time, the print quality may decline.
- Page 84 Close the ink cartridge cover. • Do not turn off the power or open the ink cartridge cover during ink charging. These actions cause the ink to be charged again, which results in a noticeable consumption of ink. In addition, there is a risk that you will not be able to print properly. •...
-
Page 85: Checking The Print Head Nozzles
How to Perform a Nozzle Check Set one unprinted disc into Stacker 1. Display the Printer Utility screen of the EPSON Total Disc Utility. “Properties screen (General screen)” on page 41 for display procedure. - Page 86 Click Print. The disc on which the nozzle check pattern was printed is output to Stacker 3 or Stacker 4. Check the printed nozzle check pattern. If it is normal, all of the lines are printed as shown in the illustration on the left below. If there are lines that were not printed, as shown in the illustration on the right below, the nozzles are clogged.
-
Page 87: Cleaning The Print Head
Maintenance Cleaning the Print Head Head cleaning is a function for cleaning the surface of the print head to maintain the print quality. Run head cleaning if the printing becomes faint or gaps appear in the printing. Print head cleaning consumes ink. Before running print head cleaning, you can run a nozzle check to check whether or not the nozzles are clogged. -
Page 88: How To Clean The Print Head
The BUSY light flashes, and head cleaning starts. When head cleaning is finished, the BUSY light goes off. Running it from a PC Display the Printer Utility screen of the EPSON Total Disc Utility. “Properties screen (General screen)” on page 41 for display procedure. - Page 89 Maintenance Click Start. The BUSY light flashes, and head cleaning starts. When head cleaning is finished, the BUSY light goes off.
-
Page 90: Aligning The Print Head
If this happens, run print head alignment. Set one unprinted disc into Stacker 1. Display the Printer Utility screen of the EPSON Total Disc Utility. “Properties screen (General screen)” on page 41 for display procedure. - Page 91 Maintenance Click Print. The disc on which the print head alignment pattern was printed is output to Stacker 3 or Stacker 4. Check the printed print head alignment pattern. Print head alignment pattern...
- Page 92 Select the number of the pattern with the fewest vertical lines. In the illustration above, the pattern with the fewest vertical lines is “5”, so select “5.” If you want to print the print head alignment pattern again, to check it, set a disc in Stacker 1, and click Realign.
-
Page 93: Correcting The Printing Position
Adjust the printing position if it has shifted towards the top, bottom, left, or right. Set one unprinted disc into Stacker 1. Display the Printer Utility screen of the EPSON Total Disc Utility. “Properties screen (General screen)” on page 41 for display procedure. - Page 94 Click Print. The disc on which there are five lines printed on the top, bottom, left and right respectively as well as one blue upward-pointing arrow is output to Stacker 3 or Stacker 4.
- Page 95 Maintenance Click Finish if the lines on the top, bottom, left and right are evenly printed on the label surface. If they are not printed evenly, adjust the alignment in one of the following ways. • If the printing has shifted to the left: Select a positive correction value in Horizontal. •...
-
Page 96: Cleaning Your Product
Cleaning Your Product To keep your product operating at its best, clean it by using the following procedure. Cleaning the Exterior Turn the product off. “Turning Off the Power” on page After the Power light goes off, unplug the power plug from the outlet. Use a soft cloth to wipe off the dust and dirt. -
Page 97: Cleaning The Air Vents (Only For Pp-100Ii/Pp-100/Pp-50)
Maintenance Cleaning the Air Vents (Only for PP-100II/PP-100/PP-50) Clean the air vents regularly (once every six months). PP-100II Turn the product off. “Turning Off the Power” on page After the Power light goes off, unplug the power plug from the outlet. Loosen the screws on the filter covers to open them. - Page 98 Tighten the screws to close the filter covers. Plug the power plug into the outlet, and turn the power on. For PP-100/PP-50 Turn the product off. “Turning Off the Power” on page After the Power light goes off, unplug the power plug from the outlet. Loosen the screws on the filter covers to open them.
- Page 99 Maintenance Tighten the screws to close the filter covers. Plug the power plug into the outlet, and turn the power on.
-
Page 100: Checking Maintenance Information
This section describes how to check information that is useful when carrying out maintenance and providing support for your product, such as usage status of the internal drives and the number of published discs. Display the Printer Utility screen of the EPSON Total Disc Utility. “Properties screen (General screen)” on page 41 for display procedure. - Page 101 Maintenance Maintenance information of your product appears. PP-100II Item Description Total discs published Cumulative number of discs the product has published (writing/printing). Number of printed discs Cumulative number of discs the product has printed. Maintenance Box free space Free space of the maintenance box (0 to 100%) If Maintenance Box free space is close to 0%, it is time to replace it.
-
Page 102: Replacing The Ink Pad (Only For Pp-100/Pp-50)
The product notifies you when it is time to replace the ink pad in the following two ways. • When appears in the Printer status display of EPSON Total Disc Utility, it is almost time to replace the ink pad. Clicking displays a message;... -
Page 103: Replacing The Maintenance Box (Only For Pp-100Ii/Pp-100Ap)
• The INK light starts flashing rapidly. • EPSON Total Disc Utility displays a message; “Printing is not possible, because it is time to replace the Maintenance Box. Please replace the Maintenance Box with a new one. Epson brand products are recommended.“... - Page 104 • Do not touch the green IC chip on the maintenance box. • Do not touch the ink ejection port of the maintenance box or the inside of the box insertion opening of the product.
-
Page 105: Replacing The Drive (Only For Pp-100Ii)
• In Mac OS, the PP-100II will not operate when the optional BD drives are installed on it. How to Check When it is Time to Replace the Drive You can check the service life of the drives with EPSON Total Disc Utility. (See “Checking Maintenance Information”... -
Page 106: Precautions For Transporting Your Product
Precautions for Transporting Your Product When transporting your product, be sure to use the original box and protective materials to protect it from an impact or the like. See Setup Guide for Mac for details on the handling of protective materials. •... - Page 107 Maintenance Turn the product off. “Turning Off the Power” on page After the Power light goes off, disconnect the power cord and USB cable. For PP-100II, remove drive 1 and drive 2. For the procedure, see the instruction manual of the drive. Attach protective materials to the arm, and secure them with tape.
-
Page 108: Troubleshooting
Troubleshooting • Refer to this information together with the EPSON Total Disc Utility Help and the information available on the Epson website. Notes • If your problem cannot be resolved even after the following remedies, contact customer support services for assistance. (See “Where to Get Help”... -
Page 109: Disc Transferring (Input/Output) Problems
Troubleshooting Disc Transferring (Input/Output) Problems Symptom/Problem Status Check/Remedy Procedure The arm does not move. Is there a foreign object (such as blue protective tape for transporting) inside the product? Press the power button to turn off the power, and then open the disc cover and check that there are no foreign objects inside. -
Page 110: Disc Writing Problems (Only For Pp-100Ii/Pp-100/Pp-50)
Clean the printer tray. (See “Disc Recording Surface is Stained with Ink” on page 135.) When disc publishing in EPSON Total Disc Maker, Setting Write Verification to Compare Notes enables checking whether data was written correctly. See EPSON Total Disc Maker Help for details. -
Page 111: Label Printing Problems
• Unevenness in the printing Are you using a recommended ink cartridge (Epson brand product)? • Mosaic-like patterns are This product performs color adjustment based on use of Epson brand ink printed cartridges. Use of non-Epson brand products can result in poor printing •... - Page 112 The ink drying time is the time after label printing is completed until the disc ink is dried in the printer tray. Set a longer ink drying time. • When publishing with EPSON Total Disc Maker: Set in Publish view. • When publishing with other applications: Set with the printer driver.
-
Page 113: Other Problems
When a write error occurs based on a preset retry write count, use of the drive is automatically stopped. Set Drive to Use in Properties screen of EPSON Total Disc Utility to restart the drive. (See “Properties Setting” on page 28.) -
Page 114: Checking Lights For Errors
“Checking the Print Head Nozzles” on page 85 for details on the nozzle check. You can check error status and remedies also in EPSON Total Disc Utility. Notes See EPSON Total Disc Utility Help for details. Power light... -
Page 115: Error Associated With Disc Transfer
Troubleshooting Error Associated with Disc Transfer Lights STACKER Conditions/Remedies Power BUSY ERROR Disc pick error Resolve the problem as follows. 1. Open the disc cover and fully separate the discs in the input stacker to prevent them from sticking together. 2. - Page 116 Lights STACKER Conditions/Remedies Power BUSY ERROR Disc transfer error Resolve the problem as follows. 1. Turn the product off. 2. Remove the disc. 3. Turn the product on and retry to publish a disc. Arm failed to release a disc Resolve the problem as follows.
-
Page 117: Error Associated With Stacker
Troubleshooting Error Associated with Stacker Lights STACKER Conditions/Remedies Power BUSY ERROR Only for PP-100II/PP-100/PP-100AP Stacker 3 is inserted for Standard mode or External Output mode (when Stacker 4 is set as the output stacker). Remove Stacker 3. Stacker 1 is not correctly inserted. Insert Stacker 1 correctly. -
Page 118: Error Associated With Ink
Conditions/Remedies Power BUSY ERROR Ink low Prepare a new ink cartridge. Use of Epson brand ink cartridges is recommended. The ink has reached its replacement time or it is not installed correctly. Replace the ink cartridge or reinstall it. (See “How to Replace the Ink Cartridges”... -
Page 119: Error Associated With Printer
Troubleshooting Error Associated with Printer Lights STACKER Conditions/Remedies Power BUSY ERROR Only for PP-100II/PP-100AP The maintenance box has reached its replacement time or it is not installed correctly. Replace the maintenance box or reinstall it. (See “How to Replace the Maintenance Box” on page 103.) If the maintenance box is not recognized even if... -
Page 120: Error Associated With Drives (Only For Pp-100Ii/Pp-100/Pp-50)
Check as follows. 1. Check the disc type. If the disc loaded in the stacker differs from the disc type you set in the Properties screen of EPSON Total Disc Utility, change the disc or setting. (See “Properties Setting” on page 28.) 2. -
Page 121: Other Error
Troubleshooting Other Error Lights STACKER Conditions/Remedies Power BUSY ERROR Improper status error Turn the product off and back on. -
Page 122: Checking With Epson Total Disc Utility
Checking with EPSON Total Disc Utility EPSON Total Disc Utility enables you to check the status of this product and the remedy procedures for errors. “Starting EPSON Total Disc Utility” on page 39 for EPSON Total Disc Utility start procedure. -
Page 123: When Discs Cannot Be Published
Troubleshooting When Discs Cannot be Published If the disc is not published by clicking Publish in the Publish view of EPSON Total Disc Maker, or if the product does not work, check the points below. Check 1: Check of EPSON Total Disc Utility... - Page 124 [Print & Scan] ([Print & Fax] in Mac OS X v10.6) in Hardware. Check that this product icon (EPSON PP-xxx-xxxxxx) is found in Printers. If the icon is not found, the printer is not registered. See Setup Guide for Mac to register the printer.
- Page 125 Troubleshooting Is the printer set to Pause? If Paused is displayed for the product’s icon (EPSON PP-xxx-xxxxxx), follow the steps below to resume the printer. Select the product icon (EPSON PP-xxx-xxxxxx) and double-click Open Print Queue..Click Resume Printer.
- Page 126 If performing all of the above checks still does not resolve the problem, the software may not be installed correctly. Uninstall (delete) the software, and then reinstall it. “Uninstalling the Software” on page 33 for the software uninstallation procedure. See Setup Guide for Mac for the software installation procedure. Please contact Customer Support if this still does not resolve the problem.
-
Page 127: Disc Does Not Come Out
Troubleshooting Disc Does not Come Out Perform the procedure below if the disc cannot be ejected because the drive tray or printer tray does not come out. Drive Tray Does not Come Out (Only for PP-100II/PP-100/PP-50) Turn the power of the product off and then on again. If the drive tray still does not come out, perform the procedure below. -
Page 128: Printer Tray Does Not Come Out
Printer Tray Does not Come Out Turn the power of the product off and then on again. If the printer tray still does not come out, perform the procedure below. For PP-100II Turn the product off. “Turning Off the Power” on page After the Power light goes off, unplug the power plug from the outlet. - Page 129 Troubleshooting Pull out the printer tray. Remove the disc, and close the disc cover. The printer tray automatically closes when the power is turned on in Step 9. Reattach the maintenance box cover. Insert the power plug into the outlet, and turn on the power.
- Page 130 For PP-100/PP-50 Turn the product off. “Turning Off the Power” on page After the Power light goes off, unplug the power plug from the outlet. Remove the two screws to remove the rear printer cover. If the disc can be removed, eject the disc and reattach the rear printer cover. If the disc cannot be removed, proceed to the procedure below.
- Page 131 Troubleshooting Pull out the printer tray. Remove the disc, and close the disc cover. The printer tray automatically closes when the power is turned on in Step 9. Reattach the rear printer cover. Insert the power plug into the outlet, and turn on the power.
- Page 132 For PP-100AP Turn the product off. “Turning Off the Power” on page After the Power light goes off, unplug the power plug from the outlet. Loosen the two screws. Remove the maintenance box cover. Pull out the maintenance box. • Do not tilt the used maintenance box. Otherwise ink may leak. •...
- Page 133 Troubleshooting Grasp the fixture as shown in the figure below, and push the printer tray in the direction of the arrow indicated below. Open the disc cover. Pull out the printer tray. Remove the disc, and close the disc cover. The printer tray automatically closes when the power is turned on in Step 13.
- Page 134 Reattach the maintenance box cover. Tighten the two screws. Insert the power plug into the outlet, and turn on the power.
-
Page 135: Disc Recording Surface Is Stained With Ink
Troubleshooting Disc Recording Surface is Stained with Ink When the disc recording surface is stained with ink, the printer tray may be dirty. Clean the printer tray by following the procedure below. For PP-100II Turn the product off. “Turning Off the Power” on page After the Power light goes off, unplug the power plug from the outlet. - Page 136 Pull out the printer tray. Use a soft cloth to wipe off any dirt on the printer tray. Close the disc cover. The printer tray automatically closes when the power is turned on in Step 10. Reattach the maintenance box cover. Insert the power plug into the outlet, and turn on the power.
- Page 137 Troubleshooting For PP-100/PP-50 Turn the product off. “Turning Off the Power” on page After the Power light goes off, unplug the power plug from the outlet. Remove the two screws to remove the rear printer cover. Grasp the fixture as shown in the figure below, and push the printer tray in the direction of the arrow indicated below.
- Page 138 Pull out the printer tray. Use a soft cloth to wipe off any dirt on the printer tray. Close the disc cover. The printer tray automatically closes when the power is turned on in Step 10. Reattach the rear printer cover. Insert the power plug into the outlet, and turn on the power.
- Page 139 Troubleshooting For PP-100AP Turn the product off. “Turning Off the Power” on page After the Power light goes off, unplug the power plug from the outlet. Loosen the two screws. Remove the maintenance box cover. Pull out the maintenance box. •...
- Page 140 Grasp the fixture as shown in the figure below, and push the printer tray in the direction of the arrow indicated below. Open the disc cover. Pull out the printer tray. Use a soft cloth to wipe off any dirt on the printer tray. Close the disc cover.
- Page 141 Troubleshooting Reattach the maintenance box cover. Tighten the two screws. Insert the power plug into the outlet, and turn on the power.
-
Page 142: Appendix
Where to Get Help Before Contacting Epson If your Epson product is not operating properly and you cannot solve the problem using the troubleshooting information in your product documentation, contact customer support services for assistance. If customer support for your area is not listed below, contact the dealer where you purchased your product. -
Page 143: Help For Users In Australia
Appendix Help for Users in Australia Contacts for information, support, and services are: Epson Australia Pty Ltd 3 Talavera Road North Ryde NSW 2113 Australia Phone: 02-8899-3666 Fax: 02-8899-3777 If you need the latest drivers, FAQs, manuals, or other downloadable, access: http://www.epson.com.au... - Page 144 Epson (Thailand) CO., Ltd. 195 Empire Tower 42nd Floor, South Sathorn Road Yannawa Sathorn, Bangkok 10120 Thailand, Tel: 0-2685-9888 Fax: 0-2685-9889 Helpdesk: 0-2685-9899 http://www.epson.co.th Epson Philippines Corporation 8th Floor, Anson's Centre #23 ADB Avenue, Pasig City 1605, Philippines Trunkline: 63-2 706-2609...
-
Page 145: Product Specifications
Appendix Product Specifications Basic Specifications External dimensions and weight PP-100II Item Description External dimensions 377 mm (W) x 493 mm (D) x 348 mm (H) Weight Approx. 24.0 kg (including the stackers and ink cartridges, but not including the power cord and discs) PP-100 Item Description... -
Page 146: Job Processing
PP-100II/PP-100 Item Description Write and print 30 discs per hour Conditions: When using Epson specified CD-Rs, drive speed of 40x, writing data of 600 MB, and speed/ bidirectional printing 15 discs per hour Conditions: When using Epson specified DVD-Rs, drive speed of 12x, writing data of 3.8 GB, and speed/... -
Page 147: Printing Specifications
Appendix Number of connectable products Item Description Number of products that can be Write and print connected to one PC* Print only *: Guaranteed number of products that can process jobs published from one connected PC at the same time. More than one PP-50 cannot be connected to one PC. - Page 148 Ink cartridge Item Description Form Separate ink cartridge for each color Color Black, cyan, magenta, yellow, light cyan, light magenta Recommended expiration date Use within the expiration date written on each individual packaging box. Use within 6 months of opening the package. Temperature When stored packaged -20°C~40°C...
- Page 149 Appendix Electrical specifications Description Item PP-100II PP-100 PP-100AP PP-50 Rated voltage AC 100 to 240 V Rated frequency 50 to 60 Hz Rated current 1.0 A Power Average during Approx. 52W Approx. 41 W Approx. 30 W Approx. 40 W consumption operation Average during...
-
Page 150: Standards And Approvals
Standards and approvals PP-100/PP-100AP Item Description Safety UL60950-1 CAN/CSA-C22. 2 No. 60950-1 FCC Part 15 Subpart B Class B CAN/CSA-CEI/IEC CISPR 22 Class B AS/NZS CISPR22 Class B Low voltage directive 2006/95/EC EN60950-1 EMC directive 2004/108/EC EN55022 Class A EN61000-3-2 EN61000-3-3 EN55024 PP-100II/PP-50... -
Page 151: Consumables And Options
You can use the following exclusive drive with PP-100II. DVD drive: BDR-PR1EPDV (Part number: C32C891002) • Do not use other drives than the Epson exclusive optional drive. Otherwise the PP-100II and the drive may be damaged. • In Mac OS, the PP-100II will not operate when the optional BD drives are installed on it.