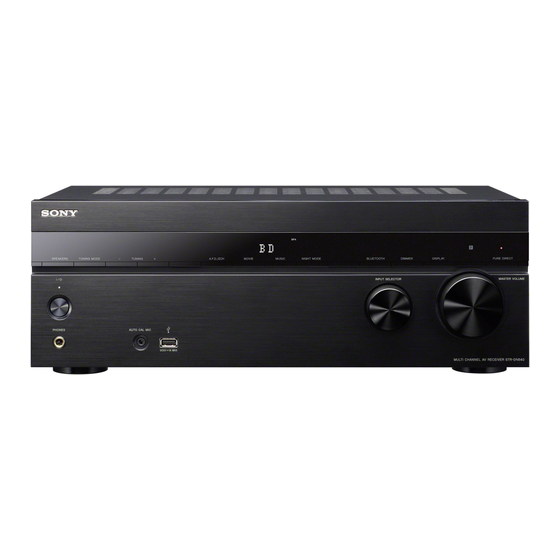
Sony STR-DN840 Operating Instructions Manual
Multi channel
av receiver
Hide thumbs
Also See for STR-DN840:
- Operating instructions manual (140 pages) ,
- Service manual (100 pages) ,
- Reference manual (72 pages)
Table of Contents
Table of Contents

Related Manuals for Sony STR-DN840


Summary of Contents for Sony STR-DN840
- Page 1 4-454-467-52(1) Multi Channel AV Receiver Operating Instructions STR-DN840...
- Page 2 For customers in Europe WARNING Disposal of Old Electrical & Electronic To reduce the risk of fire or Equipment electric shock, do not expose this (Applicable in the apparatus to rain or moisture. European Union and other European To reduce the risk of fire, do not cover the ventilation opening of the appliance with countries with newspapers, tablecloths, curtains, etc.
-
Page 3: About This Manual
• The instructions in this manual are for model purchased the product. STR-DN840. The model number is located at the lower right corner of the front panel. Notice for customers: The The illustrations used in this manual are of... - Page 4 Licensing LLC in the United States and other Thomson. countries. “x.v.Color (x.v.Colour)” and “x.v.Color (x.v.Colour)” logo are trademarks of Sony AirPlay, iPhone, iPod, iPod classic, iPod Corporation. nano, and iPod touch are trademarks of Apple Inc., registered in the U.S. and other countries.
- Page 5 FLAC Decoder OF THE POSSIBILITY OF SUCH DAMAGE. Copyright (C) 2000,2001,2002,2003,2004,2005,2006,2007 Josh Coalson Redistribution and use in source and binary forms, with or without modification, are permitted provided that the following conditions are met: – Redistributions of source code must retain the above copyright notice, this list of conditions and the following disclaimer.
-
Page 6: Table Of Contents
Preparing the Receiver Enjoying audio content stored on Connecting the AC power cord the server ......61 (mains lead) ......32 Enjoying Sony Entertainment Turning on the receiver ....32 Network (SEN) ..... 64 Setting up the receiver using the Using the PARTY STREAMING Easy Setup ......32... - Page 7 Other Operations Switching between digital and analog audio (INPUT MODE) ......... 77 Using other audio input jacks (Audio Input Assign) .... 78 Using a bi-amplifier connection ......79 Reverting back to the factory default settings ...... 79 Adjusting Settings Using the Settings menu ..... 80 Easy Setup ........
-
Page 8: Supplied Accessories
Inserting batteries into Supplied accessories the remote control • Operating Instructions (this manual) Insert two R6 (size-AA) batteries (Australia and Mexico models only) (supplied) in the remote control. Observe • Quick Setup Guide (1) the correct polarity when installing • Remote control (RM-AAU169) (1) batteries. -
Page 9: Description And Location Of Parts
Description and location of parts Front panel A ?/1 (on/standby) (page 32, 48, 54) D A.F.D./2CH, MOVIE, MUSIC The indicator above the button lights (page 50, 51) up as follows: E Display panel (page 10) Green: The receiver is turned on. F SOUND OPTIMIZER (page 53) Amber: The receiver is in standby G INPUT MODE (page 77) - Page 10 Indicators on the display panel A Input indicator G Speaker system indicator Lights up to indicate the current input. (page 34) H Tuning indicator HDMI The receiver recognizes the equipment connected via an HDMI IN jack. Lights up when the receiver tunes to a stereo broadcast.
-
Page 11: Wireless Lan Signal Strength
N Dolby Pro Logic indicator Lights up the respective indicator when the receiver performs Dolby Pro Logic processing. This matrix surround decoding technology can enhance input signals. Dolby Pro Logic PL II Dolby Pro Logic II PL IIx Dolby Pro Logic IIx PL IIz Dolby Pro Logic IIz Note... -
Page 12: Rear Panel
Rear panel A DIGITAL INPUT/OUTPUT section E AUDIO INPUT/OUTPUT section HDMI IN/OUT* jacks (page White (L) AUDIO IN jacks 23, 26, 28) (page 23, 27, 28) Red (R) OPTICAL IN jacks (page 23, SUBWOOFER OUT Black jacks (page 21) COAXIAL IN jack (page 28) F VIDEO INPUT/OUTPUT section B TUNER section (page 23, 27) -
Page 13: Remote Control
The Example: Hold down SHIFT ( ), then remote control is assigned to operate Sony press MEM ( audio/video equipment. You can reassign the input button to match the equipment connected to your receiver (page 97). - Page 14 – select track numbers. Press 0/10 /= to • The Sleep Timer will be canceled when you perform the following. select track number 10. – Press SLEEP again. – select channel numbers. – Update the software of the receiver. – select the letters (ABC, DEF, etc.). –...
- Page 15 +/– – The equipment connected to the supported HDMI input jack is not turned Adjust the volume level of all speakers at the same time. – The current input is not HDMI input. – When “Fast View” is set to “Off”. Turns off the sound temporarily.
- Page 16 To control other Sony equipment Blu-ray Disc CD player Name player player B TV ?/1 C Numeric buttons CLEAR G POP UP/MENU TOP MENU I OPTIONS J HOME K ./> N, X, x Q RETURN O R V/v/B/b, S DISPLAY...
-
Page 17: Getting Started
To output multi channel digital audio, check the HDMI jacks. digital audio output setting on the connected equipment. For a Sony Blu-ray Disc player, check that “Audio (HDMI),” “BD Audio MIX Setting,” “Dolby Digital/DTS,” “Dolby Digital,” and “DTS” are set to “Auto,” “Off,” “Bitstream,”... - Page 18 Digital audio formats supported by the receiver Digital audio formats that this receiver can decode depend on digital audio output jacks of the equipment connected. This receiver supports the following audio formats. Connection between the playback Audio format Maximum number equipment and the receiver [Display] of channels...
-
Page 19: Connections
Connections 1: Installing the speakers This receiver allows you to use up to a 7.2 7.1 channel speaker system channel system (7 speakers and 2 using surround back subwoofers). speakers You can enjoy high fidelity reproduction of Example of speaker system DVD or Blu-ray Disc software recorded configuration sound in 6.1 channel or 7.1 channel format. - Page 20 7.1 channel speaker system using front high speakers You can enjoy vertical sound effects by connecting additional two front high speakers. Place the front high speakers – at an angle between 25° to 35°. – at an angle of 20° ± 5° in height. ±...
-
Page 21: 2: Connecting The Speakers
2: Connecting the speakers Before connecting cords, be sure to disconnect the AC power cord (mains lead). Surround speaker Center speaker Right Left Right Left Right Left Surround back/ Subwoofer * Front A speaker Bi-amplifier/ Front high/ Front B speaker ** A Monaural audio cord (not supplied) B Speaker cord (not supplied) - Page 22 * When you connect a subwoofer with an auto Bi-amplifier connection standby function, turn off the function when watching movies. If the auto standby function is set to on, it turns to standby mode If you are not using surround back speakers automatically based on the level of the input and front high speakers, you can connect signal to the subwoofer, and the sound may...
-
Page 23: 3: Connecting The Tv
Video signals signals Recommended connection A Optical digital cord (not supplied) Alternative connection B Audio cord (not supplied) C Video cord (not supplied) D HDMI cable (not supplied) Sony recommends that you use an HDMI-authorized cable or Sony HDMI cable. -
Page 24: 4A: Connecting The Video Equipment
INPUT MODE (page 77). By connecting Sony “BRAVIA” Sync- **If your TV is not compatible with the ARC compatible equipment using HDMI cables, function, connect A or B. - Page 25 Notes on HDMI connections • Depending on the TV or the video equipment, 4K or 3D images may not be displayed. Check the HDMI video formats supported by the receiver (page 112). • Refer to the operating instructions of each connected equipment for details.
- Page 26 A HDMI cable (not supplied) Sony recommends that you use an HDMI- authorized cable or Sony HDMI cable. Notes • BD input has a better sound quality. When you need a higher sound quality, connect your equipment to the BD (for AUDIO) jack and select BD as input.
- Page 27 Connecting equipment with jacks other than HDMI jacks Satellite tuner, cable TV tuner VCR, DVD recorder, Video game Audio signals Video signals Audio signals Video signals A Optical digital cord (not supplied) Recommended connection B Audio cord (not supplied) Alternative connection C Video cord (not supplied)
-
Page 28: 4B: Connecting The Audio Equipment
Connecting an iPod, 4b: Connecting the iPhone, USB device audio equipment Connecting a Super Audio CD Player, CD player Before connecting cords, be sure to disconnect the AC power cord (mains lead). Super Audio CD player, CD player Audio signals iPod, iPhone, USB device A USB cable (not supplied) -
Page 29: 5: Connecting The Antennas (Aerials)
A Broadband line connection A Broadband line connection to the Internet is required in order to listen to Sony Entertainment Network (SEN) and to update the software of the receiver. Modem This is the device that is connected to the broadband line to communicate with the Internet. - Page 30 LAN cable (CAT5) (For a wired LAN connection only) • We recommend that you use this type of cable for a wired LAN. Some flat-type LAN cables are easily affected by noise. We recommend that you use normal-type cables. • If the receiver is used in an environment in which there is power supply noise from electric products or in a noisy network environment, use a shielded-type LAN...
- Page 31 Configuration example The following illustration is a configuration example of a home network with the receiver and a server. We recommend that you connect the server to the router with a wired connection. Server Internet Modem Router LAN cable LAN cable (not supplied) (not supplied) A For a wired LAN connection only.
-
Page 32: Preparing The Receiver
You can also turn on the receiver using button on the remote control. When you Preparing the Receiver turn off the receiver, press /1 again. “STANDBY” flashes on the display panel. Do not disconnect the AC power cord Connecting the AC (mains lead) while “STANDBY”... - Page 33 • Measure the frequency characteristics • The correct measurements may not be able to 1)2) take or Auto Calibration cannot be performed (Phase). when special speakers, such as dipole speakers The measurement result is not utilized when are used. “Analog Direct” is selected. The measurement result is not utilized when To set up the Auto Dolby TrueHD or DTS-HD signals with a...
-
Page 34: Setting The Speakers
To select the front speaker Setting the speakers You can select the front speakers you want to drive. surround back To set the Be sure to use the buttons on the receiver to speakers perform this operation. You can switch the usage of the speaker(s) SPEAKERS connected to the SURROUND BACK/ BI-AMP/FRONT HIGH/FRONT B... -
Page 35: Configuring The Network Settings Of The Receiver
To cancel Auto Calibration Press V/v repeatedly to select The Auto Calibration function will be “Network Settings”, then press canceled when you perform the following during the measurement process: Press V/v repeatedly to select – Press ?/1. “Internet Settings”, then press –... - Page 36 If your wireless home network is Using a wireless LAN secured by encryption, the connection security key (WEP key, WPA/ WPA2 key) for your network There are several connecting methods you (This will be needed in step 8.) can use to set up a wireless network: searching for an access point, using a WPS * SSID (Service Set Identifier) is a name that connecting method (either the push-button...
- Page 37 When using a fixed IP address What is WPS (Wi-Fi Select “Custom”, then press Protected Setup)? The IP Address Setting appears on the WPS is a standard created by the Wi-Fi TV screen. Alliance allowing you to setup a wireless .
-
Page 38: Guide To On-Screen Display (Osd) Operation
Setting up a wireless • For details on entering the PIN code into the wireless LAN router/access point, refer to the network using the WPS PIN operating instructions of the wireless LAN code method router/access point. If the access point supports the WPS PIN If you cannot find the (Personal Identification Number) code network name (SSID) you... - Page 39 Press V/v repeatedly to select a menu you want, then press enter the menu. The menu item list appears on the TV screen. Example: When you select “Watch”. V/v/B/b, Press V/v repeatedly to select the RETURN OPTIONS menu item you want to adjust, then press to enter the menu item.
-
Page 40: Basic Operations
(page 40). You can also enjoy FM/AM radio of the built in receiver. Input buttons Sound Effects Enables you to enjoy sound development provided by various Sony proprietary technologies or functions (page 50). Settings Adjusts the settings of the receiver (page 80). V/v/B/b, OPTIONS... - Page 41 Press +/– to adjust the volume. You can also use MASTER VOLUME on the receiver. Press SOUND FIELD +/– to enjoy the surround sound. You can also use A.F.D./2CH, MOVIE or MUSIC on the receiver. For details, see page 50. Tips •...
-
Page 42: Playing An Ipod/Iphone
4 Notes • Sony cannot accept responsibility in the event that data recorded to iPod/iPhone is lost or damaged when using an iPod/iPhone connected to this receiver. • This product has been designed specifically to work with iPod/iPhone and has been certified to meet... - Page 43 To operate the iPod/iPhone Selecting the iPod/ using the remote control iPhone control mode You can select the iPod/iPhone control mode using the iPhone CTRL on the remote control. You can also control all operations by viewing the information on the display panel when the TV screen is turned off.
-
Page 44: Playing A Usb Device
To avoid data corruption or devices damage to the iPod/iPhone, turn the receiver off when connecting or removing the iPod/iPhone. You can use the following Sony USB devices on this receiver. iPod/iPhone message list Verified Sony USB device Message and explanation... - Page 45 • The receiver is unable to read data other than To operate the USB device that saved in the first partition of a hard disk using the remote control drive. • Operation of models not listed here is not guaranteed. •...
- Page 46 Notes on the USB device USB message list • Do not remove the USB device during Message and explanation operation. To avoid data corruption or damage to the USB device, turn the Reading receiver off when connecting or The receiver is recognizing and reading information of the USB device.
-
Page 47: Tuner Operations
Select “Listen” from the home menu, then press Tuner Operations Select “FM” or “AM” from the Listening to FM/AM menu, then press The FM or AM menu list appears on radio the TV screen. FM/AM screen You can listen to FM and AM broadcasts You can select and operate each item through the built-in tuner. -
Page 48: Presetting Fm/Am Radio Stations (Preset Memory)
Press ?/1 to turn off the receiver. Tuning to a station While holding down TUNING directly (Direct Tuning) MODE, press ?/1 on the receiver. The current AM tuning scale is You can enter the frequency of a station changed to 9 kHz (or 10 kHz). directly by using the numeric buttons. -
Page 49: Receiving Rds Broadcasts (Europe And Australia Models Only)
Tuning to preset Receiving RDS stations broadcasts Select “FM” or “AM” from the menu, then press (Europe and Australia models only) Select “Select Preset”, then press This receiver allows you to use Radio Data System (RDS), which enables radio Select the preset station you want, stations to send additional information then press along with the regular programming signal. -
Page 50: Enjoying Sound Effects
HD-D.C.S. settings of the receiver. HD Digital Cinema Sound (HD-D.C.S.) is x A.F.D. Auto (A.F.D. AUTO) Sony’s new innovative home theater technology using the latest acoustic and Presets the sound as it was recorded/ digital signal processing technologies. It is... -
Page 51: Music Mode
x PLIIz Height (PLIIz) You can select the effect type for HD- D.C.S. as follows. Performs Dolby Pro Logic IIz mode Dynamic: • This setting is suitable for an decoding. This setting can expand a source environment which is reverberant but sound from a 5.1 channel to a 7.1 channel lacks a spacious feeling (where sound to which a vertical equipment is applied,... - Page 52 x Stadium (STADIUM) When headphones are Reproduces the feeling of a large open-air connected stadium. You can only select this sound field if the x Sports (SPORTS) headphones are connected to the receiver. Reproduces the feeling of sports broadcasting. x HP 2CH This mode is selected automatically if you x Portable Audio (PORTABLE) use headphones (except “Analog Direct”).
-
Page 53: Using The Sound Optimizer Function
– PLIIz Height is available only when the Select “Sound Optimizer”, then speaker pattern is set to a setting with press front high speakers. Select “Normal” or “Low”, then • The sound fields for music and movie do press not work in the following cases. –... -
Page 54: Using The Pure Direct Function
To cancel Pure Direct Select “Front”, “Center”, The Pure Direct function will be canceled “Surround”, or “Front High”, then when you perform the following: press – Press PURE DIRECT again. Select “Bass” or “Treble”. – Change the sound field. – Change the scene setting on the TV Adjust the gain, then press (Scene Select). -
Page 55: Using Network Features
The following server functions of the devices are compatible with this receiver. • Sony VAIO Media plus 1.3, 1.4, 2.0, and receiver • Sony HDD Network Audio System • You can enjoy audio content which has... - Page 56 Select [Control Panel] under When using Windows 8 [Settings]. This section explains how to set up manufacturer-installed Windows Media Player 12 for Windows 8. For details on how to operate Windows Media Player 12, refer to Help for Windows Media Player 12.
- Page 57 Select [Change advanced sharing Select [Allow All]. settings]. The [Allow All Media Devices] window opens. If all the devices in the local network are set to [Allowed], select [OK] and close the window. Select [Choose media streaming options] from Media streaming. Select [Allow all computers and media devices].
- Page 58 Select [Home network] or [Work When using Windows 7 network] according to the environment in which the receiver This section explains how to set up is used. manufacturer-installed Windows Media Player 12 for Windows 7. Follow the instructions that appear For details on how to operate Windows on the display according to the Media Player 12, refer to Help for...
- Page 59 – Select [Allow all]. Go to [Start] [All Programs]. The [Allow All Media Devices] window opens. If all the devices in the local network are set to [Allowed], select [OK] and close the window. Select [Windows Media Player]. Windows Media Player 11 starts up. Select [Media Sharing…] from the Select [Allow all computers and [Library] menu.
- Page 60 Check [Private] and select [Next]. Refresh the server list. When the settings are completed, refresh the server list of the receiver and select this server from the server list. For details on selecting a server, see “To refresh the server list” (page 60).
-
Page 61: Enjoying Audio Content Stored On The Server
When “No server is available” Enjoying audio content appears, or when the server on the list is not available, press OPTIONS. stored on the server Select “Refresh”, then press . The refreshed server list appears. You can play back audio content stored on the server using the receiver in MP3, Linear You can also select “HOME NETWORK”... - Page 62 To add devices to the Tips device list • If you select a folder (such as an artist folder, genre folder, etc.), then press the N button, the Select “Control Device” in “Access receiver plays all items in the selected folder. Settings”, then press •...
-
Page 63: The Remote Control
To register the TV SideView Select “OK”, then press Device The selected device is deleted from the device list. Press HOME NETWORK. Checking the copyright You can also select “HOME NETWORK” protection from “Listen” in home menu. Press OPTIONS. This receiver cannot play back files in Select “TV SideView Device WMA format with DRM copyright Registration”, then press... -
Page 64: Enjoying Sony Entertainment Network (Sen)
Numeric * Depending on the server or track, pause buttons playback may not work when the Home Network function is selected. ALPHABET SEARCH Enjoying Sony Entertainment Network V/v/B/b, (SEN) RETURN OPTIONS You can listen to music services offered on HOME the Internet with this receiver (SEN function). -
Page 65: Presetting Stations
Press SEN. Do the following The service provider list appears on the Use various Press OPTIONS. The TV screen. If the receiver functions while item displayed may vary automatically displays the last selected the receiver is according to the selected service or station, press RETURN O selecting or item or directory. -
Page 66: Using The Party Streaming Function
To listen to the preset Select “SEN”, then press station The service provider list appears on the TV screen. If the receiver automatically Press SEN. displays the last selected service or The service provider list appears on the station, press RETURN O repeatedly TV screen. - Page 67 * Available PARTY STREAMING-compliant be streamed. devices may differ depending on the countries Press PARTY START. or regions. For details on available devices, contact your nearest Sony dealers. “START.PARTY” appears on the display panel. The receiver starts PARTY streaming as a PARTY host.
-
Page 68: Streaming Music From Itunes With Airplay
Joining a PARTY Streaming music from iTunes with AirPlay The receiver can join a PARTY that has been started by another device so that you can enjoy the same audio content being Using a wireless network, you can play played in a different room. back audio content on iOS devices such as While the PARTY host device is an iPhone, iPod touch, iPad or an iTunes... - Page 69 When you use iTunes, set an iOS device to accept control from this receiver and the remote control when you want to use this Select “STR-DN840” on the AirPlay receiver and the remote control to operate menu of iTunes or your iOS device.
-
Page 70: Updating The Software
The receiver accesses the software update appears. Confirm the Sony server to update the software. message and also read the “END- If a new update is available, “[New USER LICENSE AGREEMENT FOR Software] Perform Software Update.”... -
Page 71: Network Settings
To cancel the procedure or Message and explanation to go back to the previous Device list is full screen You cannot register any more devices to the Press RETURN O at any point before the device list. receiver starts the software update. No server is available You cannot cancel the procedure or go There is no server on the network that the... -
Page 72: Searching For An Item Using A Keyword
Message and explanation Searching for an item No service is available using a keyword There is no service provider. Not available • The selected service is not available. When a list is displayed on the TV screen • An operation that is currently unavailable is (such as artist list, a track list, etc.), you can being performed. -
Page 73: Bravia" Sync Features
AV amplifier, etc. that supports the NEXT to display the previous/next Control for HDMI function. item. By connecting Sony equipment that is Repeat steps 1 to 3 until you find compatible with the “BRAVIA” Sync with an HDMI cable (not supplied), operation is... -
Page 74: Preparing For The "Bravia" Sync
If your TV is not compatible Preparing for the with the “Control for HDMI- Easy Setting” function “BRAVIA” Sync V/v/b, The receiver is compatible with the “Control for HDMI-Easy Setting” function. • If your TV is compatible with the HOME “Control for HDMI-Easy Setting”... -
Page 75: One-Touch Play
Notes • When you unplug the HDMI cable or change the You can also select a connected equipment, such connection, perform the steps given in “If your as Blu-ray Disc player or DVD player from the TV is compatible with the “Control for HDMI- TV menu. -
Page 76: System Power-Off
• When “Control for HDMI” is set to “On”, the Note “HDMI Audio Out” settings in the HDMI The sound field may not switch depending on the Settings menu will set automatically based on the System Audio Control settings (page 88). •... -
Page 77: Remote Easy Control
Remote Easy Control Other Operations You can use the TV remote control to Switching between operate the menu of the receiver. digital and analog audio Select the receiver (AV AMP) recognized by the TV. (INPUT MODE) Notes When you connect equipment to both •... -
Page 78: Using Other Audio Input Jacks (Audio Input Assign)
• COAX: Specifies the digital audio Example: signals input to the DIGITAL When you connect the DVD player to the COAXIAL jack. OPTICAL IN 1 (SAT/CATV) jack. • Analog: Specifies the analog audio – Assign the OPTICAL IN 1 (SAT/CATV) signals input to the AUDIO IN (L/R) jack to “DVD”. -
Page 79: Using A Bi-Amplifier Connection
Using a bi-amplifier Reverting back to the connection factory default settings You can clear all memorized settings and Select “Settings” from the home revert the receiver back to the factory menu, then press default settings by performing the The Settings menu list appears on the following procedure. -
Page 80: Adjusting Settings
Select the menu item you want, then press to access the menu Adjusting Settings item. Example: When you select “Speaker Using the Settings menu Settings” You can adjust various settings for speakers, surround effects, etc. using the Settings menu. V/v/B/b, RETURN Select the parameter you want, HOME... - Page 81 Settings menu list Settings Easy Setup (page 82) Speaker Settings Auto Calibration (page 82) Calibration Type Speaker Pattern A.P.M. Center Lift Up SB Assign Manual Setup Crossover Freq. Test Tone Distance Unit Audio Settings D.L.L. (page 86) Sound Optimizer Equalizer Sound Field A/V Sync.
-
Page 82: Easy Setup
• WRN Check: Displays warning Note related to the measurement results. See The menu parameters displayed on the TV screen “Message list after Auto Calibration vary, depending on the current settings or the measurement” (page 83). status of the selected icon. •... - Page 83 Select “WRN Check” in step 2 in “Auto Display and explanation Calibration” (page 82), then press • The surround back speaker is connected If a warning message appears, check the only to the SPEAKERS SURROUND message and use the receiver without BACK/ BI-AMP/ FRONT HIGH/ change.
-
Page 84: Manual Setup
– There are no front high speakers. frequency from each speaker flat. – “2ch Stereo”, “Analog Direct”, and “Multi • Engineer: Sets to “the Sony listening Stereo” is being used. room standard” frequency characteristics. – The sound field for music is being used. - Page 85 Set the size of the selected speaker, Note then press When one of the sound fields for music is • Large: If you connect large speakers selected, no sound is output from the subwoofer if all the speakers are set to “Large” in the Speaker that will effectively reproduce bass Settings menu.
-
Page 86: Audio Settings Menu
Test Tone x D.L.L. (Digital Legato Linear) Lets you select the test tone type on the The D.L.L. function is Sony proprietary “Test Tone” screen. technology that allows low quality digital audio signals and analog audio signals to be Tips played back with high quality sound. -
Page 87: Sound Field
x Sound Optimizer This function is useful, for example, when the sound of a commercial is louder than Lets you enjoy clear and dynamic sound at the TV programs. low volume levels. For details, see “Using • On the Sound Optimizer function” (page 53). •... -
Page 88: Hdmi Settings Menu
HDMI signals from the • When you connect the receiver to a video receiver’s HDMI TV OUT jack. Sony equipment (projector, etc.), sound may not be recommends this setting if you use a output from the receiver. In this case, select “BRAVIA”... -
Page 89: Input Settings Menu
x Subwoofer Level x Audio Input Assign Lets you set the level of the subwoofer to Lets you set the audio input jack(s) 0 dB or + 10 dB when PCM signals are assigned to each input. input via an HDMI connection. You can set For details, see “Using other audio input the level for each input to which an HDMI jacks (Audio Input Assign)”... -
Page 90: System Settings Menu
Select “Information”, then press Press Select the setting item you want to check, then press The default device name is “STR-DN840 The current setting information appears ******”. on the TV screen. “******” is the last 6 digits of MAC Address of the receiver. -
Page 91: Operating Without Using The Osd
x Auto Standby Operating without using Lets you set the receiver switch to standby mode automatically when you do not the OSD operate the receiver or when there is no signals input to the receiver. • On: Switches to standby mode after You can operate this receiver using the approximately 20 minutes. -
Page 92
Overview of the menus The following options are available in each menu. For details on navigating through menus, see page 91. Menu Parameters Settings [Display] [Display] Auto Calibration Auto Calibration start settings [A.CAL START] [
] Auto Calibration type FULL FLAT, ENGINEER, [CAL TYPE] FRONT REF, OFF Auto Phase Matching... -
Page 93
Menu Parameters Settings [Display] [Display] Speaker settings Speaker pattern 5/2.1 to 2/0 (20 patterns) [
] [SP PATTERN] Center Speaker Lift up 1 to 10, OFF [CNT LIFT] Front speakers size LARGE, SMALL [FRT SIZE] Center speaker size LARGE, SMALL [CNT SIZE] Surround speakers size LARGE, SMALL [SUR SIZE]... - Page 94 Menu Parameters Settings [Display] [Display] Front right high speaker distance RH 1.00 m to RH 10.00 m (RH 3’3” to RH 32’9”) [RH DIST.] (0.01 m (1 inch) interval) Subwoofer distance SW 1.00 m to SW 10.00 m [SW DIST.] (SW 3’3”...
- Page 95 Menu Parameters Settings [Display] [Display] Front high speakers bass level FH B. –10 dB to FH B. +10 dB [FH BASS] (1.0 dB step) Front high speakers treble level FH T. –10 dB to FH T. +10 dB [FH TREBLE] (1.0 dB step) Tuner settings FM station receiving mode...
- Page 96 You can select this setting only when you have performed the Auto Calibration and saved the settings. Depends on the speaker pattern setting, some parameters or settings may not be available. xxx represent a speaker channel (FL, FR, CNT, SL, SR, SB, SBL, SBR, LH, RH, SW). You can only select this parameter if “SP PATTERN”...
-
Page 97: Using The Remote Control
DVD recorders. change the assignment, hold down Sony VCRs are operated with a VTR 3 TV ?/1. setting which corresponds to VHS. Example: While holding down SAT/CATV, hold down TV ?/1. -
Page 98: Resetting The Input Buttons
Resetting the input Additional Information buttons Precautions TV INPUT TV ?/1 On safety Should any solid object or liquid fall into the cabinet, unplug the receiver and have it checked by qualified personnel before operating it any further. On power sources •... -
Page 99: Troubleshooting
Should any problem sunlight, excessive dust, or mechanical persist, consult your nearest Sony dealer. shock. Note that if service personnel changes • Do not place anything on top of the... - Page 100 • Depending on the playback The OSD menu does not appear on the equipment, you may need to set up the TV screen. equipment. Refer to the operating • Press HOME. instructions supplied with each • Check that the TV is connected equipment.
- Page 101 • When you want to listen to the sound • Adjust the speaker level (page 84). from the TV speaker, set the “HDMI • Check that the speaker settings are Audio Out” to “TV+AMP” in the appropriate for the setup using the HDMI Settings menu (page 88).
- Page 102 • Audio signals (format, sampling – Be sure to change the input of the frequency, bit length, etc.) transmitted receiver to HDMI when you want to from an HDMI jack may be suppressed watch a program on the equipment by the connected equipment. Check connected via HDMI connection to the setup of the connected equipment if the receiver.
- Page 103 • Set “HDMI Audio Out” to “AMP” in • (For Australia and Mexico models the HDMI Settings menu (page 88). only) • You can enjoy High Bitrate Audio Make sure “Pass Through” is set to (DTS-HD Master Audio, Dolby “On” in the HDMI Settings menu if TrueHD), DSD, and Multi Channel you connect equipment not compatible Linear PCM only with an HDMI...
-
Page 104: Usb Device
• Press AMP, then press DISPLAY • You are using an unsupported iPod/ repeatedly on the remote control so iPhone. See “Compatible iPod/iPhone that the frequency appears on the models” (page 42) for the supported display panel. device types. RDS does not work.* The ringtones volume of the iPhone does not change. -
Page 105: Network Connection
• Connect the supported USB device • USB device formatted with file (page 44). systems other than FAT16 or FAT32 • Press N to start playback. are unsupported.* • If you use partitioned USB device, The USB device cannot be connected only audio files on the first partition into the (USB) port. - Page 106 • Check the settings of the wireless LAN • The server may be unstable. Restart it. router/access point and do the setup • Confirm that the receiver and the again. For details on the settings of the server are connected to the wireless devices, refer to the operating LAN router/access point correctly.
- Page 107 • Refer to the operating instructions of • Check to confirm whether the audio your wireless LAN router/access file on the server has been damaged or point, and check the multicast setting. erased. Refer to the operating If the multicast setting is enabled on instructions supplied with the server.
- Page 108 • Confirm that the network is correctly The receiver joins an unintended set up. If it is not, the connection PARTY. cannot be made (page 90). • If more than one PARTY has been • The device on the device list is set to started when the receiver joins, the “Not Allow”...
- Page 109 • The receiver is not selected as the • Make sure the connected equipment is remote speaker on the iOS device. compatible with the Control for HDMI Select the receiver as the network function. speaker. • Check the Control for HDMI settings on the connected equipment.
-
Page 110: Error Messages
Refer to the following web site for details condition of the system by the message. If of the latest information on the receiver. any problem persists, consult your nearest Sony dealer. For customer in Europe: http://support.sony-europe.com/ PROTECTOR Irregular current is output to the... -
Page 111: Specifications
Digital (Coaxial) Impedance: 75 ohms Specifications S/N: 100 dB (A, 20 kHz LPF) Digital (Optical) Amplifier section S/N: 100 dB (A, 20 kHz LPF) Mexico model Output (Analog) Minimum RMS Output Power SUBWOOFER (6 ohms, 20 Hz – 20 kHz, THD 0.09%) Voltage: 2 V/1 kilohm 90 W + 90 W Equalizer... - Page 112 HDMI Video Input/Output (HDMI Repeater block) Format Frame Side-by-Side Over-Under packing (Half) (Top-and-Bottom) 4096 × 2160p @ 23.98/24 Hz – – – 3840 × 2160p @ 29.97/30 Hz – – – 3840 × 2160p @ 25 Hz – – – 3840 ×...
- Page 113 NETWORK section Ethernet LAN 10BASE-T/100BASE-TX Wireless LAN Compatible standards: IEEE 802.11 b/g Security: WEP 64 bit, WEP 128 bit, WPA/ WPA2-PSK (AES), WPA/WPA2- PSK (TKIP) Radio frequency: 2.4 GHz General Power requirements Area Power requirements Mexico 127 V AC, 60 Hz Europe 230 V AC, 50/60 Hz...
-
Page 114: Index
Index Numerics Clear memory 79 2 channel 50 remote control 98 5.1 channel 19 sound field 54 7.1 channel 19 Connection antennas 29 audio equipment 28 A.F.D. mode 50 Network 29 A/V Sync. 87, 95 speakers 21 Access Point Scan 36 TV 23 Advanced Auto Volume 87 USB device 28... - Page 115 Movie mode 50 Music mode 51 Fast View 89 Music Services 64 Fixed IP address 37 Muting 41 FM 47 FM Mode 47, 95 Name Input 49 Network settings 89 HD-D.C.S. 50 Network Standby 90 HDMI 95 Network Update 91 HDMI Audio Out 88, 95 HDMI Settings 88, 95 Home Network 61...
- Page 116 Software Update 91 Sound Effects 50 PIN code 38 Sound field 50 Push button 37 Speaker Pattern 84, 93 Speaker Settings 82, 93 SPEAKERS 34 Subwoofer Level 89 Super Audio CD player 28 Surround Settings 94 System Audio Control 75 System Power-Off 76 System Settings 90, 95 Test Tone 86, 92...
- Page 117 SOFTWARE”. You may use the SONY SOFTWARE only with the PRODUCT. By using the SONY SOFTWARE, you agree to be bound by the terms of this EULA. If you do not agree to the terms of this EULA, SONY is unwilling to license the SONY SOFTWARE to you. In such event, you should not use the SONY SOFTWARE.
- Page 118 ALLOCABLE TO THE SONY SOFTWARE. EXPORTS If you use or transfer the SONY SOFTWARE in or to a country other than your country of residence, you shall comply with applicable laws and regulations relating to exports, imports and customs. GOVERNING LAW This EULA shall be construed, governed, interpreted and applied in accordance with the laws of Japan, without regards to any conflict of laws provisions.
- Page 120 4-454-467-52(1) ©2013 Sony Corporation Printed in Malaysia...