Table of Contents
Quick Links
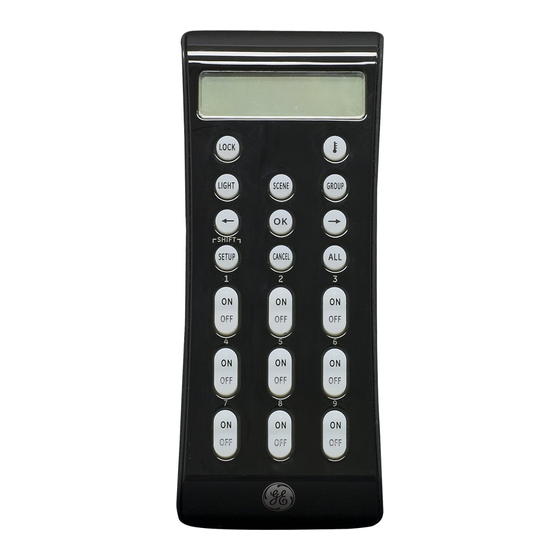
Wireless Lighting Control
Advanced Remote
SmartHome
18
Control up to 232 Z-Wave enabled devices.
*A group turns multiple lights on/off at the same time.
**A scene dims or brightens lights in multiple areas
to suit your mood.
Works with any Z-wave
certified lighting module
™
•
Individual Z-Wave devices
•
Groups*
•
Lighting scenes**
Table of Contents

Related Manuals for GE 45633


Summary of Contents for GE 45633
- Page 1 Wireless Lighting Control Advanced Remote SmartHome ™ • Individual Z-Wave devices • Groups* • Lighting scenes** Control up to 232 Z-Wave enabled devices. *A group turns multiple lights on/off at the same time. **A scene dims or brightens lights in multiple areas to suit your mood.
-
Page 2: Table Of Contents
TABLE OF CONTENTS INTRODUCTION ................4-5 Z-WAVE TERMINOLOGY ............6-7 INSTALLING BATTERIES .............. 8 Battery Use and Safety ............8 To Install Batteries ..............8 WIRELESS RANGE ................9 Effects of Home Construction on Wireless Range .. Between Z-Wave Enabled Devices ....... 9 NOTES ON SETUP AND CONTROL ........ - Page 3 EVENTS .................... 18 Adding an EVENT ..............18 Random EVENTS ..............19 Disabling/Re-enabling an EVENT ........ 19 Reviewing EVENTS ............. 19 Deleting an EVENT ............. 19 DOOR LOCKS ................. 20 Adding a Door Lock ..............20 Controlling a Door Lock ........... 20 Deleting a Door Lock ............
-
Page 4: Introduction
INTRODUCTION Thank you for purchasing the GE 45633 LCD Remote. This remote allows you to control Z-Wave certified door locks and thermostats as well as Z-Wave lighting devices. Your Z-Wave home control network can include up to 232 Z-Wave enabled devices. You can also set up and control up to 18 individual lights, 18 groups of lights as well as 18 scenes for task or mood lighting. - Page 5 Additional features include: • Easy to use LCD menu system • Backlit keypad and LCD • Event programming which allows you to set timed events such as turning on all of your lights at a certain time every day. • Control up to 4 Z-Wave certified thermostats for your HVAC Systems.
-
Page 6: Z-Wave Terminology
If this remote is used as the primary controller, you must use it to create your control network. You can use multiple remote controls with your Z-Wave lighting control network; however, only one remote will act as the primary controller. The primary controller must be used to add or delete devices (lights / nodes) from your network. -
Page 7: Installing Batteries
automatically recognizes changes to the network and updates its routing tables accordingly. Light/Node/Device: Node is the technical term used to describe a Z-Wave device in your home control network. Please note that the terms “Node”, “Device” and “Light” all refer to an individual Z-Wave enabled device and are interchangeable within the context of these instructions. -
Page 8: Battery Use And Safety
10-18. 2. Z-Wave devices controlling appliances should be removed from “All” control setting. Instructions on how to do this are included in the manual for your GE remote. 3. Do Not include Z-Wave devices in Groups or Scenes if they control appliances. -
Page 9: Effects Of Home Construction On Wireless Range
transmission distances of 25 meters or approximately 82 feet. Actual performance in a home depends on the number of walls between the remote controller and the destination device, the type of construction and the number of Z-Wave enabled devices installed in the control network. Most Z-Wave enabled devices act as signal repeaters and multiple devices result in more possible transmission routes which help eliminate “RF dead-spots”. -
Page 10: Operational Note Regarding These Instructions
FAILURE, the remote has not successfully communicated with the device. Try again if this occurs. • Dimming a GE brand dimmer to its lowest brightness level Does Not turn the light off even though it may appear off. You must press and release the Off key to actually turn it off. -
Page 11: Adding A Device To Your Home Network Without Assigning It To A Specific Number Key
In order to control the lights, they must be Z-Wave enabled and you must first add them to your home network. There are several ways to do this using your primary controller. 1. Add lights so that they can be controlled individually using the number keys (maximum of 18). -
Page 12: Controlling Individual Lights
The light will continue to get dimmer until the key is released or it reaches in minimum intensity. NOTE: Dimming a GE brand dimmer to its lowest brightness level Does Not turn the light off even though it may appear off. You must press and release the Off key to actually turn it off. -
Page 13: Deleting A Light From Your Network
5. Press OK. The screen will display SUCCESS. Deleting A Light From Your Network This completely removes the device from your home control network and if it is a GE brand device, resets it to its factory default settings. 1. Enter Setup and select LGHT SETUP. -
Page 14: Controlling A Group
Controlling a Group: 1. Press and release GROUP once to put the remote into GROUP Control mode. The screen will display GROUP. The remote will stay in this mode until one of the other modes is selected. 2. Press and release the number key for the group you wish to control (1-9). -
Page 15: Adding A Light To A Scene
SCN SETUP Remove Delete Label Adding a Light to a Scene: 1. Enter SETUP and select SCN SETUP. 2. Press OK. The screen will display ADD. 3. Press OK. The screen will display SEL DIGIT. 4. Press the number key (1-9) for the scene you wish to add the device to. -
Page 16: Deleting A Scene
10. Press OK; the screen will display SUCCESS. ALL-ON and ALL-OFF Control The factory default setting for GE Z-Wave lighting control devices is to be included in All-On and All-Off control. Other brands of Z-Wave enabled lighting control devices may have to be manu- ally added to “All”... -
Page 17: To Turn All Devices On Or Off, Perform The Following Steps
commands) • EX OFF ONLY (excluded from “ALL OFF” but still responds to “ALL ON” commands). ALL SETUP Inc On/Off Ex On Only Ex Off Only Ex On/Off To Turn all devices on or off, perform the following steps: 1. Press ALL once to put the remote in ALL Mode. The remote will stay in this mode until one of the other modes is selected. -
Page 18: Setting The Date
6. Adjust the minutes by pressing the #2 key. 7. Adjust the AM/PM setting with the #3 key (12 hr mode only). 8. Press OK. The screen will display SUCCESS. Setting the Date: 1. Enter SETUP and select DATE/TIME. 2. Press OK. The screen will display TIME. 3. -
Page 19: Random Events
control. 10. Press OK. The screen will display ON TIME. 11. Adjust the hour by pressing the #1 key. 12. Adjust the minutes by pressing the #2 key. 13. Adjust the AM/PM setting with the #3 key (12 hr mode only). 14. -
Page 20: Door Locks
4. Press OK. The Screen will display SEL DIGIT. 5. Press the number key for the EVENT you want to DELETE. 6. Press OK. The screen will display SUCCESS. DOOR LOCKS This remote is a Security Enabled Z-Wave controller. It is capable of being part of a secure Z-Wave network. -
Page 21: Deleting A Door Lock
appear in the lower right corner. The icon indicates the lock’s current status; locked or unlocked. Please note that actual operation of a door lock varies by manu- facturer. Some brands activate the mechanism to allow manual operation of the deadbolt while others automatically extend or retract the deadbolt. -
Page 22: Controlling A Thermostat
detailed instructions. ** The remote is designed to control most Z-Wave lighting control devices, door locks and thermostats sold in North America. If during the inclusion process, a thermostat is not a recognized device (“unknown”), it cannot be added to the network using the normal Setup/Thermostat/Add process and the remote will display “Failure”... -
Page 23: Deleting A Thermostat
ADVANCED CONFIGURATION Some Z-Wave devices provide advanced capabilities avail- able only through the use of a remote control like the GE 45633 Advanced Remote. One example is the GE in-wall dimmer which allows the end user to create 3 different dim rates depending upon how the dimmer is activated (manually, via a normal Z-Wave “Dim”... -
Page 24: To Create An Association
• GE Z-Wave lighting controls cannot be the source/controlling device however, they can be the destination device (one GE light switch cannot be setup to control another GE light switch but a motion sensor can be setup to control a GE light switch). -
Page 25: Replication (Copying Information To Another Remote)
Put the primary remote into programming mode so that it sends information to the secondary remote. If the primary remote is a 45633 LCD Remote, refer to the section above on Sending Network Information. 3. On the target 45633, enter SETUP and select TRANSFER. -
Page 26: To Reset The Network
PRIMARY CONTROLLER SHIFT (TRANSFER) You can transfer all of the 45633’s information to another remote, so it becomes the new primary controller. The 45633 will retain all of its programming; however, it will now be a secondary controller. Transferring Primary Controller Information: 1. -
Page 27: Functional Overview
To Recover Network Information: 1. Enter SETUP and select NETWORK. 2. Press OK. The screen will display RESET. 3. Use either Arrow key to select RECOVERY. 4. Press OK. The screen will display WAITING. 5. When the screen displays SUCCESS. You have successfully re- covered network information. -
Page 28: Troubleshooting
ON command, try increasing the brightness level. GE dimmers are programmed to turn on to their last used bright- ness level. Lowering the brightness level of a GE dimmer to its minimum setting does not turn the device off even though it looks like it is off. -
Page 29: Warranty
Compliance with IC Rules and Regulations IC: 6924A-ZW5303 Jasco Products Company Model: 45633 / ZW5303 Object is subject to the following two conditions: 1. This device may not cause interference, and 2. This device must accept any interference, including interference that may cause undesired operation of the device.”... - Page 32 GE is a trademark of General Electric Company and is used under license by Jasco Products Company LLC, 10 E. Memorial Rd., Oklahoma City, OK 73114. MADE IN CHINA © 2014, JASCO Products Z-Wave is a registered US trademark of Sigma Designs 45633 Ver.