Honeywell PC42T User Manual
Desktop printer
Hide thumbs
Also See for PC42T:
- User manual (73 pages) ,
- Quick start manual (3 pages) ,
- Quick start manual (2 pages)
Table of Contents
Table of Contents

Related Manuals for Honeywell PC42T


Summary of Contents for Honeywell PC42T
- Page 1 PC42t Desktop Printer User Guide...
- Page 2 Disclaimer Honeywell International Inc. (“HII”) reserves the right to make changes in specifications and other information contained in this document without prior notice, and the reader should in all cases consult HII to determine whether any such changes have been made. The information in this publication does not represent a commitment on the part of HII.
-
Page 3: Table Of Contents
About the PC42t Printer ........ - Page 4 Media Settings ..........49 PC42t Desktop Printer User Guide...
- Page 5 Predefined INPrint Label Formats ....... 60 PC42t Desktop Printer User Guide...
- Page 6 Contents PC42t Desktop Printer User Guide...
-
Page 7: Customer Support
For warranty information, go to www.honeywellaidc.com and click Resources > Warranty. The limited duration of the warranty for the PC42t printer is as follows: • The duration of the limited warranty for printers is one year. • The duration of the limited warranty for the printhead is six months. - Page 8 Caution: Carefully read the warning text on the envelope before using a cleaning card. Caution: To reduce the risk of electric shock or fire, keep the cover closed and turn off the printer when not in use. No user-serviceable parts inside. viii PC42t Desktop Printer User Guide...
-
Page 9: About The Printer
About the Printer This chapter introduces the PC42t printer. It includes descriptions of the printer features and basic operation. -
Page 10: About The Pc42T Printer
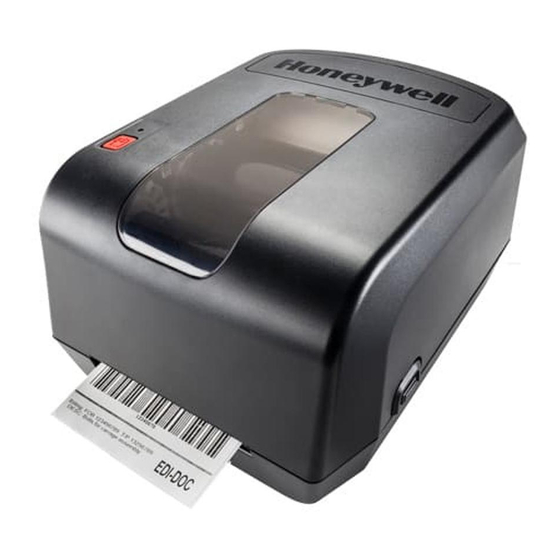
Chapter 1 — About the Printer About the PC42t Printer The PC42t printer is a lightweight, reliable printer that is easy to use. It is designed to print up to 1000 labels a day. Printer features include: • 203 dpi (8 dots/mm) printing. -
Page 11: About The Print Button
(testfeed). seconds and then release (when the printer is idle) Press and hold the The printer prints out several labels (testfeed) Print button (when and then prints the configuration label. the printer is idle) PC42t Desktop Printer User Guide... -
Page 12: About The Status Led
The simulator (ZSim and ESim) is starting up. Solid green The printer is idle and waiting for the next print job. Blinking orange The printer is upgrading its firmware from an inserted USB flash drive. PC42t Desktop Printer User Guide... -
Page 13: About Media
The printer supports both direct thermal and thermal transfer media. To use thermal transfer media, you also need thermal transfer ribbon. The PC42t printer supports media from 1 to 4.33 inches (25 to 110 mm) wide. PC42t Desktop Printer User Guide... -
Page 14: Load Tear-Off Media
1 Press in on the cover latches on both sides of the printer and open the cover. 2 Press in on the top of both locking tabs to open the print and ribbon mechanism. PC42t Desktop Printer User Guide... - Page 15 If you are using black mark media, slide the black mark sensor so that the marks pass over the sensor. • For all other media types, make sure the black mark sensor is in the center of the media path. PC42t Desktop Printer User Guide...
- Page 16 7 Adjust the media holders to the width of the media or liner. Make sure the media lays flat. 8 Lower the print and ribbon mechanism and press down until both locking tabs snap into place. PC42t Desktop Printer User Guide...
- Page 17 Chapter 1 — About the Printer 9 Close the cover. 10 Press the Print button to feed media out to the first label in the roll. PC42t Desktop Printer User Guide...
-
Page 18: Load External Media
Make sure to select ribbon that matches the face materials of the media to obtain the best durability and print quality. Note: The PC42t can only use ribbon that is “ink out,” which means that the ribbon is loaded with the inked side (the dull side) facing out. - Page 19 Chapter 1 — About the Printer 1 Press in on the cover latches on both sides of the printer and open the cover. PC42t Desktop Printer User Guide...
- Page 20 2 Insert one ribbon adapter into the thermal transfer ribbon roll and insert the other ribbon adapter into the empty ribbon takeup core. If your media is not very wide, center the media and the empty ribbon takeup core on the ribbon adapter. PC42t Desktop Printer User Guide...
- Page 21 4 Place the empty ribbon takeup core between the front takeup core holders. 5 Make sure both ribbon adapters are “locked” into the ribbon wheels on the left side of the print and ribbon mechanism. PC42t Desktop Printer User Guide...
- Page 22 7 Feed the ribbon down through the opening in the bottom of the print and ribbon mechanism, over the printhead and the front of the mechanism, and attach it to the empty takeup core. PC42t Desktop Printer User Guide...
- Page 23 8 Turn the slack wheel to take up slack in the ribbon. Make sure the ribbon surface is smooth and that the ribbon is winding correctly. 9 Close the print and ribbon mechanism. 10 Close the printer cover. PC42t Desktop Printer User Guide...
-
Page 24: Connect The Printer To Power
Connect the Printer to Power Caution: Use only the AC power adapter supplied with the printer. The use of a power adapter not approved by Honeywell voids the product warranty and may damage the printer. Caution: Turn the printer off when not in use. -
Page 25: About Direct Protocol
You may need to configure the media type and print method when you set the command language through the printer web page or the printer configuration software (not applicable when setting the printer command language with the Print button). PC42t Desktop Printer User Guide... -
Page 26: Set The Command Language With The Print Button
1 Make sure that the printer has media and ribbon (if necessary) installed. 2 On your PC, open a browser. 3 In the Location or Address bar, type the printer IP address and press Enter. The printer web page appears. PC42t Desktop Printer User Guide... -
Page 27: About Test Labels
2 Connect the printer to power and turn on the printer. 3 Press and hold the Print button until the printer calibrates the media, prints a configuration label, and then lets you select the printer command language. PC42t Desktop Printer User Guide... -
Page 28: Print A Test Label When The Printer Is Ready To Print
1 Make sure that the printer has media and ribbon (if necessary) installed. 2 Press and hold the Print button until the printer advances media to the beginning of the next label. The printer will then print out a Configuration label. PC42t Desktop Printer User Guide... -
Page 29: Connect The Printer
Connect the Printer ® This chapter explains how to download the Windows printer drivers and connect the PC42t printer to your PC and an Ethernet network. -
Page 30: Install Printer Drivers
In the Product Category list, select Printers. b In the Product Family list, select Fixed Printer. c In the Product list, select PC42t Desktop Printer and then click Submit. 4 In the downloads page, select the latest version of InterDriver. If a Security Warning dialog box appears, click Run. -
Page 31: How To Connect The Printer To Your Pc
1 Connect one end of the serial cable to the connector on the back of the printer and connect the other end to your PC. 2 Configure the serial port settings with the printer web page or with PrintSet. PC42t Desktop Printer User Guide... -
Page 32: Connect The Printer To Your Network
USB storage device. 1 If you are connecting a USB storage device, make sure the device has a single partition and is formatted as FAT16 or FAT32. 2 Connect the device to the USB host port. PC42t Desktop Printer User Guide... -
Page 33: Configure The Printer
• with PrintSet. PrintSet is available on the PrinterCompanion CD. The latest version is available from the Honeywell web site at www.honeywellaidc.com. Configure the Printer from the Printer Web Page You can configure most network settings from the printer web page. - Page 34 For media, print quality, or performance settings, click Printing. • For display, service, and general settings, and maintenance alert message triggers, click System Settings. • To set conditions that trigger error, warning, and information alert messages, click Alerts. PC42t Desktop Printer User Guide...
-
Page 35: Configure The Printer With Printset
You should check for periodic updates to the printer firmware. Updated firmware can include bug fixes or additional features that you might find useful. The latest version of the firmware is available from the PC42t printer Downloads page on www.honeywellaidc.com. -
Page 36: Download The Printer Firmware Update
1 Make sure the USB storage device has a single partition and is formatted as FAT16 or FAT32. 2 Download the printer firmware from the Honeywell website. 3 Copy the firmware upgrade file (typically a .bin format) to the root of a USB storage device. -
Page 37: Troubleshoot And Maintain The Printer
Troubleshoot and Maintain the Printer... -
Page 38: Contact Product Support
• Printer command language • Serial port settings (if applicable) • Media settings • Ethernet settings (if applicable) You can find all of this information on the printer web pages or on a test label. PC42t Desktop Printer User Guide... -
Page 39: Locate The Printer Configuration And Serial Numbers
Chapter 3 — Troubleshoot and Maintain the Printer Locate the Printer Configuration and Serial Numbers You can also find the printer configuration and serial numbers on the product label located on the bottom of the printer. Configuration Label PC42t Desktop Printer User Guide... -
Page 40: Printer Problems And Possible Solutions
• If a “Printhead Lifted” error is reported and the printhead is closed, make sure the round white sticker is present on the right side of the print and ribbon mechanism. PC42t Desktop Printer User Guide... -
Page 41: How To Restore Default Settings
5 When the status LED starts blinking green, press and hold the Print button until the status LED turns off. 6 Make sure the media is loaded correctly. 7 Close the print and ribbon mechanism. 8 Close the cover. PC42t Desktop Printer User Guide... -
Page 42: Restore Default Settings From The Printer Web Page
IP address and network name. • Check the User-Installed Files check box to erase all files you uploaded to the printer memory. • Check the System Settings check box to restore defaults for system settings, such as media width. PC42t Desktop Printer User Guide... -
Page 43: Restore Default Settings With Printset
8 If necessary, clean residue from the platen roller or tear bar with a cotton swab moistened with isopropyl alcohol. 9 Once the parts are dry, replace the media (and ribbon) in the printer. 10 Close the printer, reconnect power, and turn on the printer. PC42t Desktop Printer User Guide... -
Page 44: Replace The Printhead
5 Carefully slide the printhead out of the mechanism. The printhead is still attached to the mechanism by a ribbon cable and a grounding screw. 6 Unscrew the grounding screw with a #2 Phillips screwdriver. PC42t Desktop Printer User Guide... - Page 45 12 When the printhead is in the correct position, the printhead latches snap into place on the sides of the printhead. For a thermal transfer printer, install the ribbon. 13 Close the print and ribbon mechanism and the cover. PC42t Desktop Printer User Guide...
-
Page 46: Clean The Platen Roller
3 Press in on the top of both locking tabs to open the print and ribbon mechanism. 4 Remove the installed media (and ribbon). 5 Pry up on the end of the platen roller near the gear. PC42t Desktop Printer User Guide... -
Page 47: Clean The Interior Of The Printer
Clean the Interior of the Printer To keep the interior of the printer clean: • Make sure the media path is clean. • Make sure sensor mylar covers are free of fingerprints, oil, dirt, and dust. PC42t Desktop Printer User Guide... -
Page 48: Clean The Exterior Of The Printer
Make sure to keep the surface surrounding the printer clean as well. Honeywell has tested and recommends these cleaning products for compatibility with the exterior of the PC42t printer. Recommended Cleaners... -
Page 49: Specifications
Specifications This appendix contains specifications for the PC42t printer. -
Page 50: Printer Specifications
Storage Temperature: -40 °C to 60 °C (-40 °F to 140 °F) Relative Humidity: 15 to 80% non-condensing PC42t Print Speed, Resolution, and General Media Specifications Print Mode: Direct thermal, thermal transfer Print Speed (variable): 50, 75, and 100 mm/sec (2, 3, and 4 ips) - Page 51 DHCP Raw TCP BOOTP Web page Universal Font Scaling Technology and Standard Latin Fonts Andale Mono Andale Mono Bold Univers Univers Bold Univers Condensed Bold OCR-A OCR-B CG Triumvirate Condensed Bold MHeiGB18030C_Medium (Simplified Chinese GB18030) PC42t Desktop Printer User Guide...
- Page 52 Supports 1-bit color depth (black and white) only: Drivers Support for Microsoft Windows XP, Vista, Windows 7, Server 2003, and Server 2008 Supports 32-bit and 64-bit editions InterDriver also supports Windows 8 and Windows Server 2012 PC42t Desktop Printer User Guide...
-
Page 53: Supported Bar Code Symbologies
HIBC 39 • HIBC 128 • Industrial 2 of 5 • Interleaved 2 of 5 • ISBT-128 • Matrix 2 of 5 • Straight 2 of 5 • • Add-on bar code symbologies: • Add-on 2 PC42t Desktop Printer User Guide... - Page 54 USPS 4-State Customer Bar Code • Composite bar code symbologies: • EAN-8 Composite (CC-A, CC-B) • EAN-13 Composite (CC-A, CC-B) • GS1 Composite (previously called EAN.UCC Composite) • UPC-A Composite (CC-A, CC-B) • UPC-E Composite (CC-A, CC-B) PC42t Desktop Printer User Guide...
-
Page 55: Default Settings
Default Settings This appendix contains all of the default settings for the printer. -
Page 56: Default Configuration
Specifies if software flow control (XON/XOFF) is used Disable to manage the rate of data transmission to the host. XON/XOFF From Specifies if software flow control (XON/XOFF) is used Disable to manage the rate of data transmission from the host. PC42t Desktop Printer User Guide... -
Page 57: Ethernet Settings
From the printer web page, click the Configure tab > Printing > Media. Note: If the printer is not connected to a network, you need to use PrintSet 5 through a USB connection to configure the media settings. PC42t Desktop Printer User Guide... - Page 58 Unit of measurement is defined in the Unit of Measurement parameter. Media Width Sets the width of the printable area measured from 812 dots the media margin (X) across the printhead. Unit of measurement is defined in the Unit of Measure parameter. PC42t Desktop Printer User Guide...
- Page 59 Unit of measurement is defined in the Unit of Measure parameter. Range is -9999 to +9999. Media Calibration Selects the mode the printer uses to calibrate media. Fast Mode Use Slow if the printer has trouble identifying gaps or marks in media PC42t Desktop Printer User Guide...
-
Page 60: Print Quality Settings
Sets how fast the printer prints labels. The unit of measure is defined in the Unit of Measure parameter. Darkness Sets the image darkness for media and ribbon. Adjust Variable this parameter with the Media Sensitivity parameter. Range is 1 to 100. PC42t Desktop Printer User Guide... -
Page 61: General System Settings
Selects the unit of measure that is used to Dots define several printing parameters. Zero with Slash Determines how zero is printed or displayed on Disable (0) the screen. Disable is zero (0), Enable is (Ø). PC42t Desktop Printer User Guide... -
Page 62: Manage I/O Settings
Determines if the printer can use Telnet to Enable communicate with Direct Protocol (Fingerprint). Determines if the printer can use the LPR (Line Enable Printer Server) daemon. Telnet Determines if the printer can use Telnet to Enable communicate with another device. PC42t Desktop Printer User Guide... -
Page 63: Dns Network Services
Sets the port number that defines the Net1 TCP 9100 port. The range is from 0 to 65535. New Line Defines the characters that the printer echoes CR/LF Character to the host to indicate that it has moved to a new line. PC42t Desktop Printer User Guide... -
Page 64: Wins Network Services
From the printer web page, click the Configure tab > Network Settings > Web Server. Web Server Network Services Settings Setting Description Default Image Buffer Determines if the image buffer appears in the Enable printer web page. PC42t Desktop Printer User Guide... -
Page 65: Print Labels With Inprint
Print Labels with INPrint This appendix explains how to use the INPrint feature to print labels. -
Page 66: About The Inprint Page
1 On your desktop PC, start a browser. 2 In the address bar, type the IP address of your printer and press Enter. The printer web page appears. 3 Click Login. The Login page appears. PC42t Desktop Printer User Guide... - Page 67 7 Type information in the web form as needed. 8 (Optional) To preview the label on the screen, click Preview. An Example of a Resident Return Address Label 9 To print the label, click Print. PC42t Desktop Printer User Guide...
-
Page 68: Predefined Inprint Label Formats
Appendix C — Print Labels with INPrint Predefined INPrint Label Formats Predefined INPrint Label Formats and Sample Illustrations Format Name Sample 203_returnadd_3x1.lbx 203_in_demo_4x6.lbx PC42t Desktop Printer User Guide... - Page 69 Appendix C — Print Labels with INPrint Predefined INPrint Label Formats and Sample Illustrations (continued) Format Name Sample 203_shipaddr_4x6.lbx 203_packslip_4x6.lbx PC42t Desktop Printer User Guide...
- Page 70 Appendix C — Print Labels with INPrint PC42t Desktop Printer User Guide...
- Page 72 Honeywell Scanning & Mobility 9680 Old Bailes Road Fort Mill, SC 29707 www.honeywellaidc.com P/N PC42T-EN-UG Rev B PC42t Desktop Printer User Guide 3/15...