Samsung OfficeServ SMT+i5220 User Manual
Hide thumbs
Also See for OfficeServ SMT+i5220:
- User manual (53 pages) ,
- Setup manual (2 pages) ,
- Quick reference manual (2 pages)
Table of Contents
Quick Links
Table of Contents

Related Manuals for Samsung OfficeServ SMT+i5220


Summary of Contents for Samsung OfficeServ SMT+i5220
- Page 1 Internet Phone User’s Manual...
-
Page 2: Precautions For Safety
No Information contained herein may be copied, transcribed or Caution duplicated for any commercial purposes or disclosed to third Indication of a general caution. parties in any from without the prior written consent of SAMSUNG Electronics Co., Ltd. Product names mentioned in the document may be trademarks Restriction and/or registered trademarks of their respective companies. - Page 3 Neglecting to do so may result in electrical shock, fire, bodily Neglecting to do so may result in product malfunction and/or CAUTION WARNING injury to the user and/or damage to user’s property/assets. product damage. Power supply Power supply Do not use the damaged power Be sure to connect the power Do not turn off the power while the product is saving the call log or upgrading its line or loose plug.
-
Page 4: Table Of Contents
Contents Precautions for Safety Conventions ................1 Symbols .................. 1 WARNING ................2 CAUTION ................3 Preparations Components ................8 Installation ................9 Initial Environment Settings for Activation ....... 11 Easy Installation for activation ..............11 System Informations ..................14 Network setting .................... - Page 5 Settings ................. 45 1 Cal ..........45 1 Phone Setting 1 Function View msg. content ....45 1 Phone Setting 1 Function Basic Functions 2 Sound ................ 46 1 Phone Setting 3 Display ..............46 1 Phone Setting Making a call ................ 29 4 Language ..............
-
Page 6: Caution
Preparations Installation Components Connect the handset to the handset port on the back of your phone. This product consists of the following components. Before using the phone, make sure that you have received all components. If any items are missing, contact your dealer. Disconnect the Ethernet cable from the computer, and attach it to the PC port on the back of your IP Phone. -
Page 7: Initial Environment Settings For Activation
Initial Environment Settings for Activation Once you connect the phone to its power source, a start-up process begins. After several minutes, the NOTE phone’s LCD screen displays the Initial Environment Settings screen for Activation. Or press and hold [ ] button while in booting the phone to enter the Initial Environment Settings for Activation screen. - Page 8 In case of 3 PPPoE..Enter the System IP System ID (Phone 1 Static IP Enter System IP number) Password, and press the Enter[OK] 2 Dynamic IP Enter the User ID Password System IP 165.213.80.109 3 PPPoE button. System ID (Phone number) Password, and press the Enter[OK] button.
-
Page 9: System Informations
System Informations Network setting You can confirm the your IP Phone’s S/W version, Network information and MAC address. You can set up the your IP Phone’s S/W version, Network information and MAC address. In Activation screen, select the 2 System In Activation screen, select the 3 Network Settings, 1 Easy Install 1 Easy Install... -
Page 10: Firmware Upgrade
Firmware Upgrade You can upgrade the IP Phone’s S/W. In case of 3 PPPoE..In Activation screen, select the 4 Upgrade, and 2 Easy Install 1 Static IP press the Enter[OK] button. 3 System Info 2 Dynamic IP Enter the User ID Password, and press the 4 Network Setting 3 PPPoE... -
Page 11: System Server Setting
System Server setting Factory Reset You can set up the System IP, Phone number and Password. You can initialize the phone to its original condition. In Activation screen, select the 5 System Setting, In Activation screen, select the 6 Factory Reset, 3 System Info 4 Network Setting and press the Enter[OK] button. -
Page 12: Ip Phone At A Glance
IP Phone at a Glance Call Back If you call an extension and the line is busy or the call goes answered, Features and functions you can use the Call Back feature to receive notification when the extension is available to take a call. Network interface Call Messaging Chances are, your system administrator or a technician will connect... -
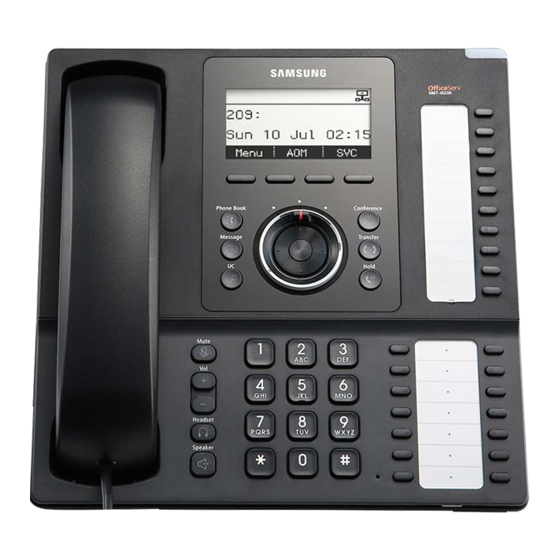
Page 13: Part Names And Buttons
Part Names and buttons Buttons Front view Buttons/Items Description Handset The handset on your IP Phone functions in the same way as a handset on a traditional phone: Displays features such as the time, date, your phone LCD screen Handset LCD Screen Soft buttons number, caller ID, line/call status and softkey tabs. -
Page 14: Status Indicator
Status Indicator The status indicator on the top of the unit give information about your phone: The following icon list show the conditions of your phone: Buttons/Items Description Status Indication Microphone Allows other callers to hear you clearly when you are During an incoming internal call speaking to them. -
Page 15: Status Icon Descriptions
Status Icon descriptions Adjusting the Volume The following icon list show the conditions of your phone: You can adjust the volume of the caller for the handset, speakerphone, and ringer individually. Descriptions Adjusting the Handset volume Appears when the Call Forwarding feature T.1234 Adjust the volume of the handset. -
Page 16: Entering Text
Basic Functions Entering Text Making a call The unit provides convenient ways to enter letters, numbers, and symbols whenever you are prompted to enter text (for example, when adding a Contacts entry or when using SMS Text Messaging). Press the button repeatedly to change the text - You can select to between the Normal phone or Mobile phone type for dialling. -
Page 17: Using The Speaker Phone
Using the speaker phone Using the Last Call To place calls with the speakerphone. Speaker In idle mode, press the Speaker button. In idle mode, press the Calllog soft button. All incoming, outgoing and missed call are listed in T.1234 Sat 09 May 17:34 the Calllog screen. -
Page 18: Using The Phonebook
Answering a call Using the Phonebook To make a call by using the phonebook. Using the handset 1 Phonebook Phone book To answer a call by using the handset. T.1234 2 Message Sat 09 May 17:34 3 Scheduler Lift the handset to receive calls. Menu Set. -
Page 19: Call Waiting
Functions available during a call Call Forwarding NOTE To enter the Service Menu screen, press the Service soft button. During a call, press the Transfer button to forward to Transfer other phone. Call Waiting You can place the current call on hold whenever you want. Enter the phone number by using the dial pad. -
Page 20: Basic Menu Usage
Basic Menu usage NOTE To enter the Menu screen, press the Menu soft button. Function menu Menu Items Soft Menu Descriptions Save the new phone number. 1 Phonebook Search the phone number by the first few letters of Search name or number. Edit the group. -
Page 21: Phonebook
1 Phonebook Phonebook Phone book 2 Message Number Registration T.1234 3 Scheduler Sat 09 May 17:34 You can save the phone number. Menu Set. Calllog Service Back All Group List In the Phonebook screen, press the New soft button. Client/Business[15] Show the all group on phonebook. -
Page 22: Call Log
1 Phonebook Message Call Log Messages T.1234 2 Message Sat 09 May 17:34 3 Scheduler Shows a list of recent outgoing, incoming or missed calls. Menu Set. Calllog Service Back New Message You can create New Text Message and send. T.1234 In idle mode, press the Message button or press InBox... -
Page 23: Outgoing Message
Outgoing Message You can view the outgoing message and the resend. Message Delete In the Message Menu screen, press the OutBox soft InBox [0/0] You can delete the saved messages. button to display the outgoing message list. OutBox [16] MsgBox In the Message Menu screen, select the desired list Welcome to my world New Msg. -
Page 24: Schedule
1 Phonebook Phone book 1 Phone settings Schedule 2 Message Settings T.1234 3 Scheduler 2 System settings Sat 09 May 17:34 T.1234 Sat 09 May 17:34 Back Menu Set. Calllog Service Menu Set. Calllog Service Back New Schedule Phone Setting 1 Function 1 Call You can use the alarm function for the schedule... -
Page 25: Phone Setting 2 Sound
Phone Setting 2 Sound Phone Setting 4 Language You can set the sound volume. You can set the displaying language. 1 Phone settings In idle mode, press the Setting soft button. In idle mode, press the Setting soft button. 1 Function setting 1 Function setting 2 System settings Select the Phone Setting... -
Page 26: Phone Setting 6 Network Infor
Phone Setting 6 Network Infor. Phone Setting 8 Reset Phone You can confirm the Network information. You can reset the phone to default condition. In idle mode, press the Setting soft button. 3 Screen In idle mode, press the Setting soft button. 5 Lock Phone Select the Phone Setting 6 Network Information... -
Page 27: System Setting 1 Call Forward
System Setting 1 Call Forward System Setting 2 Absent Msg You can set the call forwarding condition. You can set the My Informations. 1 Phone setting In idle mode, press the Setting soft button. 1 Call Forward 2 System setting T.1234 Select the 2 System Setting 2 Absent Msg... -
Page 28: System Setting 4 Firmware Upgrade
Service Menu usage Firmware Upgrade - Service Menu correspond to the option tabs displayed along the bottom of your LCD screen. Service Menu change depending on the status of your IP phone. It is provided via interworking with the system. System Setting 4 Firmware Upgrade You can upgrade the your phone firmware. - Page 29 Function Keys usage Troubleshooting Let’s think about the problems that can occur when using the IP Phone. Registration If there is any problem of IP Phone, check the below items first. If the problem is not solved with following methods, please contact the service center. Symptoms Remedies In idle mode, press the Transfer...
-
Page 30: Product Warranty
Specifications Product Warranty The specifications of the IP Phone SMT-i5220 is as follow; Category Specification Model SMT-i5220 Weight Seoul Commtech products are supplied with a one (1) year warranty based from Dimensions (mm) 223(W) 223(H) 115.5(D) the date of purchase, during which time any defective product will be repaired or Adapter Input Power AC 100 ~ 250 V / 50~60 Hz ;...