Table of Contents
Table of Contents

Related Manuals for Toshiba Canvio Home


Summary of Contents for Toshiba Canvio Home
-
Page 1: User Manual
User Manual ® CANVIO HOME English... -
Page 2: Toshiba Canvio® Home
Thank you for choosing the Toshiba CANVIO HOME. Toshiba has combined all of the most frequently used Network Attached Storage functions into a single application to make this product easy to use. We invite you to share your CANVIO HOME experiences with family and friends. -
Page 3: Table Of Contents
CONTENTS Toshiba CANVIO® HOME ..........................1 Safety precautions ..........................5 Explanation of labels ........................5 Explanation of graphic symbols ...................... 5 Regulatory statements ........................... 7 FCC information ..........................7 Contact ............................7 Canadian ICES-003..........................7 NMB-003 du Canada..........................8 Environmental disposal information ...................... 8 Copyright statement .......................... - Page 4 Create rescue media ........................25 Perform a system backup (Windows) .................... 26 Perform a system backup (Mac) ....................27 Change Time Machine® backup settings ..................27 Restore your system from a backup (Windows) ................27 Restore a backup (Mac) ........................ 28 Set up a backup schedule ......................
- Page 5 Add users to a private share on your CANVIO® HOME as a network storage device ....46 Use Windows Explorer/Finder to preserve your folder structure for uploaded files......46 Service and support ............................47 Reset your CANVIO HOME ........................47 Erase data............................47 Solutions to common issues ....................... 47 The network cannot find the CANVIO®...
-
Page 6: Safety Precautions
Do not allow any liquids or metal objects such as screws, staples or paper clips to ® enter the CANVIO HOME. Foreign objects may create a short circuit, which may cause product damage and fire, possibly resulting in serious injury. Copyright © 2013 Toshiba... - Page 7 An electric surge caused by the lightning may result in a system failure, loss of data or damage to the CANVIO HOME. Do not expose it to high or low temperatures or sudden temperature changes. This may cause condensation, resulting in a system failure, malfunction, loss of data or damage to the ® CANVIO HOME. Copyright © 2013 Toshiba...
-
Page 8: Regulatory Statements
Connect the equipment into an outlet on a circuit different from that to which the receiver is connected. Consult the dealer or an experienced radio/TV technician for help. Changes or modifications made to this equipment, not expressly approved by Toshiba or parties authorized by Toshiba could void the user’s authority to operate the equipment. -
Page 9: Nmb-003 Du Canada
This manual is copyrighted by Toshiba America Information Systems, Inc. with all rights reserved. Under the copyright laws, this manual cannot be reproduced in any form without the prior written permission of Toshiba. No patent liability is assumed, however, with respect to the use of the information contained herein. -
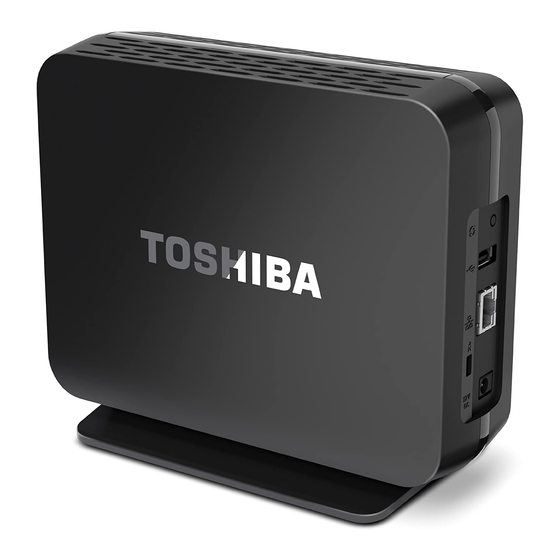
Page 10: Box Contents
Single flashing amber (top) light: An error has occurred. Disconnect and reconnect both the AC adapter and the Ethernet cable. NOTE If the amber light continues flashing, contact Toshiba support. See “Service and support” on page One or more solid lights: The device is connected and working properly. The number of lights displayed indicates how much device memory is free, as follows: Single (bottom) light: Over 70% of device memory is free. -
Page 11: System Requirements
Toshiba does not assume any liability for any damage caused by the use of an incompatible adapter. NOTE If you will not be using your CANVIO HOME device often, we recommend that you turn on the sleep mode setting to save power. “Turn HDD standby on or off” on page 32 for instructions. - Page 12 Install the software NOTE Your computer must be connected (wirelessly or through a cable) to the same router as your CANVIO HOME device. After the application has finished downloading, open your computer’s Downloads folder and double-click CanvioLauncher.exe (Windows) or CanvioHome.dmg (Mac).
- Page 13 “Change a user's password and grant the user administrator rights” on page A short video plays describing your CANVIO HOME features. Close the window after the video has stopped playing. On the Log In screen, enter the username and password you just created.
-
Page 14: Log In To Your Canvio® Home
® LOG IN TO YOUR CANVIO HOME As part of the CANVIO HOME installation process, you log in to the application for the first time (see step 6 in “Install the software” on page 10). To use the application in the future, you need to log in as follows: ®... - Page 15 NOTE Although your CANVIO HOME recognizes and stores these file formats, you can only listen to or view a file or playlist on your computer or other device if the file is in a format that the computer or device also supports. You may need to install a third-party application or audio/video playback codec to access media or other files on your computer.
- Page 16 In the right panel of the Folder Selection screen, check the box next to any folder containing a file you want to upload. Your CANVIO HOME uploads any file in that folder that matches the file type(s) you selected on the previous screen.
-
Page 17: Set Up A Schedule For Uploading/Backing Up Files
Set up a schedule for uploading/backing up files If you plan to regularly upload or back up files to your CANVIO HOME, you can schedule future backups. You can set up schedules both for public uploads and private share backups. -
Page 18: View And Listen To Music, Videos, Photos, And Other Files
To return to the music selection screen from the music playback screen, click After you return to the music selection screen, to exit the music player, click X in the upper-right corner. Watch a video From the main menu, click the Video icon. Copyright © 2013 Toshiba... -
Page 19: View A Photo
To see thumbnails of photos from a specific year, click the year in the left column. To see all photos from that year, click All in the second column. To see photos from a particular month, click the month in the second column. To view a photo full-size, double-click the thumbnail. Copyright © 2013 Toshiba... -
Page 20: Use Playback Controls
Start a slideshow of the playback. playback. displayed thumbnails. This opens the full-screen view, where you can use the slideshow playback controls shown in the next table. Skip to the next track. Skip to the next video. Copyright © 2013 Toshiba... - Page 21 “Change download and slideshow interval settings” on page Log in to another CANVIO HOME device. When the confirmation screen appears, click Yes. Refresh the screen. If you upload song, video, or photo, click this icon to see the uploaded item on the selection screen.
- Page 22 Play songs in random order (shuffle). Click the icon again to turn shuffle off. Copyright © 2013 Toshiba...
-
Page 23: Work With Playlists
View and listen to music, videos, photos, and other files Work with playlists If you have a music or photo playlist file that the CANVIO HOME supports, you can upload that file to your CANVIO HOME. “Upload files and playlists” on page You can also create, edit, and delete music and photo playlists in the CANVIO HOME software itself. -
Page 24: Play A Playlist
Use the tabs at the top of the screen to navigate to the file you want to add to the playlist. Right-click the file name and click Add to existing playlist. To select multiple files on the same screen, hold down the Ctrl or Shift key on your keyboard to multi-select, and then right-click. Copyright © 2013 Toshiba... -
Page 25: Rename A Playlist
To upload a file, click , browse to the file, and click Open. Your CANVIO HOME uploads the file to the appropriate folder, depending on the file type (music, video, photo, document, or other). -
Page 26: Delete A File
Creating rescue media on a USB thumb drive. You can use rescue media to boot up your computer and initiate a full system restore from your CANVIO HOME device. Use rescue media after you have repaired or replaced defective hardware or if you need to restore your computer to a previous state, such as before a recent software installation. The full system restore uses your most recent full system backup. -
Page 27: Perform A System Backup (Windows)
Be sure to keep the rescue media in a safe place. Do not use the rescue media USB drive to copy other files. Perform a system backup (Windows) For system backup on Windows, your CANVIO HOME supports NTFS, FAT32, and the new GUID formats. Other system formats are not supported or have not been tested. -
Page 28: Perform A System Backup (Mac)
When your CANVIO HOME becomes full, Time Machine deletes the oldest backups to create space. Verify that the Mac is connected to the same local area (share) network (LAN) as the CANVIO HOME device, and that the device is visible in the Chooser. -
Page 29: Restore A Backup (Mac)
Back up and restore your system Turn off your computer. Connect both your computer and CANVIO HOME device through a cable to the same network that you used when you backed up the system. NOTE You cannot do a system restore over a wireless connection to the network... -
Page 30: Delete A Backup (Windows)
From the main menu, click the Full System Backup icon. Select Manage Backup Space and click Continue. Click the item you want to delete. Click Delete. Delete a backup (Mac) You can delete file, folder, and entire system image backups. Copyright © 2013 Toshiba... -
Page 31: Use The Remote Access Feature
When you turn on remote access, the system assigns you a PIN. The PIN is your CANVIO HOME’s Personal Identification Number and is unique to your CANVIO HOME device. The PIN is displayed on the main menu below the Enable Remote Access NOTE on/off switch. -
Page 32: Stream Music, Videos, And Games On A Smart Tv
UPDATE YOUR CANVIO HOME SOFTWARE The CANVIO HOME software notifies you if a software update is available right on the main menu, so you can always be updated to the most current version. On the main menu, if a software update is available, the button to the right of Updates flashes blue. -
Page 33: Use Settings To Customize Your Canvio® Home
® USE SETTINGS TO CUSTOMIZE YOUR CANVIO HOME The CANVIO HOME settings let you customize use of the software and device in a number of ways. From the Settings window, you can do the following: NOTE You mus have administrator privileges or be logged in as the user “Admin” to change the settings. -
Page 34: Work With Users
Before you can give another person access to your share files, you must add that person as a user. You can make any user an administrator for your CANVIO HOME device. An administrator has the following rights: Add a private or public share area... -
Page 35: Delete A User
Work with shares When you upload files to your CANVIO HOME, those files are available to all users on your network. Alternatively, you can back up files to a private share. These files remain hidden unless you choose to share them with users you specify (see “Work... -
Page 36: Create A Private Share
Use settings to customize your CANVIO® HOME When you set up your CANVIO HOME device, you are automatically assigned a private share. You can create additional private shares, make any share public so that it is available to all your designated users, customize user access to a share, and delete a share. -
Page 37: View Program Versions
View program versions Your CANVIO HOME system is made up of a number of software programs. The program version of the CANVIO HOME software itself appears on the main Settings screen in the lower-left corner. You can also view the versions of the other software programs. -
Page 38: Manage System Settings
As with all advanced settings, we recommend that most users do not make changes to any of the system settings displayed here. The main CANVIO HOME main menu provides the features that most users need. Only highly technical, advanced users should NOTE configure these advanced options. - Page 39 To send an email notification test, click Send Test. To confirm your changes, click Submit. Shut Down/Reboot On the Shut Down/Reboot screen, you can shut down or reboot your device. Copyright © 2013 Toshiba...
-
Page 40: Manage Advanced Settings
As with all advanced settings, we recommend that most users do not make changes to any of the advanced settings displayed here. The main CANVIO HOME main menu provides the features that most users need. Only highly technical, advanced users NOTE should configure these advanced options. -
Page 41: Manage Network Settings
As with all advanced settings, we recommend that most users do not make changes to any of the network settings displayed here. The main CANVIO HOME main menu provides the features that most users need. Only highly technical, advanced users should NOTE configure these advanced options. -
Page 42: Manage Services Settings
As with all advanced settings, we recommend that most users do not make changes to any of the services settings displayed here. The main CANVIO HOME main menu provides the features that most users need. Only highly technical, advanced users NOTE should configure these advanced options. -
Page 43: Manage Access Settings
As with all advanced settings, we recommend that most users do not make changes to any of the storage settings displayed here. The main CANVIO HOME main menu provides the features that most users need. Only highly technical, advanced users should NOTE configure these advanced options. -
Page 44: Manage Media Settings
As with all advanced settings, we recommend that most users do not make changes to any of the downloader settings displayed here. The main CANVIO HOME main menu provides the features that most users need. Only highly technical, advanced users NOTE should configure these advanced options. -
Page 45: View Logs
Event Log SAMBA Log AFP Log FTP Log Export Log Mange printer settings Your CANVIO HOME can serve as a print server interface. This allows you to connect and share one or more printers through the device. Copyright © 2013 Toshiba... -
Page 46: Use Your Canvio® Home Without Installing The Software
You can send a print job to any of the printers recognized by the print server feature. To set up a network printer, connect a USB cable to the printer and to the USB port on the back of your CANVIO HOME device. -
Page 47: Set Up A Private Share On Your Canvio® Home As A Network Storage Device
You can work with the CANVIO HOME Public folder in the same way as any other folder on your computer: create subfolders, drag and drop folders and files, and so on. Any files you move into your Public folder are available to other CANVIO HOME users on your network. -
Page 48: Reset Your Canvio Home
To reset the CANVIO HOME, use a ballpoint pen or other small-tipped element to press and hold the reset button for at least two (2) seconds. This resets the device name and resets the administrator password to the default “admin.”... -
Page 49: I Forgot My Username And/Or Password
I don’t know if my version of Android™ OS is supported for the mobile app If your device is not supported for use with CANVIO HOME, a message appears. I cannot open the music, video, photo, or file feature Reboot your computer, tablet, or smartphone. -
Page 50: Operating Temperature
ABOUT TOSHIBA Toshiba is a world leader and innovator in pioneering high technology, a diversified manufacturer and marketer of advanced electronic and electrical products spanning digital consumer products; electronic devices and components; power systems; industrial and social infrastructure systems; and home appliances. Toshiba was founded in 1875, and today operates a global network of more than 490 companies, with 203,000 employees worldwide and annual sales of $77B (6.4 trillion yen).