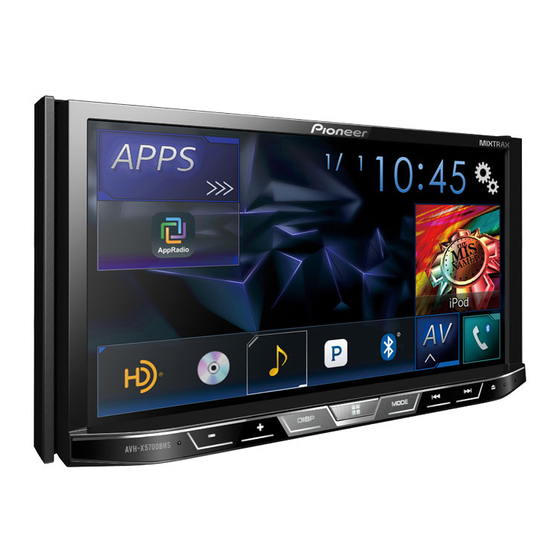
Pioneer AVH-X5700BHS Owner's Manual
Dvd rds av receiver
Hide thumbs
Also See for AVH-X5700BHS:
- System firmware update instructions (6 pages) ,
- Owner's manual (204 pages) ,
- System firmware update instructions (6 pages)
Table of Contents
Quick Links
AVH-X5700BHS
AVH-X4700BS
AVH-X3700BHS
AVH-X2700BS
AVH-X1700S
DVD RDS AV RECEIVER
AUTORADIO AV RDS LECTEUR DE DVD
RADIO AV RDS CON DVD
Important (Serial number)
The serial number is located on the bottom of this unit. For your own security and
convenience, be sure to record this number on the enclosed warranty card.
Important (Numéro de série)
Le numéro de série se trouve au bas de cet appareil. Pour votre sécurité et votre
commodité, veillez à noter ce numéro sur la carte de garantie fournie.
Importante (Número de serie)
El número de serie se encuentra en la parte inferior de esta unidad. Por su
propia seguridad y comodidad, asegúrese de anotar este número en la tarjeta de
garantía que se adjunta.
Owner's Manual
Mode d'emploi
Manual de instrucciones
Table of Contents

Related Manuals for Pioneer AVH-X5700BHS


Summary of Contents for Pioneer AVH-X5700BHS
- Page 1 AVH-X5700BHS AVH-X4700BS AVH-X3700BHS AVH-X2700BS AVH-X1700S DVD RDS AV RECEIVER AUTORADIO AV RDS LECTEUR DE DVD RADIO AV RDS CON DVD Important (Serial number) The serial number is located on the bottom of this unit. For your own security and convenience, be sure to record this number on the enclosed warranty card.
-
Page 2: Table Of Contents
Contents ■ ■ Pandora operations ........31 Thank you for buying this Pioneer product. Registration and connec- Disc ........20 Starting procedure .........31 Please read through these instructions so you tion of Bluetooth Selecting a Pandora station from the list ..31 Starting procedure .........22 will know how to operate your model properly. - Page 3 Contents ■ Setting the aspect ratio ........49 Mounting on the sun visor ......57 System settings ....40 Setting parental lock ........49 Installation on the steering column ....58 Displaying your DivX VOD registration Adjusting the microphone angle .....58 Displaying the “System” setting screen ..40 ■...
-
Page 4: Precaution
Alteration or modifications carried out without Safety of laser products, IEC 60825-1:2007, and contains a ● MODEL NO. : AVH-X5700BHS, AVH-X4700BS, AVH- appropriate authorization may invalidate the user’s right class 1M laser module. To ensure continued safety, do not X3700BHS, AVH-X2700BS remove any covers or attempt to gain access to the inside of to operate the equipment. -
Page 5: License, Warranty Disclaimer & Limitation Of Liability
OR ANY OF ITS LICENSORS, AS APPLICABLE. PIONEER vehicle is moving. If you attempt to use the functions described nearest authorized Pioneer Service Station. Do not use this AND ITS LICENSORS EXPRESSLY DISCLAIM ALL OTHER above while driving, they will become disabled until you stop... -
Page 6: When Using A Display Connected To V Out
This may result in LCD screen malfunc- on this display, stop the vehicle in a safe place and apply the Pioneer cannot guarantee compatibility with all USB mass tion due to the resulting high temperatures. parking brake. Please keep the brake pedal pushed down before storage devices and assumes no responsibility for any loss ●... -
Page 7: About This Manual
Precaution 2 Press the RESET button with a pen tip or other WARNING pointed implement. ● Keep the battery out of the reach of children. Should the Checking part names and functions on page 8 battery be swallowed, consult a doctor immediately. Settings and recorded contents are reset to the factory settings. -
Page 8: Basic Operation
Basic operation Checking part names and LCD screen Press to cycle through all the available sources. Press and hold to turn the source off. Volume (+/–) button functions Returns to the top menu during DVD playback. On the AV operation screen, press to turn the DISP MENU button... -
Page 9: Adjusting The Lcd Panel Angle
Basic operation that angle for safety. Insert a disc into the disc-loading slot. 4-speaker system with front and rear speakers, or a ● 6-speaker system with front and rear speakers and Do not place a glass or can on the open LCD panel. Ejecting a disc subwoofers. -
Page 10: How To Use The Screens
Basic operation How to use the screens Application menu screen Time and date setting screen 2014 Setting menu screen Abcdefg Abcdefg Abcdefg Abcdefg Abcdefg System Month/Date d / m / y m / d / y y / m / d Time Format 12hour 24hour... -
Page 11: Supported Av Source
You can play or use the following sources with this product. ● screen only with your finger gently. Radio (AVH-X4700BS)(AVH-X2700BS)(AVH-X1700S) ● HD Radio (HD Radio™ tuner) (AVH-X5700BHS) (AVH-X3700BHS) Using the common touch panel keys ● ● 2 Touch the source icon you want to select. -
Page 12: Registration And Connec- Tion Of Bluetooth Device
Basic operation Registration and connection of Bluetooth device If you touch the key, the rest are scrolled for display. 3 Appears when items cannot be displayed on a single page. Drag the scrubber bar or the list to view any hidden items. X4700BS X3700BHS X2700BS... -
Page 13: Switching Visibility
Registration and connection of Bluetooth device 3 Touch [Clear]. Switching visibility The confirmation screen appears. This function sets whether or not to make this product visible to Updating Bluetooth software the other device. 1 Display the “Bluetooth” screen. This function is used to update this product with the latest ... -
Page 14: Dialing From The History
Hands-free phoning 5 Touch to end the call. CAUTION X4700BS X3700BHS X2700BS X5700BHS For your safety, avoid talking on the phone as much as Dialing from the history possible while driving. Bluetooth telephone To use this function you need to connect your cellular phone to connected indicator this product via Bluetooth in advance. -
Page 15: Minimizing The Dial Confirmation Screen
Hands-free phoning ● Touch to reject the call. Cellular phone operations vary depending on the type of cel- Setting the private mode lular phone. Refer to the instruction manual that came with 2 Touch to end the call. your cellular phone for detailed instructions. During a conversation, you can switch to private mode (talk ●... -
Page 16: Setup For Ipod / Iphone Or Smartphone
Setup for iPod / iPhone or smartphone When using an iPod / iPhone or a smartphone with this product, For details about MirrorLink device compatibility with this iPod compatibility configure the settings of this product according to the device to product, refer to the information on our website. -
Page 17: Information On The Connections And Functions For Each Device
The settings and cables required for connecting each device, and the available sources are as follows. iPod / iPhone with a 30-pin connector Device connection method When connecting via Bluetooth When connecting via CD-IU201V (sold separately) (AVH-X5700BHS) (AVH-X4700BS) (AVH-X3700BHS) (AVH-X2700BS) iPhone / iPod iPhone / iPod Smartphone Setup... -
Page 18: Radio
Radio 2 Touch [AV Source Settings]. p By pressing and hold and release, you can X4700BS X2700BS X1700S also perform seek tuning. 3 Touch [Radio settings]. p By keeping touching and holding , you can Displays the preset channel list. 4 Touch [Local]. -
Page 19: Hd Radio
™ HD Radio HD Radio indicator and AM band X3700BHS X5700BHS Signal type indicator Analog AM Switches the text display between HD Radio the main channel and sub channels. 6/10 Analog AM Digital AM Displays the preset channel list. Abcdefghi Select an item on the list ("1"... -
Page 20: Starting Procedure
™ HD Radio Disc Tuning into strong frequencies Track number indicator Audio source screen 1 Local seek tuning allows you to only tune into those radio sta- Visual information related to content being played on your HD tions with sufficiently strong signals. 6/10 Radio receiver, such as Album Art, historical photographs, still 1 Display the Radio settings screen. - Page 21 Disc Video source screen 2 Video source screen 2 Hides the touch panel keys. To display again the keys, 6/10 6/10 touch anywhere on the screen. Performs frame-by-frame playback. Performs slow-motion playback. Stop Stop HOLD Each time you touch it changes the speed in four steps in the following order: 1/16 →1/8 →...
-
Page 22: Starting Procedure
Disc p The way to display the menu differs depending on the disc. Searching for the part you p By pressing , you can also skip files/chapters forward or backward. If you touch , you can operate the DVD menu want to play p By pressing and holding , you can also perform... -
Page 23: Compressed Audio Files
Compressed audio files Playback screen 1 (Example: USB) Displays the link search screen. Plays les in random order. This function is available for the USB storage device only. 6/10 : Does not play les in random order. Selecting a song in the album (link search) on page 24 Abcdefghi : Plays all les within the repeat... -
Page 24: Selecting Files From The File Name List
Compressed audio files Compressed video files Switches the media file type to video. Selecting files from the file ● CD-DA: name list Switches the media file type to CD (audio data (CD-DA)). ● Photo: Hides the touch panel keys. You can find files or folders to play back using the file name or Switches the media file type to still image (JPEG data). -
Page 25: Starting Procedure
Compressed video files Still image files Starting procedure (Example: Disc) Hides the touch panel keys. To display again the keys, 6/10 Compressed audio files on page 23 touch anywhere on the screen. Selecting files from the file Rotates the displayed picture 90°... -
Page 26: Starting Procedure
Still image files Plugging and unplugging a USB storage device on page 9 3 Touch “Yes” to overwrite the image. 6/10 p Playback is performed in order of folder numbers. Folders p Each one image can be saved for AV screen or Home are skipped if they contain no playable files. -
Page 27: Ipod
iPod Audio source screen 1 Video source screen Plays les in random order. iPod iPod 6/10 6/10 : Plays randomly songs or videos within the selected list. Abcdefghi Abcdefghi : Plays album randomly. Abcdefghi Audio source screen 2 Pops iPod 99999/99999 6/10 99999/99999... -
Page 28: Starting Procedure
iPod iPhone or smartphone iPod audio and/or video sources are enabled if either of the 3 Touch the category you want to search for. cables is connected. If you use English as the system language, the alphabet search applications iPhone with 30-pin connector on page 55 function is available. -
Page 29: Using Appradioone
● 3 Touch [APPS]. Pioneer is not liable for any issues that may arise from incorrect or flawed app-based content. The AppRadio app is launched, and the AppRadioOne screen 1 Connect your device. -
Page 30: Using The Audio Mix Function
® iPhone or smartphone applications Pandora You can view and operate the compatible applications via the Gives a “Thumbs Down” to display with multi-touch gestures like tapping, dragging, scroll- the playing track and skips ing, and flicking. to the next track. p Multi-touch gestures may be disabled depending on the MirrorLink device model that is connected. -
Page 31: Pandora Operations
X2700BS Important X5700BHS ● Requirements to access Pandora using Pioneer car audio/ iPhone with 30-pin connector on page 55 video iPhone with Lightning connector on page 55 Setup for iPod / iPhone or smartphone on page 16 ... -
Page 32: Idatalink
1 Check the serial number label on bottom of this hands-free phone for the vehicle. product. USB/iPod 6/10 2 Take a note of the serial number of this Pioneer Setting Bluetooth Abcdefghi product. Abcdefghi 1 Display the “System” setting screen. -
Page 33: Bluetooth Audio Player
iDatalink Bluetooth audio player 5 Ends a call. Phone Book screen Rejects an incoming call. Cancels call waiting. X4700BS X3700BHS X2700BS X5700BHS Dial confirmation screen Phone Book Playback screen 1 abcdefghi Bluetooth 6/10 abcdefghi Dial Abcdefghi abcdefghi Receiving 99999999999 abcdefghi Abcdefghi Abcdefgh abcdefghi... -
Page 34: Starting Procedure
Bluetooth audio player ® SiriusXM Satellite Radio Selecting files from the file Selects a file from the list. Selecting files from the file name list on page 34 name list Switches between live broadcast p By pressing the button, you can also skip files p This function may not be available depending on some forward or backward. -
Page 35: Siriusxm Tuner Operations
® SiriusXM Satellite Radio The activation process usually takes 10 to 15 minutes but may Recalls the preset channel p By pressing and holding the button, you can take longer. Do not turn off this product while the activation also move channels up or down on the current channel stored to a key from memory. -
Page 36: Setting Tunestart
® SiriusXM Satellite Radio Using category scan Activating the Traffic & Setting TuneStart ™ Weather Now You can scan each channel in the selected category. Automatically start songs from the beginning when you tune to one of your preset channels in the current preset band when 1 Touch Access the latest Traffic &... -
Page 37: Using Sportsflash List
® SiriusXM Satellite Radio When enabled, the Parental Control feature requires you to enter 2 Touch [Featured Favorites] to switch “On” Listening to the channel a passcode to tune to the locked channels. (default) or “Off”. The default passcode is “0000”. ... -
Page 38: Aux Source
AUX source AV input You can display the video image output by the device connected Setting the video signal 6/10 to this product. External video component and the display on page 56 When you connect this product to an AUX equipment, select the suitable video signal setting. -
Page 39: Starting Procedure (For Camera)
AV input MIXTRAX 2 Touch [Video Signal Setting]. Starting procedure (for camera) Deactivates the MIXTRAX mode. 3 Touch [AV]. (Example: iPod) X3700BHS 4 Touch the item you want to set. X5700BHS The following items are available: iPod 6/10 You can display the image output by the camera connected to Auto (default), PAL, NTSC, PAL-M, PAL-N, SECAM. -
Page 40: Displaying The "Mixtrax Settings" Screen
MIXTRAX System settings 3 Touch the item you want to set. Displaying the “MIXTRAX Displaying the “System” setting The following items are available: Settings” screen screen Standard (default), Simple, Custom When you select “Custom”, check the effect that you want. 1 Press 1 Press Setting the flash pattern... -
Page 41: Setting The Camera For Camera View Mode
CAUTION Displaying the “System” setting screen on page 40 1 Display the “System” setting screen. Pioneer recommends the use of a camera which outputs 2 Touch [Keyboard]. Displaying the “System” setting screen on page 40 mirror reversed images, otherwise the screen image may 3 Touch the language that you want to use. -
Page 42: Setting The Dimmer
System settings p This setting is available only when you stop your vehicle in a 4 Touch the item to select the function to be Setting the dimmer safe place and apply the parking brake. adjusted. ● Brightness: 1 Display the “System” setting screen. Setting the dimmer trigger Adjusts the black intensity. -
Page 43: Updating Firmware
System settings Audio adjustments 2 Touch [System Information]. 1 Display the “Audio” setting screen. Displaying the “Audio” setting Displaying the “Audio” setting screen on page 43 3 Touch [Firmware Information]. screen 2 Touch [Mute Level]. The “Firmware Information” screen appears. 3 Touch the item you want to set. -
Page 44: Adjusting Loudness
Audio adjustments Corrects a little the audio level difference between the music 4 Drag the graph lines to the position you want to p “All” is not available when “Network Mode” is selected as files or the sources (for the narrow dynamic range audio the speaker mode. -
Page 45: Switching The Time Alignment Preset
Audio adjustments 4 Touch to select the listening position p If you trail a finger across the bars of multiple equalizer Using the equalizer bands, the equalizer curve settings will be set to the value of if necessary. the touched point on each bar. The following items are available: Recalling equalizer curves Off (default), Front, Front Left, Front Right, All. -
Page 46: Saving The Sound Settings
Audio adjustments 1 Stop the vehicle in a quiet place, close all the 13 Store the microphone carefully in the glove Before operating the Auto EQ doors, windows and sun roof, and then turn the compartment or another safe place. function engine off. -
Page 47: Theme Menu
Theme menu Selecting the background Adjusts the brightness and the level of red, display green and blue to create a favorite color. The background display can be selected from 9 different preset displays for the AV operation screen and 6 different preset 2 Touch [Illumination]. -
Page 48: Setting Up The Video Player
Theme menu Setting up the video player You can also change the screen for set- Setting the top-priority tings by touching [Illumination], [Theme] or languages [Background] on this screen. 3 Touch the item you want to set. You can assign the top-priority language to the top-priority sub- ●... -
Page 49: Setting The Angle Icon Display
Setting up the video player ● Letter Box: Makes the image in the shape of a letterbox with 6 Touch any number between [1] to [8] to select Setting the angle icon display black bands on the top and bottom of the screen. the desired level. -
Page 50: Displaying Your Divx Vod Deregistration Code
Setting up the video player Favorite menu Registering your favorite menu items in shortcuts allows you to Displaying your DivX VOD Setting the video signal for the quickly jump to the registered menu screen by a simple touch on deregistration code rear view camera the “Favorites”... -
Page 51: Common Operations
1 Tune into the digital broadcast station. 1 Touch the screen display mode key. Radio on page 18 ● HD Radio (AVH-X5700BHS) (AVH-X3700BHS) p The appearance of this key changes according to the current HD Radio Full on page 19 setting. -
Page 52: Other Functions
Do not turn off the engine while restoring the settings. 1 Display the “System” setting screen. WARNING Pioneer does not recommend that you install this product yourself. This product is designed for professional installation only. We recommend that only authorized Pioneer service personnel, who have special training and experience in mobile electronics, set up and 2 Touch [Restore Settings]. -
Page 53: Before Installing This Product
● Never feed power to other electronic products by 1 Pioneer navigation system cutting the insulation of the power supply lead of Please contact your dealer to 4 m (13 ft. 1 in.) inquire about this product and tapping into the lead. The current the connectable navigation unit. -
Page 54: Power Cord
Connection 9 Blue/white Power cord Connect to system control terminal of the power amp (max. 300 mA 12 V DC). a Light green Used to detect the ON/OFF status of the parking brake. This lead must be connected to the power supply side of the parking brake switch. -
Page 55: Iphone And Smartphone
Connection On first-time startup on page 9 iPhone with 30-pin connector You can change the RCA output of the subwoofer depending on your subwoofer system. Connecting via the AUX input The subwoofer output of this product is monaural. iPhone and smartphone The USB interface cable for iPod / iPhone (CD-IU201V) (sold separately) is required for the connection. -
Page 56: Camera
Connection 3 USB - micro USB cable (Type USB A - micro USB B) (sup- 4 This product 2 To video input plied with CD-MU200) 5 Brown (R.C IN) 3 RCA cables (sold separately) 4 Android or MirrorLink device 6 Power supply 4 This product 7 Power cord 5 Yellow (V OUT) -
Page 57: Installation
Installation than these tolerances increases the potential for errors in Precautions before installation the vehicle’s location display, and might otherwise cause reduced display performance. CAUTION Never install this product in places where, or in a manner that: ● Could injure the driver or passengers if the vehicle stops suddenly. -
Page 58: Installation On The Steering Column
The most common problems are listed below, along with likely causes and solutions. If a solution to your problem cannot be found here, contact your dealer or the nearest authorized Pioneer service facility. Problems with the AV screen CD or DVD playback is not possible. -
Page 59: Error Messages
The connection between the cellular phone and this product your dealer or an authorized Pioneer Service Station for cannot be established now. The picture is extremely unclear/distorted and dark during assistance. - Page 60 This DivX rental has expired. — Clear the alert list. tact your dealer or the nearest authorized Pioneer service The inserted disc contains expired DivX VOD content. center for assistance.
-
Page 61: Usb Storage Device
Protect above action, please contact your dealer or an authorized All the files on the connected USB storage device are Error-02-6X/-9X/-DX Pioneer Service Station. embedded with DRM. iPod failure. — Replace the USB storage device. — Disconnect the cable from the iPod. Once the iPod’s main Incompatible USB menu is displayed, reconnect the iPod and reset it. -
Page 62: Handling And Care Of Discs
Appendix for use or handling of the disc. This is not a sign of the compatible with the general CD standard, it may not be pos- Launching the application failed. malfunction of this product. Consider it to be normal wear sible to play the CD side with this product. - Page 63 Appendix ● ● DVD-Video discs It may not be possible to play some music files from USB Subtitle files that are named with the same character string because of file characteristics, file format, recorded applica- as the DivX file before the extension are associated with the ●...
-
Page 64: Divx Compatibility
Appendix Maximum number of files: 15 000 DVD-R/-R SL/-R DL/ DVD-RW WAV files on the CD-R/-RW, DVD-R/-RW/-R SL/-R DL cannot Playable file types: MP3, WMA, AAC, WAVE, H.264, MPEG4, File extension: .avi/.divx be played. MKV, JPEG Profile (DivX version): Home Theater Ver. 3.11/Ver. 4.x/Ver. 5.x/ USB storage device Ver. -
Page 65: Copyright And Trademark Notice
Bluetooth SIG, Inc. and any use of such marks by notice Compatible audio codec: AAC/Linear PCM (LPCM) MP3 PIONEER CORPORATION is under license. Other trademarks Maximum resolution: 640 pixels x 360 pixels and trade names are those of their respective owners. -
Page 66: Aac
® iOS is a trademark on which Cisco holds the trademark right in ● Pioneer accepts no responsibility for data lost from an PANDORA, the PANDORA logo, and the Pandora trade dress the US and certain other countries. iPod, even if that data is lost while using this product. -
Page 67: Notice Regarding Video Viewing
Equalizer (13-Band Graphic Equalizer): ● The LCD screen is exposed in order to increase its visibility nearest authorized Pioneer Service Station. Frequency ..50 Hz/80 Hz/125 Hz/200 Hz/315 Hz/500 Hz/800 Hz/ within the vehicle. Please do not press strongly on it as this 1.25 kHz/2 kHz/3.15 kHz/5 kHz/8 kHz/12.5 kHz... - Page 68 Phase ..............Normal/Reverse Bluetooth Time alignment ........0 to 140 step (1 inch/step) Bass boost: (AVH-X5700BHS/AVH-X4700BS/AVH-X3700BHS/AVH-X2700BS) Gain ................+12 dB to 0 dB Version ............Bluetooth 3.0 certified Speaker level ........+10 dB to –24 dB (1 dB/step) Output power.............. +4 dBm Max.
- Page 69 TEL: 65-6472-7555 PIONEER ELECTRONICS AUSTRALIA PTY. LTD. 5 Arco Lane, Heatherton, Victoria, 3202, Australia TEL: (03) 9586-6300 PIONEER ELECTRONICS DE MEXICO, S.A. de C.V. Blvd. Manuel Avila Camacho 138, 10 piso Col.Lomas de Chapultepec, Mexico, D.F. 11000 Tel: 52-55-9178-4270, Fax: 52-55-5202-3714 先鋒股份有限公司...
- Page 70 1. Download the firmware update files to a computer from the Pioneer website: pioneerelectronics.com/firmware 2. Transfer the files to the USB storage device for insertion into the Pioneer DVD receiver Questions If you have any questions, please contact Pioneer Customer Service toll free at 1-800-421-1404, Monday through Friday, 10:30 AM - 2:30 PM and 3:30 PM - 7:00 PM (Eastern Time), excluding holidays, or online through parts.pioneerelectronics.com/contact.
- Page 71 System Firmware Update Instructions for Pioneer DVD Receivers (AVH-X1700S, AVH-X2700BS, AVH-X3700BHS, AVH-X4700BS and AVH-X5700BHS) This firmware update (version 8.29) applies only to the following models of Pioneer DVD Receivers sold in the United States and Canada. AVH-X5700BHS AVH-X4700BS AVH-X3700BHS AVH-X2700BS...
- Page 72 4. Touch the [Setting] icon. 5. Select [System information] for select menu of system setting. 6. Select [Firmware information]. 7. Confirm current version of the product. (If the firmware version shows “8.29” or higher, no further action is necessary.)
- Page 73 AVH-X2700BS AVH-X1700S DO NOT perform this firmware update if the model number of your Pioneer DVD Receiver is anything other than one of the above models. Ensure that the update file is located within the root (top) folder of your USB storage device. There should be no other files within the USB storage device.
- Page 74 5. Touch the [AV source] & touch [Off] to source Off. 6. Touch [Setting] icon. 7. Select [System information] to select the system setting menu.
- Page 75 8. Select [Firmware Update]. 9. Touch [Continue]. 10. Read the “WARNING,” then touch the [Start] button to start the update process. If it shows “ERROR” on the display, try another USB device.
- Page 76 13. The product will reboot after the update is finished. Do not touch anything even when the screen is blacked out. After it has finished rebooting, the screen will return to the menu screen. 14. The firmware update is now complete. Your Pioneer DVD Receiver is now ready for use.