Table of Contents
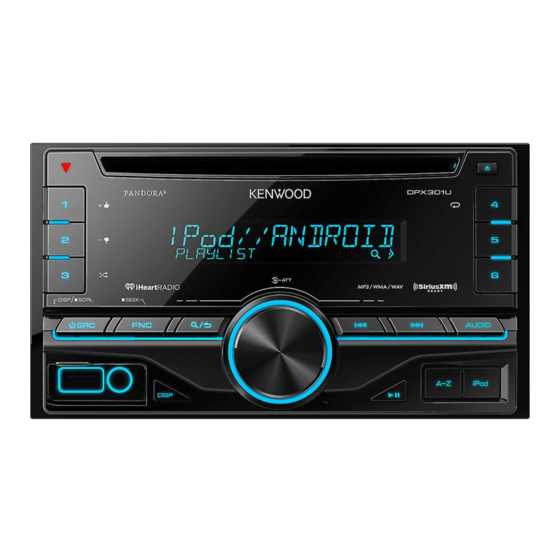
DPX301U
DUAL DIN SIZED CD RECEIVER
INSTRUCTION MANUAL
RECEPTEUR CD FORMAT DUAL DIN
MODE D'EMPLOI
RECEPTOR DUAL DE CD TAMAÑO DIN
MANUAL DE INSTRUCCIONES
Take the time to read through this instruction manual.
Familiarity with installation and operation procedures will help
you obtain the best performance from your new Dual Din Sized
CD Receiver.
For your records
Record the serial number, found on the back of the unit, in the
spaces designated on the warranty card, and in the space provided
below. Refer to the model and serial numbers whenever you
call upon your Kenwood dealer for information or service on the
product.
Model DPX301U
Serial number
US Residents Only
Register Online
Register your Kenwood product at www.Kenwoodusa.com
© 2014 JVC KENWOOD Corporation
B5A-0233-20 (KN)
JS_KWD_DPX301U_KN_C20.indd 1
7/1/2015 2:27:45 PM
Table of Contents

Related Manuals for Kenwood DPX301U


Summary of Contents for Kenwood DPX301U
-
Page 1: Instruction Manual
Record the serial number, found on the back of the unit, in the spaces designated on the warranty card, and in the space provided below. Refer to the model and serial numbers whenever you call upon your Kenwood dealer for information or service on the product. Model DPX301U... -
Page 2: Table Of Contents
CONTENTS BEFORE USE BEFORE USE Warning Do not operate any function that takes your attention away from safe driving. BASICS GETTING STARTED Caution Volume setting: RADIO • Adjust the volume so that you can hear sounds outside the car to prevent accidents. •... -
Page 3: Basics
BASICS Faceplate Remote control (RC-406) Loading slot Display window Remote sensor (Do not expose to bright sunlight.) Pull out the insulation sheet when using for the first time. * Not used How to replace the battery Volume knob Reset button (turn/press) •... -
Page 4: Getting Started
GETTING STARTED Set the initial settings Press repeatedly to enter STANDBY. Press FNC to enter [FUNCTION]. • Pressing AUDIO enter [AUDIO CONTROL] directly. Turn the volume knob to make a selection (see the following table), then press the knob. Repeat step until the desired item is selected or activated. -
Page 5: Radio
For details on how to update the firmware, see: • To store a station: Press and hold one of the number buttons (1 to 6). www.kenwood.com/cs/ce/ • To select a stored station: Press one of the number buttons (1 to 6) (or press one of the CLOCK number buttons (1 to 6) on RC-406). -
Page 6: Cd / Usb / Ipod / Android
CD / USB / iPod / ANDROID RADIO Other settings Start playback Press FNC to enter [FUNCTION]. The source changes automatically and playback starts. Turn the volume knob to make a selection (see the following table), then press the M Eject disc Label side knob. - Page 7 Random play * Press repeatedly. [BROWSE MODE] is selected. KME Light : KENWOOD Music Editor Light, KMC : KENWOOD Music DISC RANDOM/ RANDOM OFF : Audio CD Control ( 17) FOLDER RANDOM/ RANDOM OFF : MP3/WMA/WAV file, KME Light/ KMC For CD: Only for MP3/WMA files.
- Page 8 Press S / T to move to the entry position. • You can enter up to 3 characters. BROWSE MODE: Control from the unit (using KENWOOD MUSIC PLAY application). ; HAND MODE: Control Press the volume knob to start searching. other media player applications from the Android device (without using KENWOOD MUSIC PLAY application).
-
Page 9: Pandora
Pandora® Preparation: Create and save a new station Install the latest version of the Pandora application on your device Press and hold FNC. (iPhone/ iPod touch), then create an account and log in to Pandora. Turn the volume knob to select [FROM TRACK] or [FROM ARTIST], then •... -
Page 10: Iheartradio
Preparation: Search for a station Install the latest version of iHeart Link for KENWOOD application on your Press device (iPhone/ iPod touch), then create an account and log in to iHeartRadio. Turn the volume knob to select a category, then press the •... -
Page 11: Siriusxm® Radio
SiriusXM® Radio Only SiriusXM® brings you more of what you love to listen to, all in one Start listening place. Get over 140 channels, including commercial-free music plus the Press repeatedly to select SIRIUS XM. best sports, news, talk, comedy and entertainment. Welcome to the world Press repeatedly to select a band. - Page 12 SiriusXM® Radio SiriusXM Keymode SmartFavorites and TuneStart™ Press and hold the volume knob to change the keymode (channel or User stored channels (1 to 6) of the current band are recognized as replay). (Default: Channel keymode) SmartFavorite channels. SiriusXM Vehicle Tuner automatically buffers the “...
- Page 13 SiriusXM® Radio Preparation: CHANNEL LOCK To unlock settings: Select [ON] for [BUILT-IN AUX]. ( 5) 1 Turn the volume knob to select a number. 2 Press S / T to move to the entry position. Start listening 3 Repeat steps 1 and 2 to enter the current pass code. Connect a portable audio player (commercially available).
-
Page 14: Audio Settings
AUDIO SETTINGS While listening to any source... PRESET EQ DRIVE EQ/ TOP40/ POWERFUL/ ROCK/ POPS/ EASY/ JAZZ/ Press AUDIO to enter [AUDIO CONTROL]. NATURAL/ USER: Selects a preset equalizer suitable to the music Turn the volume knob to make a selection (see the following table), genre. -
Page 15: Display Settings
DISPLAY SETTINGS TROUBLESHOOTING Press FNC to enter [FUNCTION]. Symptom Remedy Turn the volume knob to select [DISPLAY], then press the • Adjust the volume to the optimum level. Sound cannot be heard. knob. • Check the cords and connections. Turn the volume knob to make a selection (see the following table), then press the knob. -
Page 16: Troubleshooting
Addition to the favorite category failed. device is unable to route the audio signal to unit. ( 18) “DISCONNECTED” Check the connection to the device. • Make sure KENWOOD MUSIC PLAY APP is installed on the Cannot playback at [BROWSE MODE]. Android device. ( 7) “NO SKIPS”... -
Page 17: More Information
• This unit supports the PC application KENWOOD Music Editor Light and Android™ application KENWOOD Music Control. • When you play audio files with song data added using the KENWOOD Music Editor Light or KENWOOD Music Control, you can search for audio files by Genres, Artists, Albums, Playlists, and Songs. -
Page 18: Installation Connection
• For the latest compatible list and software versions of iPhone/iPod, see: www.kenwood.com/cs/ce/ipod • Be sure to ground this unit to the car’s chassis again after installation. • You cannot operate iPod if “KENWOOD” or “ ” is displayed on iPod. Caution About Android device •... - Page 19 INSTALLATION / CONNECTION Installing the unit (in-dash mounting) Part list for installation Bend the appropriate tabs to hold the mounting Do the required wiring. sleeve firmly in place. (A) Mounting sleeve ( 20) Dashboard of your car (B) Wiring harness When installing without the mounting sleeve How to remove the unit Remove the mounting sleeve from the unit.
-
Page 20: Wiring Connection
To the terminal that is grounded when the telephone rings or during conversation ( 18) To front speaker (right) Gray/Black (Mute control wire) (To connect the Kenwood navigation system, Green refer your navigation manual.) Green/Black To rear speaker (left) Purple... -
Page 21: Specifications
SPECIFICATIONS FM Frequency Range 87.9 MHz — 107.9 MHz (200 kHz space) USB Standard USB 1.1, USB 2.0 (Full speed) Usable Sensitivity (S/N = 26 dB) 8.2 dBf (0.71 μV/75 Ω) File System FAT12/ 16/ 32 Quieting Sensitivity 17.2 dBf (2.0 μV/75 Ω) Maximum Supply Current DC 5 V 1 A (DIN S/N = 46 dB) MP3 Decode Compliant with MPEG-1/2 Audio Layer-3 Frequency Response (±3 dB) 30 Hz —... - Page 22 • iPhone, iPod, iPod classic, iPod nano, and iPod touch are trademarks of Apple Inc., registered in JVC KENWOOD Corporation the U.S. and other countries. 2967-3, ISHIKAWA-MACHI, •...