
Related Manuals for Whirlpool ADN 606


Summary of Contents for Whirlpool ADN 606
- Page 1 0803_GB_42 Instructions for installation, use e maintenance GAS KITCHENS WITH PILOT ADN 606 ADN 607 · ADN 608 ADN 610 · ADN 609 ADN 611 · ADN 631 04/2008...
- Page 2 CHARACTERISTICS Supplied by: Date: Customer Service: e-mail 0803_GB_42 - GAS KITCHENS WITH PILOT 04/2008 2 · 20...
-
Page 3: Table Of Contents
INDEX Diagram 6 Instructions for use 6.1 Safety, cleaning and repair rules Characteristics of the appliances 6.2 Start-up 6.2.1 Lighting and disconnecting flame burner with pilot 3 Technical data 6.3 Lighting and shutdown of electric oven GN 2/1 6.4 Lighting and shutdown of electric oven GN 1/1 4 Installation instructions 6.5 Lighting and shutdown of gas oven GN 2/1 4.1 Safety rules... -
Page 4: Diagram
1 - DIAGRAM ADN 607 ADN 606 1000 Gas 1/2" Gas 1/2" Data plate Gas 1/2" Gas 1/2" Data plate Data plate 1000 1000 Electric Electric power power Gas 1/2" Gas 1/2" Data plate Gas 1/2" Gas 1/2" Electric power... - Page 5 1 - DIAGRAM ADN 611 ADN 609 1000 Electric Electric power power Gas 1/2" Gas 1/2" Data plate Gas 1/2" Gas 1/2" Electric power Electric power Data plate Data plate 1000 ADN 610 ADN 608 1000 Gas 1/2" Gas 1/2" Data plate Gas 1/2"...
- Page 6 1 - DIAGRAM ADN 631 Gas 1/2" Data plate Gas 1/2" Data plate 0803_GB_42 - GAS KITCHENS WITH PILOT 04/2008 6 · 20...
-
Page 7: Characteristics Of The Appliances
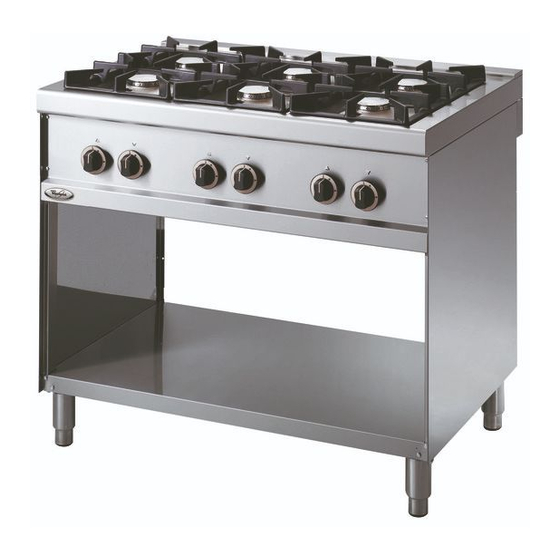
THE APPLIANCE MUST BE INSTALLED BY QUALIFIED PERSONNEL. 20 mbar 3 - TECHNICAL DATA Model Description Dimensions in mm. (LxDxH) ADN 606 Gas range 4 burners with pilot flame - open compartment 800 x 700 x 900 51BS3547 ADN 607... -
Page 8: Technical Data
II2H3+ Construction type Air necessary for combustion Nominal thermal power Minimum thermal power Overall thermal power (gas) Hour consumption G30/G31 kg/h ADN 606 • ADN 609 24.8 2,60 1,94 ADN 607 • ADN 611 37.2 3,94 2,91 ADN 608 31.5... -
Page 9: Installation Instructions
4 - INSTALLATION INSTRUCTIONS 4.1 Safety rules Gas version GN 2/1 The tubular burners are in stainless steel and are resistant to ther- • Only a local gas utility technician is authorized to carry out gas mal and mechanical stress. installations and connections. -
Page 10: Installation
4 - INSTALLATION INSTRUCTIONS 4.3.3 Installation 4.3.6 Electrical connection Before installation, gas connection, power check, conversion or adju- Before connecting the unit to the mains, check that: stment and start up ask for gas supply company advice. • The mains voltage corresponds to the values shown on the data plate;... - Page 11 5 - SET-UP FOR OPERATION Fig. 1 Fig. 2 0803_GB_42 - GAS KITCHENS WITH PILOT 04/2008 11 · 20...
-
Page 12: Power Check For Operation With Liquid Gas
5 - SET-UP FOR OPERATION 5.1.5 Power check for operation with liquid gas injector with one able for the type of gas, see table 1, install in rever- se order. Check if the type of injectors used meet the data of the table 1. After the replacement check the seal using a leack detector spray. -
Page 13: Replacing Parts
5 - SET-UP FOR OPERATION Fig. 3 tool. Rinse and dry. 5.3.4 Plug gas oven GN 2/1 When reassembling the parts, make sure you place them back in the Unscrew the fastening screws and remove the lower panel, extract right position. the ignition wire and unscrew the screws (pos. -
Page 14: Heating Elements Of Electric Oven Gn 2/1
5 - SET-UP FOR OPERATION Fig. 4 5.3.10 Heating elements of electric oven GN 2/1 Unplug the appliance from the electrical mains! The lower heating elment (pos. 1 fig. 5) is placed under the bottom. The upper heating elment (pos. 2 fig. 5) element is attached to the top of the cooking chamber. -
Page 15: Instructions For Use
6 - INSTRUCTIONS FOR USE 6.2 Start-up 6.1 Safety, cleaning and repair rules 6.2.1 Lighting and disconnecting flame burner with pilot • This appliance is used for the preparation of meals at industri- al level. Usage and cleaning can be carried only by expert per- Turn the knob of the desired burner to the left (pos. -
Page 16: Lighting And Shutdown Of Electric Oven Gn 1/1
6 - INSTRUCTIONS FOR USE 6.4 Lighting and shutdown of electric oven GN 1/1 To turn the burner off during normal operation, turn the knob as far as “0”. With knob (pos. 1 fig. 6A) turn the thermostat from the “0” position to a desired temperature between 50°C and 300°C;... -
Page 17: Useful Information On "Stainless Steel
6 - INSTRUCTIONS FOR USE a service agreement contract is recommended. • As for mechanical cleaning, it is recommended to use only steel wool or natural, plastic or steel bristle brushes. Steel wool or brushes with “stainless steel” can cause rust due to rubbing. 6.9 Recommendations for the treatment of Newly formed rust spots can be removed with slightly abrasive liq- uid soaps or fine-grained sand paper. -
Page 18: Appendix: Electrical Diagrams
7 - APPENDIX: ELECTRICAL DIAGRAMS ADN 609 • ADN 611 L 2 L 3 400V 3N ~ 8.48 A R1/R2 L1 L 2 L 3 230V 3 ~ 14.75 A R1/R2 230V ~ 25.7 A Terminal board Switch Commutator Thermostat Security thermostat R1-2 Heating element 980 W... -
Page 19: Appendix: Electrical Diagrams
7 - APPENDIX: ELECTRICAL DIAGRAMS N L1 PE Terminal board Commutator Heating element 2500 W Thermostat Green indicator light Yellow indicator light Motorized fan Total power: 2.5 kW 0803_GB_42 - GAS KITCHENS WITH PILOT 04/2008 19 · 20... - Page 20 THE MANUFACTURER RESERVES THE RIGHT TO MAKE ANY CHANGES DEEMED NECESSARY. THE MANUFACTURER CANNOT BE HELD RESPONSIBLE IF THE INSTRUCTIONS CONTAINED IN THIS MANUAL ARE NOT OBSERVED. WHIRLPOOL EUROPE srl V.le Guido Borghi, 27 I – 21025 Comerio – VA...