Table of Contents
Table of Contents

Related Manuals for Asus Chromebox for meetings


Summary of Contents for Asus Chromebox for meetings
- Page 1 Chromebox for meetings User Guide...
- Page 2 ASUS will only be responsible for or indemnify you for loss, damages or claims based in contract, tort or infringement under this Warranty Statement. This limit also applies to ASUS’ suppliers and its reseller. It is the maximum for which ASUS, its suppliers, and your reseller are collectively responsible.
-
Page 3: Table Of Contents
Left side view ..................... 9 Rear view ......................10 Using your Chromebox for meetings Getting started ....................14 Connect a display panel to your Chromebox for meetings ....14 Connect the speakerphone ................15 Connect the camera ..................16 Connect the remote control receiver ............17 Connect the AC power adapter to your Chromebox for Meetings ..................18... -
Page 4: About This User Guide
This user guide provides information about the hardware and software features of your Chromebox for meetings, organized through the following chapters: Chapter 1: Getting to know your Chromebox for meetings This chapter details the hardware components of your Chromebox for meetings. -
Page 5: Package Contents
Package contents Your Chromebox for meetings package contains the following items: Remote control and receiver Chromebox for meetings Camera Speaker AC power adapter* 6 ft. HDMI cable L-mounting bracket 15 ft. Passive USB extension cable 15 ft. CAT5e Ethernet cable... - Page 6 NOTES: • If the device or its components fail or malfunction during normal and proper use within the warranty period, bring the warranty card to the ASUS Service Center for replacement of the defective components. • Some bundled accessories may vary with different models. For details on these accessories, refer to their respective user manuals. Chromebox for meetings...
-
Page 7: Getting To Know Your Chromebox For Meetings
Getting to know your Chromebox for meetings... -
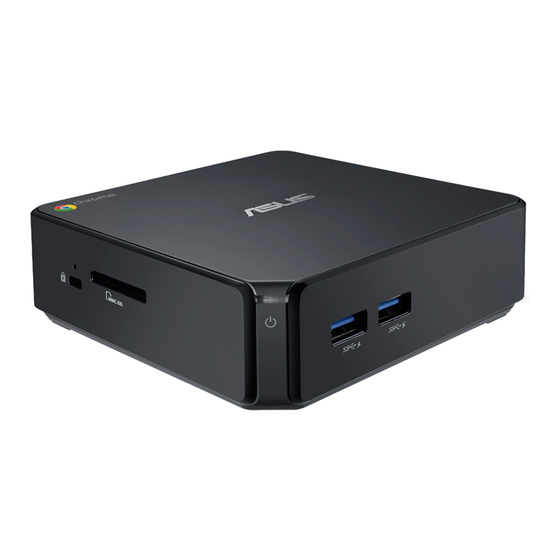
Page 8: Features
The power button allows you to turn on, turn off, or lock your Chromebox for meetings. When logged-in, press the power button to lock your Chromebox for meetings; you will then be prompted to input the account password. If you’re in the sign-in screen or in Hangouts, press the power button to shut down your Chromebox for meetings. -
Page 9: Left Side View
Left side view Kensington security slot The Kensington security slot allows you to secure your Chromebox for meetings using Kensington® security products. Memory card slot The built-in memory card reader enables your Chromebox for meetings to read and write data to and from MMC/SD cards. -
Page 10: Rear View
The supplied power adapter converts AC power to DC power for use with this port. Power supplied through this port supplies power to the Chromebox for meetings. To prevent damage to the Chromebox for meetings, always use the supplied power adapter. -
Page 11: Lan Port
DisplayPort The DisplayPort sends high-performance digital output from your Chromebox for meetings to a display device such as an LCD TV or HD monitor. Headphone/Mic combo port The stereo headphone/mic combo port is used to connect the system’s audio in/out signal to amplified... - Page 12 Chromebox for meetings...
-
Page 13: Using Your Chromebox For Meetings
Using your Chromebox for meetings... -
Page 14: Getting Started
DisplayPort • DVI connector (used with an HDMI–DVI adapter) HDMI–DVI adapter is purchased separately. NOTE: The To connect a display panel to your Chromebox for meetings: Connect a display cable either to the HDMI port or the DisplayPort. Connect display via HDMI port Connect display via DisplayPort Chromebox for meetings... -
Page 15: Connect The Speakerphone
Connect the speakerphone You can connect the speakerphone to any of the USB 3.0 ports on your Chromebox for meetings. NOTE: When connecting your speakerphone, you can refer to the following technical documentation: http://www.jabra.com/products/ pc_headsets/jabra_speak__410_series/jabra_speak_410_ms. Chromebox for meetings... -
Page 16: Connect The Camera
Connect the camera You can connect the camera to any of the USB 3.0 ports on your Chromebox for meetings. NOTE: When connecting the camera, you can refer to the following technical documentation: http://www.logitech.com/assets/45920/ hd-pro-webcam-c920-quick-start-guide.pdf. Chromebox for meetings... -
Page 17: Connect The Remote Control Receiver
Connect the remote control receiver Insert the remote control receiver dongle to the USB 3.0 port on the front panel of your Chromebox for meetings. Remove the anti-discharge battery protector from remote controller NOTE: The remote controller and receiver are paired in the factory and should automatically pair when enabled. -
Page 18: Connect The Ac Power Adapter To Your Chromebox
Connect the AC power adapter to your Chromebox for meetings To connect the AC power adapter to your Chromebox for meetings: A. Plug the AC power cord into a 100 V~240 V power source. Connect the DC power connector into the power (DC) input port of your Chromebox for meetings. - Page 19 Chromebox for meetings. • We strongly recommend that you use a grounded wall socket while using your Chromebox for meetings. • The socket outlet must be easily accessible and near your Chromebox for meetings. • To disconnect your Chromebox for meetings from its main power supply, unplug your Chromebox for meetings from the power socket. NOTE: Power adapter information: • Input voltage: 100-240 Vac • Input frequency: 50-60 Hz • Rating output current: 3.42 A (65 W)
-
Page 20: Turn On Your Chromebox For Meetings
Turn on your Chromebox for meetings Press the power button to turn on your Chromebox for meetings. IMPORTANT: Ensure that all peripherals (speakerphone, camera, remote controller and receiver) and AC power adapter are connected properly before you turn on your Chromebox for meetings. -
Page 21: Configuring Your Chromebox For Meetings
Configuring your Chromebox for meetings Chromebox for meetings... -
Page 22: Before You Begin Using Your Device For Video Conferencing
Hangouts. In addition, we recommend a minimum bandwidth of 1 mbps or 2 mbps (up/down) for group video conferencing. TIP: Although you can use your Chromebox for meetings device over a wireless network connection, we recommend using a wired network connection for best sound and video quality. - Page 23 The best speakerphone placement depends on the size and layout of the conference room: • For rooms where participants sit at one end of the room facing the display, we recommend placing the speakerphone at the end of the table closest to the Chromebox for meetings and the display. • In larger rooms where participants sit talking around a table independent of the position of the display, we recommend placing the speakerphone in the center of the table.
-
Page 24: Setup Your System
Setup your system Mount your Chromebox for meetings You can mount your Chromebox for meetings behind the display. Use a mounting bracket to attach the Chromebox for meetings to your display or to any VESA (100 mm)-compatible location. A mounting bracket comes included with your Chromebox for meetings package. - Page 25 Connect your cables Using the included cables and sensor, connect your Chromebox for meetings to the other system components: DisplayPort connects a display with DisplayPort connector. HDMI connects a display with HDMI connector. Chromebox for meetings...
- Page 26 USB 3.0 port connects the speakerphone assembly. LAN port connects to a router. TIP: Although you can use your Chromebox for meetings device over a wireless network connection, we recommend using a wired network connection for best sound and video quality.
-
Page 27: Enroll Your Device
• Press Select to make a selection. To complete basic enrollment: Turn on the display. Turn on the Chromebox for meetings. Verify or change your language, keyboard layout, and network. Select a network TIP: If your network doesn’t appear in the list, select Join Network and enter the correct settings. - Page 28 When the Hangouts screen appears, follow the onscreen instructions to test your camera and speakerphone. TIP: If you can’t see video or hear audio during the test: • Ensure that your camera and speakerphone were connected to your Chromebox for meetings before you turned on your device. • Ensure that your camera and speakerphone are connected to your device properly. • Unplug the cables and plug them in again, then restart your device.
- Page 29 Accessibility. Accessibility options include larger font and cursor size, voice prompts, and more. The options you select here apply to the setup process only, not to using Chromebox for meetings. To select the Accessibility link using the remote, navigate to the Continue or Accept and continue button and then press right.
-
Page 30: Making A Video Call
Include event details—the event title, date, time, and guests. Click Rooms, etc. on the right side of the the page. Include the name of a room with a Chromebox for meetings device, and then click Add. After booking a room, click Add video call. -
Page 31: Manage Devices And Rooms
Associate your Google Video Conferencing device with the room’s online calendar After a user enrolls a Chromebox for meetings device in a room, an admin user needs to associate the device with that room’s online calendar. This allows users to schedule video conferences using the Chromebox for meetings. - Page 32 3. The device management screen for your Chromebox for meetings device appears. Click Add calendar and room resource. 4. On the right side of the screen, click Unassigned and do one of the following: • If the room where the Chromebox for meetings device is located appears in the list, click the room name.
- Page 33 2. Click Device management, then, to the right of Hangouts device management, click Devices. 3. A screen appears showing active Chromebox for meetings devices. Click the device that you want to rename. 4. Click the arrow to the right of the device name.
- Page 34 2. Click Device management, and then, to the right of Hangouts device management, click Devices. 3. A screen appears showing active Chromebox for meetings devices. Click the device whose information you want to view. 4. Click Hardware and Os. The right side of the screen displays device information including the model, serial number, MEID, and more.
- Page 35 Google Admin console 2. Click Device management, and then, to the right of Hangouts device management, click Devices. 3. A screen appears showing active Chromebox for meetings devices. Click the device for which you want to add information. 4. Click Notes.
- Page 36 If you move your Chromebox for meetings device to a different room, you need to assign the device to that new room’s calendar. Alternatively, if you stop using a Chromebox for meetings device, you can unassign the device from any room. 1. From a laptop or other device, sign in to the Google Admin console.
- Page 37 Google Admin console 2. Click Device management, and then, to the right of Hangouts device management, click Devices. 3. A screen appears showing active Chromebox for meetings devices. Click the device that is in the room whose information you want to edit.
- Page 38 Chromebox for meetings...
-
Page 39: Troubleshooting
Troubleshooting Chromebox for meetings... -
Page 40: Fix A Problem
Fix a problem Manage devices and rooms I do not know how to identify the Chromebox for meetings device I want on the device list screen. If you are not sure which device to click, you can identify the correct one by its serial number. -
Page 41: Appendix
Appendix... -
Page 42: Safety Information
Safety information Your Chromebox for meetings is designed and tested to meet the latest standards of safety for information technology equipment. However, to ensure your safety, it is important that you read the following safety instructions. Setting up your system • Read and follow all instructions in the documentation before you... - Page 43 The warranty does not apply to the products that have been disassembled by users DO NOT throw the Chromebox for meetings in municipal waste. This product has been designed to enable proper reuse of parts and recycling. This symbol of the crossed out wheeled bin indicates...
-
Page 44: Regulatory Notices
REACH Complying with the REACH (Registration, Evaluation, Authorization, and Restriction of Chemicals) regulatory framework, we publish the chemical substances in our products at ASUS REACH website at http://csr.asus.com/english/REACH.htm. ASUS Recycling/Takeback Services ASUS recycling and takeback programs come from our commitment to the highest standards for protecting our environment. - Page 45 End-users and installers must be provide with antenna installation instructions and transmitter operating conditions for satisfying RF exposure compliance. Chromebox for meetings...
- Page 46 There are few possibilities for outdoor use: On private property or on the private property of public persons, use is subject to a preliminary authorization procedure by the Ministry of Defense, with maximum authorized power of 100mW in the 2446.5–2483.5 MHz band. Use outdoors on public property is not permitted. Chromebox for meetings...
- Page 47 This requirement is likely to change over time, allowing you to use your wireless LAN card in more areas within France. Please check with ART for the latest information (www.art-telecom.fr). NOTE: Your WLAN Card transmits less than 100 mW, but more than 10 mW. Chromebox for meetings...
- Page 48 End users must follow the specific operating instructions for satisfying RF exposure compliance. Operation is subject to the following two conditions: • This device may not cause interference and • This device must accept any interference, including interference that may cause undesired operation of the device. Chromebox for meetings...
- Page 49 EC of the European Parliament and Commission from 9 March, 1999 governing Radio and Telecommunications Equipment and mutual recognition of conformity. Wireless Operation Channel for Different Domains N. America 2.412-2.462 GHz Ch01 through CH11 Japan 2.412-2.484 GHz Ch01 through Ch14 Europe ETSI 2.412-2.472 GHz Ch01 through Ch13 Chromebox for meetings...
-
Page 50: Asus Contact Information
Department of Energy helping us all save money and protect the environment through energy efficient products and practices. All ASUS products with the ENERGY STAR logo comply with the ENERGY STAR standard, and the power management feature is enabled by default. The monitor and computer are automatically set to sleep after 10 and 30 minutes of user inactivity. - Page 51 +1-510-739-3777 +1-510-608-4555 Web site http://www.asus.com/us/ Technical Support Support fax +1-812-284-0883 General support +1-812-282-2787 Online support http://www.service.asus.com/ ASUS COMPUTER GmbH (Germany and Austria) Address Harkort Str. 21-23, D-40880 Ratingen, Germany +49-2102-959931 Web site http://www.asus.com/de Online contact http://eu-rma.asus.com/sales Technical Support Telephone +49-2102-5879555...
- Page 52 Regulation (EC) No. 642/2009 Regulation (EC) No. 617/2013 2011/65/EU-RoHS Directive Ver. 130816 CE marking (EC conformity marking) Position : CEO Name : Jerry Shen Declaration Date: 27/02/2014 __________ Signature : Year to begin affixing CE marking: 2014 Chromebox for meetings...
-
Page 53: Declaration Of Conformity
(1) This device may not cause harmful interference, and (2) this device must accept any interference received, including interference that may cause undesired operation. Representative Person’s Name : Steve Chang / President Signature : Date : Feb. 27, 2014 Ver. 120601 Chromebox for meetings... - Page 54 Chromebox for meetings...