Miele Built-in coffee machine Operating And Installation Instructions
Built-in coffee machine
Hide thumbs
Also See for Built-in coffee machine:
- Operating and installation instructions (100 pages) ,
- Operating and installation instructions (76 pages)

Related Manuals for Miele Built-in coffee machine


Summary of Contents for Miele Built-in coffee machine
- Page 1 Operating and installation instructions Built-in coffee machine To avoid the risk of accidents or damage to the appliance. it is essential to read these instructions before it is installed and used for the first time. en - AU, NZ M.-Nr. 09 549 651...
-
Page 2: Caring For The Environment
Caring for the environment Disposal of the packing Disposing of your old material appliance The transport and protective packing Electrical and electronic appliances has been selected from materials which often contain materials which, if are environmentally friendly for handled or disposed of incorrectly, disposal, and can normally be could be potentially hazardous to recycled. -
Page 3: Table Of Contents
Contents Caring for the environment ......... . 2 Description of the appliance . - Page 4 Contents Setting up User profiles ......... . . 37 Calling up User profiles .
- Page 5 Contents Cleaning and care ..........48 Quick guide .
-
Page 6: Description Of The Appliance
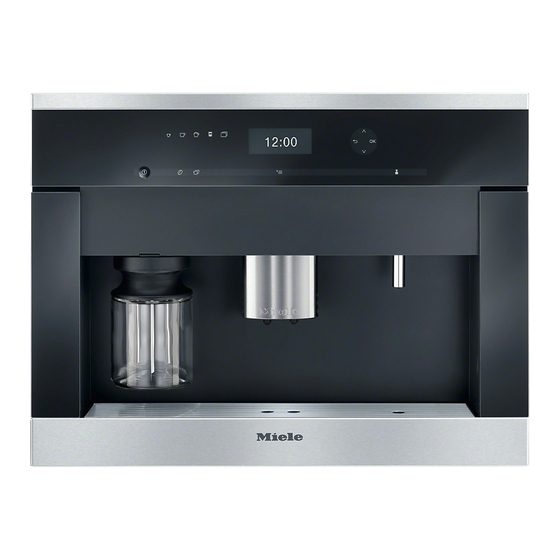
Description of the appliance Exterior view a On/Off sensor K b Controls and display c Door handle d Steam and hot water spout e Drip tray cover f Height-adjustable central spout with lighting g Milk flask with lid... - Page 7 Description of the appliance Interior view h Ground coffee chute cover i Brew unit j Ground coffee chute k Slide control for the grinder setting l Coffee bean container m Water container with inlet device n Drip tray with grid o Waste container p Drip tray inside machine door q Central spout connector...
-
Page 8: Description Of The Appliance
Change settings, show or check information, see which settings are currently active j Two portions ° Dispense two portions of a drink k Parameters , Check or change settings for preparing coffee l Optical interface (only for Miele service technicians) -
Page 9: Accessories
Accessories Accessories supplied Optional accessories – Measuring spoon Miele also offers a range of optional For ground coffee accessories, as well as cleaning and conditioning products for your coffee – Milk flask with lid machine. For storing milk and preparing drinks with milk –... -
Page 10: Warning And Safety Instructions
They contain important notes on the installation, safety, operation and care of the appliance. Miele cannot be held liable for damage caused by non-compliance with these Warning and Safety instructions. Keep the instructions in a safe place and pass them along to any future owner. - Page 11 Warning and Safety instructions Safety with children There is a danger of burning and scalding from the coffee and hot water dispensing spouts. Children's skin is far more sensitive to high temperatures than that of adults. Ensure children do not touch hot surfaces of the coffee machine or place parts of their body under the dispensing spouts.
- Page 12 The manufacturer cannot be held liable for unauthorised work. Installation work and repairs to electrical appliances must only be carried out by a Miele approved service technician. A damaged appliance is dangerous. Check it for any visible damage. Never install or attempt to use a damaged appliance.
- Page 13 Use only Miele Original spare parts. If spare parts or accessories from other manufacturers are used, the warranty will be invalidated, and Miele cannot accept liability.
- Page 14 Warning and Safety instructions Correct use The central spout and hot water spout present a danger of burning or scalding. The liquids and steam dispensed are very hot. Water in the drip tray can also be very hot. Take great care when emptying it.
- Page 15 Warning and Safety instructions Do not use green (unroasted) coffee beans or mixtures of coffee beans which contain green coffee beans. Green coffee beans are very hard and still contain a certain amount of residual moisture. These can damage the coffee machine grinder as soon as grinding begins.
- Page 16 Descale the coffee machine regularly depending on the water hardness level in your area. Descale the machine more frequently in areas with very hard water. Miele cannot be held liable for damage arising from insufficient descaling, the use of incorrect descaling agent or the use of descaling agent which is not of the appropriate concentration.
- Page 17 Warning and Safety instructions The following applies to appliances with stainless steel surfaces: Do not adhere stickers, adhesive tape or any other adhesive materials to stainless steel surfaces. The coating on the stainless steel surfaces will become damaged and lose its protective properties against soiling.
-
Page 18: Setting Up And Using The Coffee Machine
Then touch the OK set the following settings: sensor. – Language The setting is now saved. – Date – Time of day – Display (time display) ^ Touch the On/Off sensor K. "Miele - Willkommen" appears briefly in the display. -
Page 19: Water Hardness
Setting up and using the coffee machine Water hardness Display You can choose one of the following The water hardness level indicates how options: much calcium is dissolved in the water. The higher the calcium content, the – On: The time and date are always harder the water, and the harder the visible in the display when the water, the more often the coffee... - Page 20 Setting up and using the coffee machine Measuring water hardness You can measure the water hardness yourself using the enclosed test strip. Alternatively, your local water authority will be able to tell you the hardness of water in your area. ^ Dip the strip in your drinking water for approximately one second, then shake off any excess water.
-
Page 21: Operation
When the following appears in the display, you are in the drinks menu: Touch the OK sensor to confirm your selection. Miele Leaving the menu or cancelling an action Select drink To leave the current menu, touch the "Back"... -
Page 22: Filling The Water Container
Filling the water container Bacteria can cause infection. It is important to empty and fill the container with fresh tap water every day to avoid the risk of bacteria building up. Fill the water container only with fresh, cold tap water. Hot or warm water or other liquids ^ Open the appliance door. -
Page 23: Filling The Coffee Bean Container
Filling the coffee bean container Fill the coffee bean container with Tip: You can use a nut or seed grinder roasted espresso or coffee beans if you to grind green coffee beans. These want to use freshly ground coffee types of grinder generally have a beans for each cup of espresso or rotating stainless steel blade. -
Page 24: Switching The Coffee Machine On And Off
Switching the coffee machine on and off Switching on Switching off ^ Touch the On/Off sensor K. When the coffee machine is switched on, it heats up and rinses the pipework. After a coffee has been dispensed, the This not only cleans the pipework, but pipework is rinsed before the machine also warms it before coffee is prepared. -
Page 25: Adjusting The Central Spout To The Correct Cup Height
Adjusting the central spout to the correct cup height You can adjust the central spout to suit the height of the cup you are using so that the coffee or espresso will not cool down as quickly and the crema will have a better consistency than if the central spout was further away. -
Page 26: Making Drinks
Making drinks Making espresso, coffee or Dispensing a double portion long coffee You can select a double portion of coffee or espresso and have it dispensed into one or two cups. To fill two cups at the same time: ^ Place a cup under the central spout. ^ Touch the sensor for the desired drink: ^ Place one cup under each of the... -
Page 27: Cancelling Preparation
Making drinks Cancelling preparation You can use the "Coffee pot" function You can cancel preparation while "Stop" twice in a row. After this, a longer is visible in the display. cooling down time of one hour is ^ Touch the OK sensor. necessary so that the coffee machine does not become damaged. - Page 28 Making drinks Adding ready ground coffee "Prepare ground coffee?" appears in the display. Use the measuring spoon so that the correct amount is used. Making drinks with ready ground coffee Do not add more than one level scoop of ground coffee to the coffee If you want to make a drink with ready chute.
-
Page 29: Drinks With Milk
Making drinks Drinks with milk You can prepare various types of coffee with milk or hot milk and milk froth. The following types of coffee can be prepared: Cappuccino consists of approx. 2/3 milk froth and 1/3 espresso. Latte macchiato consists of 1/3 each of hot milk, milk froth and espresso. -
Page 30: Preparing Drinks With Milk
Making drinks Preparing User profile drinks Preparing drinks with milk ^ Place a suitable vessel underneath If you have set the machine up for a the central spout. specific User profile, you must first select the User profile required and ^ Touch the sensor for the desired then the type of drink. -
Page 31: Coffee The Way You Like It
Coffee the way you like it In order to customise the coffee machine to the type of coffee being To avoid damaging the grinder, used, you can change the amount of please note the following: coffee to be ground in the "Parameters" , menu, set the brewing temperature Only adjust the grinder one setting or select the "Pre-brewing"... -
Page 32: Displaying And Changing The Parameters Of A Drink
Coffee the way you like it ^ Use the arrow sensors to highlight Displaying and changing the "Amount of coffee". Touch the OK parameters of a drink sensor. ^ Touch ,. ^ Touch the arrow sensors to change The ° sensor lights up. the amount of coffee. -
Page 33: Pre-Brewing Ground Coffee
Coffee the way you like it ^ Use the arrow sensors to highlight "Brew temperature". Touch the OK sensor. The tick ( indicates which brew temperature is currently selected. ^ Use the arrow sensors to highlight the required temperature. Touch the OK sensor. -
Page 34: Changing The Portion Size
Changing the portion size The flavour of the coffee produced If the water container becomes depends on the type of coffee, how empty during the preparation of a finely the beans are ground and the drink, the programming of the portion quantity of water used. - Page 35 Changing the portion size Setting portion sizes for cappuccino Setting portion sizes for caffé latte, and latte macchiato hot milk and milk froth ^ Place a suitable container ^ Place a suitable container underneath the central spout. underneath the central spout. ^ Touch H or k until "Portion size"...
-
Page 36: Selecting Portion Size In The Parameters Menu
Changing the portion size Selecting portion size in the Setting the portion size for Parameters menu different User profiles ^ Touch ,. You can set the portion size for individual drinks for each User profile. ^ Use the arrow sensors to highlight ^ Touch {. -
Page 37: Setting Up User Profiles
You can now create a User profile. ^ Repeat the process until the required If you have allocated a profile in name appears in the display line addition to the Miele standard profile, above. you have the option to: Tip: Touch # to delete the last –... -
Page 38: Selecting A User Profile
This selection is only possible if a User profile has been allocated in addition to profile has been allocated in addition to the Miele standard profile. the Miele standard profile. ^ Use the arrow sensors to highlight ^ Use the arrow sensors to highlight "Select profile". -
Page 39: Changing A User Profile
Changing a User profile You can set up the coffee machine so that after each use it automatically reverts back to the Miele standard profile, or it retains the last selected User profile. ^ Use the arrow sensors to highlight "Change profile". -
Page 40: Settings
Settings Changing and saving settings You can use the "Settings" menu to customise the coffee machine to suit ^ Touch X. your individual requirements. ^ Select the required setting with the arrow sensors and touch the OK Calling up the "Settings" menu sensor. -
Page 41: Overview Of Available Settings
Settings Overview of available settings The factory default for the relevant option is displayed in bold. Option Available settings Language Deutsch and other languages Country Time of day Display Off / On / Night dimming Clock display 12 h / 24 h Date Timer Timer 1... - Page 42 Settings Option Available settings Showroom programme Demo mode (On / Off) Factory default settings Do not reset Reset...
-
Page 43: Language
Settings Language Setting the time of day You can select a language and country Use the arrow sensors to set the hours for all display texts. and minutes. Tip: If you select the wrong language Date by mistake, you can find the "Language"... - Page 44 Settings Selecting a timer Switch off after You can select: The "Switch off after" timer function is only available via Timer 1. – Timer 1: Switch on at, Switch off at, Switch off If none of the sensors has been after pressed or no drink has been –...
-
Page 45: Eco Mode
Settings Lighting Activating and deactivating the timer If the timer for "Switch on at" is activated The following options are available: the + symbol and the required – Set the brightness of the lighting switching on time appear in the display when the appliance is switched on. -
Page 46: Info (Display Information)
Settings Info (display information) Water hardness In the "Info" option you can choose to See "Setting up and using the coffee display the number of prepared machine" for information about water portions for each type of drink. hardness. You can also see whether more than 50 Display brightness portions can be dispensed before the machine needs to be descaled ("No. -
Page 47: Showroom Programme (Demo Mode)
Do not activate this setting for domestic use! The appliance can be presented in Miele galleries or stores with the "Showroom programme". The lighting will come on but drinks cannot be dispensed and other actions cannot be carried out. -
Page 48: Cleaning And Care
Appliance front (especially important straight after descaling) Once a month Lubricate the cap on the central spout connector When prompted Milk pipework (with the Original Miele cleaning agent for milk pipework) Brew unit (with cleaning tablets) Descale the machine As required... - Page 49 Cleaning and care Danger of burning! All surfaces of this appliance are all Always allow the machine to cool susceptible to scratching. Scratches down before cleaning. Please be on glass surfaces could even cause aware that the water in the drip tray a breakage.
-
Page 50: Rinsing The Appliance
Cleaning and care Rinsing the appliance Milk pipework After a coffee has been dispensed, the Ensure that all components in which machine is rinsed before it switches off. milk is transported are cleaned on a This removes any residual coffee regular basis. - Page 51 Cleaning and care Cleaning the milk pipework with the To clean the milk pipework: Original Miele cleaning agent for milk ^ Touch x. pipework ^ Touch Y repeatedly until "Maintenance" is highlighted in the Ensure that all components in which milk is transported are cleaned on a display.
-
Page 52: Milk Flask With Lid
Cleaning and care Milk flask with lid It is important to keep the top of the flask and the seals clean (whilst filling it and carrying it). Any soiling can lead to a malfunction of the flask in the machine. ^ Clean the milk flask holder on the coffee machine with a damp cloth. -
Page 53: Central Spout
Cleaning and care Central spout Clean the stainless steel cover of the central spout only by hand with warm water, a little washing-up liquid, and a soft cloth. All other parts are dishwasher-safe. ^ Loosen the spout by gripping the magnet on the sides and pulling it towards you. -
Page 54: Conditioning The Milk Valve
Cleaning and care Conditioning the milk valve To ensure the milk used to prepare drinks is always of the highest quality, the milk valve should be conditioned once a week. ^ Touch x. ^ Touch Y repeatedly until "Maintenance" is highlighted in the display. -
Page 55: Water Container
Cleaning and care Water container Waste container Change the water every day to prevent After a certain period of time, a a build-up of bacteria. reminder to empty the waste container will appear in the display. The waste Make sure that the valve, the container must be cleaned when this underside of the water container message appears. -
Page 56: Drip Tray
Cleaning and care Drip tray Make sure that the metal contact discs on the drip tray are cleaned Clean the drip tray every day to and dried properly. The discs will not avoid unpleasant smells and be able to detect that the drip tray is mildew. -
Page 57: Coffee Bean Container
Cleaning and care Coffee bean container Central spout connector ^ Take the coffee bean container out of The part which connects the brew unit the machine and then push the lid and the central spout is located on the back to remove it. inside of the appliance door. -
Page 58: Interior And Appliance Door
Cleaning and care Interior and appliance door Brew unit ^ First take out all removable parts and Clean the brew unit by hand only then clean the interior and the using warm water. Do not use appliance door with a mild solution of washing-up liquid. - Page 59 Cleaning and care If you cannot remove the brew unit or To replace the brew unit, proceed in can only do so with difficulty, the brew the reverse order: unit is not in the correct position (See ^ Push the brew unit back into the "Problem solving guide").
-
Page 60: Degreasing The Brew Unit
When "Place a cleaning tablet in the developed for this coffee machine. You ground coffee chute and close the can purchase the Original Miele chute" appears in the display: cleaning tablets at www.miele-shop.com (depending on ^ Remove the coffee chute cover and country) or from Miele. -
Page 61: Appliance Front
Then dry all parts with a soft cloth. Tip: You can also clean the appliance front with the Original Miele all purpose microfibre cloth. -
Page 62: Descaling The Machine
Two tablets are required for each be carried out. descaling process. ^ Touch the OK sensor to confirm this Only use the Original Miele message. descaling tablets supplied with the When the number of remaining portions appliance. Other descaling tablets reaches 0, the appliance will lock out. - Page 63 Descaling the machine ^ Fill the water container to the marker The descaling process is finished when with lukewarm water. "Process finished" appears in the display. ^ Touch the OK sensor. The coffee machine is now free of limescale and drinks can be prepared again.
-
Page 64: Problem Solving Guide
Important! Do not open the outer casing of the appliance. Installation work and repairs must only be carried out by a Miele approved ser- vice technician. Repairs and other work by unqualified persons could be dangerous. The manufacturer cannot be held liable for unauthorised work. - Page 65 Problem solving guide Message Possible cause and remedy ^ The brew unit cannot be positioned correctly, or it is dirty Fault 73 and the coffee cannot be processed. ^ Check whether you can remove the brew unit (see "Check the brew unit"...
- Page 66 Problem solving guide Message Possible cause and remedy "Too much There is too much ready ground coffee in the ground coffee ground coffee" chute. If more than one level scoop of ground coffee is added to the coffee chute, the brew unit cannot process the coffee. The ground coffee will be directed into the waste container and the fault message will appear in the display.
- Page 67 The mains fuse has tripped because the coffee machine, sensor. mains voltage or another appliance is defective. ^ Switch off at the wall socket and remove the plug. ^ Contact a qualified electrician or Miele. The coffee The switch-off time programmed using the timer has been machine switches reached.
- Page 68 Problem solving guide Problem Possible cause and remedy The sensors do There is a fault inside the appliance. ^ Open the appliance door. not react to touch. The appliance The process currently running will be stopped. cannot be ^ Disconnect the electricity supply by switching off at the operated.
- Page 69 Problem solving guide Problem Possible cause and remedy The milk pipework The milk pipework or the air suction tube is blocked. ^ Follow the instructions in "Cleaning the milk pipework of is rinsed but no rinsing water any blockages". comes out of the central spout.
- Page 70 Problem solving guide Problem Possible cause and remedy Drink preparation If the water container becomes empty while a drink is being has been prepared, the message "Continue preparation? Yes / No" will cancelled. appear in the display after the water container has been refilled and put back in the machine.
- Page 71 ^ Fill the container with fresh beans. noise than usual. There may be stones in amongst the coffee beans. ^ Switch the coffee machine off immediately. Call Miele. Espresso or coffee The coffee has been too coarsely ground. ^ Set the grinder to a finer setting (see "Setting the coffee flows into the cup too quickly.
- Page 72 Problem solving guide Problem Possible cause and remedy The crema on the The grinder setting is not correct. ^ Set the grinder to a finer or coarser setting (see "Setting coffee or espresso is not as it should the coffee grinder"). The brewing temperature is too high for this type of coffee.
-
Page 73: Cleaning The Milk Pipework Of Any Blockages
Cleaning the milk pipework of any blockages Step 1: Cleaning the milk If the quality of the milk froth is not satisfactory, the air suction tube could pipework in the milk flask lid be blocked. Follow the instructions under "Step 2: Cleaning the air suction tube and the elbow connector in the door". - Page 74 Cleaning the milk pipework of any blockages To reassemble the lid: ^ First refit the seal in the lid. Then insert the milk suction tube in the seal. Make sure you do not push the pointed end of the milk suction tube into the seal.
- Page 75 Cleaning the milk pipework of any blockages Step 4: Conditioning the milk valve ^ Touch x. ^ Touch Y repeatedly until "Maintenance" is highlighted in the display. Touch the OK sensor. ^ Use the arrow sensors to highlight "Condition milk valve". Touch the OK sensor.
-
Page 76: After Sales Service And Warranty
After sales service and warranty In the event of a fault which you cannot correct yourself, please contact Miele. The contact details for Miele are given at the back of these operating instructions. When contacting Miele, please quote the model and serial number of your appliance. -
Page 77: Saving Energy
Saving energy If the settings of the following functions are altered from the factory default, energy consumption will increase: – Eco mode – Lighting – Time of day display – Timer If the settings are altered, the message "This setting increases energy consumption"... -
Page 78: Electrical Connection
Installation, repairs and other work energy supplied to the machine, by unqualified persons could be causing it to overheat. dangerous. Miele cannot be held liable for unauthorised work. Ensure power is not supplied to the appliance until after installation or repair work has been carried out. -
Page 79: Installation
The appliance is designed to be built into a tall unit. It can also be combined with other Miele built-in appliances. If the coffee machine is to be built in above another appliance, there must be a full-width, closed shelf... -
Page 80: Ventilation
Installation ^ If there is not a seal around the Before installation, make sure that building-in niche, adhere the Miele there is no power supply to the sealing strips from the back (see machine. This also applies should it... - Page 81 Installation ^ Open the appliance door, and Tip: We recommend providing a place to sit the coffee machine which is the partially tighten the side socket same height as the building-in niche. screws. This will make it easier to connect the ^ Carefully turn the lower socket machine to the electricity supply.
-
Page 82: Adjusting The Door Hinges
Installation Adjusting the door hinges If the machine door becomes difficult to open or close after installation, you can adjust the hinges to realign it (TX 20): ^ Tighten the screw a to align it flush with the furniture front. ^ Tighten the screw b to align the door horizontally and vertically. -
Page 83: Contact Details
Miele Australia Pty. Ltd. ACN 005 635 398 ABN 96 005 635 398 Miele Center and Head Office Melbourne: 1 Gilbert Park Drive Knoxfield, VIC 3180 Miele Center and Office Melbourne: 206-210 Coventry Street South Melbourne, VIC 3205 Miele Center and Office Sydney:... - Page 84 CVA 6401 en - AU, NZ M.-Nr. 09 549 651 / 01...