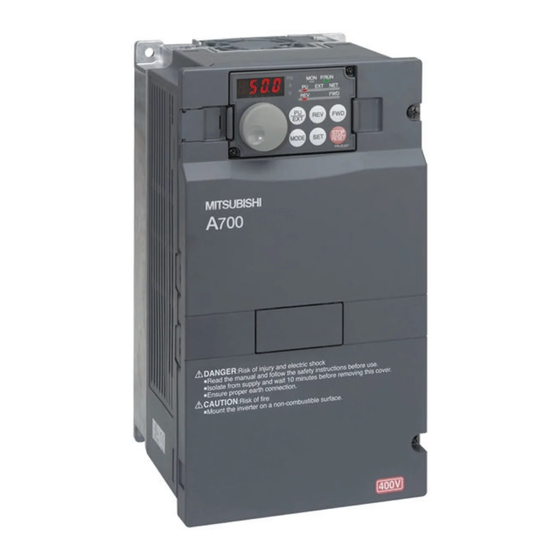
Mitsubishi Electric FR-A700 Installation Manuallines
700 series fr-a740-00023 to 12120-ec
Hide thumbs
Also See for FR-A700:
- Instruction manual (826 pages) ,
- Technical manual (550 pages) ,
- Manual (104 pages)
Table of Contents
Quick Links
INVERTER
FR-A700
INSTALLATION GUIDELINE
FR-A740-00023 to 12120-EC
Thank you for choosing this Mitsubishi Inverter.
Please read through this Installation Guideline and a CD-ROM enclosed to operate this inverter correctly.
Do not use this product until you have a full knowledge of the equipment, safety information and
instructions.
Please forward this Installation Guideline and the CD-ROM to the end user.
1
INSTALLATION OF THE INVERTER AND INSTRUCTIONS................. 1
2
OUTLINE DIMENSION DRAWING ......................................................... 2
3
WIRING.................................................................................................... 3
4
PRECAUTIONS FOR USE OF THE INVERTER..................................... 8
5
PARAMETER LIST................................................................................ 10
6
TROUBLESHOOTING........................................................................... 18
CONTENTS
700
Table of Contents

Related Manuals for Mitsubishi Electric FR-A700


Summary of Contents for Mitsubishi Electric FR-A700
-
Page 1: Table Of Contents
INVERTER FR-A700 INSTALLATION GUIDELINE FR-A740-00023 to 12120-EC Thank you for choosing this Mitsubishi Inverter. Please read through this Installation Guideline and a CD-ROM enclosed to operate this inverter correctly. Do not use this product until you have a full knowledge of the equipment, safety information and instructions. - Page 2 This section is specifically about safety matters CAUTION (2) Wiring Do not attempt to install, operate, maintain or inspect the inverter until you • Do not install a power factor correction capacitor or surge suppressor/radio have read through this Installation Guideline and appended documents noise filter (capacitor type filter) on the inverter output side.
-
Page 3: Installation Of The Inverter And Instructions
INSTALLATION OF THE INVERTER AND INSTRUCTIONS 1 INSTALLATION OF THE INVERTER AND INSTRUCTIONS • Inverter Type 00126 - EC FR - A740 Symbol Voltage Class Symbol Type number 00023 Three-phase Displays A740 400V class the rated current 12120 Rating plate FR-A740-00126-EC Inverter type Capacity plate... -
Page 4: Outline Dimension Drawing
OUTLINE DIMENSION DRAWING 2 OUTLINE DIMENSION DRAWING FR-A740-00023 to FR-A740-04320 to FR-A740-09620 to 03610-EC 08660-EC 12120-EC (Unit:mm) Inverter Type FR-A740-00023-EC FR-A740-00038-EC FR-A740-00052-EC FR-A740-00083-EC FR-A740-00126-EC FR-A740-00170-EC FR-A740-00250-EC FR-A740-00310-EC FR-A740-00380-EC FR-A740-00470-EC FR-A740-00620-EC FR-A740-00770-EC FR-A740-00930-EC FR-A740-01160-EC FR-A740-01800-EC FR-A740-02160-EC FR-A740-02600-EC FR-A740-03250-EC FR-A740-03610-EC FR-A740-04320-EC FR-A740-04810-EC FR-A740-05470-EC 1010 FR-A740-06100-EC... -
Page 5: Wiring
Terminal connection diagram 3 WIRING 3.1 Terminal connection diagram Source logic *1. DC reactor (FR-HEL) *7. A CN8 connector is provided with the Brake unit Be sure to connect the DC reactor 02160 or more. Main circuit terminal (Option) supplied with the 01800 or more. Control circuit terminal When a DC reactor is connected to *8. - Page 6 WIRING 3.2 Main circuit terminal (1) Terminal layout and wiring 400V class FR-A740-00023 to 00126-EC FR-A740-00170, 00250-EC Jumper Screw size (M4) Charge lamp R/L1 S/L2 T/L3 Jumper R1/L11 S1/L21 P/+ PR Jumper Jumper R1/L11 S1/L21 Screw size Charge lamp (M4) Screw size Power (M4)
- Page 7 WIRING FR-A740-02160, 02600-EC FR-A740-03250, 03610-EC R1/L11 S1/L21 Screw size (M4) Charge lamp R1/L11 S1/L21 Screw size (M4) Jumper Charge lamp Jumper Screw size (M10) Screw size(M10) R/L1 S/L2 T/L3 N/- R/L1 S/L2 T/L3 Screw size (M10) Power Motor Power supply Motor supply DC reactor...
- Page 8 WIRING (2) Applied cable size Select the recommended cable size to ensure that a voltage drop will be 2% max. If the wiring distance is long between the inverter and motor, a main circuit cable voltage drop will cause the motor torque to decrease especially at the output of a low frequency.
-
Page 9: Control Circuit Terminals
WIRING (3) Total wiring length (FR-A720/A740) The overall wiring length for connection of a single motor or multiple motors should be within the value in the table below. (The wiring length should be 100m maximum for vector control.) Pr. 72 PWM frequency selection setting 00052 or 00023 00038... -
Page 10: Precautions For Use Of The Inverter
THE INVERTER 4 PRECAUTIONS FOR USE OF THE INVERTER The FR-A700 series is a highly reliable product, but incorrect peripheral circuit making or operation/handling method may shorten the product life or damage the product. Before starting operation, always recheck the following items. - Page 11 PRECAUTIONS FOR USE OF THE INVERTER (13) Provide electrical and mechanical interlocks for MC1 and MC2 which are used for bypass operation. Interlock When the wiring is incorrect or if there is an electronic Power supply R/L1 bypass circuit as shown on the right, the inverter will be S/L2 damaged by leakage current from the power supply due to arcs generated at the time of switch-over or chattering...
-
Page 12: Parameter List
PARAMETER LIST 5 PARAMETER LIST 5.1 Parameter list For simple variable-speed operation of the inverter, the initial setting of the parameters may be used as they are. Set the necessary parameters to meet the load and operational specifications. Parameter setting, change and check can be made from the operation panel (FR-DU07). - Page 13 PARAMETER LIST Setting Initial Setting Initial Parameter Name Parameter Name Range Value Range Value Ω Energy saving control 0 to 50 0, 4 selection (0 to 1000mH), 9999/ 9999 Motor constant (L1) 0 to 3600mΩ 0 to 500A, (0 to 400mH), 9999 9999/ Reference current 9999...
- Page 14 PARAMETER LIST Setting Initial Setting Initial Parameter Name Parameter Name Range Value Range Value 0 to 400Hz, Automatic restart after PID control automatic 9999 0, 1, 2, 10, 11, switchover frequency 9999 instantaneous power failure selection 10, 11, 20, 21, 50, 51, 60, 61, First cushion time for restart 0 to 20s...
- Page 15 PARAMETER LIST Setting Initial Setting Initial Parameter Name Parameter Name Range Value Range Value 0 to 8, 10 to Power failure stop selection 0, 1, 2, 11, 12 RUN terminal function 20, 25 to 28, selection Subtracted frequency at 30 to 36, 39, 0 to 20Hz deceleration start 41 to 47, 64,...
- Page 16 PARAMETER LIST Setting Initial Setting Initial Parameter Name Parameter Name Range Value Range Value RS-485 communication stop Orientation speed gain (D 0, 1, 10, 11 0 to 100 bit length term) RS-485 communication Orientation deceleration 0, 1, 2 0 to 1000 parity check selection ratio RS-485 communication retry...
- Page 17 PARAMETER LIST Setting Initial Setting Initial Parameter Name Parameter Name Range Value Range Value Ω 0 to 500 Remote output selection 0, 1, 10, 11 (0 to 100%), 9999/ Remote output data 1 0 to 4095 9999 Second motor constant (X) 0 to 100Ω...
- Page 18 PARAMETER LIST Setting Initial Setting Initial Parameter Name Parameter Name Range Value Range Value Output interruption 9999 Speed control integral time 2 0 to 20s, 9999 0 to 400Hz detection level Speed setting filter 2 0 to 5s, 9999 9999 Output interruption cancel 1000% 900 to 1100%...
- Page 19 PARAMETER LIST Setting Initial Setting Initial Parameter Name Parameter Name Range Value Range Value Terminal 1 gain frequency 0 to 400Hz Speed feed forward gain 0 to 1000% (918) (speed) 100% Terminal 1 gain (speed) 0 to 300% (918) Regeneration avoidance 0, 1, 2 operation selection Terminal 1 bias command...
-
Page 20: Troubleshooting
TROUBLESHOOTING 6 TROUBLESHOOTING When an alarm (major failures) occurs in the inverter, the protective function is activated bringing the inverter to an alarm stop and the PU display automatically changes to any of the following error (alarm) indications. If your fault does not correspond to any of the following errors or if you have any other problem, please contact your sales representative. -
Page 21: List Of Alarm Display
TROUBLESHOOTING 6.2 List of alarm display Operation Panel Operation Panel Name Name Indication Indication Output side earth (ground) fault E - - - Alarm history E.GF overcurrent HOLD Operation panel lock E.LF Output phase failure E.OHT External thermal relay operation Er1 to 4 Parameter write error E.PTC*... - Page 22 Appendix 1 Instructions for Compliance with the European Directives (1) EMC Directive We have self-confirmed our inverters as products compliant to the EMC Directive (second environment of conforming standard EN61800- 3) and place the CE mark on the inverters. Note: First environment Environment including residential buildings.
- Page 23 Appendix 2 Instructions for UL and cUL Compliance (Conforming standard UL 508C, CSA C22.2 No.14) (1) Installation This inverter is a UL-listed as a product for use in an enclosure. Design an enclosure so that the inverter ambient temperature, humidity and atmosphere satisfy the specifications. (Refer to page 1.) Wiring protection For installation in the United States, branch circuit protection must be provided in accordance with the National...
- Page 24 (4) Motor overload protection This inverter is certified as a motor overload protection device by UL. When using the electronic thermal relay function as motor overload protection, set the rated motor current to Pr. 9 Electronic thermal O/L relay. Electronic thermal relay function operation characteristic Pr.
- Page 25 MEMO...
- Page 26 MEMO...
- Page 27 MEMO...
- Page 28 REVISIONS *The manual number is given on the bottom left of the back cover. Print Date Revision Manual Number Mar., 2006 IB-0600256ENG-A First edition Feb., 2007 IB-0600256ENG-B Additions • Setting value "74" of Pr.178 to Pr.189 • Breaker selection when using the inverter as UL or cUL listed product For Maximum Safety •...