JVC Network Pack SA-DV6000 User Manual
Network pack
Hide thumbs
Also See for Network Pack SA-DV6000:
- Instructions manual (43 pages) ,
- Startup manual (44 pages)

Related Manuals for JVC Network Pack SA-DV6000

Summary of Contents for JVC Network Pack SA-DV6000
- Page 1 NETWORK PACK SA-DV6000 User’s Guide LST0154-001C...
-
Page 2: Table Of Contents
Contents Introduction ... 3 Basic Inserting/removing CF memory card/LAN card ... 4 Using LAN terminal ... 5 LCD screen ... 6 Menu Settings Menu screen structure ... 7 NETWORK PACK menu screen items ... 8 Setting the NETWORK PACK menu screen ... 10 Setting network parameters ... -
Page 3: Introduction
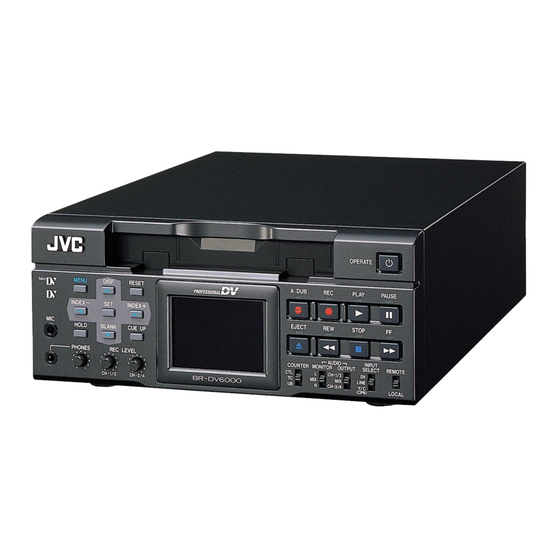
Introduction The SA-DV6000 Network Pack is designed to enhance and complement the BR-DV6000 DV Video Cassette Recorder functionality. By adding networking capabilities to the BR-DV6000, the SA-DV6000 allows users to connect to and stream video and audio from the VTR in real-time, from anywhere in the world. Viewers can connect using Windows Media Player, Quick Time Player, or the application software provided with SA-DV6000. -
Page 4: Basic
*1: Use PCMCIA card TYPE 1 or TYPE 2 adapter *2: Use PCMCIA card TYPE 2 adapter For the latest operational check card, visit the website below or contact your JVC dealer. http://www.jvc-victor.co.jp/english/pro/prodv/ When turning the power on, the card status display shown on left will flash during initial- ization. -
Page 5: Using Lan Terminal
Basic Other than the use of a LAN card, this unit is also equipped with a LAN terminal for LAN connection. VIDEO LINE MONITOR SIGNAL LAN cable types ● When connecting directly to a PC, use a 10/100 BASE-T cross cable. ●... -
Page 6: Lcd Screen
Basic Information from Network Pack SA-DV6000 is displayed on the BR-DV6000 LCD screen. Card status and warnings will be displayed when setting the LCD screen to the Enlarged display mode. \ Card status displays Display Description Flashing display during initialization (after power on). -
Page 7: Menu Settings
Menu settings When attaching Network Pack SA-DV6000 to BR-DV6000 DV Video cassette recorder, NETWORK PACK CONFIG menu and MOVIE CLIP menu are added to the BR-DV6000 TOP MENU screen. (These menus will not appear during initialization when the unit is first turned on.) -
Page 8: Network Pack Menu Screen Items
Menu settings indicates default factory setting. Item Setting NETWORK MAIN SETUP ENCODE SETUP 320 × 240 FRAME SIZE ✩ 160 × 120 BIT RATE ✩ 128K 256K 384K 512K MAX FRAME ✩ RATE for WMP ✩ STREAM TYPE for QT PRE FILTER PAGE BACK NETWORK PACK menu screen items... - Page 9 Menu settings Item Setting MPEG REC TRIG SPLIT MOVIE CLIP SETUP DELETE ALL CANCEL EXECUTE FORMAT CANCEL EXECUTE PLAY MODE REPEAT 1 REPEAT CAPTURE FILE SEND PAGE BACK MENU RESET CANCEL EXECUTE PAGE BACK Memo When setting MPEG REC to SPLIT, the following will appear in the NETWORK PACK CONFIG menu screen. CF REC: PUSH ‘SET’...
-
Page 10: Setting The Network Pack Menu Screen
Menu settings Menu screen settings can be made regardless of whether a card is inserted. Settings will be stored in the SA-DV6000 memory even when turning the power off. MENU button SET button SEARCH– ( ) button ● The NETWORK PACK CONFIG menu screen will not appear during card initial- ization (flashing display). -
Page 11: Setting Network Parameters
Menu settings When using a LAN card or LAN terminal, network related settings for SA-DV6000 are made using NETWORK MAIN SETUP of the NETWORK PACK CONFIG menu. Settings will be stored in the SA-DV6000 memory even when turning the power off. SET button SEARCH–... -
Page 12: Network Settings Menu Screen Item
Menu settings NETWORK SETUP menu screen Item Setting ✩ HOST NAME Displays the host name input setting screen. (4 ~ 64 alphanumerical characters) [Factory setting: none] ✩ DHCP Select whether DHCP server is used. OFF: Use this setting when using LAN connection rather than DHCP. ON: Use this setting when using DHCP connection. - Page 13 Menu settings PORT SETUP menu screen indicates default factory setting. Item Setting ✩ HTTP for WEB The screen for setting RTSP and HTTP port numbers appears. Browser HTTP for Web Browser can be set with the Web browser HTTP port number and HTTP for Media Player can be set with the Media Player HTTP port number.
-
Page 14: Setting User Names And Passwords
LEAP Displays the LEAP PASSWORD input screen. (4 ~ 32 alphanumerical characters) PASSWORD Set when using the LEAP function. [Default setting: sa-dv-jvc] HTTP USER Displays the HTTP USER NAME input screen. (3 ~ 8 alphanumerical characters) NAME Set when connecting from the Web browser. -
Page 15: Inputting Character Data For Network Settings
REC LEVEL BR-DV6000 CH-1/3 CH-2/4 Example: Changing HTTP USER NAME from jvc to jvc-1234 \ Select HTTP USER NAME in the SERVER SETUP menu screen and press the SET button. ● The USER NAME input setting screen appears. Characters are selected from the character selection area on the bottom of the screen. -
Page 16: Restoring Factory Default
Menu settings MENU button SET button SEARCH– ( ) button NETWORK PACK CONFIG menu screen A CK MA I N NE T WOR K P . . EN CODE P . . MPE G R EC TR G MOV I E CL I P P . -
Page 17: About Video/Audio Encoding
Encoding About video/audio encoding Since today’s technology does not permit the economical streaming or capturing (to solid-state memory) of wideband digital video signals, it is necessary to compress the video and audio signals for these applications. Encoding is the process of compressing the original signal into a signal small enough to be useful for these applications. The SA- DV6000 uses ISO MPEG-4, revision 1.04, the most widely accepted variant of the MPEG-4 algorithm, supported by industry leaders, such as Microsoft. -
Page 18: Encoding Parameter Settings
Encoding MENU button SET button SEARCH– ( ) button A CK NE T WOR K T . . EN CODE MPE G R EC T R G I MOV I E C L I P MENU R E S E T N C E L PAGE B ACK ( WMP u n d r 8 ) -
Page 19: Lan Connection
● Both static and dynamic (DHCP) IP addressing ● User selectable user name and password ● HTTP and RTSP port setting ● Connections via Windows Media Player, Quick Time Player, Internet Explorer, or JVC’s Streamproducer ● WLAN Ad Hoc mode setting ● WEP with 128 bit encryption NOTES ●... -
Page 20: Wired Lan
LAN connections The SA-DV6000 supports wired LAN connections to client computers either locally, through an intranet or over the internet. Connecting multiple VTR to a Client PC, or multiple Client PC to a VTR is supported. In addition, it is possible for a client to remotely control the VTR as well. -
Page 21: Wired Connection, Multiple Vtr To Single Client Pc
LAN connections \ Wired Connections, Multiple VTR to Single Client PC DHCP IP ADDRESS 192. 168. 100. 101 SUBNET MASK 255. 255. 255. 000 DHCP IP ADDRESS 192. 168. 100. 102 SUBNET MASK 255. 255. 255. 000 DHCP IP ADDRESS 192. 168. 100. 103 SUBNET MASK 255. -
Page 22: Wired Connection, Multiple Client Pc To A Single Vtr
LAN connections \ Wired Connections, Multiple Client PC to a Single VTR DHCP IP ADDRESS 192. 168. 100. 101 SUBNET MASK 255. 255. 255. 000 DHCP IP ADDRESS 192. 168. 100. 102 SUBNET MASK 255. 255. 255. 000 DHCP IP ADDRESS 192. 168. 100. 103 SUBNET MASK 255. -
Page 23: Wireless Lan
LAN connections The SA-DV6000 supports wireless LAN connections to client computers either locally, through an Intranet or over the Internet. Con- necting multiple VTR to a Client PC, or multiple Client PC to a VTR is supported. In addition, it is possible for a client to remotely control the VTR as well. -
Page 24: Wireless Connection, Single Vtr To Single Client Pc
LAN connections \ Wirelss Connections, Single VTR to Single Client PC MENU DISP RESET A.DUB Mini PROFESSIONAL SEARCH– SEARCH+ EJECT HOLD BLANK CUE UP PHONES REC LEVEL COUNTER MONITOR OUTPUT CH-1/3 CH-2/4 BR-DV6000 DHCP WLAN AD HOC MODE WLAN ESS ID abcdef WLAN CH IP ADDRESS... -
Page 25: Wireless Connection, Multiple Vtr To Single Client Pc
LAN connections \ Wireless Connections, Multiple VTR to Single Client PC DHCP WLAN AD HOC MODE WLAN ESS ID abcdef WLAN CH IP ADDRESS 192. 168. 100. 102 SUBNET MASK 255. 255. 255. 000 OPERATE MENU RESET A.DUB PLAY PAUSE Mini DISP PROFESSIONAL... -
Page 26: Wireless Connection, Multiple Client Pc To A Single Vtr
LAN connections \ Wireless Connections, Multiple Client PC to a Single VTR DHCP WLAN AD HOC MODE WLAN ESS ID abcdef WLAN CH IP ADDRESS 192. 168. 100. 102 SUBNET MASK 255. 255. 255. 000 DHCP WLAN AD HOC MODE WLAN ESS ID abcdef WLAN CH... -
Page 27: Proxy Settings
LAN connections It is necessary to select whether to use a proxy server or not depending on the network environment. To determine if you are using a proxy server. From Internet Explorer, click on the ‘Tools’ in the menu bar, and then click on ‘Internet Options’. -
Page 28: Using Lan Card/Lan Terminal
Using LAN card/LAN terminal The SA-DV6000 can send video on a pre-recorded DV tape or video from the video input of BR-DV6000. Capturing (save to disk) of video transmitted by means of streaming can be started/ended on the Client PC. There are three trigger modes that are supported that, in combination with the trigger mode of the provided application software, enable the VTR operator to start and stop the recording onto the PC hard drive. -
Page 29: Recording To Dv Tape And Client Pc Simultaneously
Using LAN card/LAN terminal MENU button Mini LCD screen OVER OVER FREE PLAY SP222 01/02/03 SYNC ‰ 01:23:45 INS LAN card display NETWORK PACK CONFIG menu screen A CK NE T WOR K MA I N EN CODE S E T MPE G R EC TR G MOV I E CL I P S... -
Page 30: Recording To Dv Tape And Client Pc Independently
Using LAN card/LAN terminal MENU button SET button LCD screen OVER OVER FREE PLAY SP222 01/02/03 SYNC ‰ 01:23:45 INS LAN card display NETWORK PACK CONFIG menu screen A CK NE T WOR K MA I N EN CODE S E T MPE G R EC S P I T MOV I E CL I P... -
Page 31: Streaming And Capturing From A Pre-Recorded Dv Tape
Using LAN card/LAN terminal MENU button SET button LCD screen OVER OVER FREE PLAY SP222 01/02/03 SYNC ‰ 01:23:45 INS LAN card display NETWORK PACK CONFIG menu screen A CK NE T WOR K MA I N EN CODE S E T MPE G R EC S P I T MOV I E CL I P... -
Page 32: Recording On A Cf Card
Recording on a CF card CF card recording cannot be performed when transmitting streaming data from the LAN terminal during the SPLIT mode. If the CF memory card is unformatted when performing any of the operations shown below, “NO CF FORMAT” will appear in the LCD screen/video monitor. -
Page 33: Recording To Dv Tape And Cf Card Simultaneously
Recording on a CF card MENU button Mini ● “NO CF FORMAT!” will appear if the in- serted CF memory card is not formatted. Format the card in the MOVIE CLIP SET menu screen. ( page 32) LCD screen OVER OVER FREE... -
Page 34: Recording To Dv Tape And Cf Card Independently
Recording on a CF card MENU button SET button ● “NO CF FORMAT!” will appear if the in- serted CF memory card is not formatted. Format the card in the MOVIE CLIP SET menu screen. ( page 32) LCD screen OVER OVER FREE... -
Page 35: Recording From A Pre-Recorded Dv Tape To A Cf Card
Recording on a CF card MENU button SET button ● “NO CF FORMAT!” will appear if the in- serted CF memory card is not formatted. Format the card in the MOVIE CLIP SET menu screen. ( page 32) LCD screen OVER OVER CF REMAIN 60SEC! -
Page 36: Specifying The Range Of A Dv Tape And Recording To Cf Memory Card
Recording on a CF card Recording to a CF Memory Card can be made by specifying the range of video recorded on a DV cassette tape. Operation Insert a CF memory card into the network pack. Turn on the power of BR-DV6000. Check to make sure the mark will flash during initialization.) Insert the DV cassette tape to play back. -
Page 37: Deleting All Clip Files On A Cf Memory Card
Recording on a CF card MOVIE CLIP SETUP of the NETWORK PACK CONFIG menu screen is used to delete all clips on a CF memory card. MENU button SET button SEARCH– ( ) button NETWORK PACK CONFIG menu screen A CK NE T WOR K MA I N EN CODE... -
Page 38: Movie Clip
Movie clip NETWORK PACK CONFIG menu screen A CK NE T WOR K MA I N EN CODE MPE G R EC TR G MOV I E CL I P MENU R E S E T C AN CE L PAGE B ACK ( WMP u n d r 8 ) ( C F V i e w r ) -
Page 39: Playing Back A Cf Memory Card
Movie clip When simultaneously recording the video to a DV cassette and CF memory card, recording event will be registered to the clip list of the CF memory card each time recording is performed. The clip list is stored with the recorded event number (clip number) and the date/ time when the recording was started. - Page 40 Movie clip CLIP FUNCTION screen C I P mc 0 0 8 . a s f R E V I EW D E L E T E P ROT E C T F T P SE N D S E L EC T OF F F T P SE N D PAGE BACK REVIEW...
-
Page 41: Selecting Another Clip While Playing A Clip
Movie clip ● Playback will remain on the current clip even when the FF button is pressed if the latest clip is being played back. ● Pressing the REW button during play back of the oldest clip will start playback at the starting point of the that clip. -
Page 42: Protecting A Clip File On A Cf Memory Card
Movie clip Clips recorded on a CF memory card can be protected using the MOVIE CLIP screen. SET button SEARCH- ( ) button ● When executing FORMAT in the MOVIE CLIP SETUP menu screen, protected clips will also be deleted. ●... -
Page 43: Delecting A Clip File On A Cf Memory Card
Movie clip Clips recorded on a CF memory card can be deleted using the MOVIE CLIP screen. MENU button SET button TOP MENU screen M E N U S Y S T EM . . REMO T E . . AU D I O . -
Page 44: Playing Back Cf Memory Card Clips On Your Pc
Movie clip COMPONENT VIDEO REMOTE2 LINE AUDIO CH 1/3 CH 2/4 MONITOR SYNC IN TIME CODE PLAY MONITOR SERIAL TIMER SIGNAL IN/OUT REMOTE1 DC12V REMOTE Clips recorded on a CF memory card can be played back on your PC. Caution ●... -
Page 45: Transferring A Clip On A Cf Memory To A Server
Movie clip A clip recorded on a CF memory card can be transferred to a server via FTP. Caution ● Before using this function, it is necessary to set the destination, etc. of the clip using the FTP CLIENT SETUP menu on the LCD screen or Web. -
Page 46: Transferring Multiple Clips On A Cf Memory Card To A Server
Movie clip Multiple clips on a CF memory card can be transferred to a server at once via FTP. Caution ● Before using this function, it is necessary to set the destination, etc. of the clip using the FTP CLIENT SETUP menu on the LCD screen or Web. -
Page 47: Network Remote Control
“BROWSE” users that can only view data. ● The default password for each user type is “sa-dv6k” for “jvc” users, first 4 characters of the password set for “jvc” users for “ENCODE” users (default is “sa-d”) and fixed password of “sa-dv” for “BROWSER” users. - Page 48 Network remote control Caution ● When setting the NETWORK PACK SETUP screen (NETWORK SETUP, PORT SETUP, VTR CONTROL or ENCODE PARAM- ETERS) and the same menu screen is displayed on the LCD screen of BR-DV6000, values set in the NETWORK PACK SETUP screen will not appear instantly on menu screen of the LCD screen of BR-DV6000.
-
Page 49: Network Setup Page
Network remote control Clicking NETWORK SETUP on the left of the Streamcorder screen displays the NETWORK SETUP screen for performing network related settings. Screen selection Contact your network administrator for any unclear points concerning network settings. Item Setting Address Setup MANUAL The address setting mode can be selected. -
Page 50: Ftp Client Setup
Network remote control \ FTP client setup Settings for transferring clips recorded on a CF memory card to a server via FTP are performed. Item Machine Name Input the host name of the FTP server. User Name Input the user name for logging onto the FTP server. Password Input the password for logging onto the FTP server. -
Page 51: Ftp Server Account / Ess-Id / Wep Key / Leap Server Account Setup
Network remote control FTP Server Account Setup screen ESS-ID Setup screen WEP Key Setup screen LEAP Server Account Setup screen Item Description User Name Input the FTP user name. Old password Input the currently used password. New Password Input the new password. Confirm New For confirmation, input the new password again. -
Page 52: Port Setup Page
Network remote control Clicking PORT SETUP on the left of the Streamcorder screen displays the PORT SETUP screen for performing port settings. Screen selection Item HTTP (for WEB Browser) The HTTP port for WEB browser can be set. (1 to 32767) HTTP (for Media Player) The HTTP port for Media player can be set. -
Page 53: Vtr Control
Network remote control VTR can be controlled using a network connection. Screen selection \ To control the VTR in the Streamcorder screen, the following menu items of BR-DV6000 must be set in advance. REMOTE [1/2] menu screen R EMO T E [ 1 / 2 ] R EMO T E S E L R EMO T E S E L S E R... -
Page 54: Encode Parameters
Network remote control Clicking ENCODE PARAMETERS on the left of the Streamcorder screen displays the ENCODE PARAMETERS screen for performing video/audio compression settings. Screen selection Setting range indicates default factory setting. Item Setting 320 × 240 Frame Size 160 × 120 Bit Rate 56K (bps) 128K (bps) - Page 55 Network remote control indicates default factory setting. Item Setting Stream Type For Media Player For Quick Time PRE FILTER Sets the player for stream playback. Memo • No sound will be heard when playing back using QuickTime while in the WMP mode. •...
-
Page 56: Streamcapture (Playing Back Video/Audio Using A Pc And Saving To File)
Network remote control Click the characters “STREAMCAPTURE” on the left of the Streamcorder screen to display the Streamcapture screen shown below. Video and audio sent from SA-DV6000 via LAN can be played back on your PC in the Streamcapture screen or data can be saved to files. It can be used on a PC that has Streamproducer installed. - Page 57 Network remote control About the Trigger Mode function (TRIG) The Trigger Mode function can be used to save and transmit video/audio from SA-DV6000 to your PC by synchronizing to the button operations of BR-DV6000. NETWORK PACK CONFIG menu screen A CK NE T WOR K A I N EN CODE...
-
Page 58
Network remote control About the Cast function (CAST) The Cast function can be used to send video/audio from SA-DV6000 to another PC.
Display the video to send in the video display window of the Streamcapture screen and click the CAST-VIEW button. CAST- VIEW button... - Page 59 Network remote control Various setting dialog boxes Property dialog box Click the OK button to confirm settings. Save destination folder The default save destination is as follows: Set this field when changing the save destina- tion folder. My Document\Streamcorder (\IPAddress) When changing the destination folder, press the Browse...
-
Page 60: Transferring Clips On A Cf Memory Card To A Server
Network remote control By connecting the LAN terminal of the SA-DV6000 to a network, clips on a CF memory card can be transferred to a server via FTP. Caution Before using this function, it is necessary to set the destination, etc. of the clip using the FTP CLIENT SETUP screen. ( page 50) Screen selection Preparations ●... -
Page 61: Others
Others TOP PAGE can be customized as desired. TOP PAGE created on a PC is uploaded by FTP. Set the unit so that NETWORK SETUP can be displayed. ( page 47) Create HTML on the PC using a commercially available HTML editor, etc. -
Page 62: Connecting Windows Media Player
Others Connect the SA-DV6000 to Windows Media Player using the network. Set STREAM TYPE in the ENCODE SETUP menu to “for WMP”. Open Windows Media Player. Select [File] → [Open URL]. The following dialog box will appear. Set the IP address of the VTR. http://***.***.***.***:####/asf * →... -
Page 63: Connecting Quicktime Player
Others Connect the SA-DV6000 to QuickTime Player using the network. Set STREAM TYPE in the ENCODE SETUP menu to “for QT”. Open Quick Time Player. Select [File] → [Open URL with New Player]. The following dialog box will appear. Set the IP address of the VTR. rtsp://***.***.***.***/live.mp4 * →... -
Page 64: About Updating The Network Pack
Others The network pack firmware version can be updated. For details concerning version update data, visit the JVC homepage. MENU button SET button SEARCH- ( ) button NETWORK PACK CONFIG menu screen A CK NE T WOR K MA N I... -
Page 65: Troubleshooting
CF memory card to secure recording space. Check the CF memory card and format again. If the card still cannot be format- ted, contact your nearest JVC-authorized service agent. Check the CF memory card and format. Set the OUT POINT at least 5 seconds from IN POINT. - Page 66 Set DHCP again. Insert a CF memory card with UPDATE data into the slot. Insert a CF memory card with UPDATE data into the slot. Contact your JVC dealer. Input recording signal with no copy guard protection. Troubleshooting Reference Remedy page ––...
-
Page 67: Checking Communication/Connection
Others By using the PING command standard to Windows, it is possible to check whether the connection is correct and that communication can be made from the PC to SA-DV6000. Launch the command prompt. ● For Windows 2000 From the Start button, select [Programs] → [Accessories] → [Command Prompt]. Input the following and press the Enter key. -
Page 68: Terminology
Others ● IP address Identification number assigned to each computer that is connected to a network. The address is used for communication between network devices. ● LAN (Local Area Network) A network structured within a relatively small range such as in a single building or an office of a company. ●... - Page 69 Others ● Encryption mode Setting for encrypting the flow of data during wireless communication. Following settings are available: None (Open System): No encryption. Setting will be unavailable and throughput will be improved. However, there is the risk of infor- mation leakage. 40blt WEP: Encryption is performed using 40-blt encryption key.
-
Page 70: About Ip Address/Proxy Server
Others \ About IP address Global IP address and local IP address There are 2 types of IP addresses: “global IP address” and “local IP address”. Global IP address: Just as different IP addresses are needed on a network, all PCs using the Internet worldwide must use a unique IP address. - Page 71 VICTOR COMPANY OF JAPAN, LIMITED is a registered trademark owned by VICTOR COMPANY OF JAPAN, LTD. is a registered trademark in Japan, the U.S.A., the U.K. and many other countries. © 2003 VICTOR COMPANY OF JAPAN, LIMITED LST0154-001C...