Miele CVA 6805 Operating And Installation Instructions
Hide thumbs
Also See for CVA 6805:
- Operating and installation instructions (108 pages) ,
- Installation instructions manual (19 pages) ,
- Quick start manual (2 pages)

Related Manuals for Miele CVA 6805


Summary of Contents for Miele CVA 6805
- Page 1 Operating and Installation Instructions Coffee System To prevent accidents and appliance damage read these instructions before installation or use. en - US, CA M.-Nr. 09 741 681...
-
Page 2: Table Of Contents
Contents IMPORTANT SAFETY INSTRUCTIONS....... . . 5 Preparing your appliance for an extended vacation ......9 Guide to the coffee system . - Page 3 Contents Profiles ............35 Accessing profiles .
- Page 4 Contents Cleaning and care ..........47 Overview .
-
Page 5: Important Safety Instructions
IMPORTANT SAFETY INSTRUCTIONS When using electrical appliances basic safety precautions should always be followed, including the following: Read all instructions before installation or use of the coffee system. Children in the household Please read these instructions carefully to prevent accidents and The coffee and hot water machine damage. -
Page 6: Technical Safety
The water supply must be electrician. accessible after installation. Do not use an extension cord to Only use Miele original spare parts. connect the appliance to electricity. Only then can the manufacturer Extension cords do not guarantee the guarantee the safety of this machine. -
Page 7: Proper Use
IMPORTANT SAFETY INSTRUCTIONS Proper use The integrated waterproof system will effectively protect the machine from water damage if the following The coffee and hot water conditions are met: dispensers present a danger of burning or scalding! – The coffee machine is installed The dispensed liquids and steam correctly (electricity and water are extremely hot. - Page 8 Please note the following regarding Do not fill anything into the ground water: coffee chute except ground coffee or a Miele cleaning tablet for degreasing the – Without a plumbed water supply: brew unit. Only fill the water tank with cold, fresh tap water.
-
Page 9: Preparing Your Appliance For An Extended Vacation
Preparing your appliance for the coffee machine. an extended vacation – Descale the coffee machine regularly with the appropriate number of Miele If you elect to turn off the water to descaling tablets for the water your home for an extended period of hardness level in your area. -
Page 10: Guide To The Coffee System
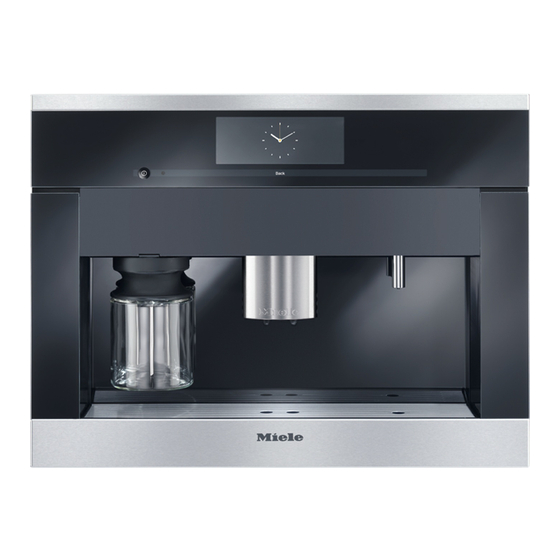
Guide to the coffee system Front view a On/Off touch control K b Touch display c "Back" sensor d Door handle e Hot water dispenser f Drip tray g Main dispenser, with automatic height-adjustment and lighting h Milk container with lid... - Page 11 Guide to the coffee system Interior view i Ground coffee chute cover j Brew unit k Ground coffee chute l Grind control lever m Coffee bean container n Water container with inlet o Drip tray with no-spill grid p Waste unit q Drip catcher r Main dispenser connector cap s Service cover...
-
Page 12: Accessories
Accessories Included accessories Optional accessories – Coffee scoop Miele offers a range of useful for measuring ground coffee accessories, as well as cleaning and conditioning products for your coffee – Milk container with lid machine. for storing and preparing milk –... -
Page 13: Operation
Operation Touch display The coffee system is operated by a finger touch. If your fingers are cold, the touch display may not react to your finger contact . Do not use pointed or sharp objects, e.g. pens, to operate the touch display. This can damage the surface! The touch display will not react if you tap it with such objects. - Page 14 Operation Using the touch display Each finger touch of an available option changes the respective field to orange. Selecting or calling up a menu ^ Touch the respective field once. Scrolling ^ Swipe the screen, i.e. place your finger on the touch display and swipe it in the desired direction.
- Page 15 Operation The numerical keypad appears. ^ Touch the desired numbers. When you enter a valid number, the "OK" field will go green. ^ Touch "OK". Entering letters Profile names or the names for your own drinks are entered using a keyboard. ^ Touch the desired letters or characters.
- Page 16 Operation The following symbols may appear in addition to the text and drinks symbols: P P P P G G GM Settings such as the brightness of the display or the volume of the audio signals are selected via a bar chart. Indicates information and instructions about operating the coffee system.
-
Page 17: First Steps To Use
^ Repeat this for "Minutes" until the – Display (time of day) current time of day is set. ^ Touch the On/Off button K. ^ Touch "OK". The display briefly shows the "Miele - The setting is now saved. Welcome" message. -
Page 18: Water Hardness
First steps to use Water hardness Display You can choose from the following Water hardness is an indication of the options: amount of minerals dissolved in water. The higher the mineral content, the – On: The display will always show the harder the water. - Page 19 First steps to use Checking water hardness level You can check the water hardness level using the supplied test strips. ^ Dip the test strip into your tap water for about one second. Then shake off any excess water. The result will be visible after about one minute.
-
Page 20: Filling The Water Tank
Filling the water tank If the coffee machine is connected to a plumbed water supply, the water is filled up automatically as soon as the machine is turned on. The inlet guide at the water tank lid ensures that the water is flows in quietly. -
Page 21: Filling The Coffee Bean Container
Filling the coffee bean container You can make coffee or espresso from Tip: Raw coffee can be used if ground roasted whole coffee beans that the in a mill used for nuts or seeds. These coffee machine will grind fresh for each mills generally have a rotating stainless portion. -
Page 22: Turning The Coffee Machine On And Off
Turning the coffee machine on and off Turning on Turning off for longer periods of time When the machine is turned on, it heats up and rinses out the pipework. This If you will not be using the coffee cleans and heats the pipework to ready machine for a while: the machine for coffee preparation. -
Page 23: Dispenser Adjustment
Dispenser adjustment Turning the dispenser adjustment on The main dispenser cannot be or off adjusted manually. ^ Touch "Main menu" or the Back sensor. The coffee system senses the height of the cup or glass being used. When a ^ Touch "Settings" %. drink has been selected, the main ^ Swipe the display until "Dispenser dispenser automatically moves to the... -
Page 24: Preparing Beverages
Preparing beverages Espresso, Coffee or Lungo Preparing two portions coffee You can request two portions of espresso or coffee at once in one cup From the "Drinks" menu: or in two separate cups simultaneously. From the "Drinks" menu: To fill two cups at the same time: ^ Place a cup under the main dispenser. -
Page 25: Canceling Preparation
Preparing beverages Canceling preparation You can use the "Coffee pot" function To cancel preparation, twice in succession. After that, the ^ Touch "Stop". coffee system will need to cool down for an hour to prevent damage to the appliance. ^ Touch "Cancel". Preparing coffee drinks from Preparing multiple cups of ground coffee... - Page 26 Preparing beverages Adding ground coffee Preparing coffee drinks from ground coffee Use the scoop supplied with the system to ensure the correct amount of ground If you want to use ground coffee: coffee is used. ^ Touch "Yes". Do not add more than one level You can now select which coffee drink scoop of ground coffee to the coffee you want prepared from the ground...
-
Page 27: Beverages With Milk
Preparing beverages Beverages with milk You can prepare various specialty coffee beverages with milk or Hot milk and Milk froth. The following specialty coffee options are available: Cappuccino H consists of about two- thirds milk froth and one-third espresso. Latte macchiato k consists of one-third a Lid each of hot milk, milk froth and espresso. -
Page 28: Preparing Hot Water
Preparing beverages Preparing drinks using a Preparing drinks with milk profile From the "Drinks" menu: If you have already created a profile ^ Place a suitable cup or glass under (see "Profiles"), you can select it before the main dispenser. preparing a drink. -
Page 29: Customizing Your Coffee
Customizing your coffee To customize the coffee system to suit your requirements, you can To prevent damage to the grinder: – change the grinder setting, Adjust the coffee grinder one level – change the amount of ground coffee, at a time. –... -
Page 30: Changing The Drink Parameters
Customizing your coffee Changing the drink parameters The amount is too much if You can change the amount of ground – espresso or coffee just drips into the coffee, the pre-brewing and the cup; brewing temperature for each drink – the crema is dark brown; individually. -
Page 31: Pre-Brewing Ground Coffee
Customizing your coffee Pre-brewing ground coffee When the pre-brewing function is turned on, the freshly ground coffee is first moistened with a little hot water. Then the remaining water is forced through the moistened coffee at high pressure. This helps release the flavor of the coffee. -
Page 32: Setting The Serving Size
Setting the serving size The flavor of a coffee beverage From the "Drinks" menu: depends not only on the type of coffee, ^ Place the desired cup under the main but also on the quantity of water used. dispenser. You can adjust the amount of water ^ Touch "Edit". - Page 33 Setting the serving size The coffee system will now start preparing your drink. Portion sizes can be set for each selected ingredient when "Save" is displayed. ^ Touch "Save" when the correct amount of the particular ingredient has been dispensed. ^ Save the portion size for the selected ingredients.
-
Page 34: Resetting Drinks
Resetting drinks You can reset the portion sizes and parameters for all drinks back to their factory default setting. From the "Drinks" menu: ^ Touch "Edit". ^ Touch "Reset drinks". "Reset all drinks to default?" appears in the display. ^ Touch "Yes". -
Page 35: Profiles
^ You can now create a profile. ^ Touch "Edit". If you have already created a profile in ^ Touch "Change name". addition to the standard Miele profile, ^ Touch the desired profile and then you also have the following options: "OK". -
Page 36: Changing A Profile
Changing a profile You can customize the system so that after preparing each beverage it automatically reverts to the standard Miele profile or retains the most recently selected custom profile. ^ Touch "Edit". ^ Touch "Change profile". You can now choose between: –... -
Page 37: Editing Drinks For A Profile
Editing drinks for a profile ^ Enter a name for the newly created You can create your own beverages for each profile and set the portion size and drink (maximum of 8 characters) and parameters, e.g. amount of coffee, touch "Save". brewing temperature, for each beverage The newly created drink will appear in individually. -
Page 38: Mymiele
MyMiele Deleting entries Frequently prepared drinks, drinks from profiles and preferred maintenance ^ Touch "Edit". programs can be displayed on the ^ Touch "Delete entry". MyMiele screen. ^ Select the entry you want to delete You can select the MyMiele screen as your starting screen (see "Settings - and confirm with "OK". -
Page 39: Settings
Settings Changing and saving settings The "Settings" menu allows you to customize the coffee system for your ^ Touch "Main menu" or the "Back" personal needs. sensor. ^ Touch "Settings" % . Accessing the "Settings" menu ^ Swipe the display until the setting you want appears and then touch it. -
Page 40: Overview Of The Setting Options
Settings Overview of the Setting options The factory setting for each menu item is shown in bold. Option Available settings Language German, other languages Country Time Display Off / On / Night shutoff Clock type Analog /Digital Time format 12 h / 24 h Date Timer Timer 1... - Page 41 Settings Option Available settings Water hardness Soft 1 Medium 2 Hard 3 Very hard 4 Brightness Volume Audio signals Keypad tone Plumbed water supply On / Off Dispenser adjustment On / Off Showroom program Demo mode (On / Off) Factory default settings Settings MyMiele...
-
Page 42: Language
Settings Language Clock type You can select your language and The time can be displayed as: country for all the displayed text. Analog or Tip:If you select the wrong language by mistake, follow the flag symbol F to return to the "Language" option. Time You can customize the time display, the Digital. -
Page 43: Timers
Settings Timers were dispensed, the system will not turn itself on again automatically. This There are two timers with the following prevents the coffee system from turning functions: itself on unnecessarily, for example The coffee system while you are away on vacation. –... -
Page 44: Eco Mode
Settings Eco mode Assigning days of the week Select the day of the week you want. Eco mode is an energy-saving mode. The selected weekday is marked with a The steam system will only heat up once a coffee beverage or steam for hot milk and milk froth is requested. -
Page 45: Lighting
Settings Lighting Info (displaying information) The following options are available: The Info menu option allows you to display the number of portions – Adjust the brightness of the lighting prepared for each individual drink. while the system is turned on. You can also see whether more than 50 –... -
Page 46: Water Hardness
Settings Factory default settings Overriding the system lock While the display shows "Press for 5 You can reset the settings back to the seconds to unlock", factory default settings and also delete the MyMiele entries. ^ touch the lock symbol for 5 seconds. Please refer to the "Overview of the As soon as the coffee system is setting options"... -
Page 47: Cleaning And Care
Cleaning and care Overview The coffee system must be cleaned regularly to prevent a build-up of bacteria. Recommended frequency To be cleaned / maintained Daily Milk container and lid (at the end of the day) Water container Waste unit Drip tray and no-spill grid Once a week Main dispenser (more often for heavier soiling) - Page 48 Cleaning and care Danger of burns! All surfaces are susceptible to Let the unit cool down before you scratching. On glass surfaces, clean it, especially the water in the scratches can lead to breakage. drip tray. All surfaces can become discolored if they are cleaned with unsuitable Do NOT use a steam cleaner to products.
-
Page 49: Rinsing The System
Cleaning and care Rinsing the system Milk pipework After a coffee beverage has been Make sure that the milk pipework is prepared, the coffee system rinses cleaned regularly and thoroughly. itself before turning off. This removes Milk contains natural bacteria that any remaining coffee residue. -
Page 50: Cleaning The Milk Pipework Using The Milk Line Cleaner
The remaining number of days developed specifically for this coffee until the milk pipework needs to be machine. It is available from Miele. cleaned will show in the display every time the coffee system is turned on. To avoid damaging the coffee ^ To confirm this message, touch "OK". -
Page 51: Milk Container With Lid
Cleaning and care Milk container with lid Ensure that the neck and lip of the container are kept clean (both when filling and when moving the container). Contamination can cause the system to malfunction. ^ The milk container (glass) can be cleaned in the dishwasher or by hand with warm water and liquid dish soap. -
Page 52: Main Dispenser
Cleaning and care Main dispenser Clean the cover of the main dispenser by hand only, using warm water and liquid dishsoap. All other components are dishwasher safe. The main dispenser must be in the maintenance position for cleaning. Otherwise you will not be able to remove the parts. - Page 53 Cleaning and care ^ Turn the top connecting piece a and ^ Now reassemble the dispensing unit pull it up and off. Then pull the in the reverse order. Make sure that bottom connecting piece b up and the upper connecting piece a clicks off.
-
Page 54: Cleaning The Milk Valve
Cleaning and care Cleaning the milk valve Sensor cover You should clean the milk valve once a The sensor cover for the cup protection week to ensure good quality milk froth. shut-off is located under the main dispenser. If the automatic dispenser ^ Touch "Main menu"... -
Page 55: Water Tank
Cleaning and care Water tank Waste unit Change the water every day to prevent After a certain time, the coffee system a build-up of bacteria. displays a message indicating that the waste unit needs to be emptied. At this Make sure that the valve, the point the container must be cleaned. -
Page 56: Drip Tray
Cleaning and care Drip tray Make sure that the metal discs (contacts) on the drip tray are Clean the drip tray daily to prevent cleaned and dried properly. If they odors and mold. are dirty or damp, the discs will not be able to detect that the drip tray is The coffee system displays a message in place or that it is full. -
Page 57: Drip Tray Cover
Cleaning and care Drip tray cover Main dispenser connector ^ Remove the drip tray cover. A connecting piece between the brew unit and the main dispenser is located ^ The drip tray cover can be cleaned in on the inside of the front. the dishwasher or by hand using ^ Clean this connector on a regular warm water and liquid dish soap. -
Page 58: Interior And Front Door
Cleaning and care Interior and front door Brew unit ^ Clean the interior and the front door Clean the brew unit by hand only with warm water and liquid dish soap using warm water. Do not use once all removable parts have been soap. - Page 59 Cleaning and care If you cannot remove the brew unit or To replace the brew unit, repeat the can only do so with difficulty, the brew previous steps in the reverse order: unit is not in the correct position (see ^ Push the brew unit back into the "Frequently asked questions").
-
Page 60: Degreasing The Brew Unit
These cleaning tablets were specially formulated for use in the coffee system. They are available from Miele. After 200 portions, the display will show the message "Degrease brew unit". This message will be displayed until the brew unit has been degreased. -
Page 61: Exterior
^ Use a clean, soft sponge with warm water and liquid dish soap to clean the housing. Dry all parts with a soft cloth. Tip: You can also clean the exterior using the Miele micro fiber cloth. -
Page 62: Descaling
The coffee system. Additional descaling following message will appear in the tablets are available from Miele. display: "No. of uses until appliance needs descaling: 50". The remaining You need two descaling tablets for the number of portions that can be made descaling process. - Page 63 Descaling The descaling program is now complete and drinks can be prepared again. When descaling the system, be sure to wipe off any splatters of descaling agent immediately! These could damage the surfaces. After descaling the system, carefully clean the water tank and the drip tray to remove all traces of descaling agent.
-
Page 64: Frequently Asked Questions
Display messages ^ To address the "fault", follow the instructions on the display. ^ If the fault message still appears on the display, contact Miele Technical Ser- vice. Fault Possible cause and solution Fault 1 - 4 There is an internal malfunction. - Page 65 Frequently asked questions Fault Possible cause and solution Fault 73 The brew unit cannot reset to the correct position or it is clogged and the ground coffee cannot be processed. ^ See if you can remove the brew unit (see "Cleaning and "Check brew unit"...
- Page 66 Frequently asked questions Fault Possible cause and solution Fault 234 The cup protection shut-off has been triggered three times since the coffee system was turned on. The cups or glasses being used are not clearly recognized by the automatic dispenser adjustment. ^ Use only cups or glasses that can be recognized by the automatic dispenser adjustment.
- Page 67 Frequently asked questions Fault Possible cause and solution "Push the water The water container is not sitting properly in the appliance. ^ Take the water container out, then put it back into the container in until it engages" appliance. This fault message will also appear if the water container is not correctly filled and inserted during descaling.
- Page 68 The circuit breaker has tripped due to a problem with the coffee system, the electricity supply or another device. ^ Unplug the coffee system. ^ Contact a qualified electrician or Miele Technical Service for assistance. The coffee system The programmed turn-off time has been reached.
- Page 69 Frequently asked questions Problem Possible cause and solution The coffee system System lock is activated. ^ Deactivate system lock (see "Settings – System lock"). does not turn on at the programmed time No days of the week have been selected. ^ Check the timer settings and adjust if necessary (see even though "Turn on at"...
- Page 70 Frequently asked questions Problem Possible cause and solution The display shows The milk container lid may be soiled, causing the sensors to the message "Fill malfunction. ^ Thoroughly clean the lid and milk container (see "Cleaning and insert milk container" clogged milk pipework").
- Page 71 ^ If the cup protection shut-off is triggered again or the main moves to the rim dispenser moves to the rim of the cup or glass again, of the cup and contact Miele Technical Service. triggers the cup protection shut- off.
- Page 72 ^ Fill the coffee bean container with fresh beans. sounds louder than usual. There might be stones mixed in with the coffee beans. ^ Turn the coffee system off immediately. Contact Miele Technical Service. Espresso or coffee The grind level is too coarse.
- Page 73 Frequently asked questions Problem Possible cause and solution There is no proper The grind level is too coarse or too fine. ^ Set the grinder control to a coarser or finer setting (see crema on the coffee or "Adjusting the grinder setting"). espresso.
-
Page 74: Cleaning Clogged Milk Pipework
Cleaning clogged milk pipework Step 1: Cleaning the milk If the quality of the milk froth is unsatisfactory, the air intake hose may pipework in the lid of the milk be clogged. Follow the instructions in container "Step 2: Cleaning the air intake hose and angled section in the door."... - Page 75 Cleaning clogged milk pipework To reassemble the lid: ^ First put the seal in the lid. Then insert the milk intake pipe into the seal. Make sure not to slide the beveled end of the milk intake hose into the seal.
- Page 76 Cleaning clogged milk pipework ^ Slide the hoses back onto the angled ^ Insert the brush into the milk valve. section and reinsert it. Move the brush back and forth. ^ Remove and disassemble the ^ Reinsert the air intake hose into the opening c.
-
Page 77: After Sales Service
Miele’s Service department, Extended Service Contracts offered by other providers for Miele products will not be recognized by Miele. Our goal is to prevent unauthorized (and untrained) service personnel from working on your Miele products, possibly doing further damage to them, you and/or your home. -
Page 78: Installation Instructions
Installation instructions Information is subject to change. Please refer to our website to obtain the most current product specification, technical & warranty information. Leave these instructions with the appliance for the consumer/user. Information is subject to change. Please refer to our website to obtain the most current product specification, technical &... -
Page 79: Caring For The Environment
Caring for the environment Disposal of packing material Disposal of an old appliance The cardboard box and packing Old appliances may contain materials materials protect the appliance during that can be recycled. Please contact shipping. They have been designed to your local recycling authority about the be biodegradable and recyclable. -
Page 80: Plumbing
Turn off the water supply before connecting the coffee machine to the plumbing. Parts must only be replaced with original Miele spare parts, available – All units and systems used to deliver from Miele. the water to the coffee system must conform with the requirements of the respective country. - Page 81 Plumbing Installing the stainless steel Connection to the water tubing in the unit supply Make sure the stainless steel tube is Disconnect the machine from the not kinked or damaged. Do not trim electrical supply before connecting stainless steel tube. it to the water supply.
-
Page 82: Lead Free Certificate
Lead free certificate This product is tested and certified by the WQA against ORD0902 for California "lead free" compliance. Miele & Cie KG Carl-Miele-Straße 29 D-3332 Gütersloh... -
Page 83: Electrical Connection
If there is any question concerning the electrical connection of this appliance to your power supply, please consult a licensed electrician or contact Miele’s Technical Service Department. See back page for contact information. -
Page 84: Installation
Installation Installation and combination options The system is designed to be built into cabinetry. - Page 85 Installation It is also possible to combine it with other built-in Miele appliances. If the coffee system is to be built in above another appliance, there must be a full-width, closed shelf between them (exception: installation with a built-in warming drawer).
-
Page 86: Ventilation
Otherwise condensation can form, ^ If there is no sealing strip around the causing damage to the coffee system installation recess, stick the Miele or the surrounding cabinets. sealing strip onto the unit from the back before putting it into the recess. - Page 87 Installation Tip: A place to set down the coffee The coffee machine is delivered with machine at the level of the installation four M5 Allen head screws that you can recess is helpful. This makes it easier use to align and fasten the unit in the for you to install the unit's electrical and installation recess.
-
Page 88: Adjusting The Door Hinges
Installation Adjusting the door hinges If the door cannot be opened or closed easily after installation, you will have to align the door (TX 20): ^ To adjust the door flush with the front of the cabinet, turn the screw a. ^ To adjust the door horizontally and vertically, turn the screw b. -
Page 89: Remotevision (Optional Accessory)
'virtual link' between your following requirements appliance and our monitoring center. If – A wireless router that supports an a fault occurs, Miele's client service IEEE 802.11b/g protocol center will be notified and contact you, ® or another trusted individual identified –... -
Page 90: Copyright And Licenses
Systems Incorporated, Adobe Macromedia Software LLC. Adobe and Flash are registered trademarks of Adobe Systems Incorporated. The proprietary rights of Miele and other relevant software suppliers (e.g. Adobe) must be respected. Miele and its suppliers reserve all rights to the software components. -
Page 95: Contact Details
Technical Service. U.S.A. Canada Miele, Inc. Importer Miele Limited National Headquarters 9 Independence Way Headquarters and Miele Centre Princeton, NJ 08540 161 Four Valley Drive 800-843-7231 Phone: Vaughan, ON L4K 4V8 609-419-9898 www.miele.ca 609-419-4298... - Page 96 CVA 6805 en - US, CA M.-Nr. 09 741 681 / 02...